Halloween Cookies Icing Recipe – Perfect Every Time
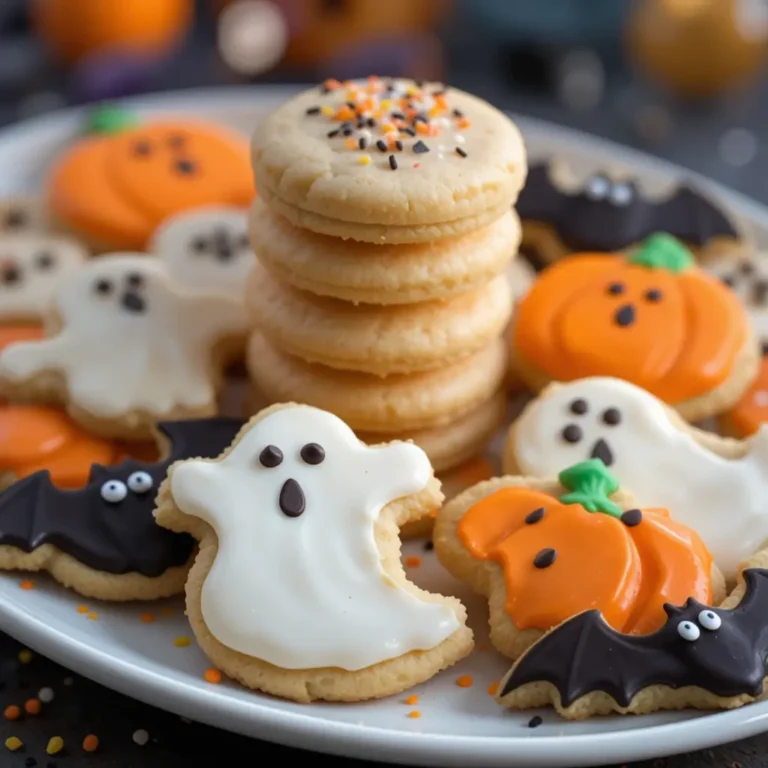
Looking to make your Halloween cookies extra special this year? This vibrant Halloween cookies icing recipe transforms ordinary sugar cookies into spooky masterpieces that kids and adults absolutely love. With just five simple ingredients and 15 minutes of prep time, you’ll create professional-looking treats that rival any bakery.
These colorful icings dry perfectly smooth and hold their shape beautifully, making them ideal for intricate Halloween designs. Unlike store-bought options, this homemade version lets you control sweetness and colors while saving money.
What is Halloween Cookies Icing?
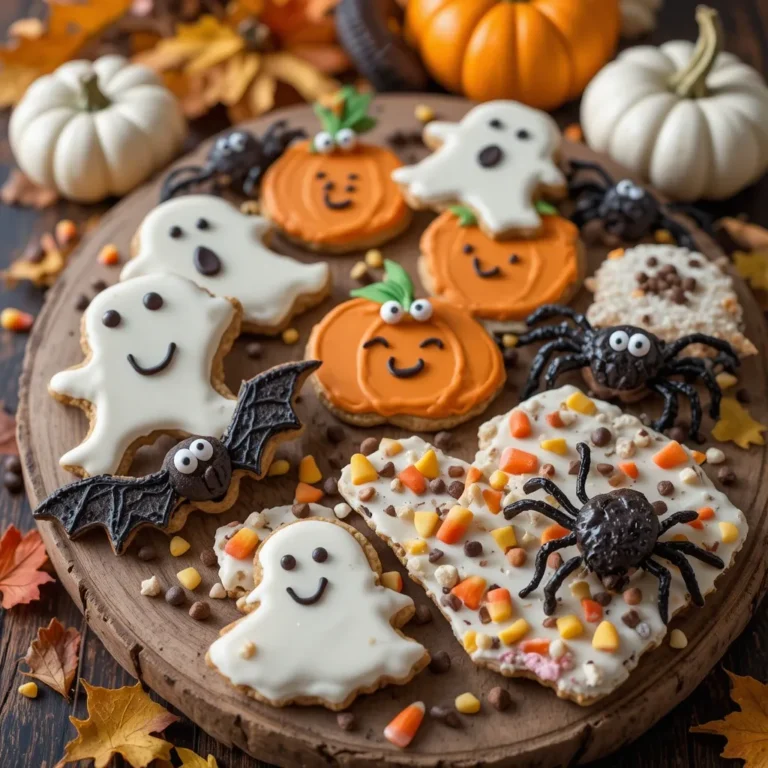
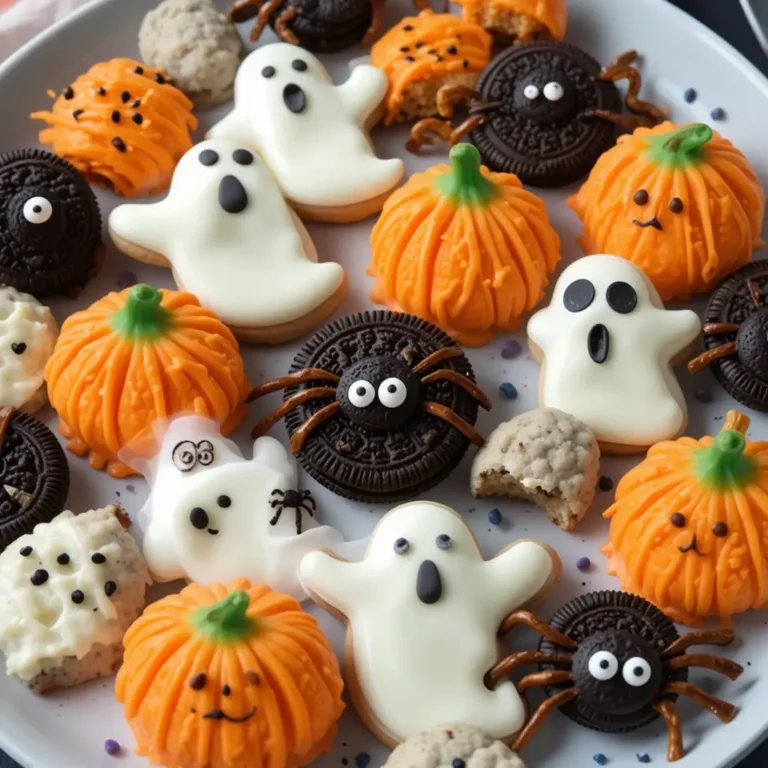
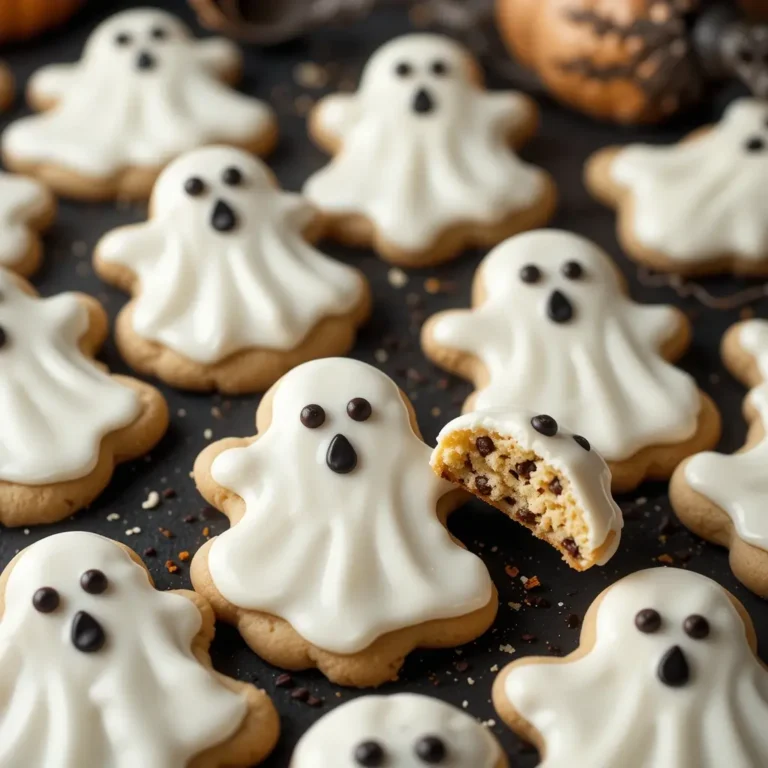
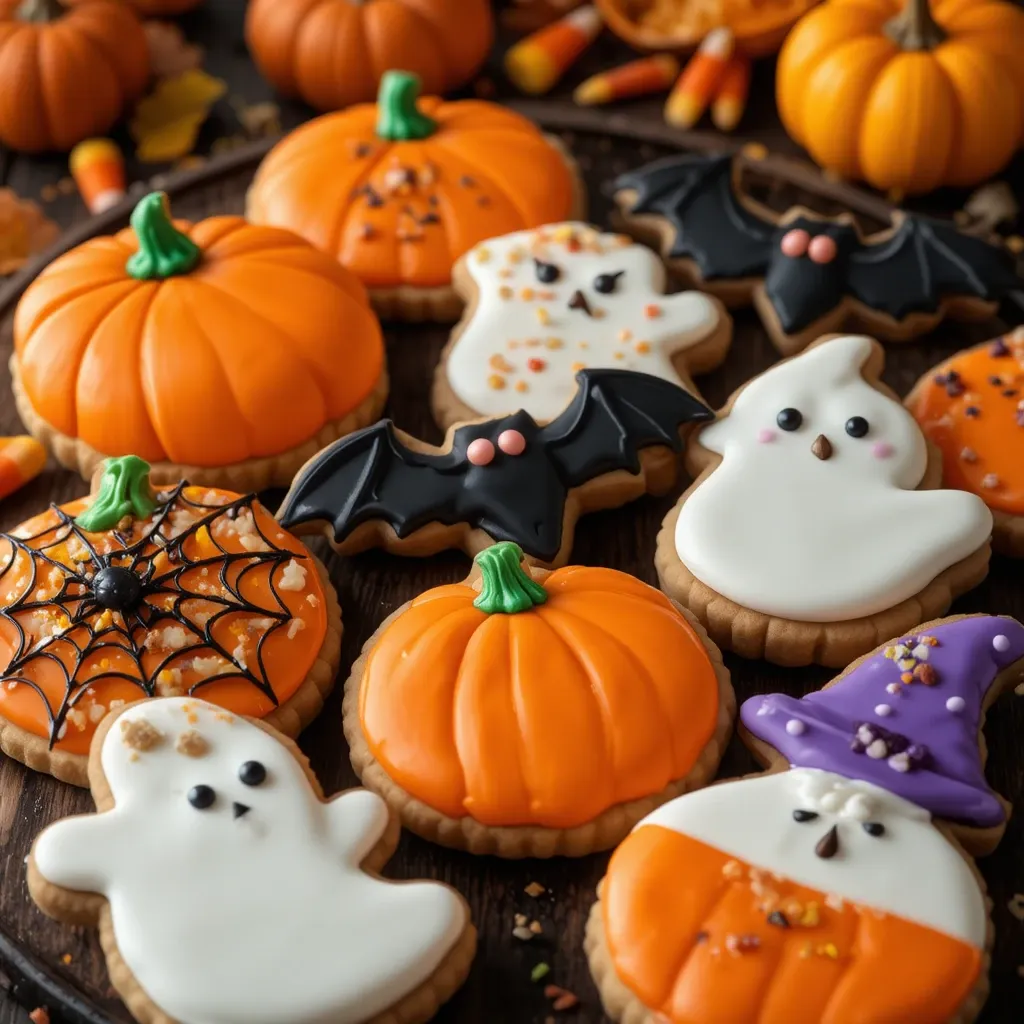
Ever wondered why we call it “icing” when it’s clearly not made of ice? Halloween cookies icing is that magical, glossy coating that transforms plain cookies into works of edible art. It’s the sweet canvas where orange pumpkins, black bats, and purple witches come to life on your cookie sheet.
This royal icing variation dries hard and smooth, perfect for stacking and gifting. As they say, “the way to a man’s heart is through his stomach,” and nothing says Halloween love quite like hand-decorated cookies! Ready to become the neighborhood’s cookie decorating hero?
Why You’ll Love This Halloween Cookies Icing
Perfect Consistency Every Time
This foolproof recipe creates the ideal icing consistency that flows smoothly yet holds its shape. No more runny disasters or thick, unworkable batches. The secret lies in the precise egg white to powdered sugar ratio that creates that perfect “ribbon” consistency professional bakers swear by.
Budget-Friendly Halloween Magic
Skip the expensive bakery cookies and create stunning Halloween treats for a fraction of the cost. One batch makes enough icing to decorate 3-4 dozen cookies, costing less than $5 total. Compare that to $30+ at specialty bakeries, and you’re saving serious money while having family fun.
Endless Creative Possibilities
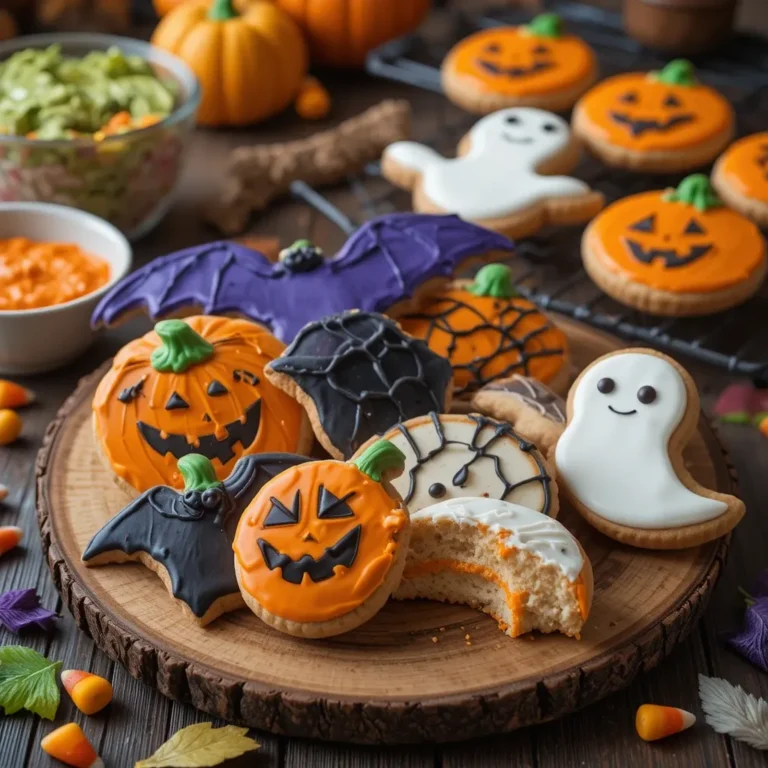
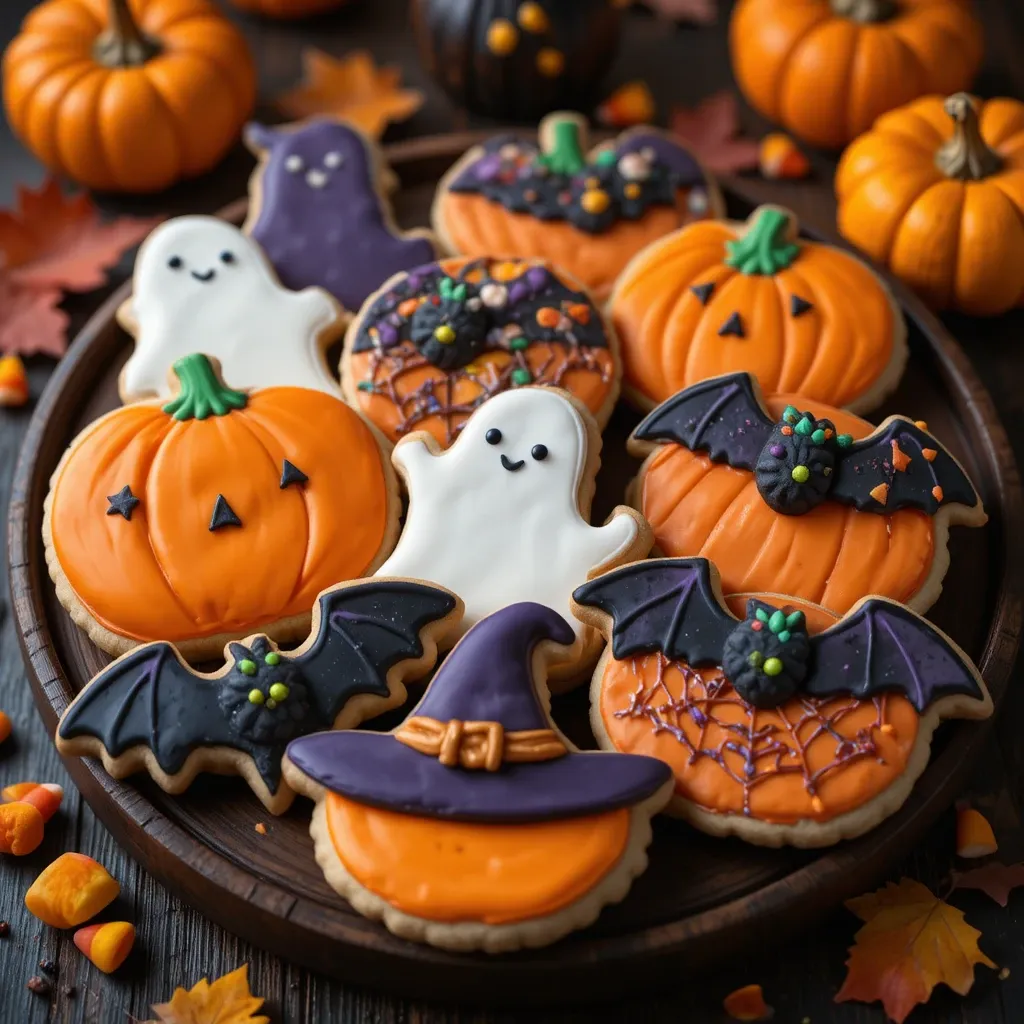
From classic orange and black to spooky purples and greens, this base recipe accepts any food coloring beautifully. Add flavor extracts like vanilla, almond, or even peppermint for extra dimension. Unlike my popular Sugar Cookie Recipe, this icing stays workable for hours, giving you plenty of time to perfect your Halloween designs.
Ready to turn your kitchen into a Halloween cookie decorating studio? Let’s dive into this game-changing recipe!
How to Make Halloween Cookies Icing
Quick Overview
This Halloween cookies icing recipe delivers professional bakery results in just 15 minutes of mixing time. The royal icing base creates that signature smooth, glossy finish that dries completely hard within 2-4 hours.
Prep Time: 15 minutes
Drying Time: 2-4 hours
Total Servings: Decorates 36-48 cookies
Key Ingredients for Halloween Cookies Icing
- 4 cups powdered sugar, sifted – Creates the sweet base and smooth texture
- 3 large egg whites, room temperature – Provides structure and glossy finish
- 1 teaspoon vanilla extract – Adds classic flavor depth
- 1/4 teaspoon cream of tartar – Stabilizes the icing for perfect consistency
- Food coloring – Orange, black, purple, green for Halloween magic
- 2-4 tablespoons water – For consistency adjustments
Pro tip: Use meringue powder instead of egg whites if you prefer a shelf-stable option.
Step-by-Step Instructions
Step 1: Prepare Your Workspace Set up your mixing station with all ingredients at room temperature. Line your counter with parchment paper and gather squeeze bottles or piping bags for easy decorating.
Step 2: Sift the Powdered Sugar Sift 4 cups of powdered sugar through a fine-mesh strainer into your mixing bowl. This prevents lumps and ensures silky-smooth icing.
Step 3: Whip the Egg Whites In a large bowl, whisk egg whites and cream of tartar until soft peaks form. This takes about 3-4 minutes with an electric mixer on medium speed.
Step 4: Add Sugar Gradually Slowly add the sifted powdered sugar, one cup at a time, mixing on low speed. Scrape down sides frequently to ensure even mixing.
Step 5: Add Vanilla and Test Consistency Mix in vanilla extract. Test consistency by lifting the beater – icing should fall in a ribbon that disappears back into the mixture within 10-12 seconds.
Step 6: Adjust Thickness For outlining: Use as-is for thick consistency. For flooding: Add water one teaspoon at a time until ribbon disappears in 8-10 seconds.
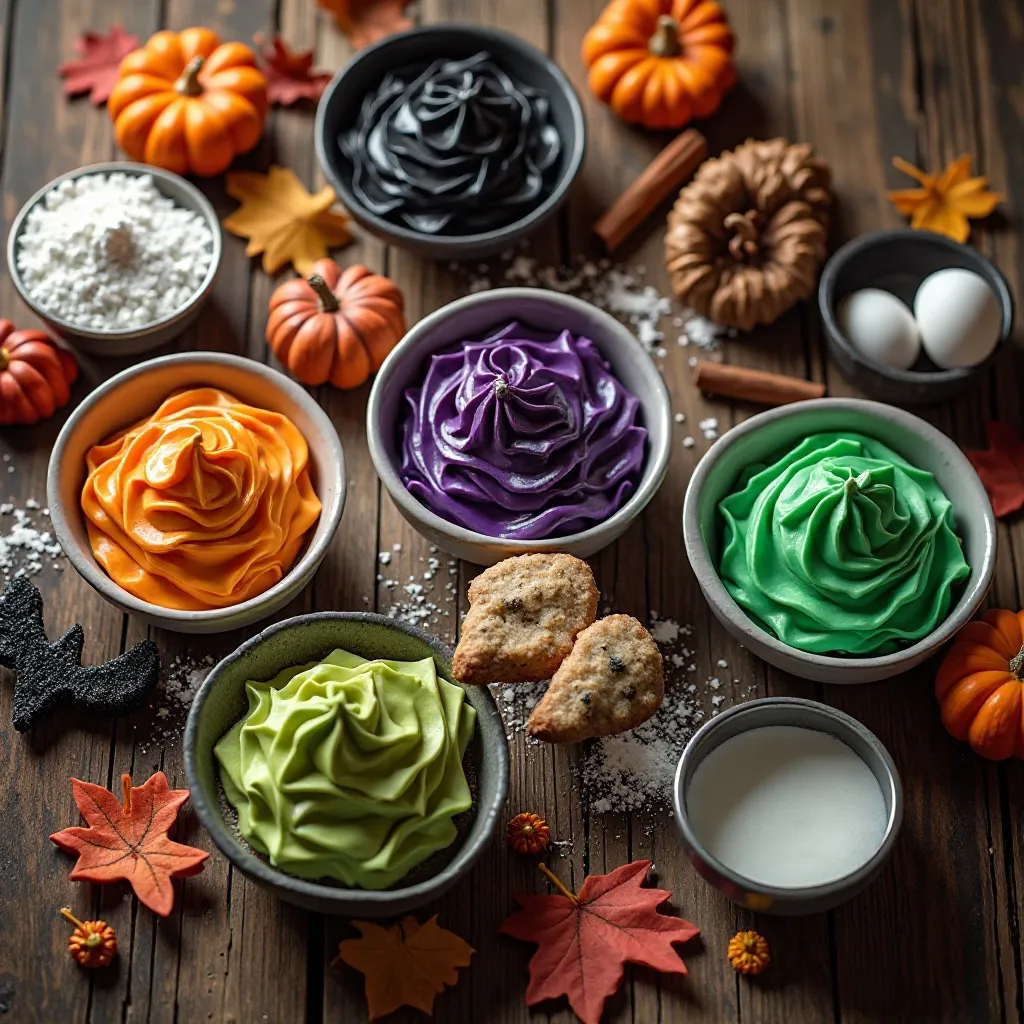
Step 7: Divide and Color Separate icing into bowls for each color. Add gel food coloring gradually – remember, colors intensify as they sit. Mix thoroughly until even.
Step 8: Fill Decorating Tools Transfer colored icing into squeeze bottles or piping bags. Twist tops tightly and cut small tips for precise decorating control.
What to Serve Halloween Cookies Icing With
These decorated cookies shine alongside warm apple cider, hot chocolate, or spiced chai tea. Create a Halloween dessert table featuring candy corn, chocolate-covered pretzels, and pumpkin-shaped marshmallows.
For party settings, pair with orange punch, witches’ brew (grape juice with dry ice effect), or classic milk for dunking. The cookies also complement autumn fruit platters with orange slices, black grapes, and apple wedges.
Top Tips for Perfecting Halloween Cookies Icing
Get the Consistency Right
The “10-second rule” is your best friend. When you lift the mixer, the icing ribbon should disappear back into the mixture in exactly 10 seconds for flooding consistency, 15 seconds for detail work.
Color Like a Pro
Gel food coloring works best – liquid colors thin the icing too much. Start with tiny amounts and build gradually. Black icing often looks gray at first but darkens as it sits.
Work in Stages
Always outline first with thicker icing, then flood with thinner consistency. Wait 15-20 minutes between steps to prevent colors from bleeding together.
Prevent Air Bubbles
Tap decorated cookies gently on the counter to release trapped air bubbles. Use a toothpick to pop stubborn bubbles immediately after flooding.
Storing and Reheating Tips
Store decorated cookies in airtight containers at room temperature for up to one week. Layer between parchment paper to prevent sticking and color transfer.
For longer storage, freeze undecorated cookies for up to 3 months. Decorated cookies don’t freeze well as icing can crack and colors may bleed when thawed.
The icing itself keeps covered at room temperature for 2-3 days. Press plastic wrap directly onto surface to prevent crusting. Re-whip briefly before using if separation occurs.
Nutritional Information
| Nutrition Facts | Per Decorated Cookie |
|---|---|
| Calories | 85 |
| Total Fat | 0.2g |
| Sodium | 8mg |
| Total Carbohydrates | 21g |
| Sugars | 20g |
| Protein | 0.8g |
Frequently Asked Questions
Can I make this icing without egg whites?
Yes! Substitute 3 tablespoons meringue powder mixed with 1/4 cup warm water. This creates identical results with better food safety for events.
Why is my Halloween cookies icing too thick?
Add water one teaspoon at a time until you reach proper consistency. Remember, icing should flow like thick honey for flooding areas.
How long does Halloween cookies icing take to dry completely?
Allow 2-4 hours for complete drying at room temperature. Avoid humid environments which can extend drying time significantly.
Can I make different colored icings ahead of time?
Absolutely! Prepare colors up to 3 days ahead. Store covered with plastic wrap pressed directly on surface to prevent skin formation.
What’s the best way to achieve true black icing?
Use chocolate-flavored icing as your base, then add black gel coloring. This prevents the bitter taste that comes from excessive black coloring.
My icing is too runny – how do I fix it?
Gradually add more sifted powdered sugar, one tablespoon at a time, mixing well between additions until proper consistency returns.
Pro Decorator Secrets
Want to take your Halloween cookies to the next level? Here are insider tips that professional cookie decorators use:
Wet-on-Wet Technique: Drop contrasting colors onto wet base icing, then drag a toothpick through for marbled effects perfect for spider webs or witch hair.
Edible Glitter Magic: Add edible pearl dust or disco dust while icing is still wet for magical sparkly effects that catch light beautifully.
Texture Adventures: Use different piping tips to create fur textures for werewolves, scales for dragons, or bumpy surfaces for warty witch faces.
Advanced Color Theory: Mix complementary colors for more sophisticated palettes. Deep burgundy with gold creates elegant vampire themes, while sage green with cream makes sophisticated autumn cookies.
Troubleshooting Common Issues
Icing Won’t Flow Smoothly: Your consistency is too thick. Add water drop by drop until ribbon test shows 10-second disappearance.
Colors Look Muddy: You’ve added too much liquid coloring or mixed complementary colors. Start fresh with gel colors for vibrant results.
Icing Cracks When Dry: Usually caused by too-thick application or forced drying with heat. Apply thinner coats and let air-dry naturally.
Bleeding Between Colors: Wait longer between decorating steps. Each layer needs 15-20 minutes to set before adding adjacent colors.
This Halloween cookies icing recipe transforms ordinary baking into extraordinary memories. Whether you’re creating treats for trick-or-treaters, school parties, or family fun, these professionally smooth, vibrantly colored icings make every cookie a masterpiece. The foolproof consistency and easy cleanup make it perfect for involving kids in the decorating process, creating traditions that last for years.
Ready to become your neighborhood’s Halloween cookie hero? Grab your ingredients and let the spooky-sweet decorating begin!