31 Halloween Treats Scary Easy to Make
Get ready to create the most spine-chilling, deliciously creepy halloween treats scary that will make your party unforgettable! These spooky snacks combine blood-curdling appearance with mouthwatering flavors that both kids and adults will devour.
Whether you’re hosting a monster bash or just want to add some frightful fun to October, these treats are surprisingly simple to make and guaranteed to steal the show at any Halloween gathering.
What Are Halloween Treats Scary?
Ever wondered why we call them “scary” treats when they’re actually irresistibly delicious? These spooky creations transform ordinary ingredients into ghoulish goodies that look terrifying but taste heavenly. From ghostly meringues to creepy crawler cookies, these treats prove that the way to anyone’s heart is through their stomach—even if that heart is decorated with edible blood!
The best part? They’re designed to look frightening while delivering comfort food satisfaction. Ready to turn your kitchen into a haunted bakery? Let’s dive into these spine-tingling recipes!

Why You’ll Love This Halloween Treats Scary Collection
Frighteningly Simple to Create
These halloween treats scary are perfect for busy party planners who want maximum impact with minimal stress. Most recipes require basic ingredients you already have in your pantry, and the techniques are straightforward enough for beginners.
Unlike complicated desserts that require pastry chef skills, these treats use clever decorating tricks to achieve their spooky appearance. A few drops of food coloring, some creative piping, and strategic candy placement transform everyday treats into Halloween masterpieces.
Budget-Friendly Haunted Happiness
Making your own halloween treats scary saves you serious money compared to buying overpriced store-bought Halloween desserts. A single batch of these treats costs a fraction of what you’d pay at specialty bakeries, yet delivers twice the “wow” factor. You’re in control of ingredients, portions, and presentation, which means more treats for less money. Plus, homemade goodies taste fresher and can be customized to accommodate dietary restrictions or preferences.
Crowd-Pleasing Flavors with Spooky Appeal
These treats combine classic flavors like chocolate, vanilla, and caramel with creative presentations that capture Halloween’s eerie essence. The gooey centers, crunchy textures, and sweet-savory combinations create an exciting taste experience. If you loved our previous recipe for Chocolate Chip Cookie Bars, you’ll absolutely adore how these treats take familiar flavors to frightening new heights. Each bite delivers comfort food satisfaction wrapped in a delightfully creepy package.
Why spend money on bland store-bought Halloween candy when you can create show-stopping treats that become the talk of the party? Roll up your sleeves and let’s get spooky in the kitchen!
How to Make Halloween Treats Scary
Quick Overview
These halloween treats scary are deceptively easy to prepare, delivering professional-looking results that will impress everyone at your party. The combination of rich chocolate, creamy frosting, and clever candy decorations creates treats that are both visually stunning and incredibly delicious.
What makes these treats special is their versatility—you can adapt them for various skill levels and dietary needs. The recipes use simple techniques like melting, mixing, and decorating, making them accessible to bakers of all experience levels.
Time Requirements:
- Prep Time: 20-30 minutes
- Cook Time: 15-25 minutes (varies by recipe)
- Decorating Time: 30-45 minutes
- Total Time: 1 hour 15 minutes to 1 hour 40 minutes
- Yield: 24-30 treats (depending on size)
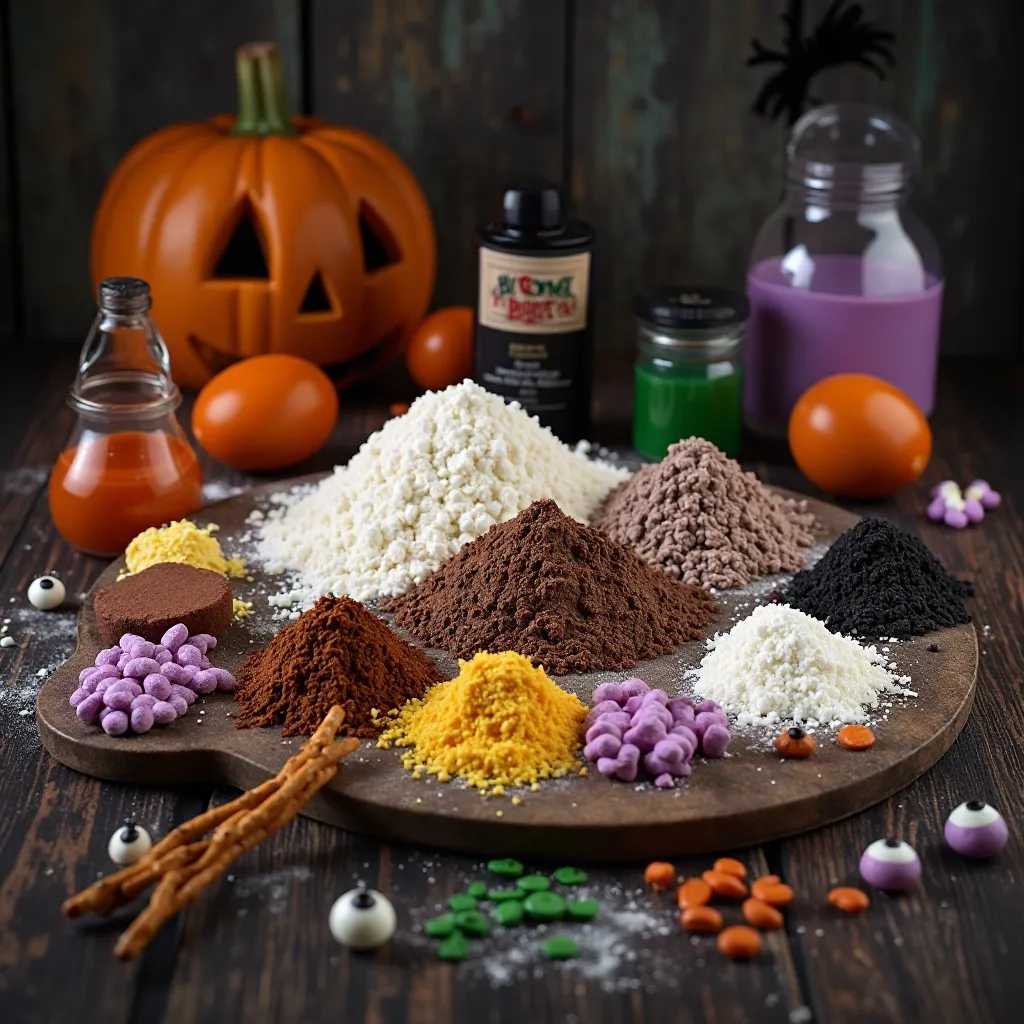
Key Ingredients for Halloween Treats Scary
For the Base Treats:
- 2 cups all-purpose flour
- 1 cup granulated sugar
- ¾ cup unsalted butter, softened
- 2 large eggs, room temperature
- 1 teaspoon vanilla extract
- ½ teaspoon baking powder
- ¼ teaspoon salt
- ½ cup cocoa powder (for chocolate versions)
For Spooky Decorations:
- 2 cups powdered sugar
- 3-4 tablespoons milk
- Orange, black, purple, and green gel food coloring
- Mini chocolate chips (for eyes)
- Candy eyeballs (various sizes)
- Red decorating gel (for blood effects)
- Pretzel sticks (for spider legs or bones)
- White chocolate chips
- Black licorice laces
- Candy corn
- Mini marshmallows
Optional Flavor Enhancers:
- 1 teaspoon almond extract
- ½ teaspoon cinnamon
- Pinch of espresso powder (enhances chocolate flavor)
Step-by-Step Instructions
How do you make the base dough?
Start by preheating your oven to 350°F (175°C) and lining your baking sheets with parchment paper. In a large mixing bowl, cream together the softened butter and granulated sugar for 3-4 minutes until the mixture becomes light and fluffy. This step is crucial for creating treats with the perfect texture.
Add the eggs one at a time, beating well after each addition. Pour in the vanilla extract and mix until fully incorporated. The mixture should look smooth and creamy at this point.
In a separate bowl, whisk together the flour, baking powder, salt, and cocoa powder (if making chocolate treats). This ensures even distribution of the dry ingredients and prevents lumps in your final dough.
How do you combine everything properly?
Gradually add the dry ingredients to the wet mixture in three separate additions. Mix on low speed after each addition until just combined. Don’t overmix—this can result in tough, dense treats instead of tender ones. The dough should pull away from the sides of the bowl and be slightly sticky to touch.
If the dough seems too soft, refrigerate it for 15-20 minutes. This makes it easier to handle and shape. For cookie-style treats, you can now scoop tablespoon-sized portions onto your prepared baking sheets, spacing them about 2 inches apart.
How do you bake them to perfection?
Bake the treats for 12-15 minutes, or until the edges are set but the centers still look slightly underdone. They’ll continue cooking on the hot baking sheet after you remove them from the oven. For cake-style treats, increase baking time to 18-22 minutes and test with a toothpick inserted in the center—it should come out with just a few moist crumbs.
Let the treats cool on the baking sheet for 5 minutes before transferring them to a wire cooling rack. This prevents them from breaking apart while they’re still warm and fragile.
How do you create spooky decorations?
Once your treats are completely cool, it’s time for the fun part—decorating! Prepare your frosting by whisking together powdered sugar and milk until smooth. Divide the frosting into separate bowls and tint each with your chosen food coloring. For deep, vivid colors, use gel food coloring rather than liquid.
For Ghost Treats: Pipe white frosting onto the treats in a ghost shape, creating a rounded top that tapers at the bottom. Add two mini chocolate chips for eyes and use a tiny dot of black frosting for the mouth.
For Spider Treats: Cover treats with black or purple frosting. Break pretzel sticks into small pieces for legs—4 on each side. Add two candy eyeballs at the front and use the pretzel pieces to create realistic spider legs that bend at the joints.
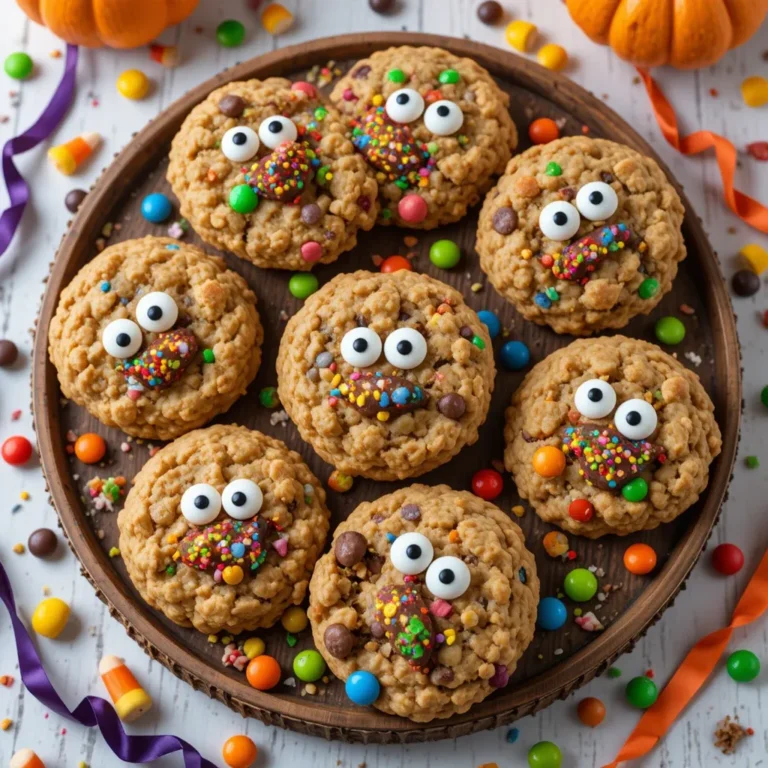
For Monster Treats: Use bright green frosting as the base. Add multiple candy eyeballs (3-5 for a mutant effect), create a jagged mouth with red decorating gel, and add texture with coconut flakes or crushed cookies for “hair.”
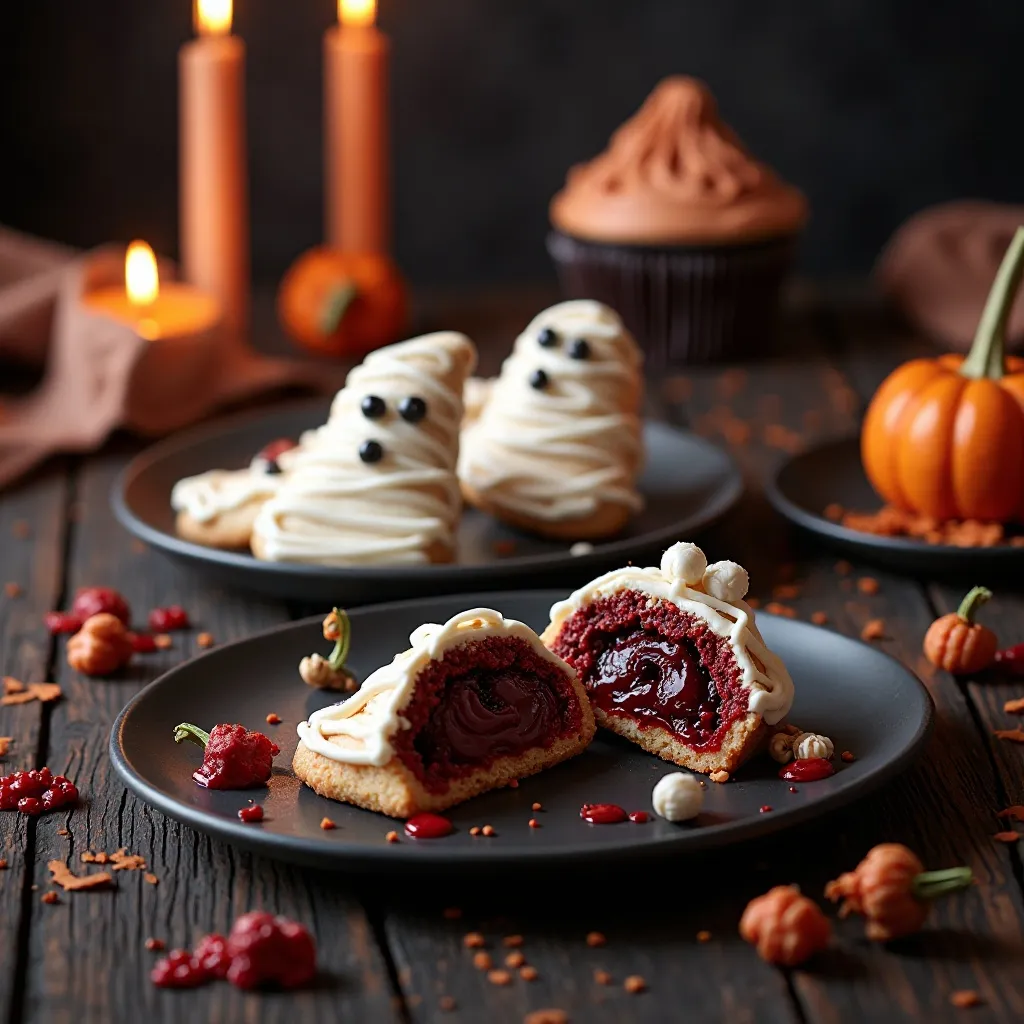
For Mummy Treats: Melt white chocolate and transfer to a piping bag or plastic bag with the corner snipped off. Pipe thin lines back and forth across each treat to create bandage wrapping. Leave a small gap in the center where you’ll add two candy eyeballs. Let the chocolate harden before adding the eyes with a small dot of frosting.
For Vampire Bite Treats: Frost with red-tinted frosting, then use white candy melts or fondant to create two fangs. Add red decorating gel around the “bite marks” for a bloody effect that looks deliciously gruesome.
How do you add finishing touches?
The final details make these treats truly scary. Use toothpicks to add texture to frosting (drag through for fur effects), create webs with thin piped lines, or dust with edible glitter for an eerie shimmer. Red decorating gel works perfectly for blood drips, wounds, or vampire bites.
Work quickly with candy decorations, placing them while the frosting is still wet so they adhere properly. If your frosting has already set, use small dots of fresh frosting as “glue” for attaching candy pieces.
What to Serve Halloween Treats Scary With
Spooky Beverages: These halloween treats scary pair beautifully with themed drinks. Serve them alongside blood-red fruit punch, witch’s brew (green sherbet punch), or hot apple cider with cinnamon sticks. For adult parties, try them with pumpkin spice cocktails or black vodka martinis garnished with gummy worms.
Savory Balance: Since these treats are sweet, balance your party spread with savory options. Mummy hot dogs wrapped in crescent rolls, pizza skulls cut with cookie cutters, or cheese and crackers arranged in a skeleton shape provide contrast. Veggie platters arranged as monster faces or spider webs add healthy options.
Additional Sweet Treats: Create a dessert table by pairing these with complementary treats. Caramel apples, popcorn balls, pumpkin cupcakes, and candy bark offer variety in textures and flavors. Display everything on tiered platters with Halloween decorations for maximum visual impact.
Party Theme Integration: Serve these treats on black or orange platters, use dry ice for fog effects (safely), and arrange them around LED candles. Place them in clear jars labeled with spooky names like “Zombie Fingers” or “Witch Warts” for added entertainment value.
Top Tips for Perfecting Halloween Treats Scary
What’s the secret to vibrant colors?
Always use gel food coloring instead of liquid. Gel colors are more concentrated, require less product, and won’t thin out your frosting. Start with small amounts and gradually add more until you reach your desired shade. Black frosting can be tricky—combine chocolate frosting with black gel for the deepest color without a bitter aftertaste.
How do you prevent decorations from sliding off?
Make sure your base treats are completely cool before decorating. Warm treats will melt frosting, causing decorations to slide. Apply frosting in a slightly thick layer that’s tacky enough to hold candy pieces. If working in a warm kitchen, refrigerate frosted treats for 10 minutes before adding decorations.
What are the best ingredient substitutions?
For gluten-free versions, use a 1:1 gluten-free baking flour blend. Replace butter with coconut oil for dairy-free treats, and use flax eggs (1 tablespoon ground flaxseed mixed with 3 tablespoons water per egg) for vegan options. Sugar-free alternatives work well if you reduce the overall sweetness and adjust baking time by 2-3 minutes.
How do you avoid overmixing the dough?
Mix dry ingredients just until incorporated—you should still see a few flour streaks before you stop. Overmixing develops gluten, resulting in tough treats. Use a folding motion with a spatula for the final incorporation rather than prolonged beating with a mixer.
What’s the trick to professional-looking piping?
Use disposable piping bags or plastic bags with corners snipped for easy cleanup. Keep consistent pressure while piping for even lines. For intricate details, use a toothpick to guide frosting into tight spaces. Practice on parchment paper first if you’re nervous about decorating directly on treats.
How do you prevent treats from spreading too much?
Chill the dough for 20-30 minutes before baking if it seems too soft. Don’t skip the creaming step—properly creamed butter and sugar create structure. Make sure your baking powder is fresh (test it by adding a pinch to hot water; it should fizz vigorously).
What’s the best way to transport these treats?
Layer treats in airtight containers with parchment paper between layers. Place larger, sturdier treats on the bottom and delicate decorated ones on top. For extra protection, keep containers in a cooler with ice packs during transport, especially in warm weather.
Storing and Reheating Tips
Room Temperature Storage: Store halloween treats scary in an airtight container at room temperature for up to 5 days. Place parchment paper between layers to prevent decorations from sticking together. Keep containers in a cool, dry place away from direct sunlight, which can fade food coloring and melt chocolate decorations.
Refrigeration Guidelines: If your kitchen is warm or treats contain perishable frosting (cream cheese, whipped cream), refrigerate them in airtight containers for up to 1 week. Bring treats to room temperature 30 minutes before serving for the best flavor and texture. Condensation can affect decorations, so ensure containers are truly airtight.
Freezing Instructions: Freeze undecorated treats for up to 3 months. Wrap individual treats in plastic wrap, then place in freezer bags with air removed. Label with the date and recipe name. Thaw overnight in the refrigerator, then bring to room temperature before decorating. This method is perfect for make-ahead party planning.
Decorated Treats Freezing: You can freeze fully decorated treats, but some decorations may not survive well. Hard candy and chocolate decorations freeze best, while frosting may crack or weep upon thawing. Flash-freeze treats on a baking sheet for 1 hour, then wrap individually and store in freezer bags for up to 1 month.
Reheating (If Desired): While these treats are typically served at room temperature, you can gently warm undecorated ones in the microwave for 10-15 seconds for a fresh-from-the-oven taste. Remove any candy decorations first, as they may melt. Alternatively, wrap in foil and warm in a 300°F oven for 5-7 minutes.
Frequently Asked Questions
Can I make these halloween treats scary ahead of time?
Absolutely! Bake the base treats up to 1 week ahead and store in airtight containers. You can also freeze undecorated treats for up to 3 months. Decorate 1-2 days before your party for the freshest appearance. This make-ahead flexibility makes party planning much less stressful.
What are the easiest halloween treats scary for kids to help make?
Ghost treats and mummy treats are perfect for little hands! Kids love adding candy eyeballs and drizzling chocolate for mummy bandages. Set up a decorating station with various toppings and let children create their own spooky masterpieces. Supervise any steps involving hot ingredients or sharp tools.
How do I make my halloween treats scary look more professional?
Use piping bags with small tips for detailed work, invest in quality gel food coloring for vibrant hues, and take time with placement of decorations. Look at photos for inspiration and sketch your design before decorating. Practice on a few treats before moving to your final batch.
Can I use store-bought dough or cake mix?
Yes! Sugar cookie dough, brownie mix, or cake mix work wonderfully as bases. This shortcut saves time while still allowing you to create impressive decorations. Focus your energy on creative decorating rather than baking from scratch if you’re short on time.
What’s the best way to display halloween treats scary at a party?
Create height variation using tiered stands, cake pedestals, and books under tablecloths. Use Halloween-themed platters, add dry ice for fog effects (safely in separate containers), and scatter plastic spiders or fake cobwebs around displays. Label treats with creative names on small cards or tags.
How can I make these treats healthier?
Substitute half the all-purpose flour with whole wheat flour, reduce sugar by 25%, use Greek yogurt instead of some butter, and choose natural food colorings. Add pureed pumpkin or sweet potato for moisture and nutrition. Top with dark chocolate instead of milk chocolate for added antioxidants.
What should I do if my frosting is too thick or too thin?
If frosting is too thick, add milk 1 teaspoon at a time until you reach desired consistency. If too thin, add powdered sugar 2 tablespoons at a time. Aim for a consistency that holds its shape but spreads smoothly—like thick peanut butter.
Can these halloween treats scary accommodate food allergies?
Yes! Use gluten-free flour blends for gluten allergies, coconut oil or vegan butter for dairy-free needs, and flax eggs for egg allergies. Many candy decorations are allergy-friendly, but always check labels. Consider making separate batches for guests with severe allergies to prevent cross-contamination.
Nutritional Information
| Nutrient | Per Treat (Average) |
|---|---|
| Calories | 180-220 |
| Total Fat | 8g |
| Saturated Fat | 5g |
| Cholesterol | 25mg |
| Sodium | 95mg |
| Total Carbohydrates | 28g |
| Dietary Fiber | 1g |
| Sugars | 18g |
| Protein | 2g |
| Vitamin A | 4% DV |
| Calcium | 2% DV |
| Iron | 6% DV |
Note: Nutritional values vary based on specific recipes, decorations, and portion sizes. Values are approximate.
Extra Helpful Tips and Tricks
Color Psychology for Halloween Treats: Use the classic Halloween color palette strategically. Orange represents pumpkins and harvest, black adds mystery and night, purple evokes magic and potions, while green suggests monsters and slime. Combine these colors in unexpected ways for treats that capture attention immediately.
Texture Variation Ideas: Add crunch to soft treats with crushed cookies, nuts, or toffee bits. Create contrast by pairing smooth frosting with crunchy candy. Layer different textures within a single treat—such as a soft cookie base, chewy caramel center, and crispy chocolate shell—for an exciting eating experience.
Making Treats Interactive: Create “build your own” decorating stations where guests customize their treats. Provide various frosting colors, candy options, and edible decorations. This entertainment doubles as an activity and dessert, perfect for kids’ parties or casual gatherings.
Photography Tips for Social Media: Photograph treats in natural light against dark backgrounds for dramatic effect. Use Halloween props like mini pumpkins, fake cobwebs, and autumn leaves. Capture details with close-up shots and create flat-lay arrangements from above. Add candles or string lights for atmospheric glow.
Scaling Recipes for Crowds: Double or triple recipes easily for large parties. Prepare cookie dough in advance and freeze in logs, slicing and baking as needed. Set up assembly-line decorating to speed up the process. Recruit helpers—decorating is more fun with friends!
Theme Variations: Adapt these base recipes for different Halloween themes. Create elegant “haunted mansion” treats with black and gold decorations, rustic “harvest festival” versions with caramel and pecans, or child-friendly “cute monster” treats with bright colors and silly faces.
Ingredient Quality Matters: Use real butter instead of margarine for superior flavor and texture. Choose pure vanilla extract over imitation for authentic taste. Invest in quality cocoa powder—Dutch-processed creates darker, richer chocolate treats that look appropriately spooky.
Creating a Spooky Ambiance: Serve treats on vintage platters from thrift stores, use Halloween-themed linens, and arrange treats around carved pumpkins. Play eerie music and dim lights for atmosphere. The presentation is half the fun!
These halloween treats scary prove that homemade goodies can be both impressively spooky and surprisingly simple to create. With basic ingredients, creative decorations, and these detailed instructions, you’ll craft treats that become legendary at your Halloween celebrations. Start planning your frightfully delicious menu today—your guests are in for a deliciously scary surprise!