Easy Halloween Treats Spiders Recipe – Ready in 45 Minutes
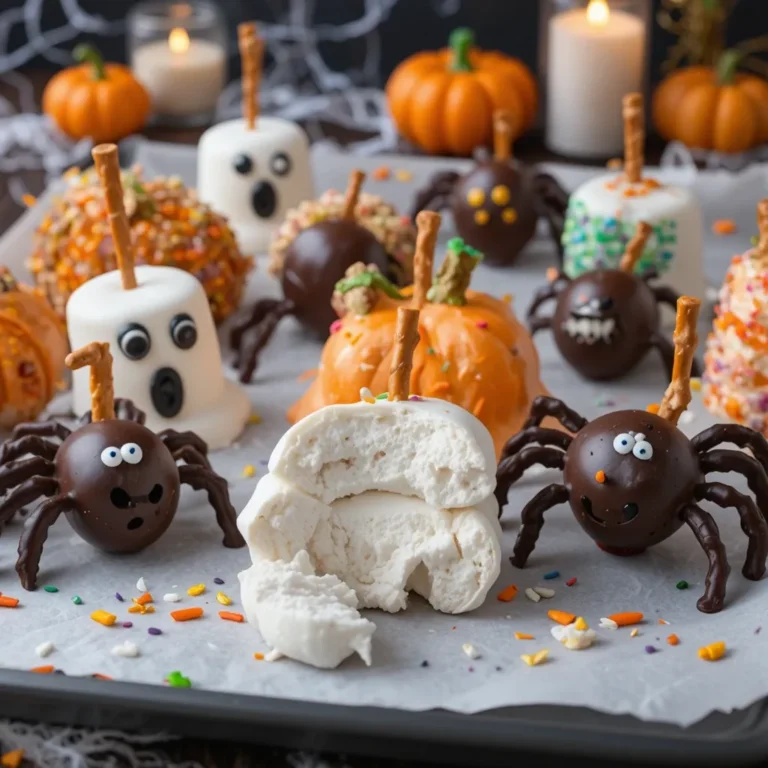
Get ready to fall in love with these adorable Halloween treats spiders! These creepy-crawly confections are irresistibly cute, incredibly easy to make, and require absolutely no baking. With just a handful of simple ingredients and about 20 minutes of your time, you’ll create show-stopping Halloween treats that’ll have kids and adults squealing with delight.
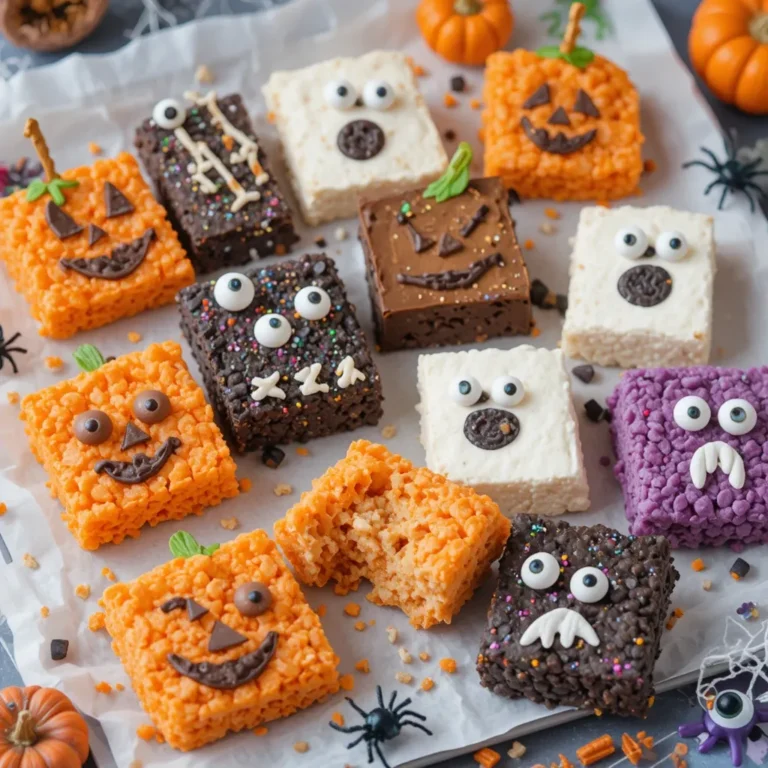
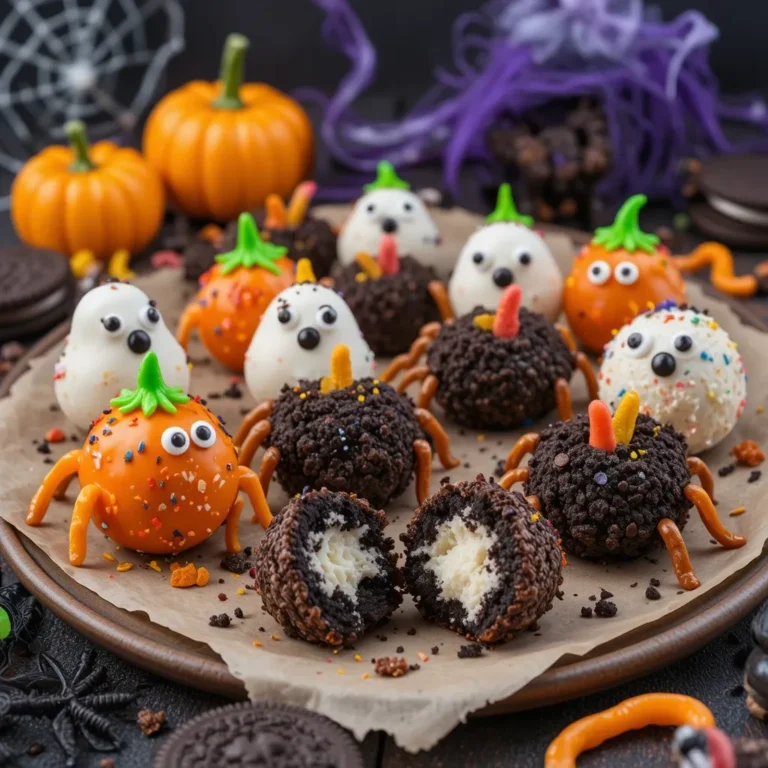
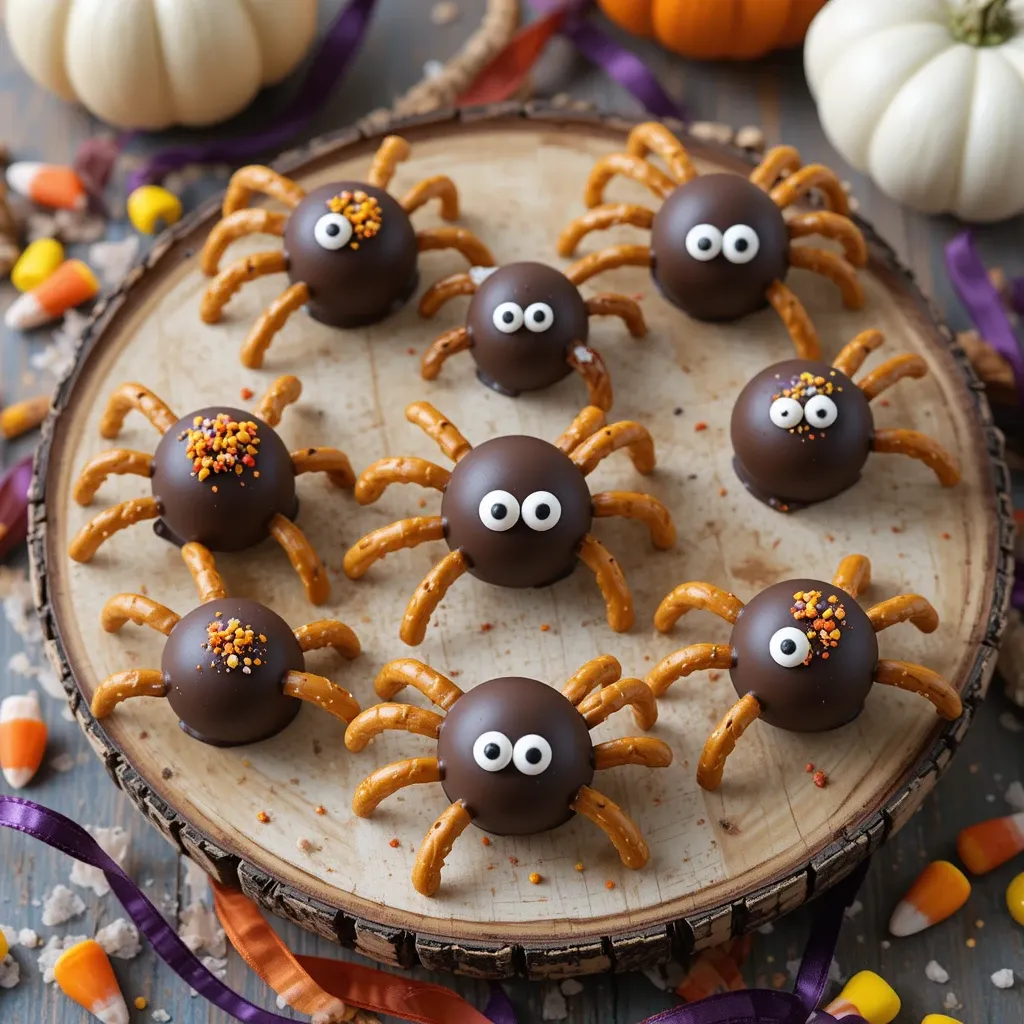
These chocolate-covered peanut butter spiders are the perfect combination of sweet, salty, and spooky – making them an absolute must-have for your Halloween party spread. Much like our popular Halloween Monster Cookies, these spiders prove that the best treats are often the simplest ones!
What Are Halloween Treats Spiders?
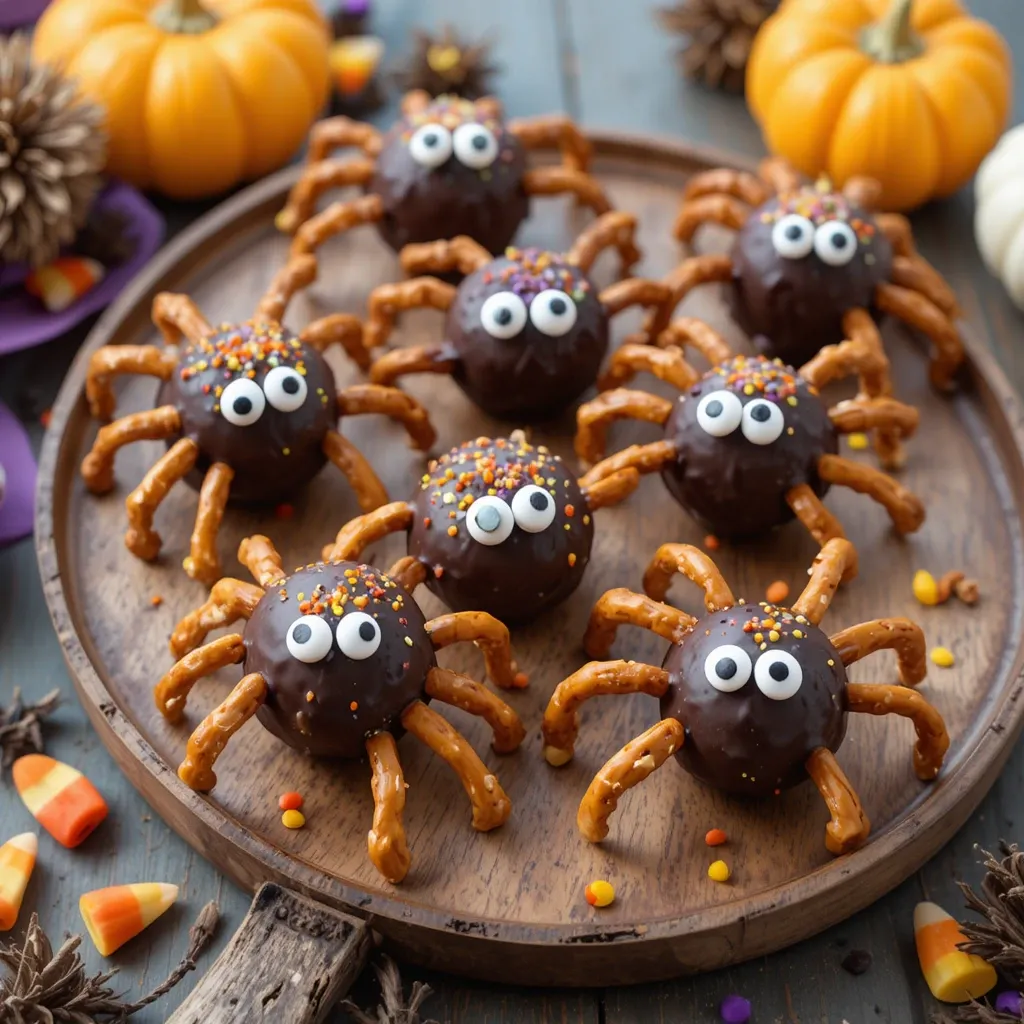
Ever wondered why we call these adorable confections “spiders”? Well, with their round chocolate bodies, crunchy pretzel legs, and candy eyes that seem to follow you around the room, they’re the cutest eight-legged creatures you’ll ever want to eat!
These no-bake treats transform everyday pantry staples into Halloween magic. The secret? It’s all about creativity and a little bit of chocolate. As the saying goes, “the way to a man’s heart is through his stomach,” and these spiders will web their way into everyone’s hearts!
Don’t be intimidated by their adorable appearance – even kids can help make these. Ready to create your own spider squad?
Why You’ll Love This Halloween Treats Spiders Recipe
The Perfect Halloween Party Showstopper
These Halloween treats spiders are guaranteed conversation starters at any Halloween gathering. Each spider features a glossy chocolate coating that gives way to a creamy peanut butter center, creating an irresistible flavor combination that guests can’t stop talking about. The satisfying crunch of pretzel legs adds the perfect textural contrast, making every bite exciting.
Budget-Friendly Fun
Forget spending a fortune on store-bought Halloween candy! Making these spiders at home costs a fraction of what you’d pay for fancy decorated treats. With basic ingredients like chocolate chips, peanut butter, and pretzels, you can create dozens of spiders for less than $10. Your wallet will thank you, and your guests will never know how affordable they were to make.
Customizable and Allergy-Friendly
The beauty of this recipe lies in its versatility. Use dark chocolate, milk chocolate, or even white chocolate for different looks. Swap peanut butter for sunflower seed butter to make them allergy-friendly. Add colorful candy eyes, edible glitter, or tiny candy pieces for extra personality.
Similar to our Halloween Chocolate Bark recipe, these treats encourage creativity and personalization. Whether you’re making them for a school party, trick-or-treaters, or just for fun, they’re endlessly adaptable.
Ready to bring these spooky spiders to life? Let’s get started – you’ll be amazed at how simple they are to create!
How to Make Halloween Treats Spiders
Quick Overview
These Halloween treats spiders are incredibly simple to make and require no special baking skills. The process involves melting chocolate, forming spider bodies, attaching pretzel legs, and adding candy eyes for that adorable spooky look.
The treats feature a rich chocolate coating with a creamy peanut butter filling that creates the perfect sweet and salty combination. The pretzel sticks provide a satisfying crunch that complements the smooth chocolate beautifully.
Time Breakdown:
- Prep Time: 15 minutes
- Chill Time: 30 minutes
- Total Time: 45 minutes
- Servings: 20-24 spiders
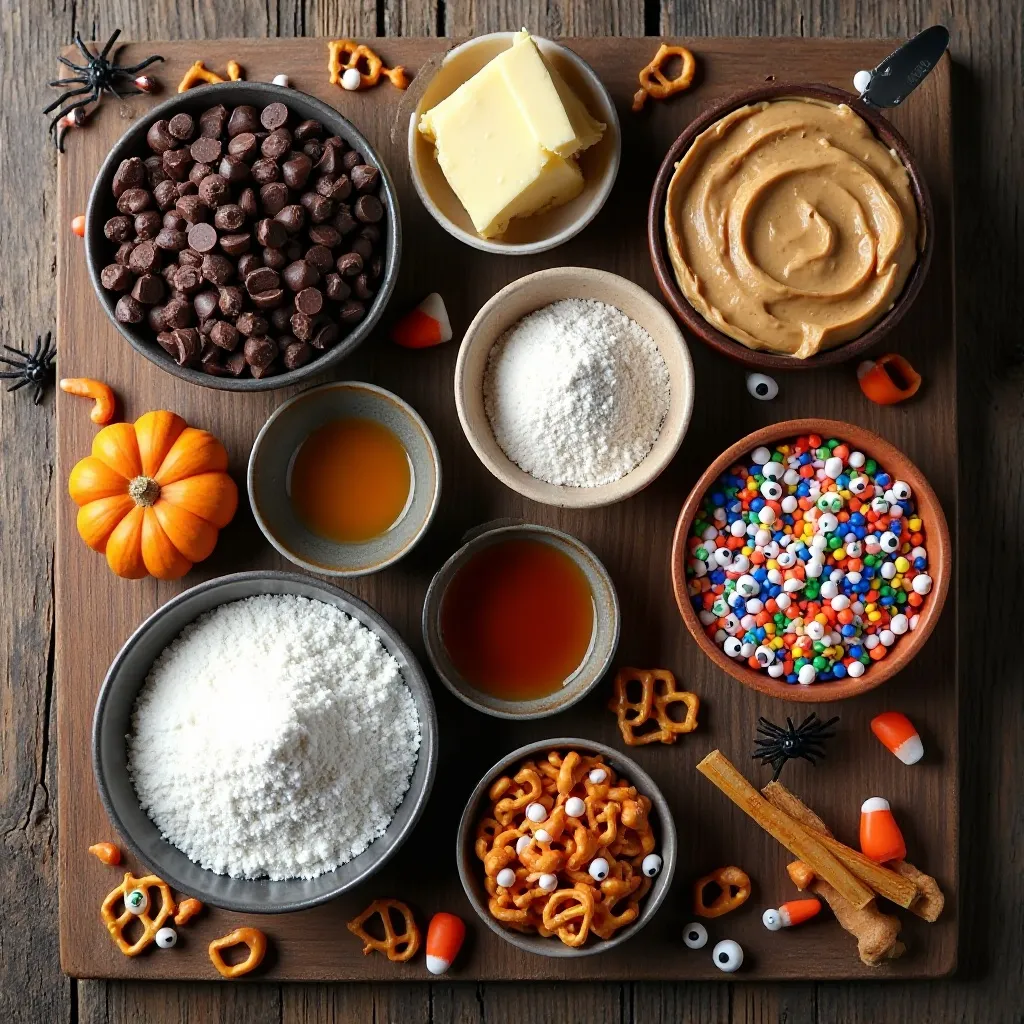
Key Ingredients for Halloween Treats Spiders
For the Spider Bodies:
- 2 cups semi-sweet chocolate chips (or milk chocolate)
- 1 cup creamy peanut butter
- 2 tablespoons butter (softened)
- 1 cup powdered sugar
- ½ teaspoon vanilla extract
For Assembly:
- 96-120 thin pretzel sticks (for legs)
- 40-48 candy eyes (2 per spider)
- Optional: orange or purple sprinkles for extra Halloween flair
Special Equipment:
- Parchment paper or silicone baking mat
- Medium mixing bowl
- Microwave-safe bowl
- Small cookie scoop or spoon
- Toothpicks for placing eyes
Step-by-Step Instructions
Prepare Your Peanut Butter Filling
Start by combining the creamy peanut butter, softened butter, powdered sugar, and vanilla extract in a medium mixing bowl. Mix thoroughly until the ingredients are fully incorporated and the mixture is smooth and creamy. The consistency should be thick enough to hold its shape but still easy to roll.
Use a small cookie scoop or tablespoon to portion out the mixture. Roll each portion between your palms to create smooth balls, about 1 inch in diameter. Place the peanut butter balls on a parchment-lined baking sheet, spacing them about 2 inches apart.
Transfer the baking sheet to your refrigerator and chill the peanut butter balls for at least 20 minutes. This chilling step is crucial because it helps the balls firm up, making them much easier to coat with chocolate without falling apart.
Melt Your Chocolate
While your peanut butter balls are chilling, prepare your chocolate coating. Place the chocolate chips in a microwave-safe bowl. Microwave on 50% power in 30-second intervals, stirring thoroughly between each interval.
Continue this process until the chocolate is completely smooth and melted, with no lumps remaining. Be careful not to overheat the chocolate, as this can cause it to seize and become grainy. The chocolate should flow smoothly off your spoon when it’s ready.
Let the melted chocolate cool slightly for 2-3 minutes before coating. This prevents the peanut butter centers from melting and helps create a thicker, more even coating.
Attach the Pretzel Legs
Here’s where your spiders start coming to life! Take 8 pretzel sticks for each spider. On your parchment-lined surface, arrange the pretzel sticks in a spider leg pattern – 4 legs on each side, angled outward slightly to mimic a spider’s stance.
The pretzel sticks should be positioned so they radiate from where the spider’s body will sit, with about 1 inch extending underneath where you’ll place the chocolate-covered ball. This arrangement ensures the legs will stick properly to the chocolate.
Coat and Assemble the Spiders
Remove your chilled peanut butter balls from the refrigerator. Working with one ball at a time, drop it into the melted chocolate. Use a fork to roll it around, ensuring it’s completely coated with chocolate. Lift the ball with the fork, allowing excess chocolate to drip back into the bowl.
Carefully place the chocolate-covered ball onto the center of your arranged pretzel legs. The weight of the ball and the melted chocolate will help secure the legs in place. Press down very gently if needed, but don’t flatten the ball.
Work quickly during this step, as the chocolate begins to set rapidly. If your chocolate starts to thicken while working, reheat it briefly in the microwave for 10-15 seconds.
Add the Finishing Touches
While the chocolate is still wet and tacky, immediately place 2 candy eyes on the front of each spider. Use a toothpick to position them precisely where you want them. The eyes should be placed close together near the top of the spider for the cutest effect.
If you’re using sprinkles or other decorations, add them now while the chocolate is still soft. You can sprinkle them over the entire spider or place them strategically on the body for a festive touch.
Final Chill and Set
Once all your spiders are assembled and decorated, place the entire baking sheet in the refrigerator. Let them chill for at least 30 minutes, or until the chocolate is completely firm and set.
This final chilling step ensures the chocolate hardens properly and the pretzel legs stay securely attached. Your spiders are now ready to serve, pack, or store!
What to Serve Halloween Treats Spiders With
These adorable spiders are versatile treats that work beautifully in many serving scenarios. Here are some perfect pairing ideas:
For Halloween Party Platters: Arrange your spiders alongside Halloween sugar cookies, ghost-shaped marshmallows, and candy corn for a spooky dessert spread. Add some orange and black M&Ms scattered around the platter for extra color.
Beverage Pairings: Serve with cold milk for kids, or pair with hot apple cider, pumpkin spice lattes, or even Halloween-themed cocktails for adults. The sweet-salty combination works wonderfully with both hot and cold drinks.
Dessert Board Ideas: Create a Halloween charcuterie board featuring these spiders, chocolate-covered pretzels, caramel apples, popcorn balls, and an assortment of Halloween candies. Add fresh fruit like grapes and strawberries for balance.
Party Favor Packaging: Place 2-3 spiders in clear cellophane bags tied with orange and black ribbons. They make perfect take-home treats that guests will love.
Top Tips for Perfecting Halloween Treats Spiders
Use Room Temperature Ingredients
Make sure your peanut butter and butter are at room temperature before mixing. Cold ingredients won’t blend smoothly and can result in lumpy filling that’s difficult to work with. Let them sit out for about 30 minutes before starting.
Don’t Skip the Chilling Steps
Chilling the peanut butter balls before dipping is essential. If they’re too soft, they’ll fall apart when you try to coat them with chocolate. Similarly, the final chill ensures everything sets properly.
Control Your Chocolate Temperature
Overheated chocolate becomes thick and grainy. Always use 50% power in your microwave and stir frequently. If your chocolate becomes too thick, add ½ teaspoon of coconut oil or shortening to thin it out.
Work in Batches
Don’t try to coat all your spiders at once. The chocolate will start to harden, making it difficult to attach the pretzel legs and eyes. Work in batches of 4-5 spiders for best results.
Choose the Right Pretzel Sticks
Use thin pretzel sticks rather than thick ones. Thin sticks look more like spider legs and are easier to bite through. If you can only find thick pretzels, you can carefully break them to create thinner pieces.
Prevent Pretzel Legs from Breaking
Handle pretzel sticks gently, as they’re fragile. If some break during assembly, don’t worry – slightly shorter or mismatched legs add character and make your spiders look more unique!
Get Creative with Chocolate Varieties
Experiment with different types of chocolate for variety. White chocolate spiders look like ghostly albino spiders, dark chocolate creates sophisticated Halloween treats, and orange-tinted white chocolate adds festive color.
Make Them Nut-Free
For allergy-friendly versions, substitute the peanut butter with sunflower seed butter, soy nut butter, or cookie butter. The texture and taste remain delicious while accommodating dietary restrictions.
Storing and Reheating Tips
Refrigerator Storage: Store your Halloween treats spiders in an airtight container in the refrigerator for up to 2 weeks. Layer them between sheets of parchment paper to prevent sticking. Keep them away from strongly-scented foods, as chocolate can absorb odors.
Room Temperature Storage: If your house is cool (below 70°F), you can store the spiders at room temperature in an airtight container for up to 5 days. This makes them perfect for party displays that will be consumed quickly.
Freezer Storage: These spiders freeze beautifully! Place them in a single layer on a baking sheet and freeze until solid (about 1 hour). Then transfer to a freezer-safe container or bag, separating layers with parchment paper. They’ll keep for up to 3 months.
Thawing Instructions: Remove frozen spiders from the freezer and let them thaw in the refrigerator for 2-3 hours, or at room temperature for 30-45 minutes. Don’t thaw them in the microwave, as the chocolate will melt.
Preventing Condensation: When bringing refrigerated or frozen spiders to room temperature, leave them in their covered container during thawing. This prevents condensation from forming on the chocolate, which can create a dull appearance.
Gift-Giving Storage: If packaging these as gifts, store them in the refrigerator until shortly before giving. Include a note about proper storage so recipients know how to keep them fresh.
Frequently Asked Questions
Can I make Halloween treats spiders without peanut butter?
Absolutely! You can substitute peanut butter with sunflower seed butter, almond butter, cashew butter, or even cookie butter for a different flavor profile. Each alternative creates delicious spiders that are perfect for those with peanut allergies. Just ensure the consistency is similar to peanut butter – thick enough to hold shape when rolled into balls.
Why are my pretzel legs falling off?
Pretzel legs typically fall off when the chocolate is too cool or has already started to set before you place the spider body on top. Make sure your chocolate is freshly melted and still warm when assembling. Also, press the chocolate-covered ball gently onto the pretzels to ensure good contact. Working quickly is key!
Can I use candy melts instead of chocolate chips?
Yes, candy melts work wonderfully for this recipe! They’re actually easier to work with than chocolate chips because they melt smoothly and set quickly. Candy melts also come in various colors, so you can make orange, purple, or green spiders for extra Halloween fun. Follow the package instructions for melting.
How do I prevent the chocolate from getting too thick?
If your chocolate thickens while working, simply microwave it for 10-15 seconds to restore its smooth consistency. You can also add ½ teaspoon of coconut oil or vegetable shortening to thin it out. Avoid adding water or milk, as these can cause the chocolate to seize and become grainy.
Can kids help make these Halloween treats spiders?
Definitely! This is a fantastic recipe for kids to help with. They can roll the peanut butter balls, arrange the pretzel legs, and place the candy eyes. Supervise the chocolate melting and dipping steps, as hot chocolate can cause burns. It’s a fun family activity that creates lasting Halloween memories!
What’s the best way to transport these spiders to a party?
Transport your spiders in a sturdy container with a tight-fitting lid. Place parchment paper between layers to prevent sticking. Keep them chilled until you’re ready to leave, then transport in a cooler with ice packs if it’s warm outside. They can sit at room temperature during the party for several hours without issues.
Can I make these spiders ahead of time?
These spiders are perfect for advance preparation! Make them up to 2 weeks ahead and store in the refrigerator, or up to 3 months ahead in the freezer. This makes party planning so much easier. Just remember to bring them to room temperature about 30 minutes before serving for the best texture.
Why did my chocolate turn white after storing?
That white coating is called “chocolate bloom” and occurs when chocolate is exposed to temperature fluctuations or moisture. While it looks unappealing, it’s completely safe to eat and doesn’t affect the taste. Prevent bloom by storing spiders in airtight containers at consistent temperatures and bringing them to room temperature slowly.
Nutrition Information
| Nutrient | Per Spider (1 serving) |
|---|---|
| Calories | 145 |
| Total Fat | 9g |
| Saturated Fat | 4g |
| Cholesterol | 3mg |
| Sodium | 75mg |
| Total Carbohydrates | 15g |
| Dietary Fiber | 1g |
| Sugars | 11g |
| Protein | 3g |
Nutritional values are approximate and may vary based on specific ingredients used.
Creative Variations to Try
White Chocolate Ghost Spiders: Use white chocolate and add a small ghost shape on top of each spider using white candy melts. These look ethereal and spooky!
Mint Chocolate Spiders: Add ½ teaspoon peppermint extract to your peanut butter mixture for a refreshing twist. Use dark chocolate for coating to complement the mint flavor.
S’mores Spiders: Replace the peanut butter filling with marshmallow cream mixed with graham cracker crumbs. These taste just like campfire s’mores in spider form!
Caramel-Filled Spiders: Add a small piece of soft caramel candy to the center of each peanut butter ball before coating. The gooey surprise inside makes these extra special.
Rainbow Spiders: Tint white chocolate with food coloring to create spiders in various colors. Use purple, orange, green, and black for a festive Halloween rainbow.
Troubleshooting Common Issues
Problem: Peanut butter balls are too soft to handle
- Solution: Add more powdered sugar, 2 tablespoons at a time, until the mixture firms up. Alternatively, refrigerate the mixture for 15 minutes before rolling.
Problem: Chocolate coating is too thick
- Solution: Thin it with ½ teaspoon coconut oil or shortening. Never use water, as it will ruin the chocolate.
Problem: Candy eyes won’t stick
- Solution: Place eyes immediately after coating while chocolate is still wet. If chocolate has hardened, use a tiny dab of melted chocolate as “glue.”
Problem: Spiders look messy
- Solution: Use a fork to lift spiders from the chocolate, tapping gently to remove excess. Practice makes perfect – your first few might be messier than the last!
Fun Facts About Halloween and Spider Treats
Did you know that spiders have been associated with Halloween for centuries? In medieval folklore, seeing a spider on Halloween was considered good luck! Today, these eight-legged creatures remain one of the most popular Halloween symbols.
Chocolate and peanut butter became America’s favorite combination in the 1920s when H.B. Reese created the first peanut butter cup. Our spider treats celebrate this classic pairing while adding a spooky Halloween twist!
Making Halloween treats at home is a tradition that dates back to the 1950s when homemade goodies were the norm for trick-or-treaters. While store-bought candy dominates today, homemade treats like these spiders bring back that nostalgic, personal touch.
Final Thoughts
These Halloween treats spiders prove that impressive-looking desserts don’t have to be complicated or time-consuming. With simple ingredients, minimal effort, and maximum creativity, you’ll create memorable treats that become a Halloween tradition in your home.
Whether you’re hosting a Halloween party, sending treats to school, or just having fun with the kids on a chilly October afternoon, these chocolate peanut butter spiders deliver on every level. They’re cute without being scary, delicious without being overly sweet, and fun to make without being frustrating.
So grab your ingredients, rally the kids, and start creating your spider army! Don’t forget to take photos of your creations and share them – these photogenic treats are guaranteed to get lots of attention on social media.
Happy Halloween, and happy spider-making! May your treats be spooky, your chocolate be smooth, and your pretzel legs stay perfectly attached. Now get in that kitchen and let’s make some Halloween magic! 🕷️🎃