No-Bake Thanksgiving Turkey Oreo Cookies in 30 Minutes
These adorable Thanksgiving turkey Oreo cookies are the perfect festive treat that combines simplicity with charm! Imagine transforming ordinary Oreos into stunning turkey displays that’ll have your guests saying “wow” before they even take a bite.
With just a handful of ingredients and no baking required, you’ll create Instagram-worthy desserts in under 30 minutes. Kids absolutely love helping with these, making them ideal for family bonding time. If you enjoyed our Pumpkin Spice Cookies, you’ll fall head over heels for these festive turkey treats!
What Are Thanksgiving Turkey Oreo Cookies?
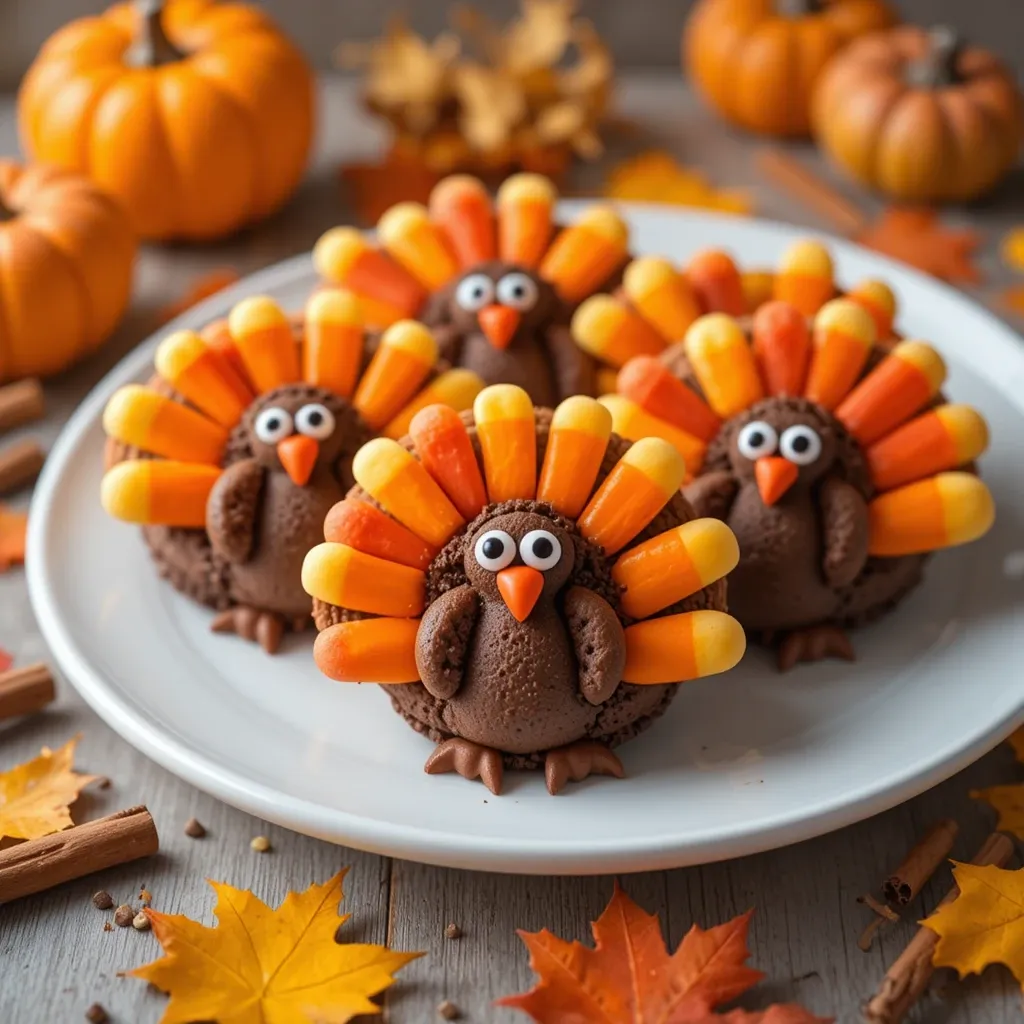
Ever wonder how a simple sandwich cookie becomes the star of your dessert table? Thanksgiving turkey Oreo cookies are no-bake treats where Oreos get dressed up as adorable turkeys using candy corn, candy eyes, and chocolate.
They’re whimsical, they’re delicious, and they prove that the way to everyone’s heart is through creative desserts! These little gobblers require zero baking skills but deliver maximum “aww” factor. Ready to transform your cookie stash into a flock of edible turkeys? Let’s get started!
Why You’ll Love This Thanksgiving Turkey Oreo Cookies Recipe
No-Bake Convenience Meets Holiday Magic
The beauty of Thanksgiving turkey Oreo cookies lies in their incredible simplicity. There’s no mixer, no oven, and no complicated techniques involved. You’re essentially decorating pre-made cookies, which means even the littlest helpers can participate without risk of kitchen disasters.
The entire process takes about 20-30 minutes from start to finish, making these perfect for last-minute holiday parties or when you need a quick contribution to the potluck table.
Budget-Friendly Festive Treats
Making Thanksgiving turkey Oreo cookies at home saves you a fortune compared to buying decorated cookies from bakeries. With basic ingredients that cost under $15, you can create 2-3 dozen stunning treats.
Most of the ingredients are items you might already have in your pantry after Halloween. Those leftover candy corns? Perfect turkey feathers! The chocolate chips from your baking stash? Ideal for creating beaks and holding everything together.
Customizable and Allergy-Friendly Options
These treats are wonderfully versatile. Use regular Oreos, Double Stuf, or even gluten-free versions. Want to make them nut-free for school parties? No problem – these are naturally nut-free!
The decoration possibilities are endless. Add orange frosting for extra flair, use different colored candy melts, or experiment with various candy combinations. Similar to our Christmas Cookie Decorating Guide, these invite creativity while following a simple base recipe.
Perfect for All Ages
Whether you’re entertaining toddlers or impressing adults, these cookies bridge the gap beautifully. Kids love the fun, playful design, while adults appreciate the nostalgic combination of Oreos and festive creativity. They’re conversation starters that taste as good as they look!
How to Make Thanksgiving Turkey Oreo Cookies
Quick Overview
These no-bake Thanksgiving turkey Oreo cookies are ridiculously easy to make!
The process involves melting chocolate, attaching candy decorations, and letting everything set. No fancy equipment needed – just a microwave or double boiler, some patience, and your creative spirit.
The cookies feature a classic Oreo base decorated to look like turkeys with candy corn “feathers,” candy eyes, and chocolate chip “beaks.”
Time Breakdown:
- Prep Time: 15 minutes
- Decoration Time: 15 minutes
- Setting Time: 30 minutes
- Total Time: 1 hour
- Servings: 24 cookies
Key Ingredients for Thanksgiving Turkey Oreo Cookies
For the Base:
- 24 Oreo cookies (regular or Double Stuf)
- 1 cup semi-sweet chocolate chips or candy melts (orange or brown)
- 1 tablespoon coconut oil or shortening (optional, for smoother chocolate)
For Decoration:
- 48 candy eyes (wiggle eyes)
- 24 candy corn pieces
- 24 Reese’s Pieces or chocolate chips (for beaks)
- 120-150 pieces of candy corn (5-6 per cookie for tail feathers)
- 1/4 cup white chocolate chips or frosting (for “gluing” decorations)
Optional Add-Ons:
- Orange or red frosting for wattles
- Mini chocolate chips for feet
- Colorful sprinkles
- Red food coloring for custom decorations
Step-by-Step Instructions
Step 1: Prepare Your Workspace
Line a large baking sheet or tray with parchment paper or wax paper. This prevents sticking and makes cleanup effortless.
Arrange all your candy decorations in small bowls for easy access. Having everything organized before you start is crucial since chocolate sets quickly. Set out your Oreos in rows on your prepared surface.
Step 2: Melt the Chocolate
Place chocolate chips in a microwave-safe bowl. If using, add 1 tablespoon of coconut oil to make the chocolate smoother and easier to work with.
Microwave in 30-second intervals, stirring between each interval, until completely melted and smooth. This usually takes 1-2 minutes total. Alternatively, melt chocolate using a double boiler on the stovetop over low heat, stirring constantly.
Be careful not to overheat the chocolate, as it can seize and become grainy. If chocolate seems too thick, add a tiny bit more coconut oil.
Step 3: Create the Turkey Tail Feathers
Take one Oreo cookie and place a small dollop of melted chocolate on the back edge (the part that will be the “top” of your turkey).
Arrange 5-6 candy corn pieces in a fan pattern to create the turkey’s colorful tail feathers. The pointed ends should face outward, with the wider ends meeting in the center.
Press gently into the chocolate to secure them. The chocolate acts as glue. Let this set for 2-3 minutes before moving to the next step.
Repeat this process for all 24 cookies before moving forward. Working in batches helps ensure consistency.
Step 4: Attach the Turkey Face
Once the tail feathers have set slightly, flip the cookie so the feathers are in the back and the flat Oreo surface is facing you.
Place a small amount of melted chocolate or white chocolate in the center of the Oreo. This is where you’ll build the turkey’s face.
Step 5: Add the Eyes and Beak
While the chocolate is still wet, press two candy eyes onto the upper portion of the Oreo, leaving space below for the beak.
Position them close together for a cuter look. The chocolate will hold them in place as it dries.
For the beak, place a Reese’s Pieces candy or mini chocolate chip pointed-side down between and slightly below the eyes. Use a tiny dab of chocolate if needed to secure it.
Step 6: Create the Wattle (Optional
For extra authenticity, create a little red wattle under the beak. Use a small dot of red frosting, or take a small piece of red fruit leather cut into a teardrop shape.
Attach it with a tiny bit of chocolate or frosting just below the beak. This step is optional but adds adorable detail!
Step 7: Add Final Touches
If you want to add feet, use two mini chocolate chips positioned at the bottom edge of the Oreo. Secure with a tiny amount of melted chocolate.
Some bakers like to add a small dusting of edible gold glitter or orange sprinkles around the turkey for extra festive flair.
Step 8: Let the Cookies Set
Once all decorations are in place, let the cookies sit undisturbed at room temperature for 30-45 minutes until the chocolate is completely hardened.
For faster setting, you can place the tray in the refrigerator for 15-20 minutes. However, be aware that condensation may form when you remove them if your kitchen is warm.
Once set, your Thanksgiving turkey Oreo cookies are ready to display and devour!
What to Serve Thanksgiving Turkey Oreo Cookies With
These delightful treats pair beautifully with various beverages and desserts for your Thanksgiving spread.
Beverage Pairings:
- Hot apple cider with cinnamon sticks
- Pumpkin spice lattes or chai tea
- Cold milk (a classic with Oreos!)
- Sparkling apple juice for kids
- Coffee or espresso for adults
Complementary Desserts:
- Pumpkin pie or pecan pie
- Caramel apple slices
- Mini pumpkin cheesecakes
- Autumn sugar cookies
- Cranberry bliss bars
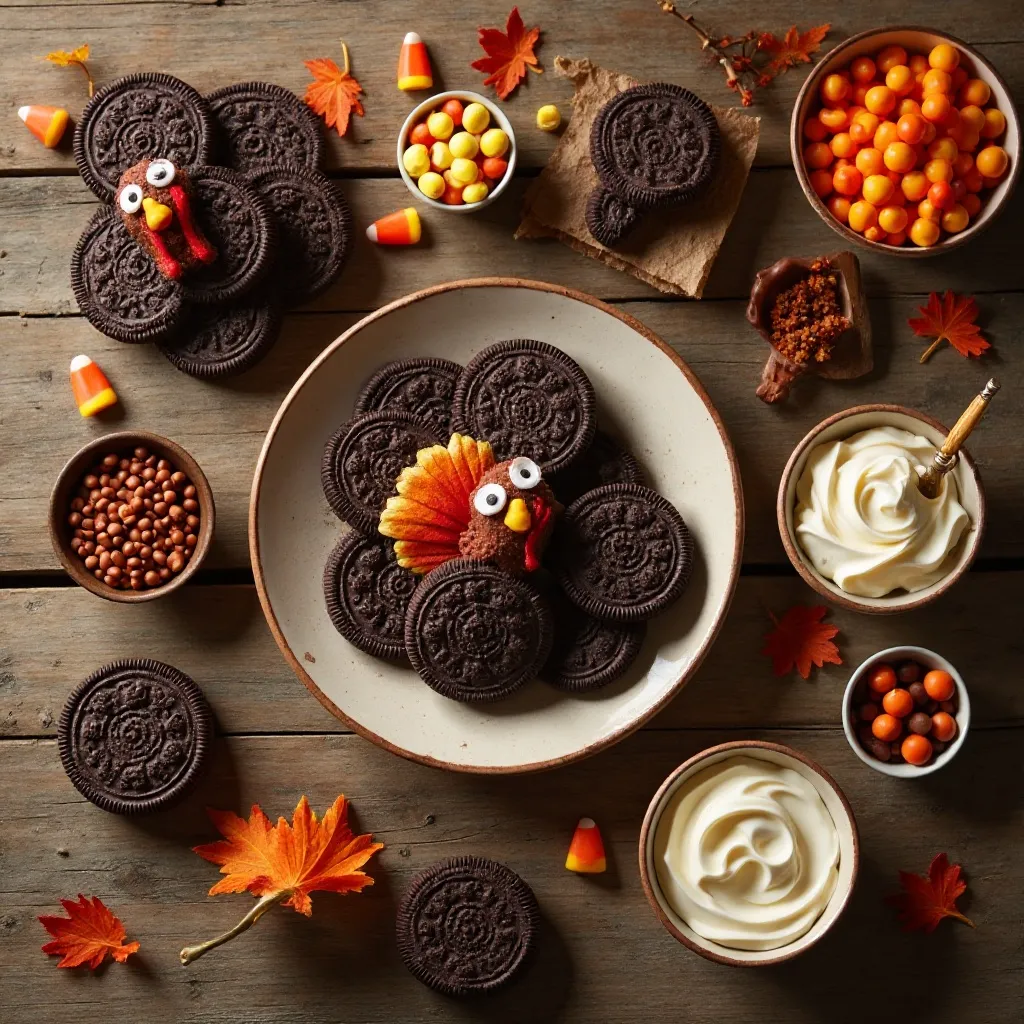
Serving Suggestions: Arrange your turkey Oreo cookies on a decorative platter with fall leaves, mini pumpkins, or autumn-themed serving ware. They make stunning centerpieces for dessert tables.
Create a “turkey farm” display by standing them upright in small cups filled with crushed Oreo crumbs to look like dirt. Kids especially love this presentation!
Package them in clear cellophane bags tied with orange and brown ribbons as party favors or hostess gifts.
Top Tips for Perfecting Thanksgiving Turkey Oreo Cookies
Choose the Right Chocolate
Candy melts work better than regular chocolate chips because they set firmer and hold decorations more securely. If using chocolate chips, definitely add coconut oil or shortening to improve consistency.
Orange or brown candy melts create a more authentic turkey look, but chocolate chips taste more indulgent. Choose based on your priority: aesthetics or flavor.
Work Quickly But Carefully
Chocolate sets faster than you might expect. Prepare all your decorations within arm’s reach before you start.
If your chocolate starts hardening while you’re working, simply pop it back in the microwave for 10-15 seconds to re-melt.
Work on 3-4 cookies at a time rather than trying to do all 24 at once. This prevents the chocolate from setting before you can add decorations.
Secure Those Feathers
The tail feathers are the most likely part to fall off. Use a generous amount of chocolate to secure them, and let them set completely before handling the cookies.
For extra security, you can pipe a line of chocolate along the base of the feathers after they’ve been placed.
Customize for Dietary Needs
For gluten-free versions, use gluten-free sandwich cookies. Kinnikinnick or Glutino make excellent alternatives to Oreos.
Make them dairy-free by using dairy-free chocolate chips and dairy-free sandwich cookies like Newman’s Own Chocolate O’s.
Storage While Decorating
If you’re decorating in a warm kitchen, work near a fan or in a cooler room. Heat can cause candy eyes to slide and chocolate to take forever to set.
Don’t refrigerate immediately after decorating unless absolutely necessary, as temperature changes can cause chocolate to “bloom” (develop white streaks).
Avoid Common Mistakes
Don’t use too much chocolate or your decorations will slide off. A little goes a long way!
Don’t twist the Oreo cookies apart – keep them as complete sandwiches for structural integrity.
Don’t stack the finished cookies until they’re completely set, or you’ll squash your turkey faces.
Storing and Reheating Tips
Room Temperature Storage: Store Thanksgiving turkey Oreo cookies in an airtight container at room temperature for up to 5 days. Place parchment paper between layers to prevent them from sticking together.
Keep them away from direct sunlight or heat sources, which can melt the chocolate and cause decorations to slide off.
Refrigeration: These cookies can be refrigerated for up to 2 weeks. Store them in a single layer in airtight containers with parchment paper between layers.
Allow them to come to room temperature for 10-15 minutes before serving for the best taste and texture. Cold Oreos can be a bit hard on the teeth!
Freezing: Surprisingly, these freeze beautifully! Place them in a single layer in a freezer-safe container with parchment paper between layers. They’ll keep for up to 2 months.
To thaw, remove from the freezer and let them sit at room temperature for 30 minutes. Never microwave to speed up thawing, as this will melt all your decorations!
Make-Ahead Tips: These are perfect make-ahead treats. Prepare them 2-3 days before your Thanksgiving gathering and store them in airtight containers.
For maximum freshness, add the candy eyes on the day of serving, as they can sometimes “weep” moisture if stored too long in humid conditions.
Transporting Tips: When taking these to a party, transport them in a single layer in a flat container. A disposable aluminum pan covered with plastic wrap works perfectly.
If stacking is unavoidable, use toothpicks stuck into the corners of parchment paper as spacers between layers.
Frequently Asked Questions
Can I use other cookies besides Oreos?
Absolutely! Any round sandwich cookie works well. Try chocolate chip cookies, vanilla wafers, or even homemade sugar cookies. The decoration process remains the same. Keep in mind that Oreos provide the best contrast for the colorful decorations and have a flat surface that’s ideal for attaching candy.
What if I can’t find candy eyes?
No problem! You can use mini white chocolate chips with a small dot of melted dark chocolate for pupils. Alternatively, white frosting with a black sprinkle or food-safe marker works great. You can also use white M&Ms with chocolate chips on top.
Can I make these with kids?
These are perfect for kids! Children ages 4 and up can help with decoration under supervision. Give younger kids the job of arranging candy corn or placing eyes, while older kids or teens can handle the melted chocolate. Just ensure an adult handles all melting tasks.
Why is my chocolate not sticking to the Oreos?
This usually happens when there’s oil or moisture on the cookie surface. Make sure your Oreos are at room temperature and completely dry. If you’ve touched them with wet or greasy hands, wipe them gently with a paper towel. Also ensure your chocolate isn’t too hot, as this can cause it to slide off before setting.
How do I keep candy corn from falling off?
Use enough chocolate as “glue” – don’t be stingy! Press the candy corn gently but firmly into the chocolate, and let it set for at least 5 minutes before moving the cookie. You can also place the cookies in the refrigerator for 5 minutes to speed up the setting process for the tail feathers specifically.
Can I use frosting instead of melted chocolate?
Yes, but chocolate works better as an adhesive. If you prefer frosting, use thick buttercream or royal icing, as they hold decorations more securely than thin frosting. The advantage of frosting is that you can add food coloring to match your color scheme. The disadvantage is that it doesn’t set as firmly.
Are these cookies nut-free?
The basic recipe using Oreos, candy corn, candy eyes, and chocolate chips is nut-free. However, if you use Reese’s Pieces for the beak, note that while they don’t contain nuts, they’re made in facilities that process peanuts. For completely nut-free versions, use chocolate chips for the beak instead.
How far in advance can I make these?
You can make these up to 1 week ahead if stored properly in an airtight container at room temperature. They also freeze well for up to 2 months. For best results, make them 2-3 days before serving – they’ll still be fresh and the decorations will be secure.
What’s the best way to display these at a party?
Create a tiered display using cake stands at different heights. Arrange them on a platter lined with faux autumn leaves or burlap. You can also stand them upright in small shot glasses or cups for a “turkey farm” effect. For kid parties, set up a “turkey pond” using blue tissue paper with cookies arranged around it.
Can I add more decorations?
Definitely! Get creative with orange frosting for wattles, pretzel sticks for legs, or different colored candy melts for variety. Some people add mini marshmallows for fluffy turkey bodies or use M&Ms for more colorful feathers. Let your imagination run wild!
Nutrition Information
| Nutrient | Amount Per Cookie |
|---|---|
| Calories | 95 |
| Total Fat | 4g |
| Saturated Fat | 1.5g |
| Cholesterol | 0mg |
| Sodium | 65mg |
| Total Carbohydrates | 15g |
| Dietary Fiber | 0.5g |
| Sugars | 10g |
| Protein | 1g |
Nutrition information is approximate and based on one decorated Oreo cookie with standard decorations.
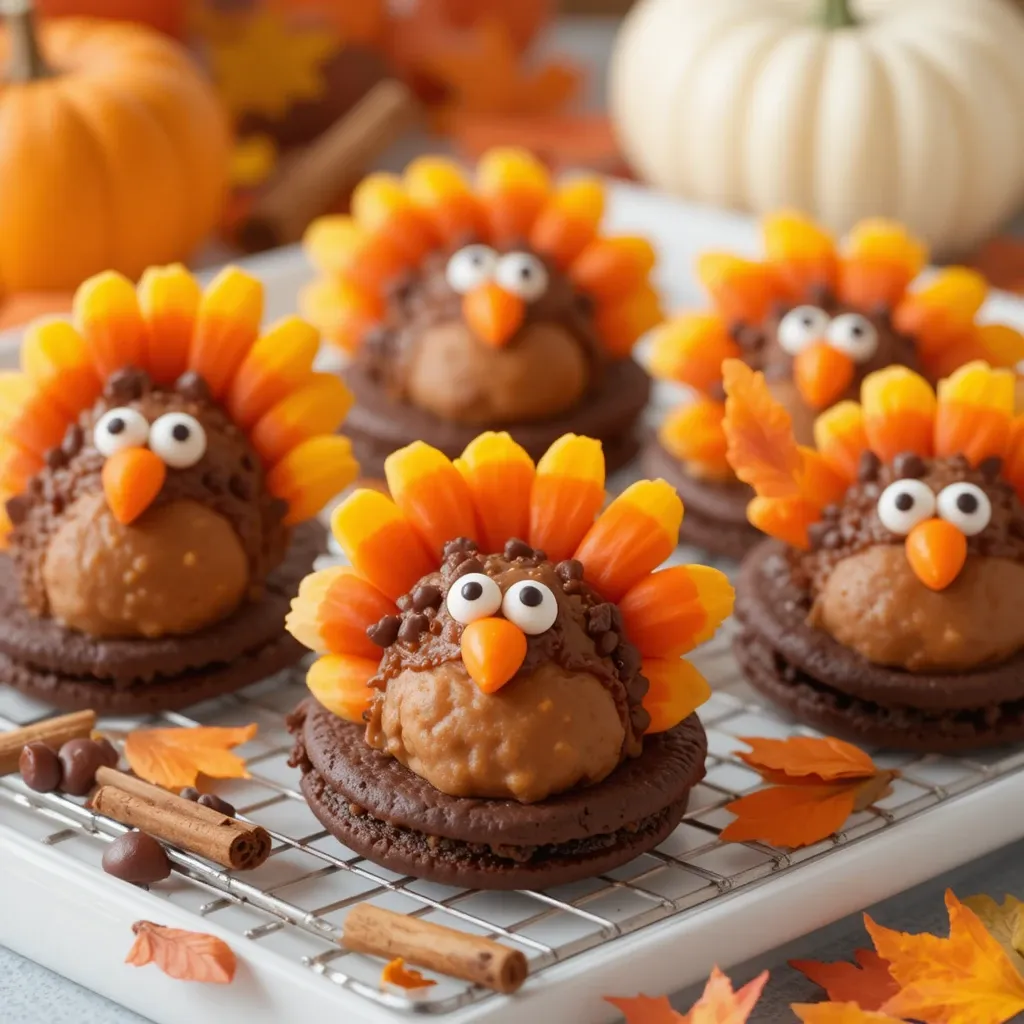
Creative Variations to Try
Peanut Butter Turkey Cookies: Use Nutter Butter cookies instead of Oreos for a peanut butter twist. The elongated shape creates a different turkey silhouette that’s equally adorable.
White Chocolate Turkey Cookies: Use Golden Oreos with white chocolate as the adhesive, and pastel-colored candies for a lighter, spring-inspired turkey (perfect for practicing before Thanksgiving!).
Mini Turkey Bites: Use Mini Oreos to create bite-sized turkey treats. These are perfect for kids’ parties and easier for little hands to manage.
Chocolate-Covered Turkey Cookies: Dip the entire Oreo in melted chocolate before decorating for an extra indulgent treat. Use orange or brown chocolate for the coating.
Gluten-Free and Vegan Options: Substitute gluten-free sandwich cookies and dairy-free chocolate chips to accommodate dietary restrictions without sacrificing cuteness or flavor.
Final Thoughts
Thanksgiving turkey Oreo cookies prove that the most impressive holiday treats don’t require hours in the kitchen or professional baking skills. With simple ingredients and a bit of creativity, you can create memorable desserts that delight both kids and adults.
These charming cookies embody everything we love about holiday baking: they’re fun to make, beautiful to display, and absolutely delicious to eat. The no-bake convenience means you can focus on what really matters during the holidays – spending time with loved ones rather than being chained to the oven.
Whether you’re preparing them for a classroom party, potluck contribution, or your own Thanksgiving table, these turkey Oreo cookies are guaranteed to bring smiles. They’re forgiving enough for first-time decorators yet impressive enough to wow your guests.
So gather your supplies, round up your little helpers, and get ready to create an adorable flock of edible turkeys. Your Thanksgiving dessert table will never be the same! Happy decorating, and may your holidays be filled with sweetness, laughter, and plenty of these cute turkey cookies.
Don’t forget to share your creations! Tag us on social media with your turkey Oreo cookies – we love seeing your creative variations and decorating styles. Happy Thanksgiving!