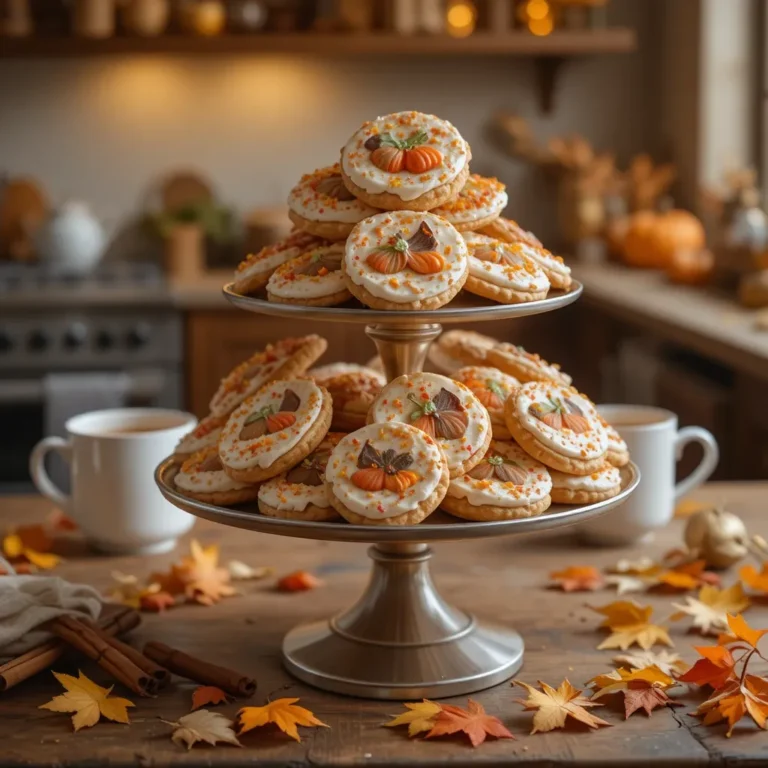
Easy Thanksgiving Pumpkin Cookies Decorated
Get ready to fall in love with these adorable Thanksgiving pumpkin cookies decorated with festive designs! These soft, pillowy cookies burst with warm pumpkin spice and create the perfect canvas for creative decorating. Here’s a fun fact: pumpkin cookies became popular in America during the 1930s when home bakers discovered pumpkin puree kept cookies incredibly moist.
These delightful treats are special because they combine nostalgic fall flavors with artistic expression, making them perfect for holiday gatherings, kids’ activities, or gift-giving. Much like our popular Cinnamon Roll Cookies, these require minimal effort but deliver maximum wow-factor. Let’s create some edible autumn art together!
What is Thanksgiving Pumpkin Cookies Decorated?
Ever wondered why we can’t resist decorating cookies shaped like pumpkins? It’s simple – these Thanksgiving pumpkin cookies decorated are edible masterpieces that celebrate harvest season!
What makes them special is the combination of a tender, spiced cookie base infused with real pumpkin puree, topped with colorful royal icing or buttercream designs. Some say the way to anyone’s heart is through beautifully decorated treats, and these prove it! Ready to unleash your inner cookie artist?
Why You’ll Love This Thanksgiving Pumpkin Cookies Decorated
Perfectly Spiced and Incredibly Soft
These cookies aren’t your average sugar cookies. The addition of pumpkin puree creates an ultra-moist texture that stays soft for days. Each bite delivers warm cinnamon, nutmeg, and ginger notes that instantly transport you to a cozy autumn afternoon. The pumpkin flavor is present but not overwhelming, creating a balanced cookie that both kids and adults adore.
Budget-Friendly Holiday Baking
Making Thanksgiving pumpkin cookies decorated at home saves you serious money compared to bakery prices. A single batch yields 24-30 cookies for under $10, while bakery versions can cost $3-5 per cookie! You’ll have complete control over ingredients, avoiding preservatives and artificial flavors. Plus, decorating becomes a fun family activity rather than an expensive purchase.
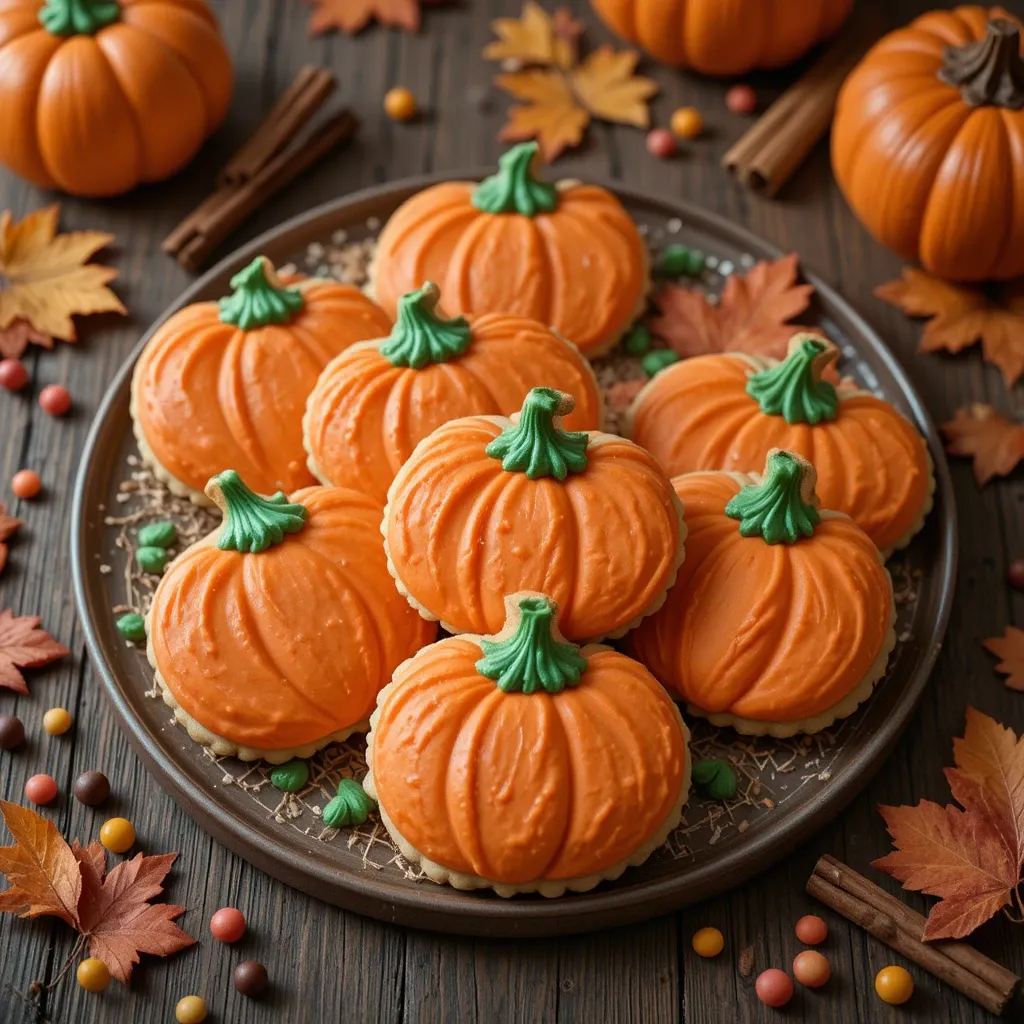
Endless Decorating Possibilities
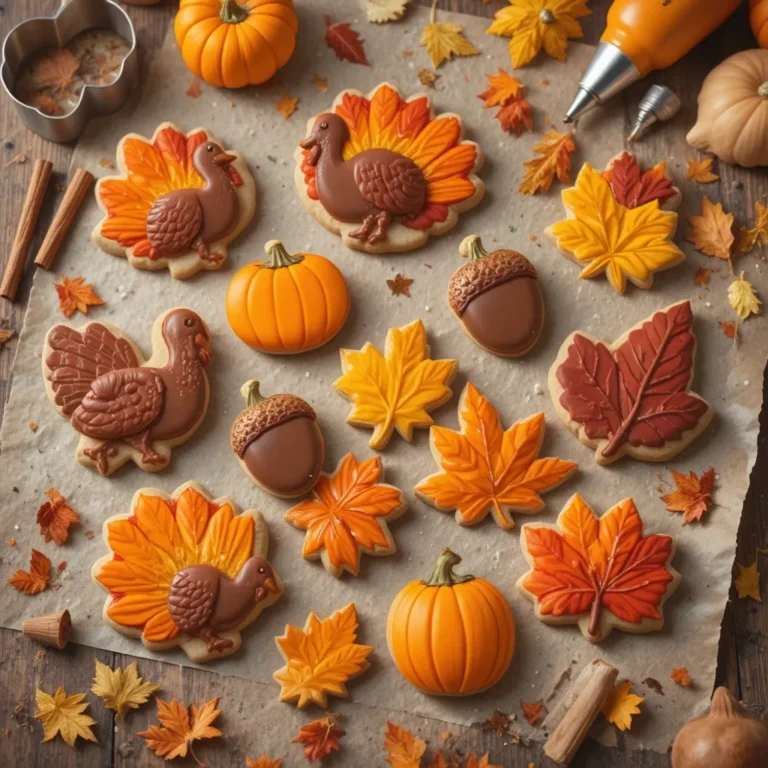
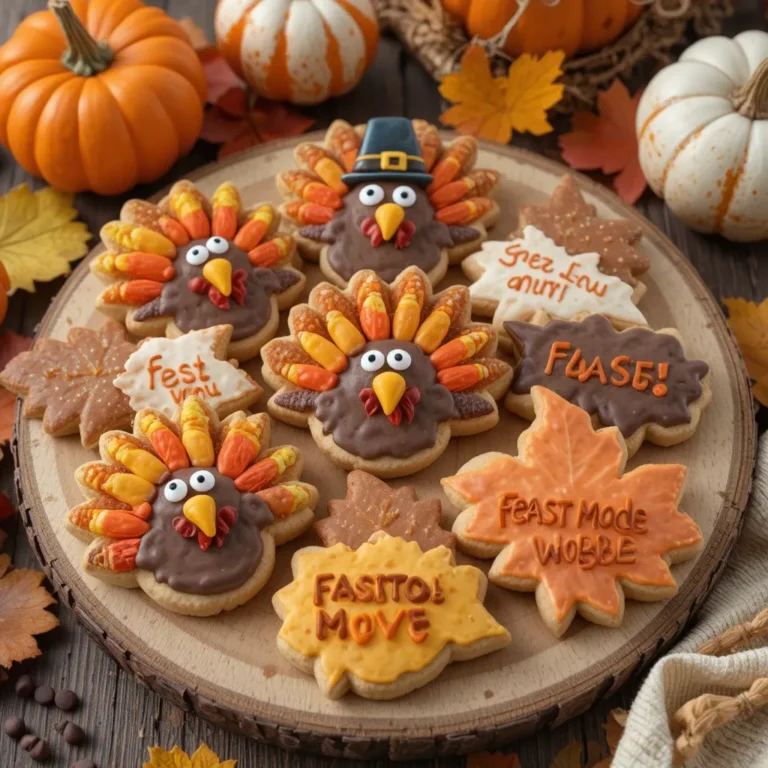
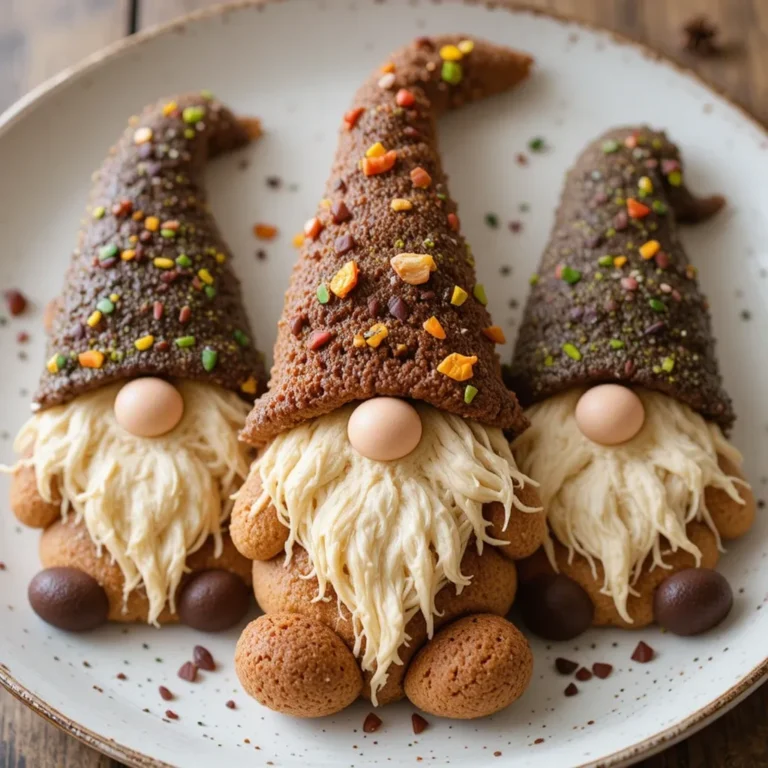
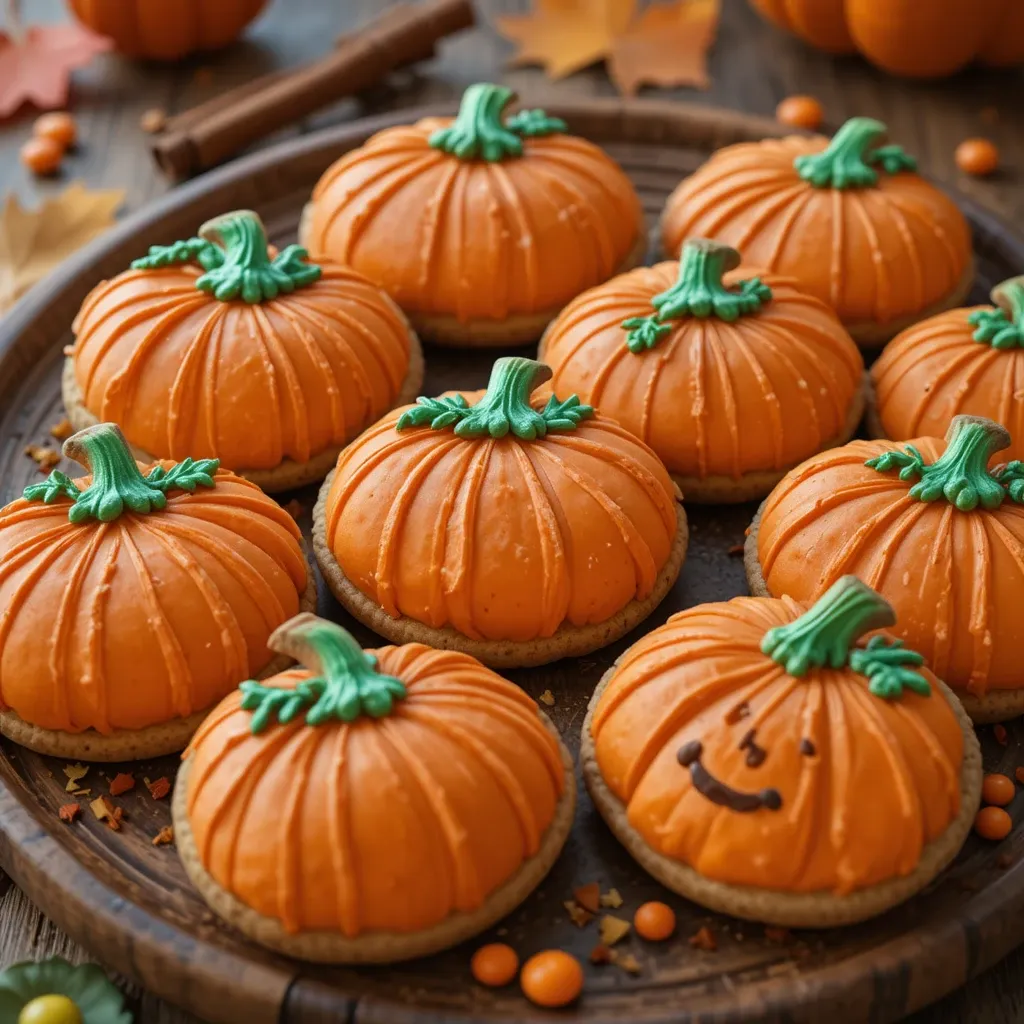
The smooth surface of these cookies becomes your edible canvas. Use orange icing for classic pumpkins, add green stems and vines, or create jack-o’-lantern faces. Royal icing allows for intricate details, while buttercream offers a softer, more rustic look. Add edible glitter, sprinkles, or painted designs with food coloring. Similar to our Decorated Sugar Cookies, the creative options are truly limitless. Grab your piping bags and let your imagination run wild – your Thanksgiving dessert table will thank you!
How to Make Thanksgiving Pumpkin Cookies Decorated
Quick Overview
These Thanksgiving pumpkin cookies decorated are surprisingly easy to make, even for beginner bakers. The cookie dough comes together in one bowl using simple pantry ingredients.
The soft, cake-like texture holds its shape perfectly during baking, creating ideal surfaces for decorating. Rich pumpkin flavor combines with warming spices to create an irresistible autumn treat.
Time Breakdown:
- Prep Time: 20 minutes
- Chill Time: 1 hour
- Baking Time: 12 minutes per batch
- Decorating Time: 30-45 minutes
- Total Time: Approximately 2 hours 30 minutes
Key Ingredients for Thanksgiving Pumpkin Cookies Decorated
For the Cookies:
- 2 ½ cups all-purpose flour
- 1 teaspoon baking powder
- 1 teaspoon baking soda
- ½ teaspoon salt
- 2 teaspoons ground cinnamon
- 1 teaspoon ground ginger
- ½ teaspoon ground nutmeg
- ¼ teaspoon ground cloves
- ½ cup unsalted butter, softened
- 1 cup granulated sugar
- 1 cup pumpkin puree (not pumpkin pie filling)
- 1 large egg
- 1 teaspoon vanilla extract
For the Decoration:
- 3 cups powdered sugar
- 3 tablespoons meringue powder
- 5-6 tablespoons water
- Orange, green, and brown gel food coloring
- Piping bags and tips
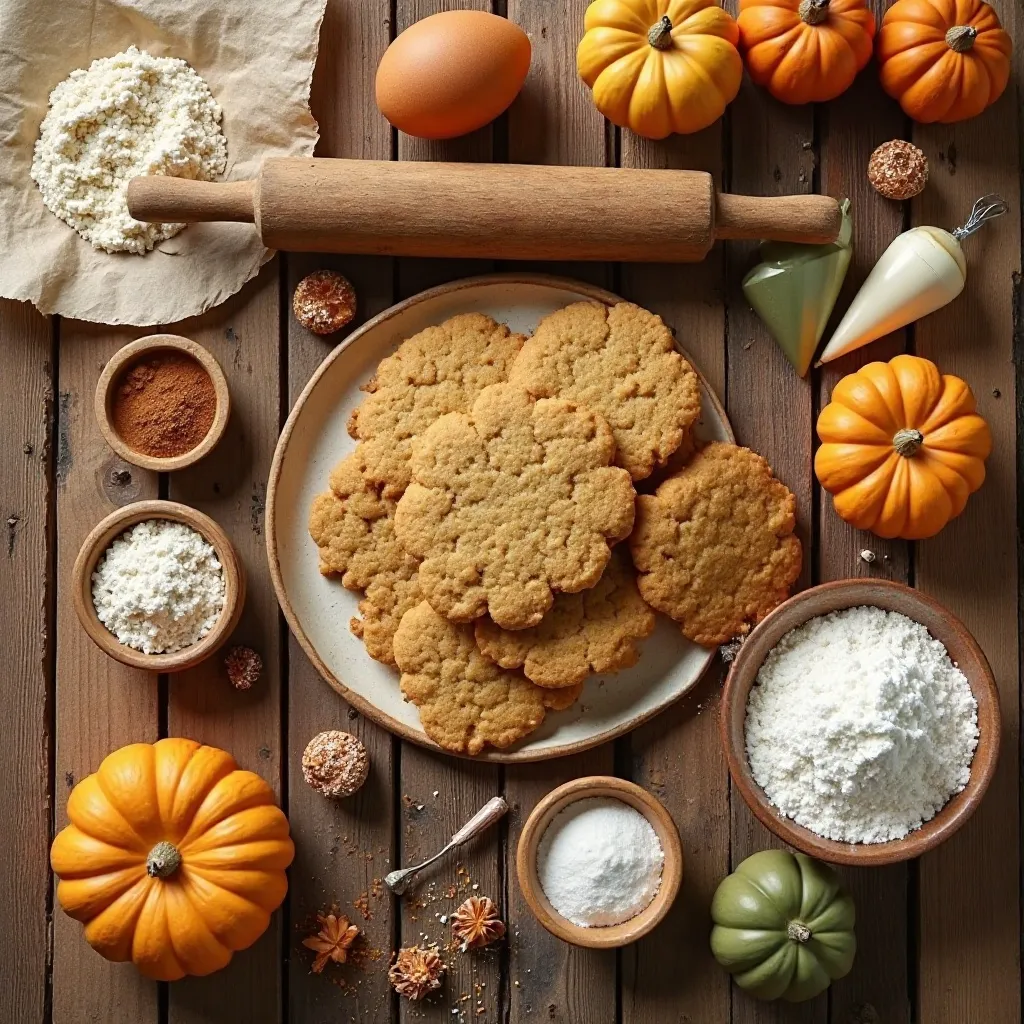
Step-by-Step Instructions
Prepare the Cookie Dough
Start by whisking together your dry ingredients in a medium bowl. Combine the flour, baking powder, baking soda, salt, cinnamon, ginger, nutmeg, and cloves. Set this mixture aside. In a large mixing bowl, cream the softened butter and granulated sugar together using an electric mixer on medium speed for 2-3 minutes until light and fluffy. The mixture should look pale and increase in volume.
Add Wet Ingredients
Beat in the pumpkin puree until fully incorporated, scraping down the sides of the bowl as needed. The mixture may look slightly curdled, but this is normal. Add the egg and vanilla extract, mixing until just combined. Don’t overmix at this stage, as it can make cookies tough.
Combine and Chill
Gradually add the dry ingredient mixture to the wet ingredients, mixing on low speed until just combined. The dough will be soft and slightly sticky. Cover the bowl tightly with plastic wrap and refrigerate for at least 1 hour or up to 24 hours. This chilling step is crucial for cookies that hold their shape and have the perfect texture.
Shape and Bake
Preheat your oven to 350°F (175°C) and line baking sheets with parchment paper. Remove the chilled dough from the refrigerator. Using a medium cookie scoop or tablespoon, portion out dough balls and place them 2 inches apart on the prepared baking sheets. You can flatten them slightly with the palm of your hand for more uniform shapes. Bake for 10-12 minutes until the edges are set and the centers look slightly underdone. The cookies will continue cooking on the hot pan after removal.
Cool Completely
Let the cookies cool on the baking sheet for 5 minutes before transferring to a wire cooling rack. Allow them to cool completely before decorating, as warm cookies will melt the icing. This takes approximately 30-40 minutes.
Prepare Royal Icing
While cookies cool, make your royal icing. In a large bowl, combine powdered sugar and meringue powder. Add water one tablespoon at a time, beating with an electric mixer on low speed. Mix for 5-7 minutes until stiff peaks form. The icing should hold its shape when you lift the beater. Divide icing into separate bowls and add gel food coloring to create orange, green, and brown colors.
Decorate Your Cookies
Thin some orange icing with a few drops of water to create “flood” consistency for the base layer. Transfer to a piping bag fitted with a small round tip. Outline each cookie, then fill in the center, using a toothpick to spread icing evenly. Let this base layer dry for 1-2 hours. Once dry, use thicker consistency icing in piping bags to add details like pumpkin ridges, stems, vines, or faces. Allow decorated cookies to dry completely for 4-6 hours or overnight before stacking or packaging.
What to Serve Thanksgiving Pumpkin Cookies With
These Thanksgiving pumpkin cookies decorated shine as standalone treats, but they pair beautifully with complementary beverages and dishes. Serve them alongside hot apple cider, pumpkin spice lattes, or chai tea for the ultimate fall experience. They make excellent additions to Thanksgiving dessert spreads alongside pecan pie, apple crisp, or pumpkin cheesecake.
For a fun brunch idea, arrange these cookies on a platter with cream cheese and bagels, fresh fruit, and yogurt parfaits. Kids love them with cold milk or hot chocolate. Create a cookie decorating station at your Thanksgiving gathering by serving plain baked cookies alongside bowls of different colored icings, sprinkles, and candies.
These cookies also work wonderfully as part of a fall cookie exchange or bake sale display. Package them in clear cellophane bags tied with autumn-colored ribbons for beautiful hostess gifts or party favors.
Top Tips for Perfecting Thanksgiving Pumpkin Cookies Decorated
Use Pure Pumpkin Puree, Not Pie Filling
This is crucial! Pumpkin pie filling contains added sugars and spices that will throw off your recipe balance. Look for cans labeled “100% pure pumpkin” or “pumpkin puree.” If you accidentally bought pie filling, don’t use it for this recipe. You can also make your own puree from fresh pumpkins, but canned works perfectly and saves time.
Measure Flour Correctly
Too much flour creates dry, cakey cookies. Use the spoon-and-level method: spoon flour into your measuring cup and level off with a knife. Never scoop directly from the bag, as this compacts the flour and adds up to 25% more than needed.
Don’t Skip the Chilling Step
Chilling the dough is non-negotiable. It allows the flour to fully hydrate, prevents excessive spreading during baking, and makes the dough easier to handle. If you’re short on time, you can chill for just 30 minutes, but 1 hour is ideal.
Watch Baking Time Carefully
These cookies continue baking on the hot pan after removal from the oven. Take them out when centers still look slightly underdone and edges are just set. Overbaking creates hard, dry cookies. Every oven is different, so check at the 10-minute mark.
Achieve the Perfect Icing Consistency
Royal icing consistency makes or breaks your decoration. For outlining, it should hold stiff peaks. For flooding (filling in), thin it with water until it flows smoothly but isn’t runny. Test by drawing a line through the icing with a knife – it should disappear within 10-15 seconds for flooding consistency.
Color Your Icing Properly
Always use gel food coloring, not liquid. Liquid coloring adds too much moisture and affects icing consistency. Gel colors are also more vibrant and require less product. Start with a tiny amount and add more gradually – you can always add more but can’t take it away.
Work in Batches
Don’t try to decorate all cookies at once. Work on 6-8 at a time, allowing each batch to dry before moving to the next. This prevents smudging and gives you better results.
Storing and Reheating Tips
Room Temperature Storage: Store undecorated cookies in an airtight container at room temperature for up to 5 days. Place parchment paper between layers to prevent sticking. The pumpkin keeps them naturally moist, so they won’t dry out quickly.
Decorated Cookie Storage: Once royal icing is completely dry (6-8 hours), store decorated cookies in a single layer in airtight containers for up to 1 week. If you need to stack them, place parchment paper between layers. Keep containers at room temperature away from direct sunlight and humidity, which can soften icing.
Refrigeration: These cookies don’t require refrigeration and actually taste best at room temperature. However, if your kitchen is very warm or humid, you can refrigerate them for up to 2 weeks. Let them come to room temperature before serving for the best flavor.
Freezing Instructions: Freeze undecorated baked cookies for up to 3 months. Let them cool completely, then place in freezer-safe containers or bags with parchment paper between layers. Thaw at room temperature for 2-3 hours before decorating. You can also freeze decorated cookies for up to 2 months, but be aware that some icing colors may slightly fade.
Cookie Dough Freezing: The unbaked dough freezes beautifully for up to 3 months. Portion into balls, freeze on a baking sheet until solid, then transfer to freezer bags. Bake directly from frozen, adding 2-3 minutes to the baking time.
Reheating: These cookies are best enjoyed at room temperature and don’t need reheating. If you prefer them slightly warm, microwave for 5-7 seconds, but avoid this with decorated cookies as the icing may melt.
Tips for Avoiding Common Baking Mistakes
Spreading Too Much: If your cookies spread excessively, your butter was too warm or you didn’t chill the dough long enough. Always chill dough for the full hour and ensure butter is softened, not melted.
Dry, Crumbly Texture: This happens when you add too much flour or overbake. Measure flour correctly and remove cookies when centers look slightly underdone.
Cake-Like Instead of Cookie-Like: Too much pumpkin puree can make cookies cakey. Measure exactly one cup and press excess moisture out with paper towels if needed.
Cookies Don’t Hold Shape: Under-chilling or oven temperature too low causes shape loss. Verify your oven temperature with an oven thermometer and chill dough properly.
Icing Won’t Dry: High humidity prevents royal icing from setting. Run a dehumidifier in your decorating space or add more powdered sugar to stiffen the icing.
Colors Bleeding Together: Decorating before the base layer dries causes colors to bleed. Always wait 1-2 hours between icing layers.
Burnt Bottoms: Dark baking sheets absorb more heat. Use light-colored pans or double-stack your baking sheets.
Frequently Asked Questions
Can I make these cookies without a cookie cutter?
Absolutely! These Thanksgiving pumpkin cookies decorated work perfectly as drop cookies. Simply scoop dough onto baking sheets and gently flatten with your palm. You can still decorate them with pumpkin designs even without the classic pumpkin shape.
Why are my cookies puffy instead of flat?
Puffy cookies result from too much leavening or not enough liquid. Make sure you’re measuring baking powder and baking soda accurately. The pumpkin puree should also be measured properly – too little will make cookies puffier.
Can I use butter instead of shortening in the icing?
For decorated cookies, royal icing made with meringue powder works best because it dries hard and smooth. Buttercream icing is delicious but stays soft and can smudge easily. If you prefer buttercream, use it for cookies that won’t be stacked or packaged tightly.
How do I prevent my cookies from sticking to the pan?
Always use parchment paper or silicone baking mats. These create a non-stick surface and ensure even baking. Greasing the pan can cause cookies to spread too much and develop greasy edges.
Can I make these cookies gluten-free?
Yes! Replace all-purpose flour with a 1:1 gluten-free baking flour blend that contains xanthan gum. The texture will be slightly different but still delicious. Avoid using single-grain gluten-free flours like almond or coconut flour, as they won’t provide the right structure.
My icing is too thick – what should I do?
Add water one teaspoon at a time, mixing thoroughly after each addition. For flooding consistency, you want the icing to be thin enough to flow but thick enough to stay within outlines. Test frequently as you thin it down.
How far in advance can I bake these cookies?
Bake undecorated cookies up to 5 days ahead and store in airtight containers. Decorate them 1-3 days before your event. Fully decorated cookies store well for up to one week, making them perfect for advance holiday prep.
Can I use fresh pumpkin instead of canned?
Yes, but it requires extra steps. Roast pumpkin chunks until soft, puree until smooth, and strain through cheesecloth to remove excess moisture. Canned puree is more consistent and actually recommended for baking.
Why do my cookies taste bland?
This usually means spices weren’t measured correctly or are old. Ground spices lose potency after 6 months. Use fresh spices for the best flavor and don’t be afraid to add an extra ½ teaspoon of cinnamon if you love spice.
Can kids help make these cookies?
Definitely! Kids can help mix ingredients, scoop dough, and especially enjoy decorating. The decorating process is forgiving and fun for all ages. Just supervise oven use and ensure decorating happens after cookies cool completely.
Nutrition Information
| Nutrient | Per Cookie (undecorated) |
|---|---|
| Calories | 110 |
| Total Fat | 4g |
| Saturated Fat | 2.5g |
| Cholesterol | 18mg |
| Sodium | 95mg |
| Total Carbohydrates | 18g |
| Dietary Fiber | 0.5g |
| Sugars | 10g |
| Protein | 1g |
| Vitamin A | 25% DV |
Note: Nutrition information is approximate and varies based on decoration amount. Royal icing adds approximately 40-60 calories per cookie.
Extra Tips for Success
Create a Decorating Station: Set up your workspace before starting. Line up piping bags, have toothpicks ready for detail work, and keep paper towels nearby for cleanup.
Practice Your Technique: Before decorating cookies, practice piping designs on parchment paper. This helps you get comfortable with pressure and flow control.
Keep Icing Covered: Royal icing dries quickly when exposed to air. Keep bowls covered with damp towels when not actively using them.
Use Quality Food Coloring: Invest in gel food coloring from brands like Americolor or Wilton. The colors stay vibrant and won’t fade like cheaper alternatives.
Match Your Icing Tips: Use round tip #2 or #3 for outlining and details, and round tip #5 for flooding. Having the right tools makes decorating much easier.
Create Dimension: After the base layer dries, add dimensional details like raised pumpkin ridges or textured stems using thicker consistency icing. This creates professional-looking cookies.
Embrace Imperfection: Handmade cookies have character! Don’t stress over perfect decorations – rustic, homemade looks are charming and authentic.
Photography Tips: If you’re photographing for social media, use natural light and arrange cookies on autumn-themed props like wood boards, fall leaves, or plaid napkins.
These Thanksgiving pumpkin cookies decorated transform simple ingredients into stunning autumn masterpieces. Whether you’re creating them for a holiday gathering, family baking day, or thoughtful homemade gift, these cookies deliver on both flavor and presentation.
The soft, spiced base combined with creative decorations makes them a Thanksgiving tradition worth starting. Happy baking, and enjoy every delicious, beautifully decorated bite!