Wet on Wet Thanksgiving Cookies Everyone will Love
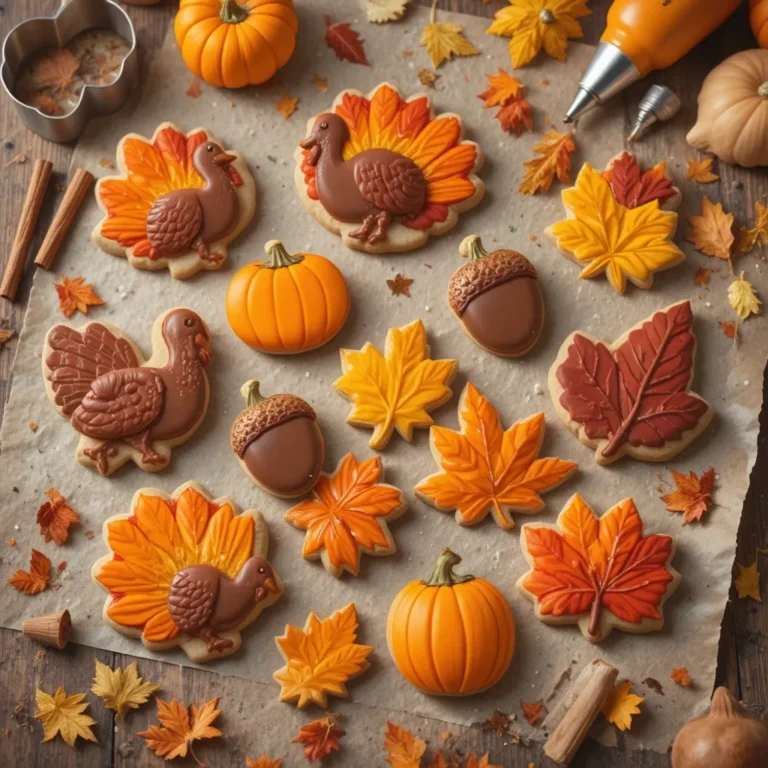
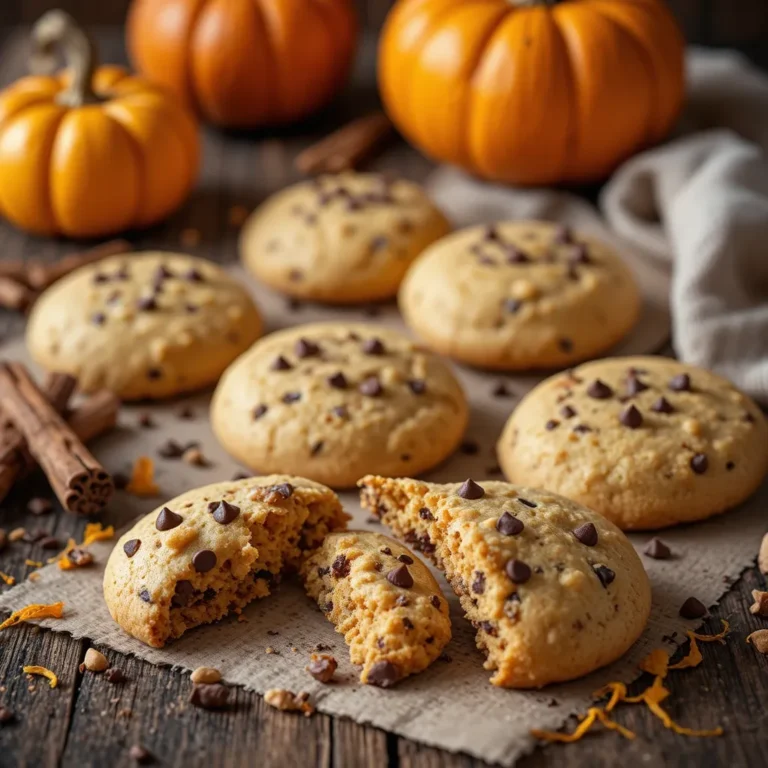
These stunning wet on wet Thanksgiving cookies combine artistic flair with delicious flavor, creating edible masterpieces perfect for your holiday table. Using a simple watercolor painting technique with royal icing, you’ll create beautiful autumn leaves, turkeys, and pumpkins that taste as amazing as they look.
This beginner-friendly decorating method requires no special piping skills, making it ideal for busy home bakers. Similar to our popular Christmas Sugar Cookies, these Thanksgiving treats bring joy to both the making and eating. Get ready to impress your guests with cookies that look professionally decorated but are surprisingly simple to create!
What Are Wet on Wet Thanksgiving Cookies?
Ever wondered why these cookies have such an unusual name? Wet on wet Thanksgiving cookies get their name from the watercolor painting technique where you apply wet icing onto another layer of still-wet icing, creating gorgeous marbled effects.
It’s like painting edible autumn art right on your cookies! As the saying goes, the way to a person’s heart is through their stomach, and these beauties work every time. The colors blend and swirl naturally, creating unique designs that look like you spent hours decorating. Ready to become a cookie artist? Let’s dive in!
Why You’ll Love This Wet on Wet Thanksgiving Cookies Recipe
Stunning Visual Appeal Without the Stress
These cookies deliver jaw-dropping results that look like they came from a professional bakery. The wet on wet technique creates natural color blending that’s impossible to mess up. Each cookie becomes a one-of-a-kind masterpiece with swirled autumn hues of orange, red, yellow, and brown flowing together beautifully.
Budget-Friendly Holiday Treats
Making these festive cookies at home costs a fraction of what you’d pay at a specialty bakery. You’ll need basic cookie ingredients and food coloring, which you probably already have in your pantry. A single batch makes 24-36 cookies depending on size, perfect for feeding a crowd without breaking the bank.
Customizable for Any Skill Level
Whether you’re a beginner or experienced baker, this recipe works for you. The forgiving nature of the wet on wet technique means there’s no pressure to create perfect lines or intricate details. You can keep designs simple with autumn leaves or challenge yourself with turkeys and cornucopias. Much like our Easy Pumpkin Cookies, this recipe focuses on fun and flavor over complicated techniques. Try making these beautiful treats at home and watch everyone’s faces light up when you bring them to your Thanksgiving gathering!
How to Make Wet on Wet Thanksgiving Cookies
Quick Overview
This recipe delivers bakery-quality decorated cookies using a simple watercolor icing technique. The buttery sugar cookies provide the perfect canvas for your edible artwork, while the smooth royal icing creates those signature blended effects.
Time Breakdown:
- Prep Time: 30 minutes
- Chill Time: 1 hour
- Baking Time: 10-12 minutes per batch
- Decorating Time: 45 minutes
- Total Time: Approximately 2 hours 30 minutes
The cookies themselves bake up perfectly soft with crisp edges, holding their shape beautifully for decorating. The real magic happens with the royal icing technique that transforms simple cookies into stunning edible art pieces.
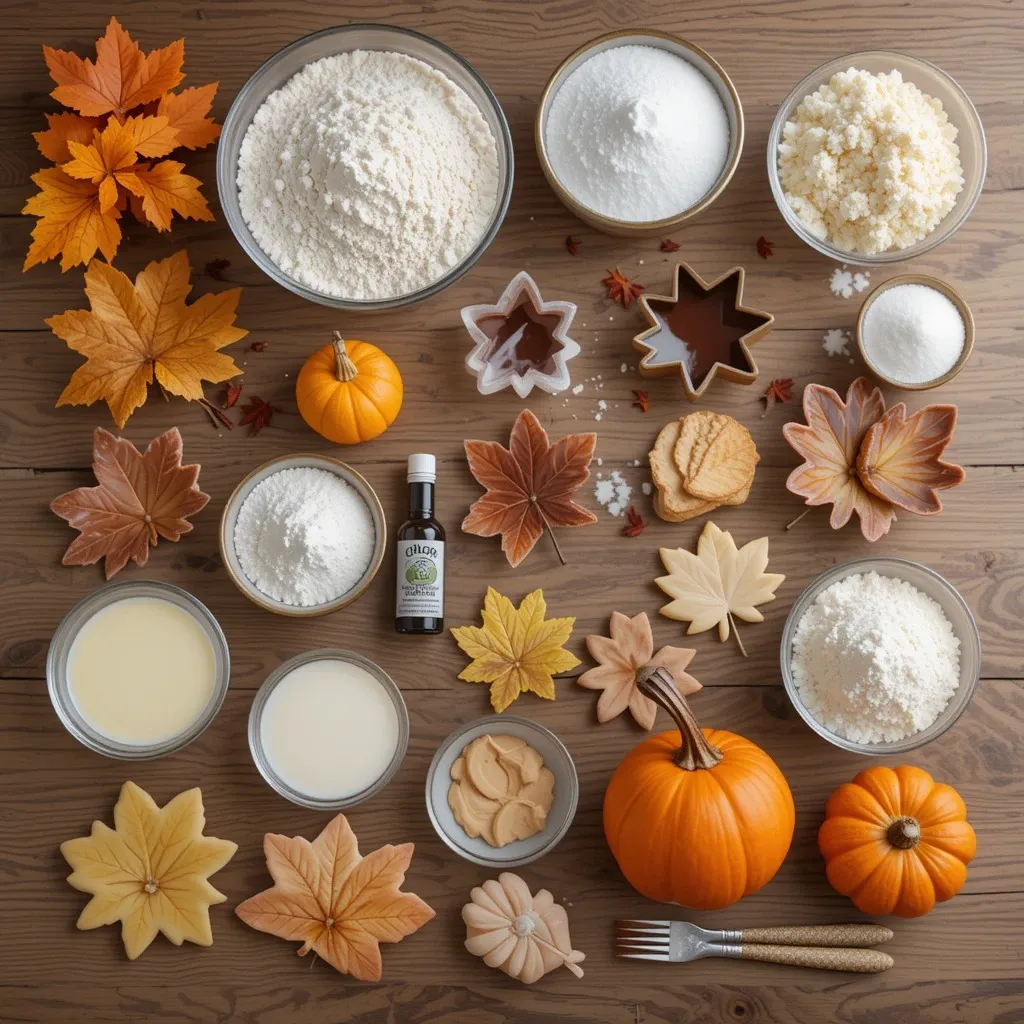
Key Ingredients for Wet on Wet Thanksgiving Cookies
For the Sugar Cookies:
- 3 cups all-purpose flour
- 1½ teaspoons baking powder
- ½ teaspoon salt
- 1 cup unsalted butter, softened
- 1 cup granulated sugar
- 1 large egg
- 2 teaspoons vanilla extract
- 1 tablespoon milk
For the Royal Icing:
- 4 cups powdered sugar, sifted
- 3 tablespoons meringue powder
- 6-7 tablespoons warm water
- ½ teaspoon vanilla extract
For Decorating:
- Gel food coloring in autumn colors (orange, red, yellow, brown, burgundy)
- Thanksgiving cookie cutters (leaves, turkeys, pumpkins, acorns)
- Small paintbrushes or toothpicks
Step-by-Step Instructions
Making the Cookie Dough:
Start by whisking together your flour, baking powder, and salt in a medium bowl. Set this aside while you prepare the wet ingredients.
In a large mixing bowl, cream the softened butter and sugar together using an electric mixer on medium speed for about 3-4 minutes. The mixture should look light and fluffy. Scrape down the sides of the bowl to ensure everything combines evenly.
Add the egg and vanilla extract to the butter mixture. Beat on medium speed until fully incorporated, about 1 minute. The mixture should look smooth and slightly pale.
With your mixer on low speed, gradually add the flour mixture to the wet ingredients. Mix just until the dough comes together. Add the tablespoon of milk and mix for another 10-15 seconds until the dough is smooth but not overmixed.
Divide the dough into two equal portions and flatten each into a disc about 1 inch thick. Wrap each disc tightly in plastic wrap and refrigerate for at least 1 hour or up to 3 days.
Rolling and Cutting:
Preheat your oven to 350°F and line two baking sheets with parchment paper.
Remove one disc of dough from the refrigerator and let it sit at room temperature for 5 minutes to make rolling easier. On a lightly floured surface, roll the dough to ¼ inch thickness, turning and flouring as needed to prevent sticking.
Cut out shapes using your Thanksgiving cookie cutters. Place cookies on prepared baking sheets, spacing them about 2 inches apart. Gather scraps, re-roll once, and cut more cookies.
Bake for 10-12 minutes until the edges are just barely golden. The centers should still look slightly underdone. Remove from oven and let cookies cool on the baking sheet for 5 minutes before transferring to a wire rack to cool completely.
Preparing the Royal Icing:
In a large bowl, combine the sifted powdered sugar and meringue powder. Add 6 tablespoons of warm water and the vanilla extract.
Using an electric mixer on low speed, beat the mixture for 1 minute. Increase to medium-high speed and beat for 5-7 minutes until the icing forms stiff peaks. The icing should be bright white and hold its shape.
To test consistency for wet on wet technique, add water one teaspoon at a time until the icing reaches “flood consistency.” When you lift the beater, the icing should flow back into itself and smooth out within 10-15 seconds.
Creating the Wet on Wet Design:
Divide your royal icing into separate bowls based on how many colors you want to use. For Thanksgiving, use 4-5 bowls for orange, red, yellow, brown, and burgundy.
Add gel food coloring to each bowl one drop at a time, stirring well after each addition until you achieve your desired shade. Remember that colors will darken slightly as they dry.
Working with one cookie at a time, use a spoon or piping bag to flood the entire surface with your base color. Spread it gently with a small offset spatula or the back of a spoon to create an even layer reaching all edges.
Immediately while the base is still wet, add small dots or lines of your second color using a toothpick, small brush, or squeeze bottle. The wet icing will allow the colors to blend naturally.
Use a toothpick to gently swirl the colors together, creating marble effects, leaf veins, or feather patterns. Work quickly while both layers are wet for the best blending.
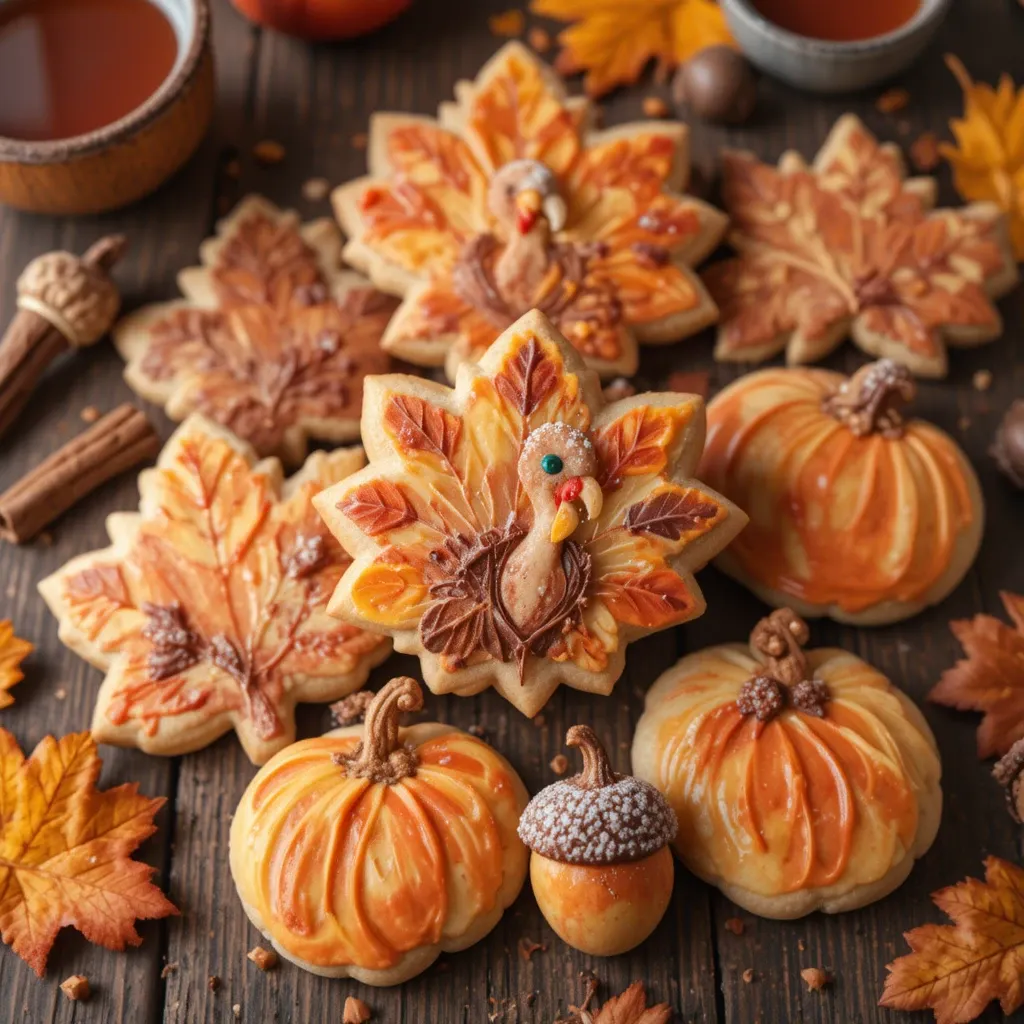
Continue adding and swirling additional colors as desired. For leaves, try adding red and yellow dots on an orange base. For turkeys, create feather effects with multiple colors radiating from the center.
Let the cookies dry completely at room temperature for at least 6-8 hours or overnight before stacking or packaging.
What to Serve Wet on Wet Thanksgiving Cookies With
These beautiful cookies are perfect as standalone desserts on your Thanksgiving dessert table. They pair wonderfully with hot apple cider or spiced chai tea, enhancing the autumn flavors.
Serve them alongside a cheese and fruit platter for elegant afternoon entertaining. The sweet cookies balance beautifully with sharp cheddar and crisp apple slices.
Create a stunning dessert spread by displaying them with pumpkin pie, pecan tarts, and apple crisp. The cookies add visual interest and variety to traditional Thanksgiving sweets.
For a cozy evening treat, serve these cookies with warm vanilla ice cream or whipped cream. Pair with coffee or hot chocolate for the ultimate comfort food experience.
They also make exceptional party favors when packaged in clear cellophane bags tied with autumn ribbons. Your guests will love taking home these edible works of art.

Top Tips for Perfecting Wet on Wet Thanksgiving Cookies
Getting the Perfect Cookie Base
Use room temperature butter that’s soft but not melted. It should leave a slight indent when pressed but still hold its shape. This ensures proper creaming and even texture.
Don’t skip chilling the dough. Cold dough rolls more easily, cuts cleaner, and holds its shape better during baking. If the dough becomes too soft while working, pop it back in the fridge for 10 minutes.
Roll your dough to an even ¼ inch thickness using rolling pin rings or guides. This ensures uniform baking and prevents some cookies from burning while others stay underdone.
Mastering Royal Icing Consistency
The right consistency makes or breaks the wet on wet technique. Your icing should be thin enough to flow and self-level but thick enough to stay on the cookie without running off the edges.
Test your icing consistency on a plate before decorating cookies. Draw a line with a spoon and count to 10-15 seconds. The line should disappear completely, creating a smooth surface.
Keep unused icing covered with a damp cloth to prevent crusting. Royal icing dries quickly when exposed to air, forming a skin that ruins the smooth finish.
Creating Beautiful Wet on Wet Designs
Work one cookie at a time to ensure the base stays wet enough for proper blending. If you flood multiple cookies before adding colors, the first ones may dry too much.
Less is more with the wet on wet technique. Adding too many colors or over-swirling creates muddy brown results instead of distinct autumn hues.
Use gel food coloring instead of liquid for more vibrant colors that don’t thin your icing. Start with tiny amounts as gel colors are highly concentrated.
For intricate designs like turkey feathers, work from the outside in. Add your accent colors around the edges first, then fill the center, pulling the colors inward with your toothpick.
Let gravity help you. Gently tilt and rotate cookies to encourage colors to flow and blend naturally.
Troubleshooting Common Issues
If your icing is too thick and won’t spread smoothly, add water one teaspoon at a time. Mix thoroughly and test before adding more.
If icing is too thin and runs off the cookie edges, add powdered sugar one tablespoon at a time until it thickens to the right consistency.
Lumpy icing ruins the smooth finish. Always sift your powdered sugar and beat the icing on high speed for the full time to eliminate all lumps.
Air bubbles create cratered surfaces. Pop any visible bubbles immediately with a toothpick before the icing sets.
Storing and Reheating Tips
Store completely dried decorated cookies in an airtight container at room temperature for up to 2 weeks. Layer them between sheets of parchment paper to prevent sticking and protect the decorations.
Never refrigerate decorated cookies as condensation will cause the royal icing to become sticky and colors to bleed. Room temperature storage in a cool, dry place works best.
For longer storage, freeze undecorated baked cookies for up to 3 months. Wrap them tightly in plastic wrap, then place in a freezer bag. Thaw at room temperature before decorating.
You can also freeze decorated cookies for up to 1 month, but the colors may slightly fade. Freeze them in a single layer on a baking sheet until solid, then transfer to an airtight container with parchment between layers.
These cookies don’t require reheating and are best enjoyed at room temperature. The crisp texture and smooth icing are perfect as-is. Simply remove from storage 5 minutes before serving if they’ve been in a cool location.
Tips for Avoiding Common Baking Mistakes
Never use butter straight from the refrigerator. Cold butter won’t cream properly, resulting in dense cookies that spread too much during baking.
Don’t overmix your cookie dough after adding flour. Overmixing develops gluten, creating tough, chewy cookies instead of tender ones. Mix just until the flour disappears.
Avoid using old baking powder. If your baking powder is over 6 months old, test it by adding a teaspoon to hot water. It should bubble vigorously. Old baking powder won’t help cookies rise properly.
Don’t overbake your cookies. They should look slightly underdone in the center when you remove them from the oven. They’ll continue cooking on the hot pan as they cool.
Never decorate warm cookies. The heat will melt royal icing and cause colors to run together uncontrollably. Always let cookies cool completely, at least 1 hour.
Don’t add decorating colors to wet icing without the base layer first. You need a wet foundation for the technique to work properly.
Avoid humid days for decorating if possible. High humidity prevents royal icing from drying properly and can cause colors to bleed even after they seem set.
Don’t stack cookies until the icing is completely dry. This takes at least 6-8 hours. Stacking wet cookies will destroy your beautiful designs.
Frequently Asked Questions
What is the wet on wet cookie decorating technique?
The wet on wet technique involves applying colored royal icing onto a base layer of wet icing before it dries. The moisture allows the colors to blend and create watercolor-like effects. This creates beautiful marbled patterns without requiring advanced piping skills.
Can I use store-bought cookie dough for this recipe?
Yes, you can use refrigerated sugar cookie dough to save time. Roll it to ¼ inch thickness and cut into shapes. The decorating technique is what makes these cookies special, so store-bought dough works fine if you’re short on time.
How long does royal icing take to dry on cookies?
Royal icing typically takes 6-8 hours to dry completely at room temperature. Factors like humidity, icing thickness, and room temperature affect drying time. For best results, let cookies dry overnight before packaging or stacking.
Can I make these cookies ahead of time?
Absolutely! Bake cookies up to 1 week ahead and store in an airtight container. Decorate them 2-3 days before your event. Fully dried decorated cookies stay fresh for 2 weeks at room temperature.
What’s the difference between flood consistency and stiff consistency royal icing?
Stiff consistency royal icing holds peaks and is used for piping borders and details. Flood consistency is thinned with water until it flows easily and self-levels, perfect for covering entire cookie surfaces. For wet on wet technique, you need flood consistency.
Do I need special tools for wet on wet decorating?
No special tools required! You only need squeeze bottles or spoons for applying icing, toothpicks for swirling colors, and small bowls for different colors. Most people already have these items at home.
Why are my colors turning brown or muddy?
Over-swirling causes colors to mix completely rather than blend partially. Use a light hand and make only 2-3 swirl motions. Also, using too many colors at once creates muddy results. Stick to 2-3 colors per cookie.
Can I use regular food coloring instead of gel?
Gel food coloring is strongly recommended because liquid coloring thins your royal icing too much. If you must use liquid coloring, use very small amounts and reduce the water in your icing recipe slightly.
How do I fix icing that’s too thick or too thin?
For thick icing, add water one teaspoon at a time and mix thoroughly. For thin icing, add sifted powdered sugar one tablespoon at a time. Always test consistency before decorating cookies.
Can I use this technique with buttercream frosting?
No, buttercream doesn’t work for wet on wet technique. Royal icing is essential because it dries hard and smooth. Buttercream stays soft and the colors would continue bleeding indefinitely.
Nutrition Information
| Nutrient | Amount Per Cookie |
|---|---|
| Calories | 145 |
| Total Fat | 5g |
| Saturated Fat | 3g |
| Cholesterol | 18mg |
| Sodium | 45mg |
| Total Carbohydrates | 24g |
| Dietary Fiber | 0g |
| Sugars | 16g |
| Protein | 1g |
Based on 30 cookies per batch. Nutritional values are approximate.
Extra Tips for Cookie Decorating Success
Create a practice cookie first to test your color combinations and swirling technique. Use a spare cookie or even a small plate to experiment before working on your actual batch.
Keep paper towels handy to wipe your toothpicks between swirls. This prevents color contamination and keeps your designs crisp.
Use a lazy Susan or rotating cake stand when decorating. This lets you easily rotate cookies for even coverage and better angle access.
Create an assembly line by organizing your colors, tools, and cookies before starting. This keeps you efficient while working within the wet icing window.
Take photos of your favorite designs so you can recreate them later. The random nature of wet on wet means you’ll never get exactly the same design twice.
Consider making a few extra cookies beyond what you need. This gives you room for experimentation and practice without pressure.
These wet on wet Thanksgiving cookies bring together simple baking and artistic expression in the most delicious way. The forgiving technique means everyone can create something beautiful, making this the perfect activity for family baking sessions or solo creative time. Your Thanksgiving table deserves these stunning edible centerpieces that taste every bit as amazing as they look!