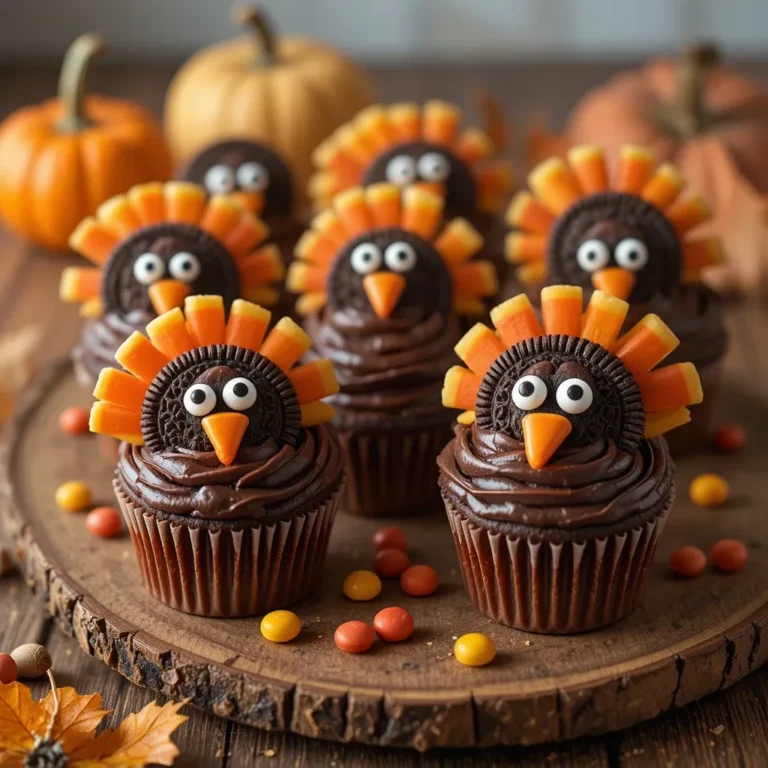
Thanksgiving Cupcakes Mashed Potatoes So Easy
Picture this: Thanksgiving dinner is winding down, everyone’s loosening their belts and claiming they couldn’t possibly eat another bite. Then I bring out a casserole dish of what looks like creamy, buttery mashed potatoes topped with golden gravy. My uncle actually groaned and said “I’m too full for seconds!”
The look on his face when he took a bite and discovered it was actually vanilla cake with buttercream frosting? Priceless. That was three years ago, and now my family won’t let me skip making these thanksgiving cupcakes mashed potatoes – they’ve become as essential to our holiday table as the real thing.
These aren’t your average holiday cupcakes. They’re a playful dessert that celebrates the fun side of Thanksgiving while looking exactly like everyone’s favorite savory side dish. I stumbled onto this idea after seeing similar creations online, but after dozens of trials (and a lot of frosting experiments), I’ve perfected a version that actually looks convincing enough to fool dinner guests.
The “gravy” is the real showstopper – a salted caramel butterscotch sauce that makes people do a double-take when they realize they’re eating dessert.
What Makes These Thanksgiving Cupcakes Mashed Potatoes So Special
Let me be honest: novelty desserts can sometimes be all show and no substance. But these cupcakes genuinely taste incredible while delivering that wow-factor presentation. The cake itself is a tender, moist vanilla base that’s sturdy enough to hold up to generous frosting but light enough that you can actually finish one after a full Thanksgiving meal.
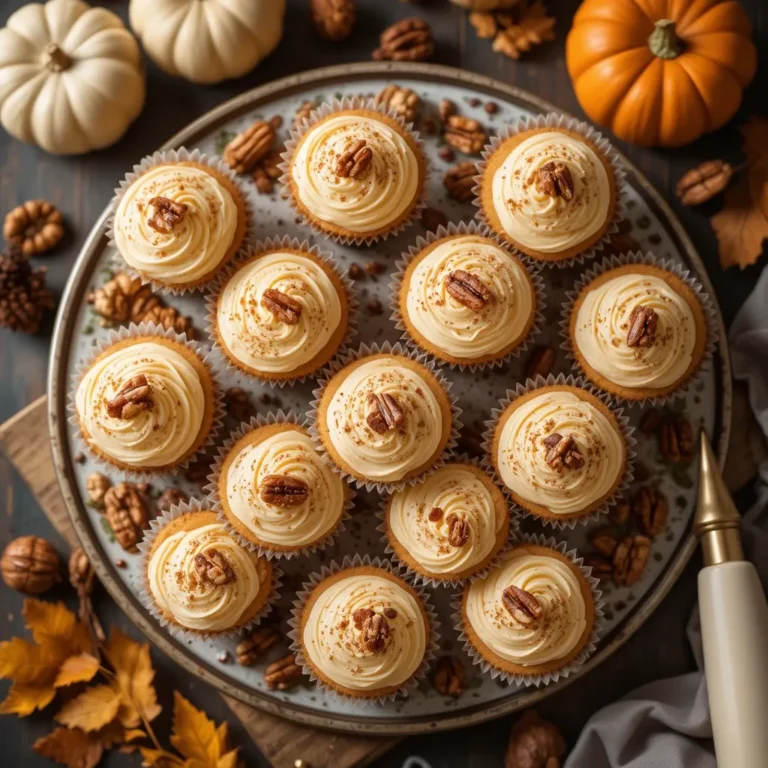
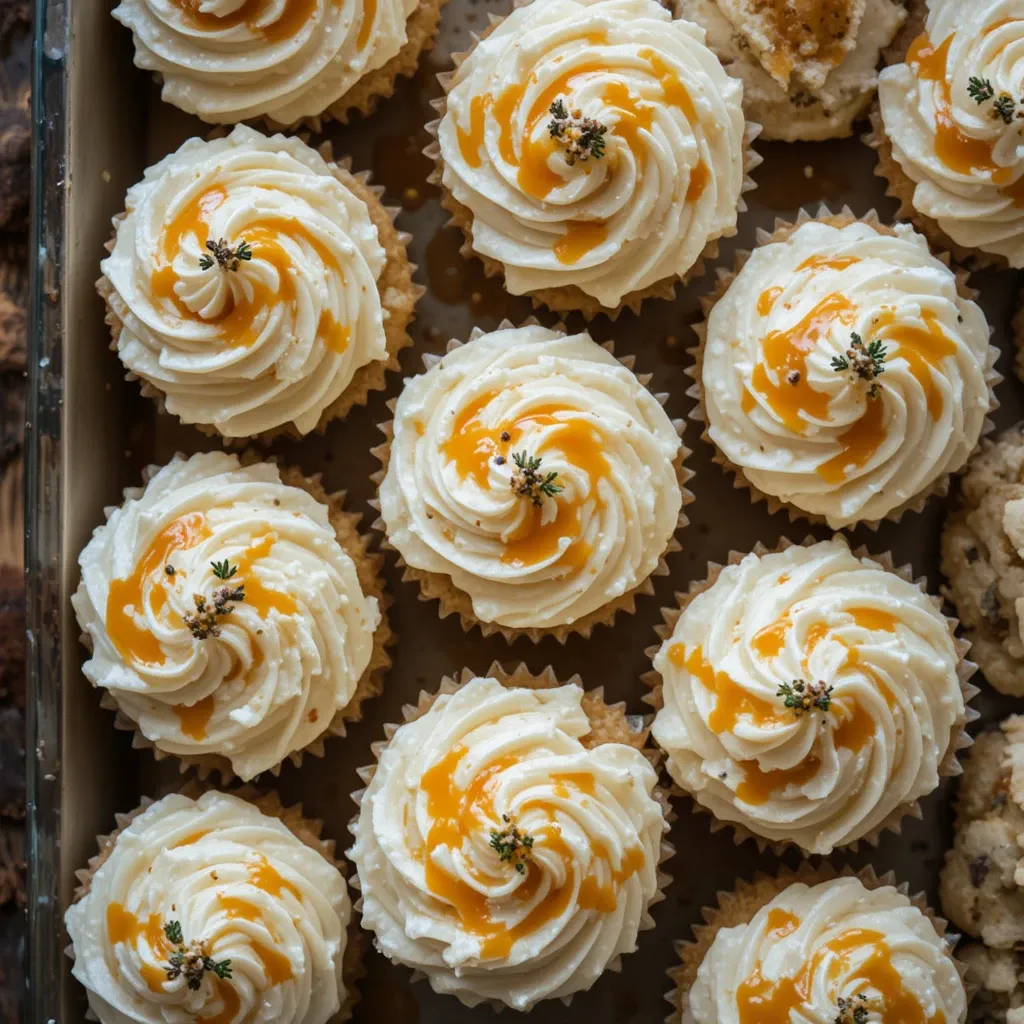
The “mashed potato” frosting is a vanilla buttercream that I’ve tweaked to have the exact texture of fluffy whipped potatoes – not too stiff, with those signature peaks and swirls.
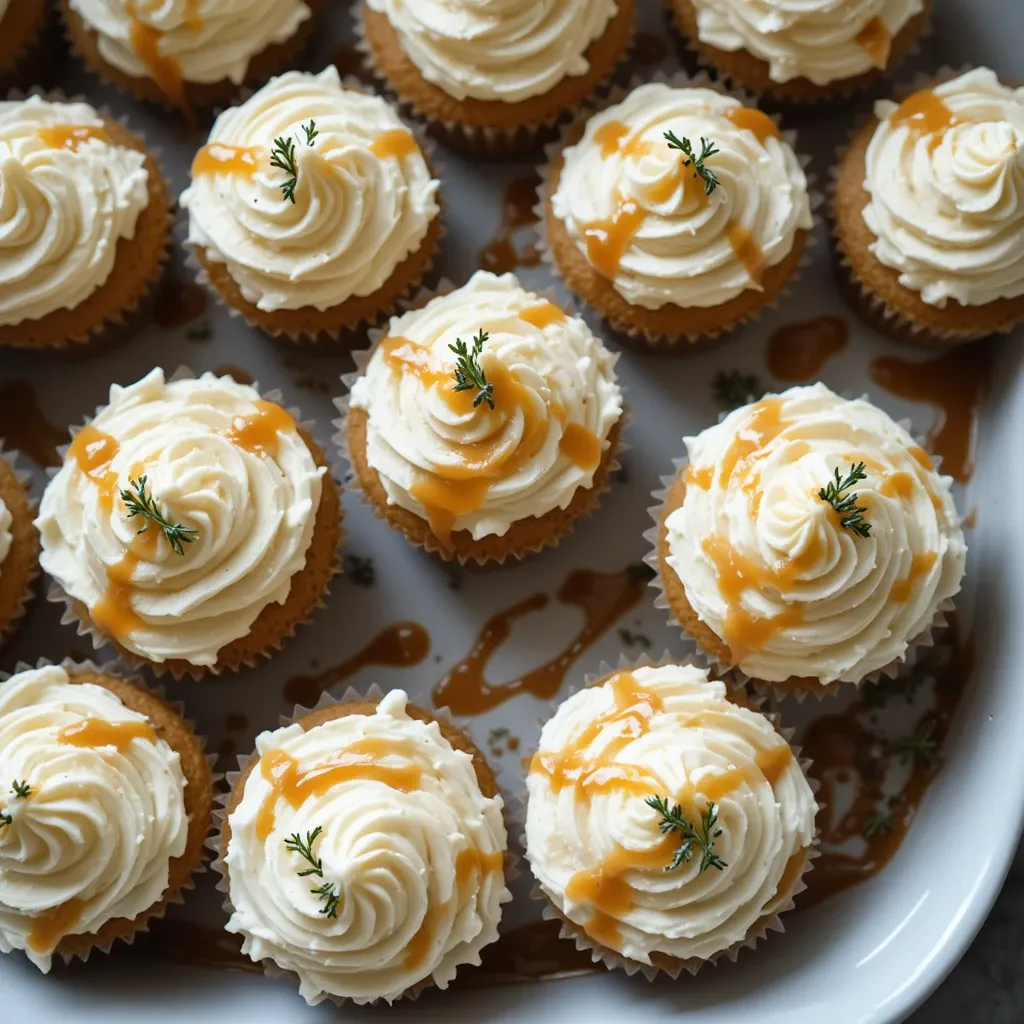
What really seals the deal is serving them in a casserole dish, just like you would actual mashed potatoes. I use a 9×13 baking dish and arrange them so they’re touching slightly, then pipe the frosting across the top to create one continuous “surface” of mashed potatoes. The caramel butterscotch sauce pooled on top mimics that butter-and-gravy situation we all love. It’s whimsical, it’s delicious, and it starts conversations – which is exactly what Thanksgiving desserts should do.
Why You’ll Love This Recipe
It’s a Total Crowd-Pleaser
These thanksgiving cupcakes mashed potatoes work for everyone at your table. Kids absolutely lose their minds over the trick (and the sweet “gravy”), while adults appreciate the clever presentation and genuinely good flavor. I’ve served these at formal Thanksgiving dinners and casual Friendsgivings, and they always get the same enthusiastic response. There’s something about a playful dessert that gives people permission to relax and have fun, even at fancy gatherings.
Surprisingly Easy to Pull Off
I know they look complicated, but I promise you don’t need professional pastry skills. If you can make cupcakes and buttercream frosting (or honestly, if you can use a box mix and store-bought frosting), you can make these. The “mashed potato” texture comes from a simple piping technique – you literally just blob the frosting on like you’re scooping mashed potatoes. Messy is authentic here. The more imperfect it looks, the more realistic it becomes.
Make-Ahead Friendly
Thanksgiving Day is chaotic enough without worrying about dessert. I bake these cupcakes up to two days ahead, frost them the night before, and keep them refrigerated. The caramel sauce can be made a week in advance. The morning of Thanksgiving, I just pull them out, let them come to room temperature for about 30 minutes, then warm up the sauce and drizzle it on right before serving. That’s it. Your dessert is handled while you’re wrestling with a turkey.
It Solves the “Too Full for Pie” Problem
We all know that moment after Thanksgiving dinner when someone cuts into a pie and everyone suddenly claims they’re stuffed. But these cupcakes are individually portioned, which somehow makes them less intimidating than a slice of pie. People feel like they can grab one, nibble on it, and not commit to a huge dessert. Plus, the vanilla cake is lighter than dense pumpkin or pecan pie, so it actually feels doable even when you’re full.
Budget-Friendly Ingredients
This recipe uses basic baking staples you probably already have: flour, sugar, butter, eggs, vanilla. No specialty ingredients, no expensive extracts, no hunting down obscure items at three different stores. The most “extra” component is the caramel sauce, and even that just requires sugar, butter, and cream – things I always have for holiday cooking anyway. You can make two dozen of these for less than the cost of buying a fancy bakery cake.
Recipe Card for Thanksgiving Cupcakes Mashed Potatoes
| Recipe Details | |
|---|---|
| Prep Time | 30 minutes |
| Cook Time | 18 minutes |
| Total Time | 48 minutes (plus cooling) |
| Servings | 24 cupcakes |
| Difficulty | Easy |
| Calories | 285 per serving |
| Protein | 3g |
| Carbs | 38g |
| Fat | 14g |
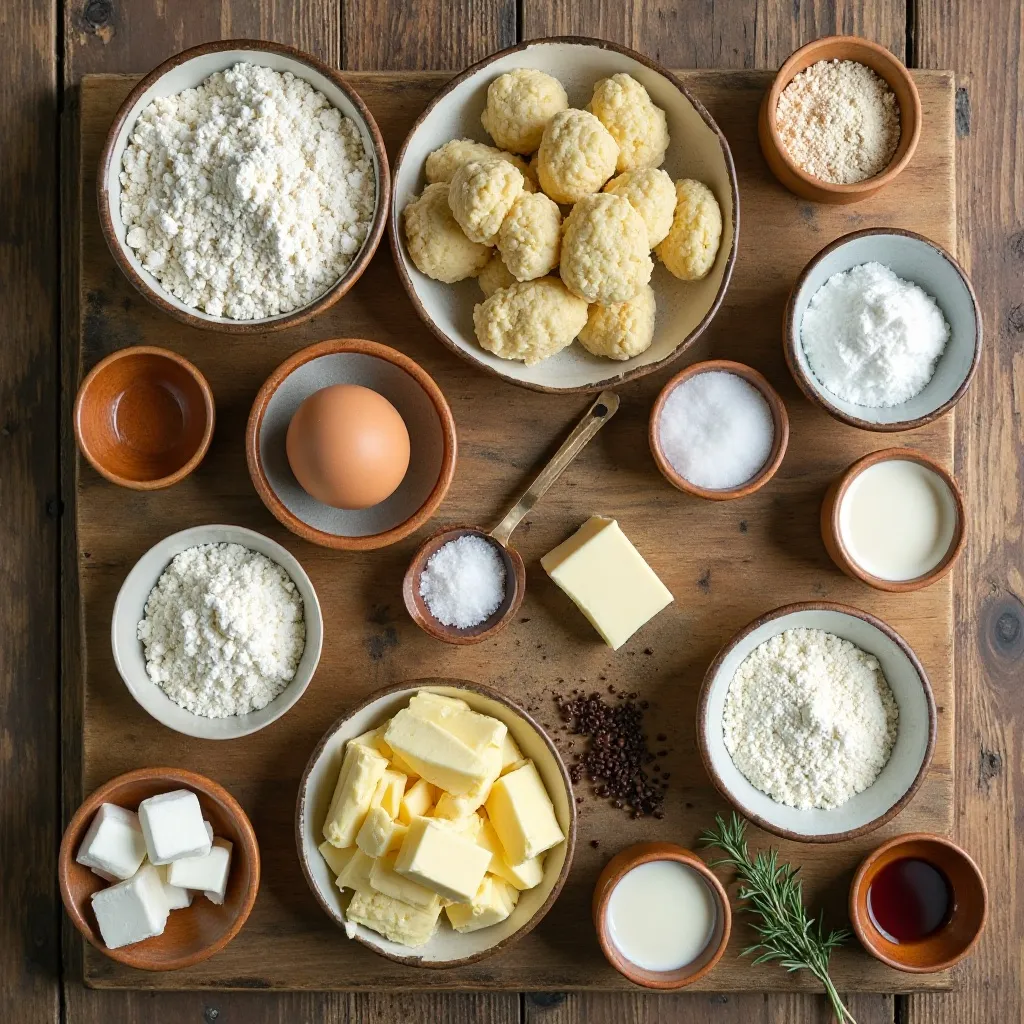
Ingredients for Thanksgiving Cupcakes Mashed Potatoes
Before we dive into the ingredient list, let me tell you that this recipe has three main components: the cupcakes, the “mashed potato” frosting, and the “gravy.” Don’t skip the gravy – it’s what takes these from cute to absolutely convincing. I’ve tried various frostings over the years, and the vanilla buttercream truly gives the best mashed potato texture. It holds its shape but still has that slightly soft, scoopable quality.
For the Cupcakes:
- 2¾ cups all-purpose flour
- 2½ teaspoons baking powder
- ½ teaspoon salt
- 1 cup (2 sticks) unsalted butter, room temperature
- 2 cups granulated sugar
- 4 large eggs, room temperature
- 1 tablespoon vanilla extract
- 1 cup whole milk, room temperature
For the “Mashed Potato” Frosting:
- 2 cups (4 sticks) unsalted butter, room temperature (don’t skimp here)
- 8 cups powdered sugar, sifted
- 6-8 tablespoons heavy cream
- 2 teaspoons vanilla extract
- Pinch of salt
For the “Gravy” (Salted Caramel Butterscotch Sauce):
- 1 cup granulated sugar
- 6 tablespoons unsalted butter, cubed
- ½ cup heavy cream, room temperature
- 1 teaspoon vanilla extract
- ¾ teaspoon sea salt (or to taste)
Optional Garnish:
- Fresh thyme or rosemary sprigs (to really sell the mashed potato illusion)
- Cracked black pepper for dusting
How to Make Thanksgiving Cupcakes Mashed Potatoes
Quick Overview
Here’s the game plan: we’re making tender vanilla cupcakes as our base, then creating a thick vanilla buttercream that we’ll pipe to look like scoops of mashed potatoes. Finally, we’re making a quick salted caramel sauce that mimics gravy. The whole process takes under an hour of active time, though you’ll need to factor in cooling time for the cupcakes. I usually do this over two days – cupcakes on day one, assembly on day two.
Step-by-Step Instructions
Step 1: Prepare Your Cupcakes
Preheat your oven to 350°F and line two 12-cup muffin tins with cupcake liners. I know the liners are visible, but trust me – trying to frost these without liners is a nightmare. In a medium bowl, whisk together the flour, baking powder, and salt. Set this aside. This dry mix can actually be prepared days in advance if you’re the ultra-organized type (I’m not, but I admire you if you are).
Step 2: Cream the Butter and Sugar
In your stand mixer (or with a hand mixer in a large bowl), beat the butter and sugar together on medium-high speed for about 4-5 minutes. You want this mixture pale and fluffy – like really fluffy. This step incorporates air into your batter, which gives you that light, tender crumb. Don’t rush it. I usually set a timer because I’m tempted to move on too early.
Step 3: Add Eggs and Vanilla
With your mixer on medium-low, add the eggs one at a time, beating well after each addition. The mixture might look slightly curdled after the second egg – that’s normal, keep going. Add the vanilla extract and beat until everything is combined and smooth. Your kitchen should smell amazing right about now.
Step 4: Alternate Dry and Wet Ingredients
Here’s where technique matters a little: with your mixer on low speed, add about one-third of your flour mixture, then half of your milk. Add another third of the flour, the remaining milk, and finish with the last of the flour. Mix each addition just until combined – stop as soon as you don’t see streaks of flour. Overmixing develops gluten, which makes tough cupcakes. We want tender here.
Step 5: Bake Until Golden
Divide the batter evenly among your cupcake liners, filling each about two-thirds full. This is where a cookie scoop comes in handy – I use a large one and do two scoops per liner. Bake for 17-19 minutes, until a toothpick inserted in the center comes out clean or with just a few moist crumbs. The tops should spring back when lightly pressed. Let them cool in the pans for 5 minutes, then transfer to a wire rack to cool completely. Do not try to frost warm cupcakes – your frosting will melt into a puddle. Ask me how I know.
Step 6: Make the “Mashed Potato” Frosting
This is where the magic happens. In your stand mixer fitted with the paddle attachment (paddle is better than whisk for this texture), beat the room-temperature butter on medium speed for about 3 minutes until it’s creamy and pale. With the mixer on low, gradually add the powdered sugar one cup at a time.
Once all the sugar is incorporated, add 6 tablespoons of cream, the vanilla, and salt. Increase the speed to medium-high and beat for 3-4 minutes. You want it thick enough to hold stiff peaks but soft enough to pipe. If it’s too thick, add more cream a tablespoon at a time. If it’s too thin, add more powdered sugar. The texture should remind you of actual mashed potatoes – that’s your goal.
Step 7: Create the “Mashed Potato” Effect
Here’s my method: arrange your cooled cupcakes close together in a 9×13 casserole dish or on a large serving platter. Using a large piping bag fitted with a large round tip (or just cut a big opening in the bag), pipe generous dollops of frosting onto each cupcake.
Don’t worry about being neat – you want it to look like scoops of mashed potatoes. I pipe one large mound on each cupcake, then go back and add more frosting to connect them and fill gaps, creating that casserole appearance. Use the back of a spoon to create swirls and peaks, just like you would with real mashed potatoes.
Step 8: Make the “Gravy”
This caramel sauce is so good you’ll want to make extra to keep in your fridge for ice cream. In a medium, heavy-bottomed saucepan, heat the sugar over medium heat. Don’t stir at first – just let it sit and melt. As it begins to melt and turn amber, use a heat-resistant spatula to gently stir, ensuring even melting.
Once it’s completely melted and a deep amber color (watch carefully – the line between caramel and burnt is thin), remove from heat and immediately add the butter. It will bubble vigorously – this is normal. Stir until the butter is melted, then slowly pour in the cream while stirring constantly. The mixture will bubble up again. Once smooth, stir in the vanilla and salt. Let it cool for about 10 minutes until it’s warm but not scalding.
Step 9: Serve and Watch the Reactions
Right before serving, drizzle or pour the warm caramel sauce over your “mashed potatoes,” letting it pool in spots just like gravy would. If you want to really commit to the bit, add a few sprigs of fresh herbs like thyme or rosemary, and maybe a light dusting of cracked black pepper (which also tastes great with caramel, by the way). Bring the whole casserole dish to the table without explanation and enjoy the confused faces.
Perfect Pairings for This Dish
These thanksgiving cupcakes mashed potatoes work beautifully as a standalone dessert, but if you want to create a full dessert spread, they play well with traditional Thanksgiving sweets. I like to serve them alongside a classic pumpkin pie and maybe a pecan tart – the contrast between familiar favorites and this playful surprise makes for a more interesting dessert table.
For drinks, I’ve found that a rich coffee or espresso is perfect. The slight bitterness balances the sweetness of the frosting and caramel. At our last Thanksgiving, someone brought a salted caramel and we drizzled a little over each cupcake alongside the butterscotch sauce – absolutely divine, and very adult.
If you’re doing a kid’s table, consider putting out some fun toppings: extra caramel sauce, chocolate chips, or sprinkles. Let them “customize” their cupcakes. It keeps them entertained while the adults finish their coffee and conversation. I’ve also served these at Friendsgiving potlucks where everyone brings a traditional Thanksgiving dish, and these cupcakes become the surprise star that everyone photographs for Instagram.
Pro Tips from My Kitchen
Can I make these ahead of time?
Absolutely, and I actually recommend it for stress-free entertaining. Bake the cupcakes up to 3 days in advance and store them in an airtight container at room temperature. Make the frosting up to 5 days ahead and keep it refrigerated – just let it come to room temperature and give it a quick re-whip before using. The caramel sauce keeps for up to 2 weeks refrigerated. Assemble the frosted cupcakes the night before your event and keep them refrigerated, then let them sit at room temperature for 30 minutes before serving. Add the warm caramel “gravy” right before presenting.
The secret to perfect frosting texture
Room temperature butter is non-negotiable here. If your butter is too cold, you’ll have lumps; too warm and your frosting will be soupy. I leave mine out for about an hour before starting. Also, don’t skip the step of beating the butter alone before adding sugar – this creates a fluffier, more stable frosting. If your frosting looks slightly yellowish (from the butter), that’s actually perfect for mashed potato aesthetics. Pristine white frosting doesn’t look as realistic.
Preventing dry cupcakes
The biggest mistake people make with cupcakes is overbaking. Start checking at 17 minutes – when a toothpick comes out with a few moist crumbs (not wet batter, but not bone dry), they’re done. They’ll continue cooking slightly as they cool. Also, measure your flour correctly by spooning it into your measuring cup and leveling it off. If you scoop directly from the bag, you’ll pack in too much flour and end up with dense, dry cupcakes.
Making the caramel foolproof
Sugar can go from perfect caramel to burnt and bitter in seconds. Once it starts turning amber, don’t walk away – stay right there and watch it. Use a light-colored pan if you have one, so you can accurately see the color developing. If you’re nervous, remove it from heat when it’s light amber; it will continue darkening from residual heat. Better slightly light than burnt. And please, be careful – molten sugar is essentially liquid lava. Keep kids and pets away during this step.
Piping without a piping bag
If you don’t have a piping bag, use a large ziplock bag with a bottom corner snipped off. For an even easier method, use a sturdy spoon or small ice cream scoop to dollop the frosting onto each cupcake, then use the back of the spoon to shape and swirl it. The rustic look actually works better for the mashed potato illusion anyway.
Flavor variations that work
While I love the classic vanilla cake and vanilla frosting combo, I’ve experimented with other flavors. A brown butter cake with cream cheese frosting is incredible and gives a slightly more sophisticated flavor. For chocolate lovers, a chocolate cake with vanilla frosting looks like chocolate mashed potatoes (weird but delicious). You could also add a teaspoon of maple extract to the frosting for a maple-vanilla flavor that screams fall.
Make-Ahead and Storage Guide
Refrigerator Storage
Fully assembled thanksgiving cupcakes mashed potatoes (with frosting but before adding the caramel sauce) will keep beautifully in the refrigerator for up to 3 days. Store them in an airtight container or cover your casserole dish tightly with plastic wrap.
The frosting will firm up when cold, which actually makes them easier to transport if you’re bringing them somewhere. Just remember to let them sit at room temperature for 30-45 minutes before serving so the frosting softens to that perfect texture.
Freezer Instructions
You can freeze unfrosted cupcakes for up to 3 months. Wrap each one individually in plastic wrap, then place them all in a freezer-safe bag or container. Thaw overnight in the refrigerator, then bring to room temperature before frosting. I don’t recommend freezing the assembled, frosted cupcakes – the frosting texture doesn’t recover well from freezing. The caramel sauce freezes beautifully though. Freeze in a jar or airtight container, thaw in the fridge, then warm gently before serving.
How Long Does It Last?
The caramel sauce will keep in the refrigerator for up to 2 weeks – just rewarm it gently in the microwave or on the stovetop, stirring frequently. Leftover frosting can be refrigerated for up to a week in an airtight container. Bring it to room temperature and re-whip before using. The frosted cupcakes taste best within 2-3 days, though they’re still good for up to 4 days. After that, the cake starts to dry out despite the moisture from the frosting.
Recipe FAQs
Can I use a different type of frosting?
Sure! Cream cheese frosting works and gives a slight tang that balances the sweet caramel. Swiss or Italian meringue buttercream are more stable in warm conditions if you’re serving these at a hot venue. Just avoid whipped cream frosting – it’s too soft and won’t hold the mashed potato shape. The vanilla buttercream I’ve specified is really ideal because its texture and color are most realistic.
What if I don’t want to make caramel from scratch?
I get it – caramel can be intimidating. Buy a good quality jarred caramel sauce and warm it up with a splash of heavy cream and a pinch of sea salt. Heat it until it’s pourable but not too thin. Ghirardelli and Trader Joe’s both make excellent caramel sauces that work great here. No judgment from me – the cupcakes are still impressive.
Can I make these gluten-free?
Absolutely. Use a 1:1 gluten-free flour blend that contains xanthan gum (like Bob’s Red Mill or King Arthur). The texture will be nearly identical. I’ve made them this way for my gluten-free sister and even she couldn’t tell the difference. Just make sure your baking powder is gluten-free too – most are, but it’s worth checking.
How do I transport these to someone else’s house?
This is actually easier than you’d think. Frost them in the casserole dish you plan to serve them in, cover tightly with plastic wrap, and refrigerate for at least an hour to firm up the frosting. Transport the dish in a cooler or insulated bag with ice packs if it’s warm outside. Bring the caramel sauce in a separate jar and warm it when you arrive. Don’t drizzle the sauce until right before serving, or it will soak into the frosting during transport.
Do these really fool people?
In my experience, yes – at least initially! The key is the presentation. Serving them in a casserole dish, using a large serving spoon, and keeping a straight face all help sell the illusion. Kids usually figure it out faster than adults, especially if they see you serving from a dessert plate. But that moment of confusion is pure gold. Even after people know they’re cupcakes, they still comment on how realistic they look.
Can I make mini versions?
Mini cupcakes would be adorable for this! Use a mini muffin tin and reduce the baking time to 10-12 minutes. You’ll get about 48-60 mini cupcakes from this batter. The frosting and caramel amounts will be plenty. These would be perfect for a large gathering where people want just a bite or two of dessert.
My Personal Story With This Recipe
I first attempted these thanksgiving cupcakes mashed potatoes for a Friendsgiving about five years ago, and let me tell you, the first batch was a disaster. I used a whipped cream frosting that immediately melted into a puddle, and my caramel seized up into a grainy mess. I almost gave up, but my best friend convinced me to try again. We spent an entire Saturday experimenting with different frosting textures and caramel techniques, eating way too many cupcakes in the process.
When I finally got it right for Thanksgiving that year, the reaction made all the trial and error worth it. My grandmother, who’s usually quite traditional about holiday desserts, laughed harder than I’d seen her laugh in years. She took a photo with her ancient flip phone and made me promise to make them every year. Now, three Thanksgivings later, extended family members actually call ahead to confirm I’m bringing “those potato cupcakes.” They’ve become part of our family tradition in a way I never expected.
What I love most about this recipe is that it gives people permission to play with their food and enjoy the whimsy of the holiday. Thanksgiving can get so serious – the pressure to create a perfect Norman Rockwell scene, the family dynamics, the stress of cooking a huge meal. These silly, delicious cupcakes remind everyone that it’s supposed to be fun. They spark conversation, they make people smile, and honestly, they taste damn good too.
This Thanksgiving, skip the same-old pumpkin pie routine and bring these show-stopping cupcakes to the table. They’ll give your guests something to talk about long after the dishes are done and the leftovers are packed away.
If you make them, snap a photo and share it – I love seeing people’s surprised faces when they realize they’re eating dessert! And if you’re feeling extra creative, tell me in the comments: what other Thanksgiving dishes would make hilarious dessert disguises?