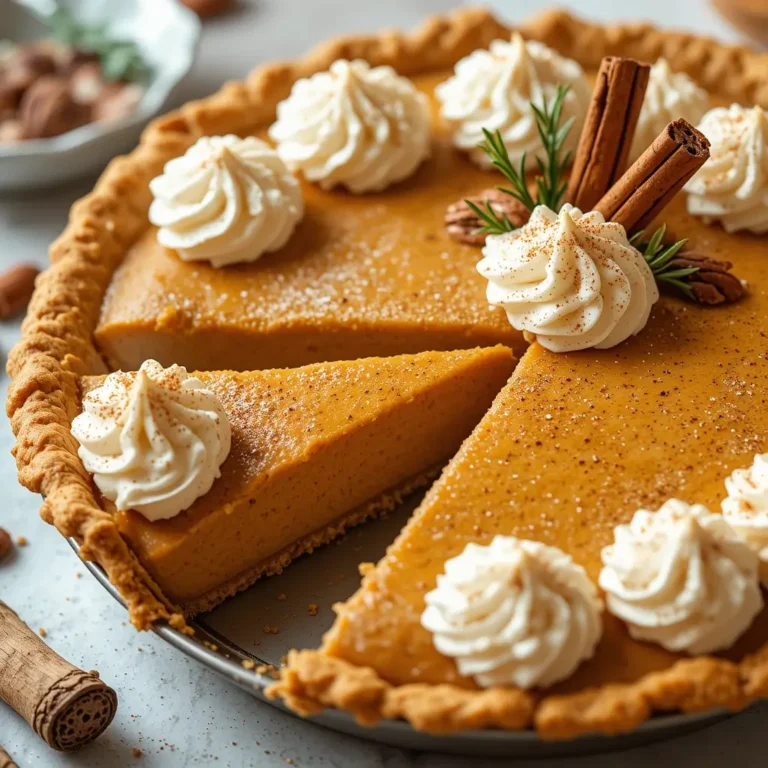
20 Minute Prep Pumpkin Pudding Pie
Imagine sinking your spoon into the silkiest, most heavenly pumpkin pudding pie that melts on your tongue like autumn clouds. This isn’t your average pumpkin pie – it’s a luxuriously creamy, perfectly spiced dessert that combines the best of pumpkin pie and chocolate pudding in one show-stopping treat.
Did you know that pumpkin pudding pie originated in colonial America when resourceful bakers discovered that adding cornstarch created an incredibly smooth texture? This recipe is special because it delivers restaurant-quality results in just 20 minutes of active prep time, making it perfect for busy families who want to impress without stress.
Unlike our popular apple crisp recipe, this dessert requires no fancy techniques or expensive ingredients – just simple pantry staples transformed into pure magic. Get ready to become the hero of every holiday gathering with this foolproof recipe that will have everyone begging for seconds!
What is Pumpkin Pudding Pie?
Ever wondered why we call this heavenly dessert “pudding pie” when it’s clearly not your average pudding? Well, here’s the delicious truth: this recipe creates a texture so impossibly smooth and creamy that it’s like eating pumpkin-flavored silk in pie form!
The name comes from the unique cooking method that creates a pudding-like consistency while maintaining the classic pie structure. As they say, “the way to a man’s heart is through his stomach,” and this pumpkin pudding pie is your secret weapon for winning hearts and taste buds. Ready to discover what makes this dessert so irresistibly special?
Why You’ll Love This Pumpkin Pudding Pie
Rich, Velvety Texture That Melts in Your Mouth
This pumpkin pudding pie delivers an incredibly smooth, creamy texture that’s lighter than traditional pumpkin pie but more substantial than regular pudding. The secret lies in the perfect balance of eggs, cream, and cornstarch that creates a silky consistency you simply can’t achieve with store-bought alternatives.
Budget-Friendly Family Dessert
Making this pumpkin pudding pie at home costs approximately 60% less than purchasing similar desserts from bakeries. With basic pantry ingredients like canned pumpkin, eggs, and spices, you can create an elegant dessert that serves 8-10 people for under $8.
Warm Spices and Flavor Combinations
The aromatic blend of cinnamon, nutmeg, ginger, and vanilla creates a flavor profile that captures the essence of fall in every bite. Unlike our popular pecan pie recipe, this dessert lets the pumpkin shine while the spices provide the perfect supporting cast. The optional whipped cream topping adds an extra layer of indulgence that makes each slice feel like a special occasion.
Ready to transform your kitchen into a bakery and create memories that’ll last all season long? Let’s dive into this amazing recipe!
How to Make Pumpkin Pudding Pie
Quick Overview
This pumpkin pudding pie combines the best of both worlds – the familiar flavors of pumpkin pie with an incredibly smooth, pudding-like texture that’s absolutely divine. What makes this recipe special is its foolproof method that virtually guarantees success every time.
Key Features:
- Silky smooth, restaurant-quality texture
- Rich pumpkin flavor with warm spices
- No-fail technique perfect for beginners
- Make-ahead friendly for busy schedules
Preparation Time:
- Prep Time: 20 minutes
- Cook Time: 45 minutes
- Cooling Time: 2 hours
- Total Time: 3 hours 5 minutes
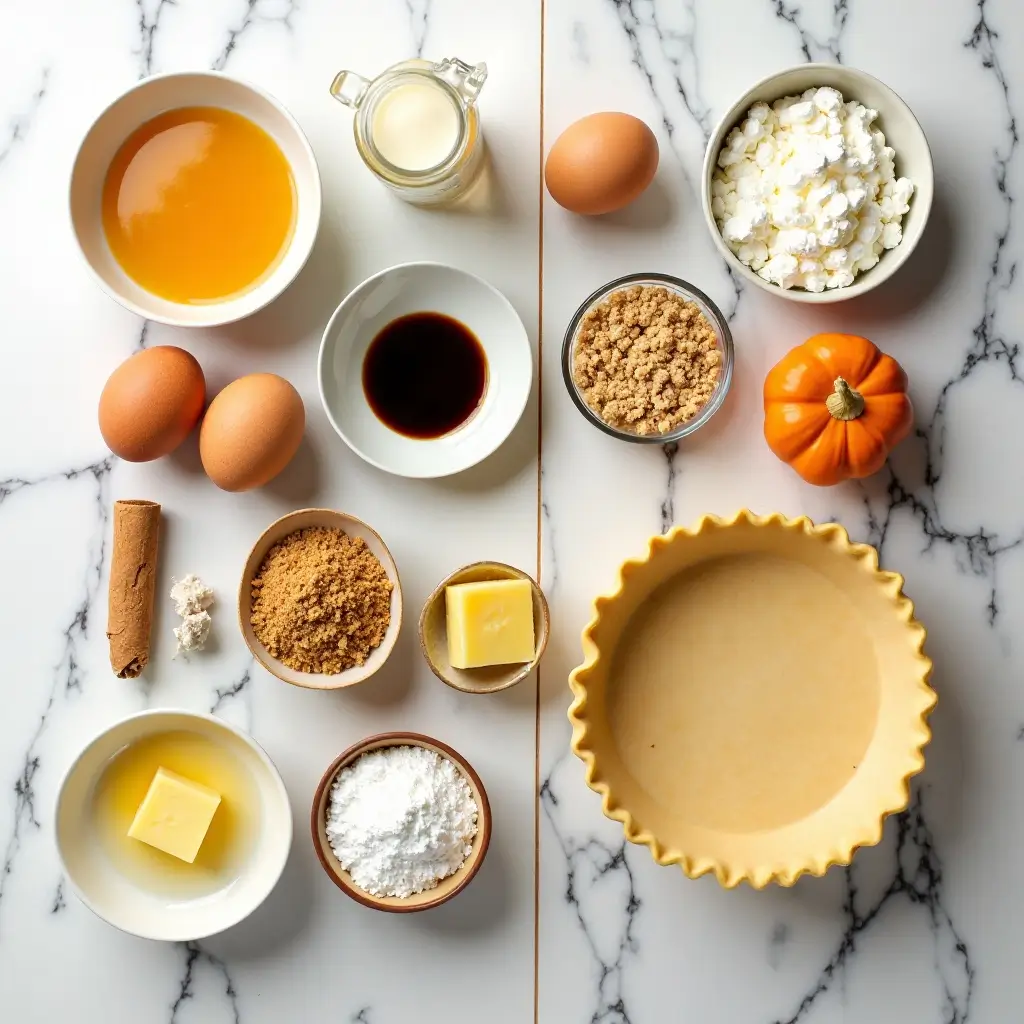
Key Ingredients for Pumpkin Pudding Pie
For the Filling:
- 1 (15 oz) can pumpkin puree
- 3 large eggs
- 1 cup heavy cream
- 1/2 cup brown sugar, packed
- 1/4 cup cornstarch
- 1 teaspoon vanilla extract
- 1 teaspoon ground cinnamon
- 1/2 teaspoon ground nutmeg
- 1/4 teaspoon ground ginger
- 1/4 teaspoon salt
For the Crust:
- 1 pre-made 9-inch pie crust (or homemade)
- 1 tablespoon butter, melted
For Topping:
- 1 cup heavy whipping cream
- 2 tablespoons powdered sugar
- 1/2 teaspoon vanilla extract
Step-by-Step Instructions
Step 1: Prepare Your Workspace
Preheat your oven to 375°F (190°C). Remove your pie crust from the refrigerator and let it come to room temperature for about 10 minutes. This prevents cracking when you press it into the pie pan.
Step 2: Prep the Pie Crust
Place the pie crust in a 9-inch pie pan, pressing it gently against the bottom and sides. Trim any excess dough, leaving about 1/2 inch overhang. Crimp the edges decoratively and brush with melted butter for a golden finish.
Step 3: Mix the Dry Ingredients
In a small bowl, whisk together cornstarch, cinnamon, nutmeg, ginger, and salt. This ensures even distribution and prevents lumps in your final pudding pie.
Step 4: Combine Wet Ingredients
In a large mixing bowl, whisk the eggs until smooth. Add pumpkin puree, heavy cream, brown sugar, and vanilla extract. Whisk until completely combined and smooth.
Step 5: Create the Perfect Filling
Gradually add the dry ingredient mixture to the wet ingredients, whisking constantly to prevent lumps. Continue whisking for 2-3 minutes until the mixture is completely smooth and well-combined.
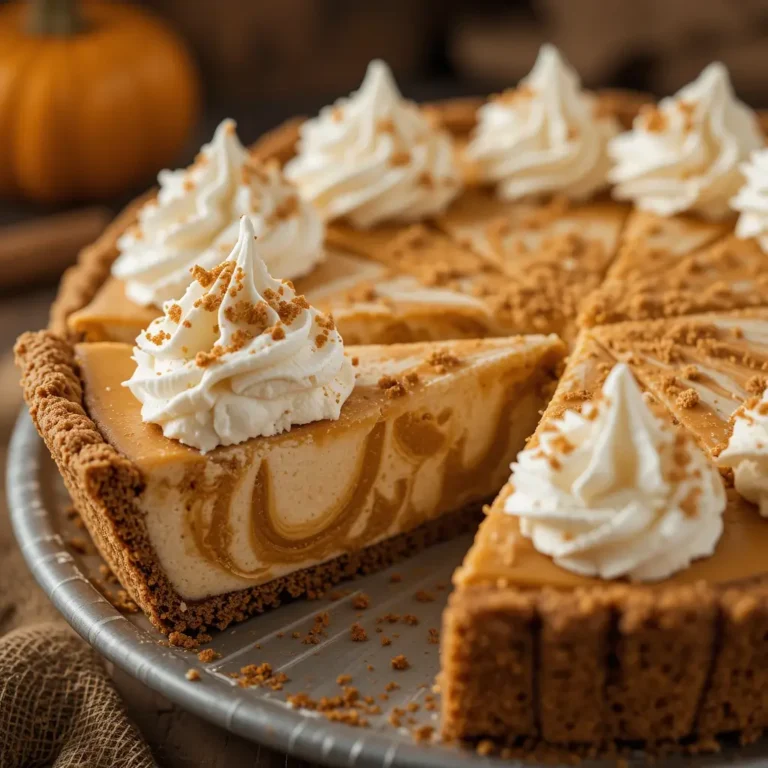
Step 6: Assemble and Bake
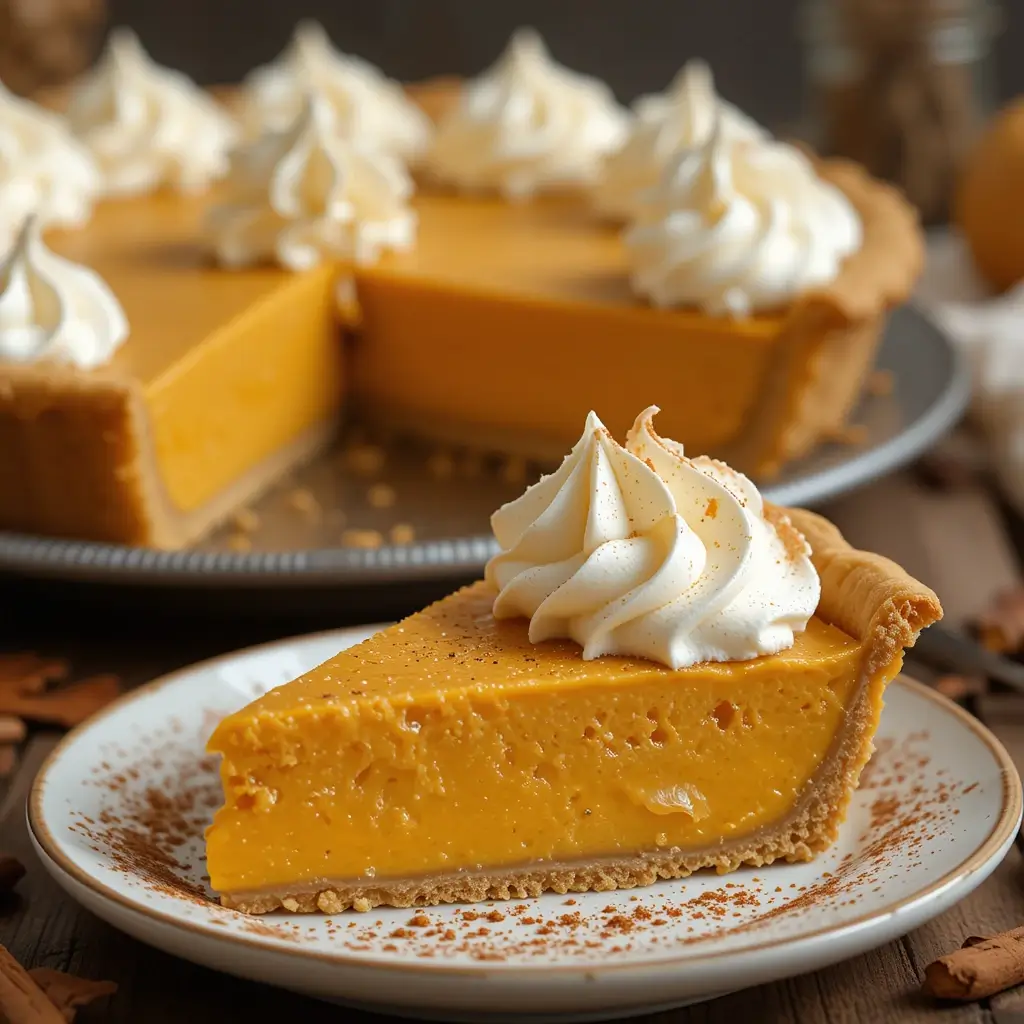
Pour the filling into your prepared pie crust, spreading it evenly with a spatula. Bake for 45-50 minutes, or until the center is set but still slightly jiggly when gently shaken.
Step 7: Cool and Chill
Remove from oven and cool completely at room temperature for 1 hour, then refrigerate for at least 2 hours before serving. This cooling process is crucial for achieving the perfect pudding-like texture.
Step 8: Prepare Whipped Cream Topping
Just before serving, whip the heavy cream, powdered sugar, and vanilla extract until soft peaks form. Dollop generously on each slice.
What to Serve Pumpkin Pudding Pie With
Hot Beverages:
- Spiced chai tea latte
- French press coffee with cinnamon
- Hot apple cider with rum
Complementary Desserts:
- Vanilla bean ice cream
- Caramel sauce drizzle
- Candied pecans for crunch
Seasonal Pairings:
- Thanksgiving dinner as the perfect finale
- Fall harvest parties
- Cozy movie nights with family
Top Tips for Perfecting Pumpkin Pudding Pie
Use Room Temperature Ingredients
Allow eggs and cream to come to room temperature before mixing. This prevents the filling from curdling and ensures a smooth, even texture throughout your pie.
Don’t Overbake the Filling
The center should be set but still slightly jiggly when you gently shake the pan. It will continue cooking from residual heat and firm up as it cools.
Strain for Ultra-Smooth Texture
For the silkiest possible texture, strain your filling mixture through a fine-mesh sieve before pouring into the crust. This removes any small lumps and creates professional-quality smoothness.
Prevent Crust Soggy Bottom
Blind bake your crust for 10 minutes before adding the filling, or brush with beaten egg white to create a moisture barrier.
Temperature Control is Key
Use an oven thermometer to ensure accurate temperature. Fluctuations can cause the pudding to separate or become grainy.
Storing and Reheating Tips
Refrigerator Storage: Store covered in the refrigerator for up to 4 days. Cover tightly with plastic wrap, pressing it directly onto the surface to prevent a skin from forming.
Freezing Instructions: This pumpkin pudding pie freezes beautifully for up to 2 months. Wrap tightly in plastic wrap, then aluminum foil. Thaw overnight in the refrigerator before serving.
Serving from Cold: This dessert is best served chilled. Remove from refrigerator 10-15 minutes before serving to take the chill off for optimal flavor.
Make-Ahead Tips: Prepare up to 2 days in advance. The flavors actually improve overnight, making this perfect for holiday meal planning.
Nutrition Information
| Nutrient | Per Slice (8 servings) |
|---|---|
| Calories | 285 |
| Total Fat | 18g |
| Saturated Fat | 11g |
| Cholesterol | 95mg |
| Sodium | 180mg |
| Total Carbs | 28g |
| Fiber | 3g |
| Sugars | 22g |
| Protein | 6g |
| Vitamin A | 185% DV |
| Iron | 8% DV |
Frequently Asked Questions
Can I use fresh pumpkin instead of canned?
Absolutely! Use 1 1/4 cups of fresh pumpkin puree. Roast pumpkin halves at 400°F for 45 minutes, then puree until smooth. Make sure to strain out excess moisture.
Why is my pumpkin pudding pie runny?
This usually happens when the pie is underbaked or hasn’t cooled completely. The cornstarch needs proper heat activation and cooling time to thicken properly. Chill for at least 2 hours.
Can I make this dairy-free?
Yes! Substitute heavy cream with full-fat coconut milk and use a dairy-free pie crust. The texture will be slightly different but still delicious.
How do I know when it’s done baking?
The center should be set but still slightly jiggly when gently shaken. A knife inserted near the center should come out mostly clean with just a few moist crumbs.
Can I add other spices?
Certainly! Try adding 1/8 teaspoon of cardamom, cloves, or allspice. Start with small amounts as these spices can be overpowering.
What’s the difference between pumpkin pie and pumpkin pudding pie?
Pumpkin pudding pie has a smoother, creamier texture thanks to the addition of cornstarch and extra cream. It’s lighter and more silky than traditional pumpkin pie.
Bonus: Creative Variations to Try
Chocolate Pumpkin Pudding Pie: Add 1/4 cup cocoa powder and 2 oz melted dark chocolate for a rich twist.
Maple Pumpkin Pudding Pie: Replace half the brown sugar with pure maple syrup for deeper flavor complexity.
Spiced Rum Pumpkin Pudding Pie: Add 2 tablespoons spiced rum to the filling for an adult version.
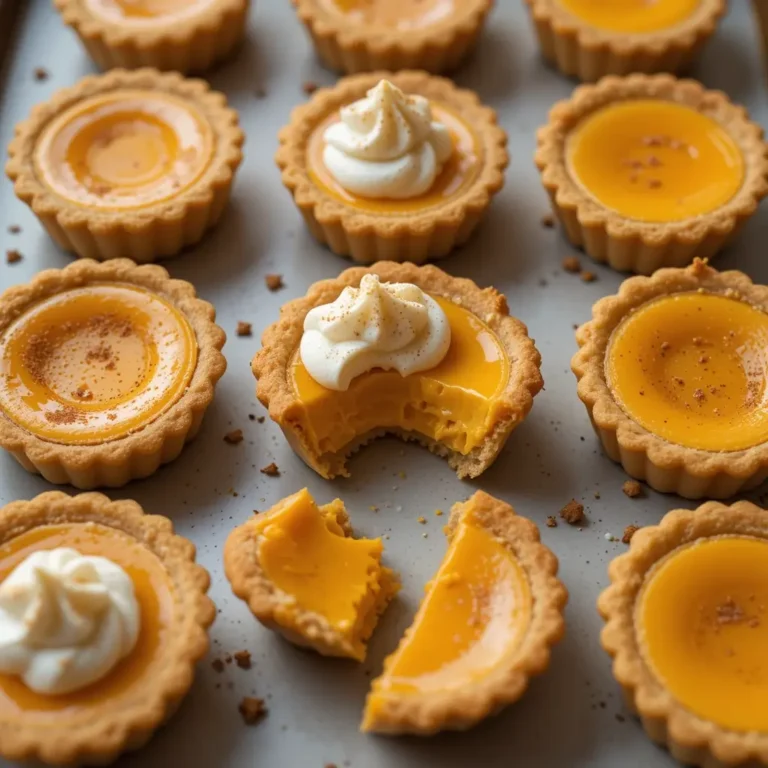
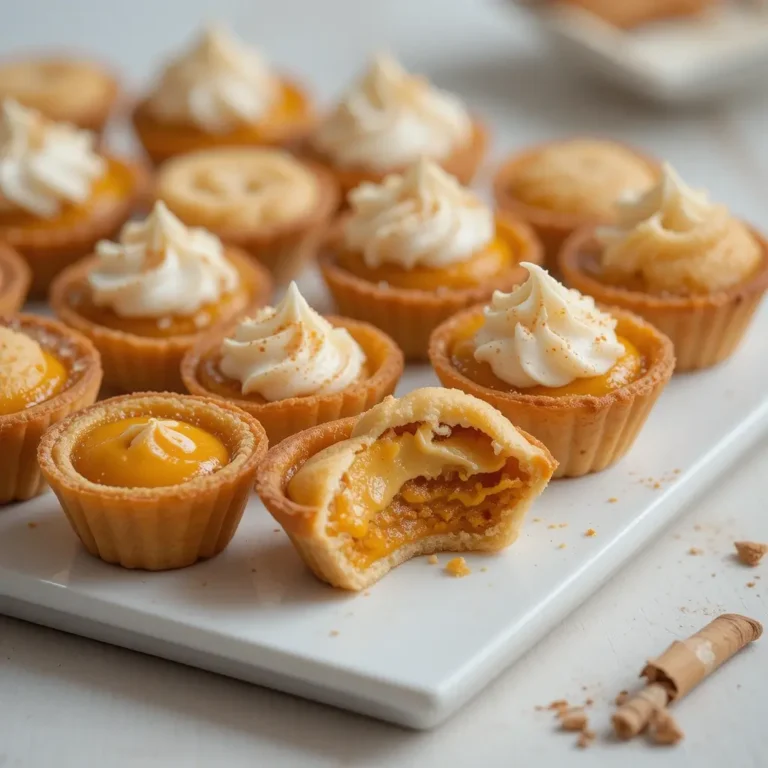
Mini Pumpkin Pudding Pies: Use a muffin tin with mini pie crusts for individual servings perfect for parties.
This pumpkin pudding pie recipe represents the perfect marriage of tradition and innovation – keeping all the beloved flavors of fall while elevating the texture to new heights. Whether you’re hosting Thanksgiving dinner or just want to treat your family to something special, this recipe delivers consistent, impressive results every single time. The best part? Once you master this technique, you’ll have the confidence to experiment with your own creative variations. Happy baking!