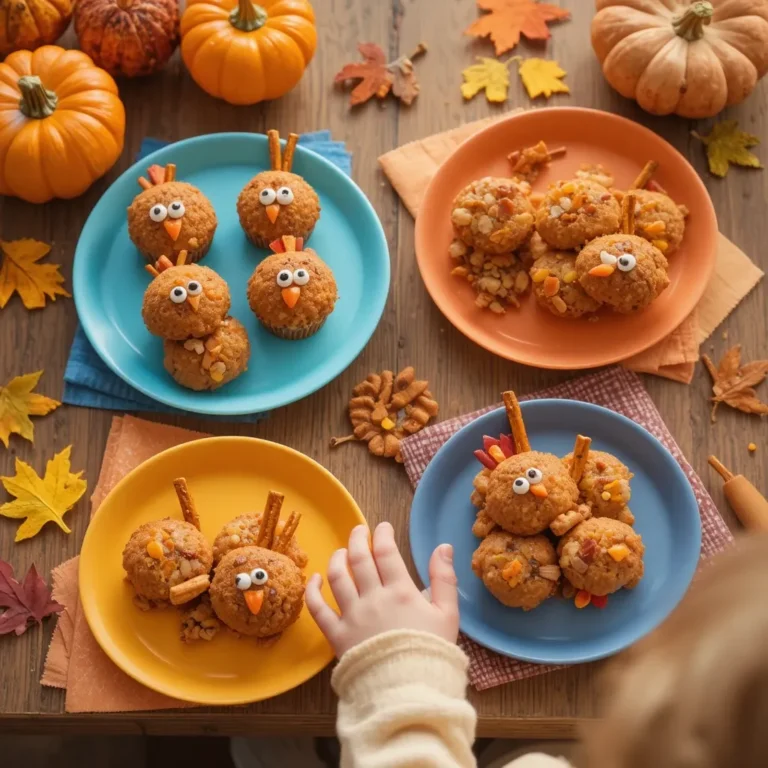
Thanksgiving Pies Chocolate The Ultimate Decadent Holiday Dessert
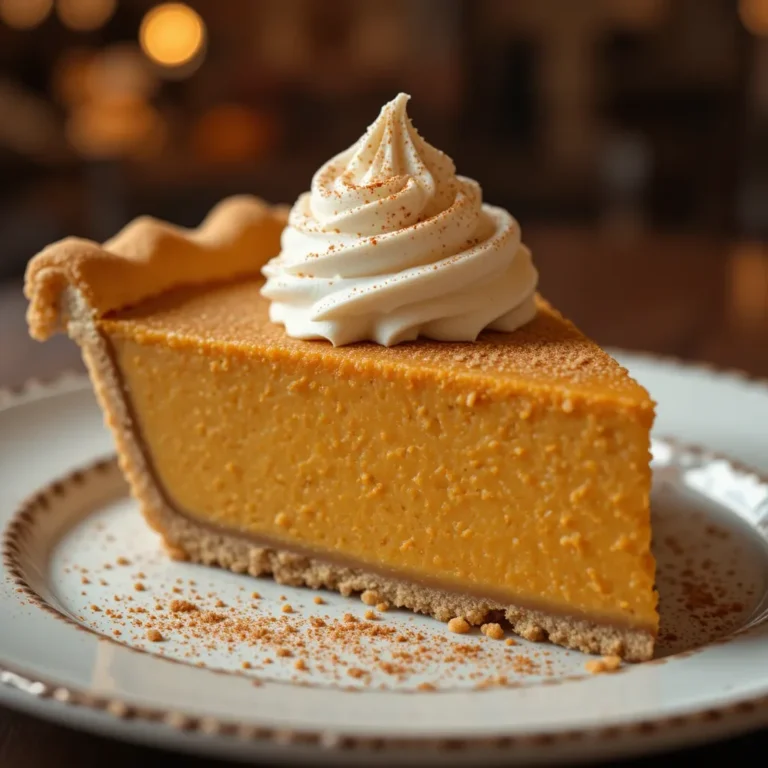
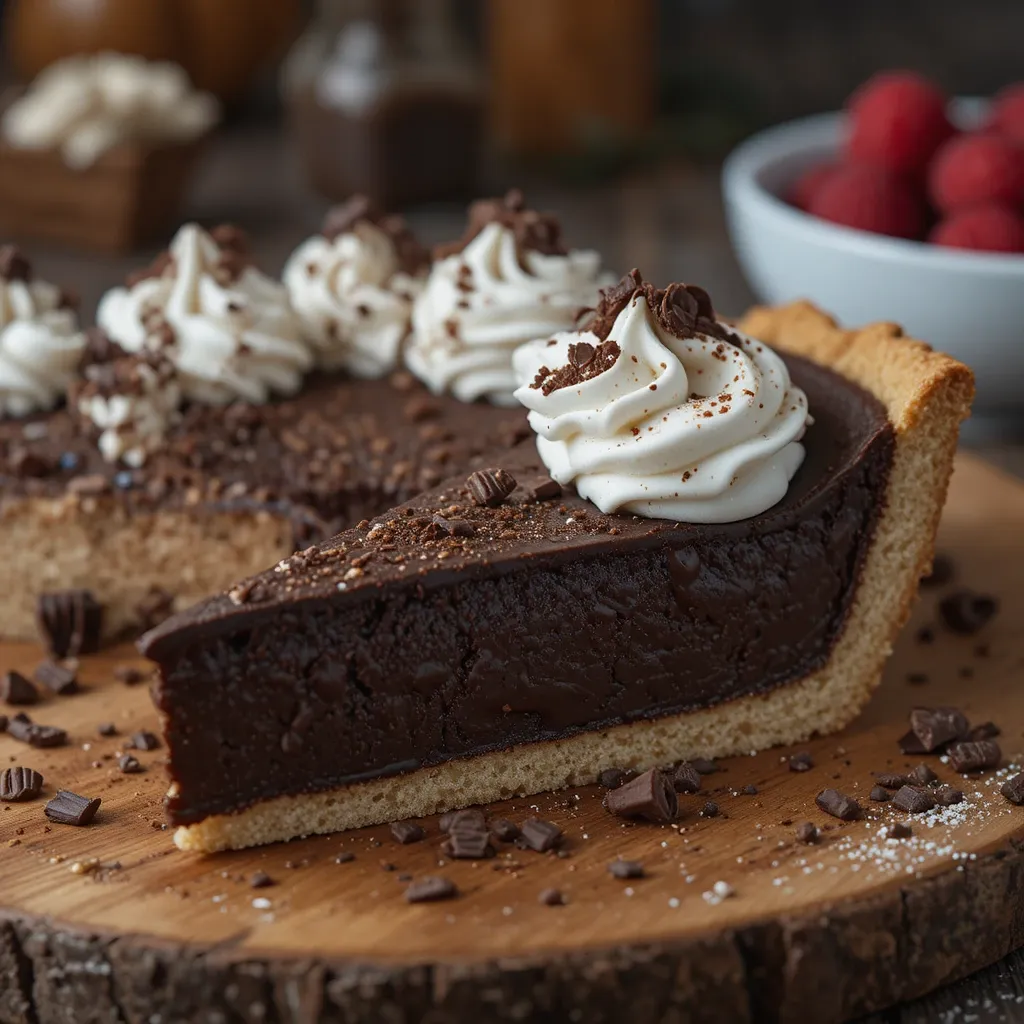
There’s something magical about slicing into a rich, velvety chocolate pie at Thanksgiving dinner. While everyone else fights over the last piece of pumpkin pie, I’m reaching for this showstopping chocolate masterpiece. This Thanksgiving chocolate pie combines a buttery, flaky crust with a silky-smooth chocolate filling that melts on your tongue.
Here’s a fun fact: chocolate desserts weren’t traditional at Thanksgiving until the 1950s, but now they’re stealing the spotlight! This pie is special because it’s surprisingly simple to make, requires just 20 minutes of prep time, and impresses every single guest. If you loved my Classic Pecan Pie, you’ll adore this chocolate version even more!
What is Thanksgiving Pies Chocolate?
Ever wonder why we call it “Thanksgiving Pies Chocolate” instead of just chocolate pie? Well, it’s because this isn’t your everyday chocolate dessert! This is the fancy, dressed-up version that deserves a spot on your holiday table next to all those traditional pies.
My grandmother used to say, “the way to a man’s heart is through his stomach,” and let me tell you, this chocolate pie has won over countless hearts at my Thanksgiving table. Ready to become the dessert hero at your holiday gathering?
Why You’ll Love This Thanksgiving Pies Chocolate
Rich, Decadent Chocolate Flavor
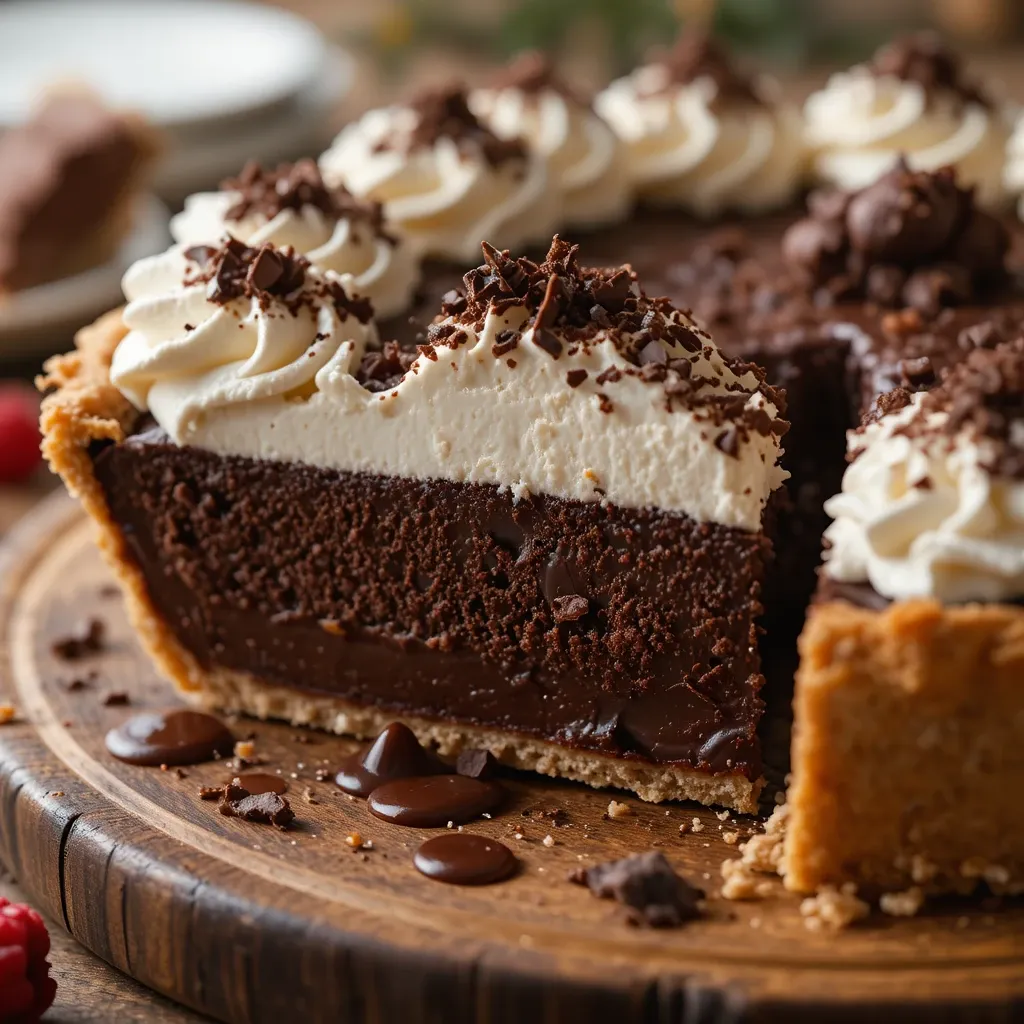
The star of this pie is the intensely chocolatey filling that strikes the perfect balance between rich and sweet. Made with high-quality dark chocolate and cocoa powder, every bite delivers that deep chocolate flavor you crave. The texture is incredibly smooth and creamy, almost like a chocolate silk pie, but with more body and character.
Budget-Friendly Holiday Baking
Making this Thanksgiving chocolate pie at home saves you serious money compared to bakery prices. A store-bought chocolate pie can cost $25-40, but you can make this masterpiece for under $12. Plus, you control the quality of ingredients, ensuring you’re using real butter, premium chocolate, and fresh cream instead of mystery fillers.
Customizable Toppings and Mix-Ins
The beauty of this pie lies in its versatility. Top it with billowy whipped cream, dust it with cocoa powder, add chocolate shavings, or drizzle with salted caramel. You can even fold in crushed peppermint or espresso powder to the filling for a unique twist. If you enjoyed my Chocolate Cream Cheese Brownies, you’ll love how this pie offers similar customization options. Go ahead and make this recipe your own – your kitchen, your rules!
How to Make Thanksgiving Pies Chocolate
Quick Overview
This Thanksgiving chocolate pie is easier than you think! The crust comes together in minutes, and the filling requires just a few simple steps of melting, whisking, and pouring. The result is a luxuriously creamy, deeply chocolatey pie with a satisfying texture that’s neither too dense nor too light.
Time Breakdown:
- Prep Time: 20 minutes
- Baking Time: 40 minutes
- Cooling Time: 3 hours (or overnight)
- Total Time: 4 hours
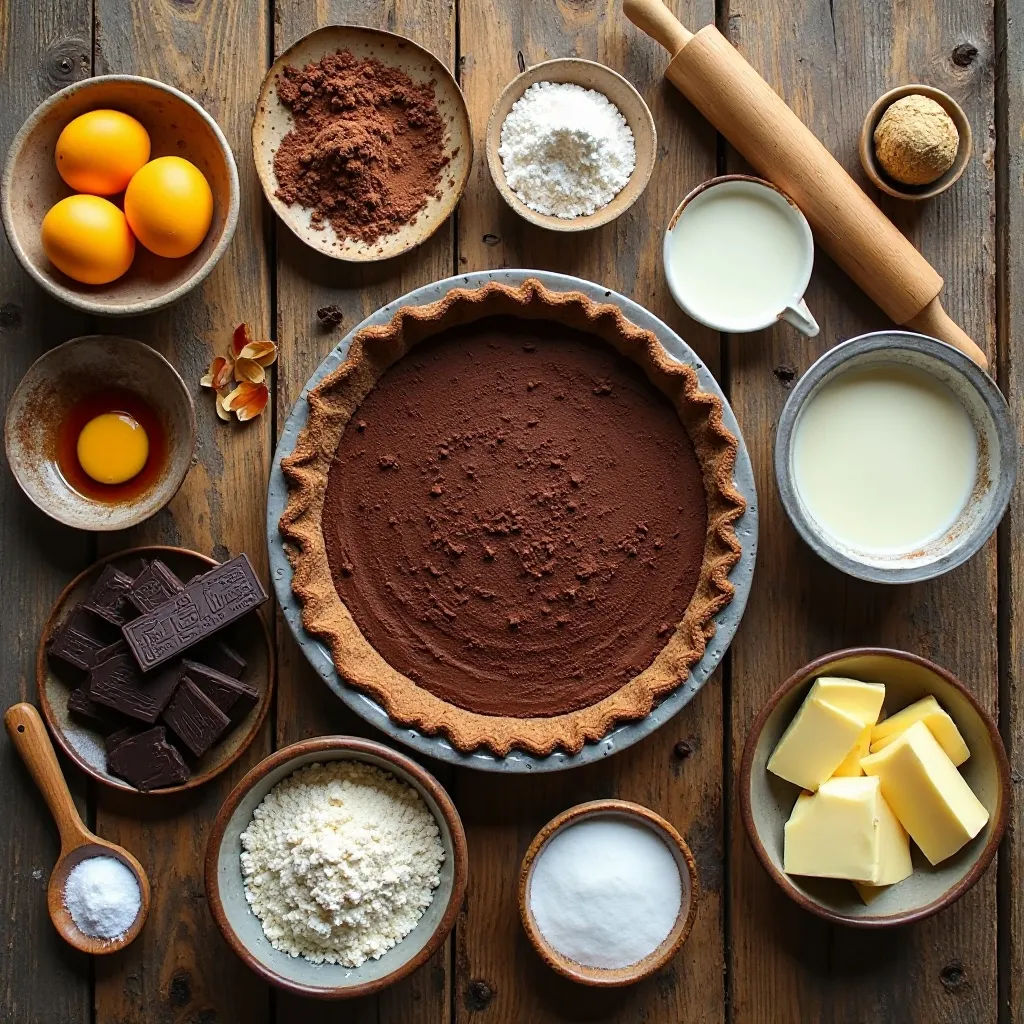
Key Ingredients for Thanksgiving Pies Chocolate
For the Crust:
- 1½ cups all-purpose flour
- ½ teaspoon salt
- 1 tablespoon sugar
- ½ cup (1 stick) cold unsalted butter, cubed
- 3-4 tablespoons ice water
For the Chocolate Filling:
- 8 ounces high-quality dark chocolate (60-70% cacao), chopped
- ¾ cup heavy cream
- ½ cup whole milk
- ¾ cup granulated sugar
- 3 tablespoons cornstarch
- 3 tablespoons unsweetened cocoa powder
- ¼ teaspoon salt
- 4 large egg yolks
- 3 tablespoons unsalted butter
- 1 teaspoon pure vanilla extract
For Topping:
- 1 cup heavy whipping cream
- 2 tablespoons powdered sugar
- Chocolate shavings or curls for garnish
Step-by-Step Instructions
Step 1: Prepare the Pie Crust
In a large bowl, whisk together the flour, salt, and sugar. Add the cold, cubed butter and use a pastry cutter or your fingertips to work the butter into the flour until the mixture resembles coarse crumbs with pea-sized pieces of butter. Drizzle in the ice water one tablespoon at a time, mixing gently until the dough just comes together. Form into a disk, wrap in plastic wrap, and refrigerate for 30 minutes.
Step 2: Roll and Blind Bake the Crust
Preheat your oven to 375°F (190°C). On a lightly floured surface, roll out the chilled dough into a 12-inch circle, about ⅛-inch thick. Carefully transfer it to a 9-inch pie pan, pressing it gently into the bottom and sides. Trim the excess, leaving a 1-inch overhang, then fold and crimp the edges. Prick the bottom with a fork, line with parchment paper, and fill with pie weights or dried beans. Bake for 20 minutes, remove the weights and parchment, then bake for another 10-12 minutes until golden brown. Let cool completely.
Step 3: Make the Chocolate Filling Base
In a medium saucepan, combine the heavy cream and milk over medium heat until it just begins to simmer. Remove from heat. In a separate bowl, whisk together the sugar, cornstarch, cocoa powder, and salt until well combined and no lumps remain. This step is crucial for a smooth filling!
Step 4: Temper the Egg Yolks
In another bowl, whisk the egg yolks until smooth. Gradually add about ½ cup of the hot cream mixture to the yolks while whisking constantly. This tempering process prevents the eggs from scrambling. Pour the egg mixture back into the saucepan with the remaining cream mixture, whisking continuously.
Step 5: Cook the Chocolate Custard
Return the saucepan to medium heat and whisk in the dry ingredients. Cook, whisking constantly, for 5-7 minutes until the mixture thickens considerably and begins to bubble. It should coat the back of a spoon and hold its shape when you draw a line through it. Remove from heat immediately.
Step 6: Add Chocolate and Butter
Add the chopped dark chocolate, butter, and vanilla extract to the hot custard. Let sit for 1 minute to allow the chocolate to melt, then whisk vigorously until completely smooth and glossy. The mixture should be silky and well-combined with no chocolate chunks remaining.
Step 7: Fill and Chill the Pie
Pour the chocolate filling into the cooled pie crust, using a spatula to spread it evenly. Gently tap the pie pan on the counter a few times to release any air bubbles. Press a piece of plastic wrap directly onto the surface of the filling to prevent a skin from forming. Refrigerate for at least 3 hours or overnight until completely set and firm.
Step 8: Make the Whipped Cream Topping
When ready to serve, beat the heavy whipping cream with powdered sugar in a chilled bowl using an electric mixer on medium-high speed. Beat for 2-3 minutes until stiff peaks form. Be careful not to overbeat, or you’ll end up with butter! Spread or pipe the whipped cream over the chilled pie and garnish with chocolate shavings.
What to Serve Thanksgiving Pies Chocolate With
This decadent chocolate pie pairs beautifully with several Thanksgiving staples. Serve it alongside:
- Strong coffee or espresso – The bitterness cuts through the sweetness perfectly
- Vanilla ice cream – A scoop on the side creates a delightful temperature contrast
- Fresh raspberry sauce – The tartness balances the rich chocolate
- Hot cocoa with marshmallows – For a chocolate-lover’s dream pairing
- Salted caramel sauce – Drizzle over each slice for extra indulgence
Don’t forget to serve this after your turkey, stuffing, and green bean casserole. Your guests will need a moment to digest before diving into dessert, so consider serving it 30 minutes after clearing the dinner plates.
Top Tips for Perfecting Thanksgiving Pies Chocolate
Use Quality Chocolate
The chocolate is the star here, so don’t skimp! Use high-quality dark chocolate bars (not chips) from brands like Ghirardelli, Lindt, or Guittard. Chocolate chips contain stabilizers that prevent smooth melting, so stick with chopped bars for the silkiest filling.
Keep Everything Cold for the Crust
Your butter, water, and even your bowl should be cold when making pie crust. Cold butter creates those flaky layers we all love. If your kitchen is warm, pop the flour in the freezer for 10 minutes before starting. Work quickly and handle the dough as little as possible to prevent the butter from melting.
Don’t Skip the Tempering Step
Tempering the eggs is essential! If you add cold eggs directly to hot liquid, they’ll scramble and ruin your silky filling. Always add a small amount of hot liquid to the eggs first, whisking constantly, before adding them back to the pan.
Whisk Constantly During Cooking
The filling can go from perfect to burnt in seconds. Keep whisking the entire time it’s on the heat, making sure to scrape the bottom and corners of the pan where the mixture tends to stick and thicken first.
Cool Completely Before Serving
I know it’s tempting, but patience is key! The pie needs at least 3 hours to set properly. Cutting into it too early will result in a runny mess. For best results, make this pie the night before Thanksgiving and let it chill overnight.
Prevent a Soggy Bottom
Blind baking the crust is non-negotiable. This pre-baking step ensures your crust stays crisp even after adding the wet filling. Make sure to prick the bottom with a fork to prevent bubbling, and use pie weights for even baking.
Storing and Reheating Tips
Refrigerator Storage:
This Thanksgiving chocolate pie must be stored in the refrigerator due to the dairy-based filling. Cover the pie loosely with plastic wrap or aluminum foil, or place it in a large, airtight container. It will stay fresh for up to 4 days. The whipped cream topping is best added fresh before serving, but if you’ve already topped it, the pie will still taste delicious for 2-3 days.
Freezing Instructions:
You can freeze this chocolate pie for up to 2 months! Wrap the unfrosted pie tightly in plastic wrap, then in aluminum foil. For best results, freeze it on a flat surface in the freezer. When ready to serve, thaw it in the refrigerator overnight. Add the whipped cream topping after thawing.
Reheating (Optional):
This pie is meant to be served chilled, so reheating isn’t necessary. However, if you prefer a slightly warmer pie, let individual slices sit at room temperature for 15-20 minutes before serving. Never microwave the entire pie, as this will make the filling runny and the crust soggy.
Make-Ahead Tip:
The crust can be baked up to 2 days in advance and stored at room temperature, wrapped tightly. The filled pie can be made 1-2 days ahead, making it perfect for stress-free holiday prep!
Common Baking Mistakes to Avoid
Mistake 1: Overworking the Pie Dough
Handling the dough too much develops gluten, resulting in a tough, chewy crust instead of a tender, flaky one. Mix just until the dough comes together, and stop! You should still see small pieces of butter throughout the dough.
Mistake 2: Using Chocolate Chips Instead of Bar Chocolate
Chocolate chips are formulated to hold their shape during baking, which means they don’t melt as smoothly. This can create a grainy texture in your filling. Always use chopped chocolate bars for the smoothest, most luxurious result.
Mistake 3: Not Measuring Cornstarch Correctly
Too much cornstarch creates a stiff, gummy filling, while too little leaves it runny. Always level off your measuring spoons with a knife for accuracy. When in doubt, err on the side of slightly less cornstarch.
Mistake 4: Cooking the Filling on Too High Heat
High heat can cause the eggs to scramble or the chocolate to seize. Medium heat is your friend here. It takes a few extra minutes, but the smooth, creamy result is worth the patience.
Mistake 5: Skipping the Plastic Wrap on the Filling
If you don’t press plastic wrap directly onto the filling’s surface while it cools, a thick skin will form. This skin doesn’t incorporate back into the filling and creates an unpleasant texture. Press that wrap right onto the chocolate!
Mistake 6: Adding Whipped Cream Too Early
Whipped cream starts to weep and separate after a few hours. For the prettiest presentation and best texture, add it no more than 2-3 hours before serving. You can always whip cream ahead and keep it refrigerated, then re-whip briefly before adding.
Mistake 7: Not Chilling Long Enough
A warm or lukewarm pie won’t slice cleanly and will look messy on the plate. The filling needs those full 3 hours (or overnight) to set properly. Use this time to prepare other dishes or simply relax before the big meal!
Nutrition Information
| Nutrient | Amount Per Serving |
|---|---|
| Serving Size | 1 slice (1/8 of pie) |
| Calories | 485 |
| Total Fat | 28g |
| Saturated Fat | 17g |
| Cholesterol | 145mg |
| Sodium | 215mg |
| Total Carbohydrates | 52g |
| Dietary Fiber | 3g |
| Sugars | 35g |
| Protein | 6g |
Note: Nutrition information is approximate and may vary based on specific ingredients used.
Frequently Asked Questions
Can I use milk chocolate instead of dark chocolate?
Yes, but your pie will be much sweeter and less complex in flavor. Dark chocolate (60-70% cacao) provides the best balance of sweetness and rich chocolate taste. If you prefer sweeter desserts, try using 50-60% cacao chocolate as a middle ground.
Why is my chocolate pie filling grainy?
Graininess usually comes from overheating the chocolate or using chocolate chips instead of chopped chocolate bars. Make sure to remove the custard from heat before adding the chocolate, and let it sit for a minute before stirring. This gentle melting prevents the chocolate from seizing.
Can I make this pie without eggs?
Eggs are crucial for the custard structure, but you can try using a cornstarch-only thickened filling (increase cornstarch to ½ cup) for an egg-free version. The texture will be different – more pudding-like than custard-like – but still delicious!
How do I prevent my pie crust from shrinking?
Shrinking happens when the dough is stretched too much when fitting it into the pan, or when it’s not chilled long enough. Always roll your dough slightly larger than needed, gently lift and press it into the pan (never stretch), and make sure to chill it for at least 30 minutes before baking.
Can I use a store-bought pie crust?
Absolutely! A store-bought refrigerated pie crust works perfectly and saves time. Just follow the package directions for blind baking. This is a great shortcut if you’re short on time during the busy holiday season.
What’s the best way to get clean pie slices?
Use a sharp knife dipped in hot water and wiped dry between each cut. The warm knife glides through the chocolate filling more easily, creating clean, beautiful slices. Also, make sure the pie is completely chilled and set before cutting.
Can I add coffee or espresso to enhance the chocolate flavor?
Yes! Adding 1-2 tablespoons of instant espresso powder to the filling amplifies the chocolate flavor without making it taste like coffee. It’s a professional baker’s secret that makes the chocolate taste even more intense and sophisticated.
Why did my pie filling turn out too runny?
This usually means the filling wasn’t cooked long enough to fully activate the cornstarch. It needs to come to a full boil and cook for at least 2 minutes at a boil while whisking. Also, make sure you’re measuring ingredients accurately – too little cornstarch will result in a runny filling.
Final Thoughts
This Thanksgiving pies chocolate recipe has become a cherished tradition at my holiday table, and I hope it becomes one at yours too. There’s something incredibly satisfying about creating a dessert from scratch that rivals anything you’d find in a fancy bakery. The look on your guests’ faces when they take that first bite – pure chocolate bliss – makes every minute of preparation worthwhile.
Don’t be intimidated by making pie from scratch. Yes, it requires a few steps, but none of them are complicated. Take your time, follow the instructions, and trust the process. Before you know it, you’ll be pulling a gorgeous, professional-looking chocolate pie from your oven.
This Thanksgiving, give yourself permission to skip the traditional pumpkin pie (or make both – no judgment here!) and try something that’ll have everyone asking for seconds. Happy baking, and happy Thanksgiving!