The Best Thanksgiving Sugar Cookies for Teachers
Last Tuesday morning, I was frantically trying to figure out what to give my daughter’s teacher for Thanksgiving. Store-bought cards felt impersonal, and let’s be honest—another coffee mug wasn’t going to cut it. Then it hit me: homemade Thanksgiving sugar cookies for teachers. Not just any cookies, though. These needed to be special, beautiful, and actually delicious (because teachers deserve better than rock-hard decorated cookies that look pretty but taste like cardboard).
I’ve been making these Thanksgiving sugar cookies for teachers for three years now, and they’ve become my go-to teacher appreciation gift every November. The first time I made them, I was so nervous about the icing that I almost gave up.
But once I figured out the right consistency—trust me, it’s all about that perfect flood icing—everything clicked into place. Now teachers at my kids’ school actually request them!
Here’s the thing: these cookies are approachable enough for beginners but impressive enough to make you look like a baking superstar. And the best part? You can make them ahead of time (lifesaver for busy parents), and they actually stay soft and delicious for days.
What Makes These Thanksgiving Sugar Cookies for Teachers So Special
Real talk: I’ve tried probably fifteen different sugar cookie recipes over the years. Some spread too much. Others turned out dry and crumbly. A few tasted so bland they needed to be drowned in frosting just to be edible.
This recipe is different. After testing this recipe eight times (yes, eight!), I finally nailed the perfect combination of buttery flavor, soft texture, and cookies that hold their shape beautifully when decorated. These aren’t your average sugar cookies—they’re the kind that make teachers text you asking for the recipe.
The secret? A combination of butter and a touch of cream cheese in the dough. It sounds weird, I know, but it creates this incredible tender crumb that stays soft for days. Most sugar cookie recipes use only butter, but I find that adding cream cheese gives you that bakery-style texture without any weird tang.

Why You’ll Love This Recipe
It’s Actually Easy (I Promise!)
Listen, I’m not a professional baker. My kitchen is usually a disaster zone, and I’ve definitely had my share of Pinterest fails. But these cookies? They’re genuinely beginner-friendly. The dough comes together in one bowl, doesn’t require chilling for hours (just 30 minutes!), and rolls out like a dream. I timed myself last week—from start to finished decorated cookies, it took me about 2 hours and 15 minutes, including baking time.
Teachers Genuinely Appreciate Homemade
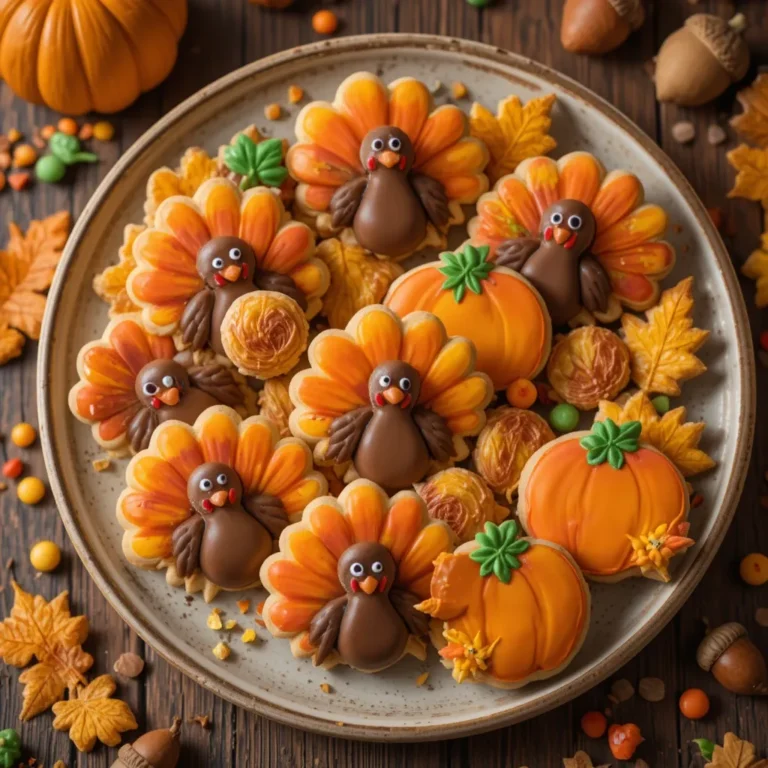
After making these Thanksgiving sugar cookies for teachers for three years, I can tell you: homemade treats stand out. My daughter’s kindergarten teacher told me she keeps one of these cookies on her desk and nibbles on it throughout the day. That made my whole week! There’s something personal about giving food you made with your own hands, especially when it’s decorated with autumn leaves, turkeys, and acorns.
They Stay Soft and Delicious
You know that disappointing moment when decorated cookies turn hard as rocks after a day? Won’t happen here. I’ve left these cookies in an airtight container for five days (purely for research purposes, obviously), and they stayed soft and chewy. The secret is in the ingredient ratios and not overbaking them. You’ll know they’re done when the edges are barely starting to turn golden—they’ll look slightly underdone, but trust the process.
Perfect for Class Parties Too
While I originally created these as Thanksgiving sugar cookies for teachers, they’re also perfect for classroom parties. Last year, I made 60 of these for my son’s third-grade harvest celebration, and they disappeared in about ten minutes. Kids love decorating them too, which brings me to my next point…
Kid Helpers Welcome
My 7-year-old can cut out shapes with cookie cutters (supervised, of course), and even my 4-year-old helps with sprinkling colored sugar. It’s become a fun family tradition the week before Thanksgiving break. Just be prepared for your kitchen to look like a glitter bomb exploded—but honestly, that’s part of the charm.
Recipe Card
| Recipe Details | |
|---|---|
| Prep Time | 20 minutes (plus 30 min chilling) |
| Cook Time | 9 minutes per batch |
| Total Time | 2 hours (including decorating) |
| Servings | 24-30 cookies (depending on cutter size) |
| Difficulty | Easy |
| Calories | 145 per cookie |
| Protein | 2g |
| Carbs | 19g |
| Fat | 7g |
Thanksgiving Sugar Cookies for Teachers Ingredients
Before we dive into the ingredient list, let me say this: don’t skimp on the butter quality here. I learned this the hard way when I tried using margarine once (never again). Real butter makes a massive difference in flavor. Also, I always use pure vanilla extract, not imitation—your cookies will thank you.
For the Cookie Dough:
- 3 cups all-purpose flour (I spoon and level mine—don’t pack it)
- 1½ teaspoons baking powder
- ½ teaspoon salt
- 1 cup (2 sticks) unsalted butter, softened
- 2 ounces cream cheese, softened (this is the secret weapon!)
- 1 cup granulated sugar
- 1 large egg, room temperature
- 2 teaspoons pure vanilla extract
- ½ teaspoon almond extract (optional but SO good)
For the Royal Icing:
- 4 cups powdered sugar, sifted
- 3 tablespoons meringue powder
- 5-6 tablespoons water (adjust for consistency)
- Gel food coloring (orange, yellow, red, brown for Thanksgiving)
For Decoration:
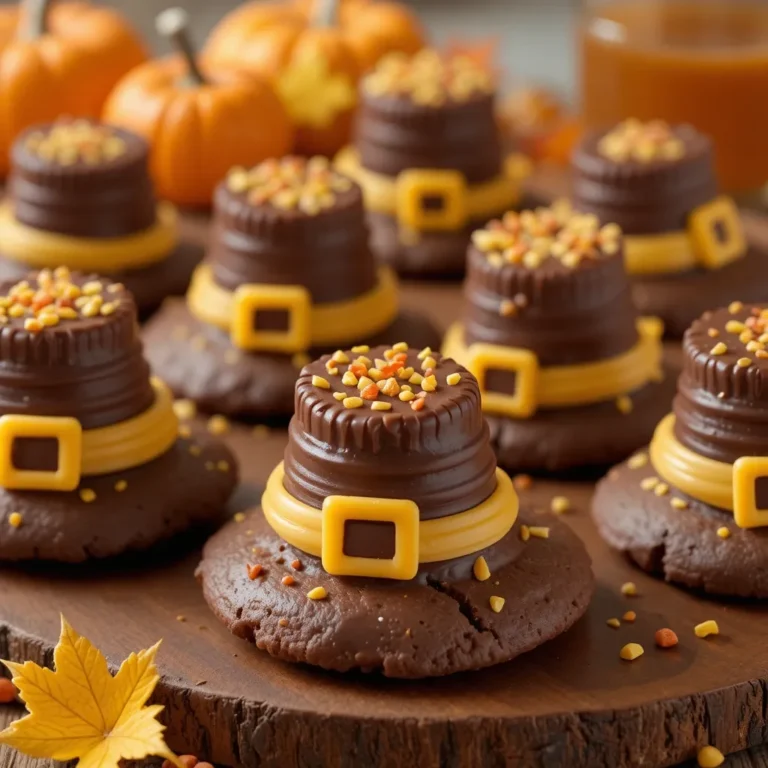
- Thanksgiving-themed cookie cutters (leaves, turkeys, pumpkins, acorns)
- Colored sprinkles or sanding sugar
- Edible markers (optional, for adding teacher names)

My Ingredient Notes
The cream cheese addition is non-negotiable for me. It creates a softer, more tender cookie that doesn’t dry out. And about the almond extract? It adds this subtle depth that people can’t quite put their finger on but makes the cookies taste more “bakery-style.” Don’t skip it if you have it!
How to Make Perfect Thanksgiving Sugar Cookies
Quick Overview
Here’s what you’re in for: we’ll cream butter and sugar until fluffy (this matters more than you think), mix in dry ingredients, chill the dough briefly, roll and cut shapes, bake until barely golden, then decorate with royal icing. The whole process is straightforward, and I’ll walk you through exactly what to look for at each stage.
Step-by-Step Instructions
Step 1: Prep Your Workspace Preheat your oven to 350°F and line two baking sheets with parchment paper. (Pro tip: I always use parchment paper instead of greasing the pan—cookies release perfectly and cleanup is a breeze.) While the oven heats, make sure your butter and cream cheese are truly softened. I leave mine on the counter for about 45 minutes before starting. You should be able to press your finger into it easily.
Step 2: Mix the Dry Ingredients In a medium bowl, whisk together flour, baking powder, and salt. Set this aside. I know it seems like an extra step, but mixing your dry ingredients first ensures everything is evenly distributed. I once forgot the baking powder entirely because I didn’t do this step—rookie mistake that resulted in flat, dense cookies.
Step 3: Cream Butter, Cream Cheese, and Sugar In a large mixing bowl (I use my stand mixer with the paddle attachment), beat the butter, cream cheese, and sugar on medium-high speed for 3-4 minutes. This is crucial—you want it light, fluffy, and pale in color. Don’t rush this step! I set a timer because it’s easy to underestimate how long 3 minutes actually is. The mixture should look almost like frosting when it’s ready.
Step 4: Add Egg and Extracts Beat in the egg, vanilla extract, and almond extract (if using) until fully combined, about 1 minute. Scrape down the sides of the bowl to make sure everything is incorporated. The mixture will look slightly curdled—that’s totally normal and exactly what should happen.
Step 5: Incorporate Dry Ingredients With the mixer on low speed, gradually add the flour mixture. Mix just until the dough comes together—you’ll see it pull away from the sides of the bowl. This usually takes about 30-45 seconds. Don’t overmix! Overmixing develops the gluten and makes tough cookies (I learned this the hard way during my second attempt).
Step 6: Chill the Dough Divide the dough in half, flatten each half into a disc, wrap in plastic wrap, and refrigerate for 30 minutes. I used to skip this step when I was in a hurry, and the dough was sticky and impossible to work with. Trust me, those 30 minutes make everything so much easier. The dough should feel firm but not rock-hard when you’re ready to roll it out.
Step 7: Roll and Cut Shapes Lightly flour your work surface and rolling pin. Roll the dough to about ¼-inch thickness. (If it cracks at the edges, let it warm up for 2-3 minutes—it’s too cold.) Cut out shapes using your Thanksgiving cookie cutters and place them on prepared baking sheets, spacing them about 2 inches apart. They don’t spread much, but give them a little room. Re-roll scraps and repeat—I usually get about 24-30 cookies total depending on cutter size.
Step 8: Bake to Perfection Bake for 8-10 minutes. Here’s the thing: you want to pull them out when they’re barely starting to turn golden at the edges. The centers will look slightly underdone and puffy—that’s perfect! They’ll continue cooking on the hot baking sheet for a minute or two after you remove them from the oven. I set my timer for 8 minutes and check them, then usually bake for 1-2 minutes more. Every oven is different, so watch carefully on your first batch.
Step 9: Cool Completely Let cookies cool on the baking sheet for 5 minutes (they’re too fragile to move immediately), then transfer to a wire rack to cool completely. And I mean completely—if they’re even slightly warm, the icing will melt and slide right off. I usually let mine cool for at least 45 minutes. Sometimes I bake them in the evening and decorate the next day.
Step 10: Make Royal Icing In a large bowl, whisk together powdered sugar and meringue powder. Add 5 tablespoons of water and beat with an electric mixer on low speed for 7-8 minutes. The icing should be thick and hold stiff peaks (this is “outline consistency”). To make flood icing for filling in shapes, thin a portion with water, one teaspoon at a time, until it’s the consistency of shampoo. When you drizzle it, the lines should disappear within 10-15 seconds.
Step 11: Decorate Your Cookies Divide icing into separate bowls and tint with gel food colors—I use orange, yellow, red, and brown for Thanksgiving themes. Fit piping bags with small round tips (I use Wilton #2 or #3) and outline each cookie first with stiff icing. Let the outline set for about 10 minutes, then fill in with flood icing.
You can add details with contrasting colors while the base is still wet, or wait for it to dry completely and pipe details on top. If you want to add a teacher’s name, let the icing dry completely (at least 4 hours) and use edible markers.

What to Serve With Thanksgiving Sugar Cookies
Okay, so technically these Thanksgiving sugar cookies for teachers are a gift, not part of a meal—but if you’re making extras for your family (and you should!), here’s how I serve them:
With Hot Apple Cider This is my favorite pairing. The spiced warmth of apple cider complements the buttery sweetness of these cookies perfectly. I made this combo for our family on Thanksgiving morning last year, and it’s become a new tradition.
As Part of a Dessert Spread If you’re hosting Thanksgiving dinner, add these to your dessert table alongside pumpkin pie and apple crisp. They add a fun, colorful element, and kids especially love them. Plus, they’re less filling than heavy pies, so guests can enjoy them without feeling stuffed.
In Teacher Gift Boxes This is how I typically present these: I arrange 4-6 decorated cookies in a clear cellophane bag, tie it with raffia or orange ribbon, and attach a tag that says “Happy Thanksgiving from [Child’s Name].” Simple but thoughtful. You could also package them in small boxes lined with tissue paper for a fancier presentation.
Coffee or Tea Party These cookies are fantastic with a cup of coffee or tea. The sweetness pairs beautifully with slightly bitter coffee—my husband steals these from our teacher gifts all the time and eats them with his morning coffee.
Pro Tips from My Kitchen
Can I make the dough ahead of time?
Absolutely! I actually prefer making the dough a day in advance. Wrap it well in plastic wrap and refrigerate for up to 3 days, or freeze for up to 2 months. If frozen, thaw overnight in the refrigerator before rolling. I’ve noticed the flavor actually develops and improves slightly after a day in the fridge—something about the ingredients mingling together.
Use room temperature ingredients
This isn’t just fussy baker talk—it actually matters! When your butter, cream cheese, and egg are at room temperature, they cream together much more easily and create a smoother, more uniform dough. Cold ingredients can lead to a lumpy mixture that doesn’t incorporate properly. I take mine out of the fridge about an hour before I start baking.
The flood icing consistency trick
Getting flood icing right took me forever to master. Here’s my foolproof test: drizzle a line of icing back into the bowl. If it disappears and smooths out within 10-15 seconds, you’ve nailed it. Too thick, and it won’t spread properly (you’ll get bumpy surfaces). Too thin, and it’ll slide right off the cookie edges. Add water literally one teaspoon at a time—it’s easier to thin icing than to thicken it.
Don’t skip the cream cheese
I tested this recipe both with and without cream cheese, and honestly, the version without it just doesn’t compare. The cream cheese adds moisture and tenderness without making the cookies cakey or soft. They still have structure and hold their shape beautifully, but they’re not dry or crumbly like some sugar cookies can be.
My timing secret for multiple batches
Here’s how I efficiently make several batches: While batch one bakes, I’m cutting shapes from the second portion of dough. While batch one cools, batch two bakes, and I’m preparing the icing. This assembly-line approach cuts down on total time significantly. It took me 23 minutes the first time I made these cookies, but now I can bang out three dozen in under two hours, including decorating.
Let icing dry completely
I know it’s tempting to package these up right away, but patience pays off here. Royal icing needs at least 4-6 hours to fully harden (overnight is even better). If you try to stack or package them too soon, all your beautiful decorating work will smudge. I usually bake and decorate in the evening, let them sit overnight on the counter uncovered, then package them the next morning.
Storing and Reheating Tips
Room Temperature Storage
Once the icing is completely dry, store these Thanksgiving sugar cookies for teachers in an airtight container at room temperature for up to 1 week. Layer them between sheets of parchment paper to prevent sticking. I use a large plastic container with a tight-fitting lid, and they stay perfectly soft. My kitchen smelled like vanilla and butter for days after making these last week—not complaining!
Freezing Instructions
Want to make these way in advance? You can freeze the baked, undecorated cookies for up to 3 months. Wrap them well in plastic wrap, then place in freezer bags. Thaw at room temperature before decorating. I don’t recommend freezing decorated cookies because the icing can get sticky and the colors might bleed slightly when thawing.
Make-Ahead Strategy
Here’s my game plan for stress-free teacher gifts: I make and freeze the dough 2-3 weeks before Thanksgiving. Then, the weekend before Thanksgiving break, I bake and decorate the cookies. They stay fresh at room temperature until I hand them out on the last day of school before break. This way, I’m not frantically baking and decorating the night before!
How Long Do They Last?
Honestly? In my experience, these cookies stay fresh and soft for up to a week in an airtight container. But they never last that long in my house! Between my kids sneaking them and my husband “quality testing,” they’re usually gone within 3-4 days.
Variations to Try
Simple Glaze Instead of Royal Icing
If royal icing intimidates you (I get it—I was terrified of it at first), you can make a simple glaze instead. Mix 2 cups powdered sugar with 3-4 tablespoons milk and ½ teaspoon vanilla until smooth. Dip cookies face-down into the glaze, let excess drip off, and place on a wire rack to set. Sprinkle with colored sugar while still wet. It’s less precise but still looks festive!
Add Spices to the Dough
For extra Thanksgiving flavor, add ½ teaspoon cinnamon and ¼ teaspoon nutmeg to the dry ingredients. I tested this variation last year, and while I prefer the plain vanilla version for versatility, the spiced cookies are delicious and have that cozy autumn vibe. My mother-in-law actually preferred the spiced version!
Chocolate Dipped Version
After the cookies are completely cooled (but before decorating), dip half of each cookie in melted chocolate and let it set. Then decorate the non-chocolate half with icing. This creates a beautiful contrast and adds another layer of flavor. Kids especially love this version!
Recipe FAQs
Why did my cookies spread too much?
If your cookies spread excessively, your dough was probably too warm when you put it in the oven. Make sure you chill the dough for the full 30 minutes, and if your kitchen is warm, chill the cut shapes on the baking sheet for 10 minutes before baking. Also, check that you’re measuring flour correctly—too little flour can cause spreading.
Can I use regular food coloring instead of gel?
You can, but gel colors are much better for royal icing. Regular liquid food coloring adds extra moisture to the icing, which can throw off the consistency. I once used liquid coloring and had to add so much to get vivid colors that my icing became too runny. Gel colors are concentrated, so you need just a tiny amount, and they don’t affect the icing texture.
How do I prevent air bubbles in my flood icing?
After mixing your flood icing, let it sit for about 10 minutes, then gently stir (don’t whisk—that adds more bubbles). Any remaining bubbles can be popped with a toothpick right after flooding the cookie. I keep a toothpick handy while decorating and just drag it through any bubbles I see. They pop instantly!
Can I use cookie cutters other than Thanksgiving shapes?
Of course! While I designed these as Thanksgiving sugar cookies for teachers, the dough works beautifully for any occasion. I’ve used this same recipe for Christmas cookies, birthday cookies, and even wedding shower cookies. It’s my universal go-to sugar cookie recipe because it’s so reliable.
My icing won’t hold its shape—what went wrong?
Your icing is too thin. Add more powdered sugar, a tablespoon at a time, until it holds stiff peaks. For outline icing, you want it thick enough that when you lift the beater, the icing stays in a peak for several seconds before slowly settling. It should feel thick and almost paste-like.
Do I have to use meringue powder?
Meringue powder helps royal icing set hard and shiny, and it’s more food-safe than using raw egg whites. You can find it at craft stores in the baking aisle or on Amazon. I tried making royal icing with egg whites once and it never quite set properly—it stayed slightly tacky. Meringue powder is worth the investment if you plan to decorate cookies regularly.
Why These Cookies Matter
Here’s the honest truth: teachers work incredibly hard, especially during that exhausting stretch before Thanksgiving break when everyone (kids and adults alike) is ready for a vacation. Taking the time to make homemade Thanksgiving sugar cookies for teachers shows genuine appreciation in a way that feels personal and thoughtful.
Last year, my son’s teacher told me she saved the acorn-shaped cookie I made and kept it on her desk for a week before finally eating it. She said it made her smile every time she looked at it. That’s the magic of homemade gifts—they carry a piece of your time and care with them.
In my opinion, these cookies make the biggest difference because they’re not just delicious—they’re beautiful, they show effort, and they tell teachers “I see you, I appreciate you, and I thought you deserved something special.” And really, isn’t that what we all want to feel during the holidays?
Ready to Start Baking?
So there you have it—my tried-and-true recipe for Thanksgiving sugar cookies for teachers that actually taste as good as they look! The first time I made these, I was so nervous about messing up the decorating that I almost didn’t try. But I’m so glad I pushed through that fear because these cookies have brought so much joy—to teachers, to my kids, and honestly, to me too. There’s something deeply satisfying about creating something beautiful with your own hands.
I’d love to hear how your cookies turn out! Are you making these for teachers, or are you planning to enjoy them at your own Thanksgiving celebration? Do you have a favorite cookie cutter shape? Drop a comment below and let me know—I read every single one!