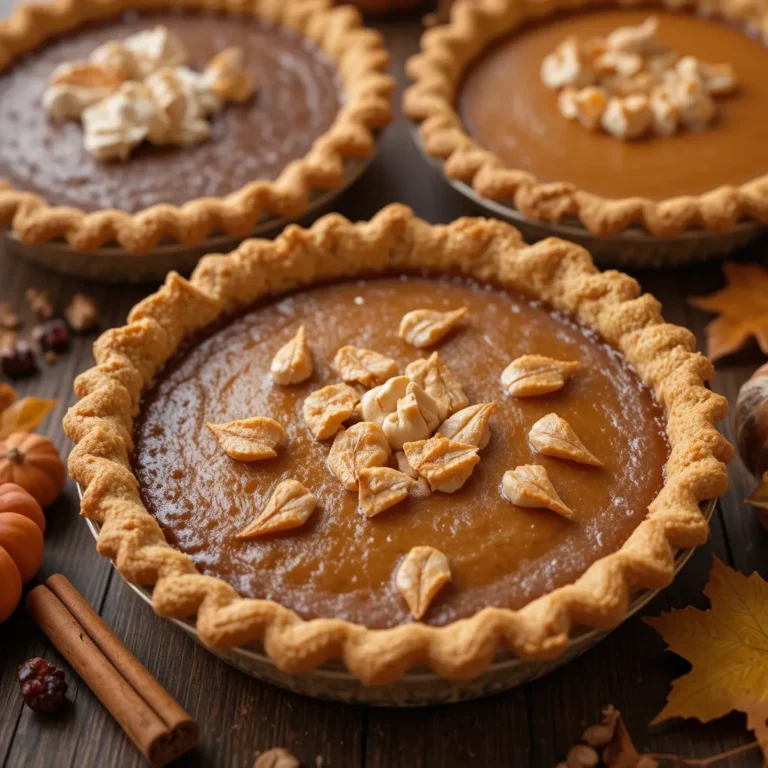
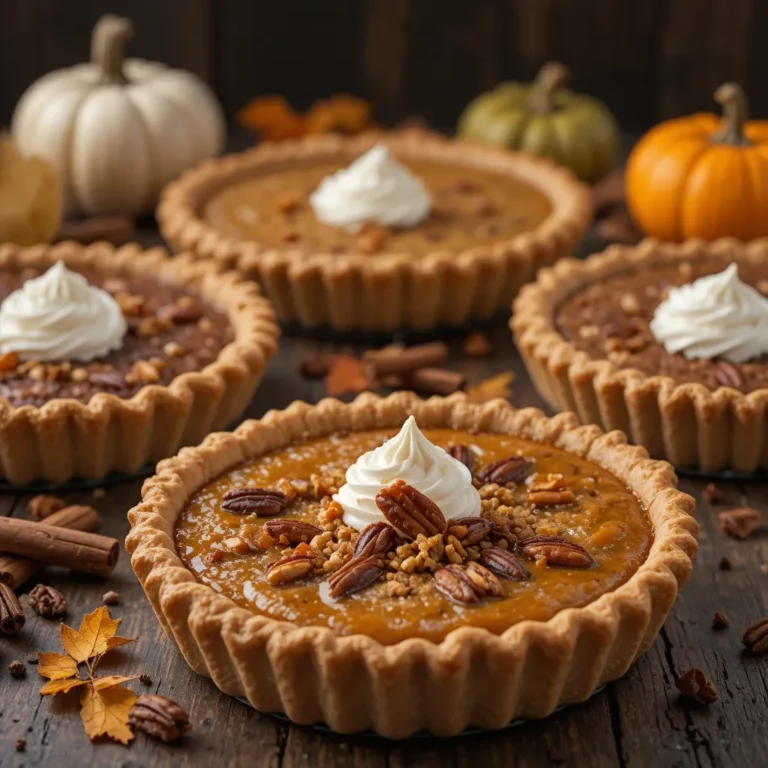
The Best Thanksgiving Pies Cherry You’ll Ever Make
Picture this: It’s Thanksgiving morning, and while everyone else is stressing over the turkey, I’m pulling a gorgeous cherry pie from the oven. The ruby-red filling is bubbling through the lattice crust, and my kitchen smells like a holiday dream. Honestly? This thanksgiving pies cherry recipe has saved me more times than I can count.
The first time I made this cherry pie for Thanksgiving, I was terrified. I’d always stuck to the traditional pumpkin because, well, that’s what you’re “supposed” to do, right? But my aunt brought a cherry pie one year, and it disappeared faster than the turkey. That’s when I realized thanksgiving pies cherry desserts don’t have to play second fiddle to pumpkin. They can be the star.
I’ve been perfecting this recipe for six years now, and let me tell you – it’s become my most requested dish. My brother-in-law literally texts me in October to make sure I’m bringing “that cherry pie” to Thanksgiving dinner. The secret? A combination of tart and sweet cherries, a touch of almond extract, and a buttery, flaky crust that shatters perfectly with each bite.
Why Cherry Pie Belongs on Your Thanksgiving Table
Here’s the thing about thanksgiving pies cherry options – they bring something different to a table that’s often dominated by spiced pumpkin and pecan flavors. Don’t get me wrong, I love those classics, but there’s something refreshing about the bright, fruity tang of cherries cutting through all those rich, heavy dishes.
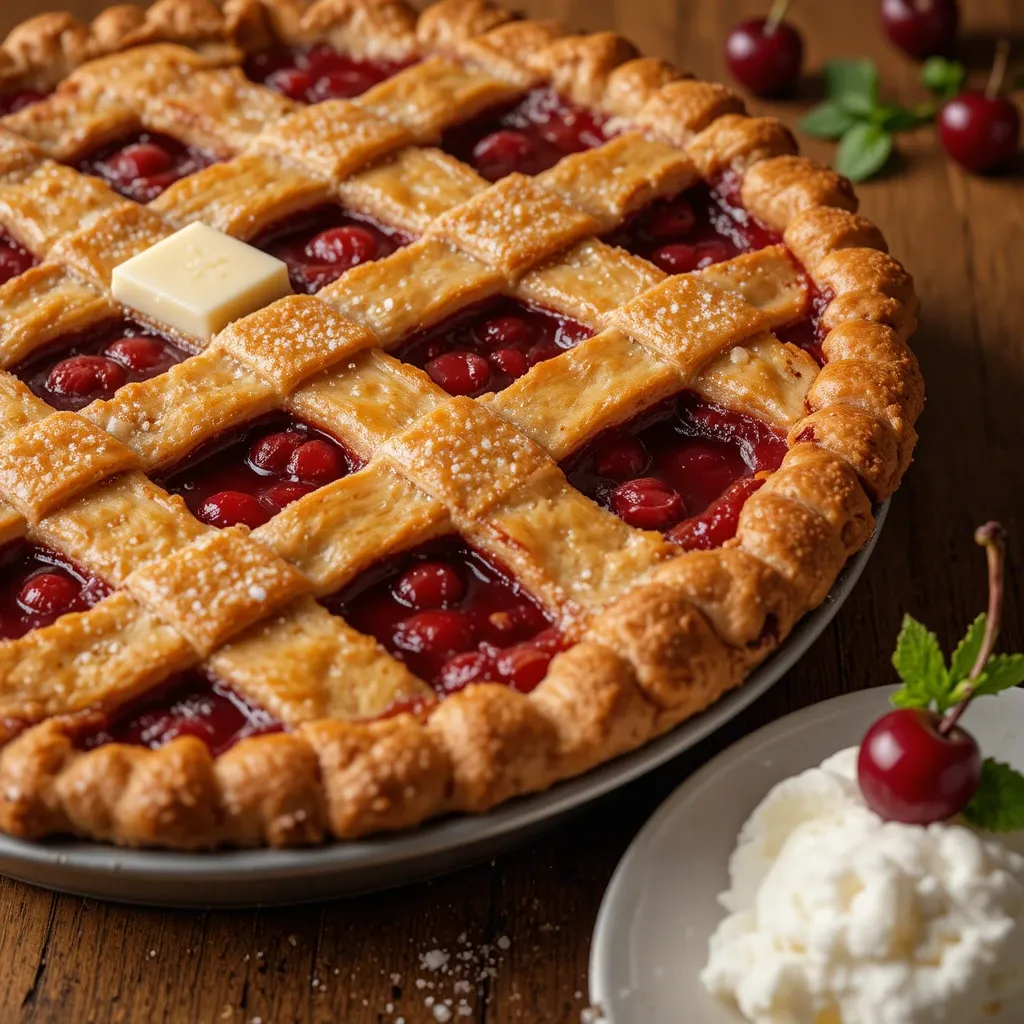
Cherry pie also has this gorgeous visual appeal. When you set it down on the Thanksgiving table with that deep red filling peeking through a golden lattice crust, people literally gasp. I’ve noticed it photographs beautifully too, which makes your holiday Instagram game strong (not that we’re competitive about Thanksgiving or anything).
In my opinion, what really makes cherry pie special for Thanksgiving is its versatility. It’s fancy enough for the main event but casual enough that nobody feels intimidated. Plus, unlike pumpkin pie which can feel heavy after a massive turkey dinner, cherry pie feels lighter and more refreshing. You can actually eat a slice without feeling like you need to unbutton your pants.
What Makes This Cherry Pie Recipe a Winner
It Works Every Single Time
After testing this recipe probably twenty times over the years, I can confidently say it’s foolproof. The filling sets perfectly without being gummy, the crust stays crisp on the bottom, and you don’t need any fancy equipment. I’ve made this in my tiny apartment kitchen with a wonky oven, and it still turned out gorgeous.
You Can Make It Ahead
Real talk – Thanksgiving is chaotic enough without trying to bake pies the day of. I usually make this thanksgiving pies cherry dessert two days before Thanksgiving. It actually tastes better after sitting for a day because the flavors meld together. The first time I discovered this, it changed my entire holiday prep game.
The Flavor Balance Is Perfect
Most recipes call for either all tart cherries or all sweet cherries, but I find using both creates this incredible depth of flavor. The tart cherries give you that classic “cherry pie” tanginess, while the sweet cherries add natural sweetness so you don’t need to dump in tons of sugar. Took me three years to figure out that ratio, but it was worth every test pie.
Your House Will Smell Amazing
I’m not exaggerating when I say my neighbors have knocked on my door asking what I’m baking when I make this pie. The combination of butter, cherries, and that hint of almond extract creates this incredible aroma that screams “holiday baking.” My kitchen smelled incredible for two days after I made this last Thanksgiving.
It’s Actually Budget-Friendly
Unlike some fancy Thanksgiving recipes that require expensive ingredients, this pie won’t break the bank. You can use frozen cherries (which I actually prefer for consistency), and the rest is just flour, butter, sugar, and a few pantry staples. I calculated it once, and the whole pie costs me about $12 to make, which feeds 8-10 people.
Thanksgiving Pies Cherry Recipe Card
| Recipe Details | |
|---|---|
| Prep Time | 30 minutes |
| Cook Time | 55 minutes |
| Total Time | 1 hour 25 minutes (plus cooling) |
| Servings | 8-10 slices |
| Difficulty | Medium |
| Calories | 380 per slice |
| Protein | 4g |
| Carbs | 52g |
| Fat | 18g |
Ingredients for Thanksgiving Pies Cherry Perfection
Before we dive into the ingredient list, let me tell you about the one ingredient you absolutely cannot skip – the almond extract. I know it seems like a tiny detail, but it makes cherries taste more like themselves. Trust me on this. I once forgot to add it, and the pie was good but not spectacular. That little bottle is the secret weapon.
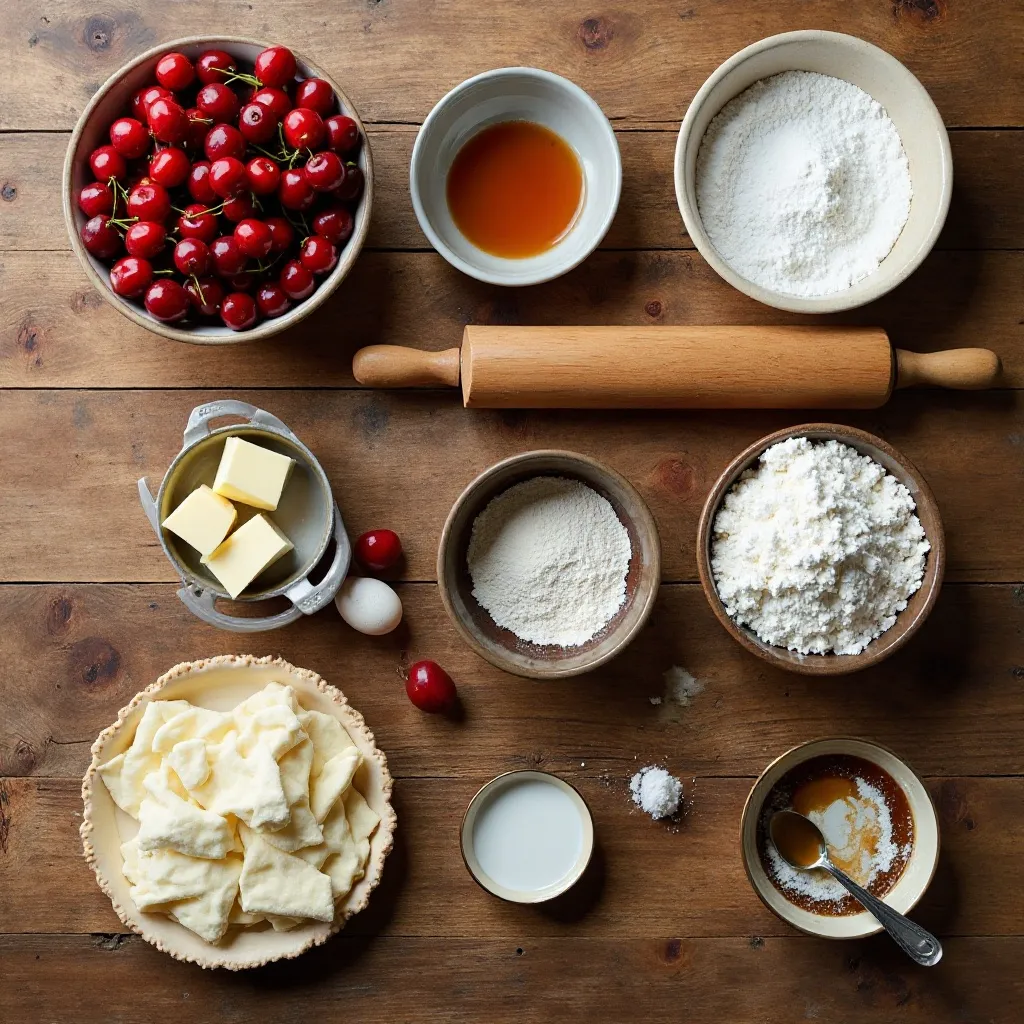
For the Crust:
- 2½ cups all-purpose flour (I use King Arthur, but any brand works)
- 2 tablespoons granulated sugar
- 1 teaspoon salt
- 1 cup (2 sticks) cold unsalted butter, cut into cubes
- 6-8 tablespoons ice water
- 1 egg (for egg wash)
- Coarse sugar for sprinkling
For the Cherry Filling:
- 5 cups pitted cherries (I use 3 cups tart, 2 cups sweet – fresh or frozen)
- 1 cup granulated sugar
- ¼ cup cornstarch
- ¼ teaspoon salt
- 1 tablespoon fresh lemon juice
- 1 teaspoon almond extract
- 2 tablespoons unsalted butter, cut into small pieces
- ½ teaspoon vanilla extract
Ingredient Notes from My Kitchen:
If you’re using frozen cherries (which I do 90% of the time), don’t thaw them completely. I let them sit out for about 15 minutes so they’re slightly softened but still mostly frozen. This prevents them from releasing too much juice and making your filling runny.
The cornstarch is crucial for getting that perfect, sliceable consistency. I’ve tried tapioca starch and flour, but cornstarch gives you the cleanest, clearest filling. When I first made this, I used flour and it turned out cloudy and gummy – learned that lesson the hard way.
How to Make the Perfect Thanksgiving Cherry Pie
Let me walk you through this process step by step. I’ve made this enough times that I can almost do it with my eyes closed, but I remember how intimidating it felt the first time. Don’t stress – you’ve got this.
Step 1: Make the Pie Crust
In a large bowl, whisk together the flour, sugar, and salt. Add your cold butter cubes and use a pastry cutter (or two forks, or even your hands) to work the butter into the flour until it looks like coarse crumbs with some pea-sized pieces of butter remaining. This took me about 5 minutes the first time, but now I can do it in 3.
Drizzle in the ice water, one tablespoon at a time, mixing gently with a fork. You’ll know it’s ready when the dough just comes together and holds its shape when you press it. Don’t overmix – a few dry spots are fine. Divide the dough in half, shape each half into a disk, wrap in plastic wrap, and refrigerate for at least 1 hour. (Pro tip: I often make this the night before.)
Step 2: Prepare the Cherry Filling
While your dough chills, let’s make the filling. In a large bowl, toss together the cherries, sugar, cornstarch, and salt. Make sure every cherry gets coated with the cornstarch mixture – this is what helps it thicken up beautifully. Add the lemon juice, almond extract, and vanilla extract, and stir to combine.
Here’s something I learned the hard way: let this mixture sit for about 15 minutes. The cherries will start releasing juice, and you’ll see the cornstarch beginning to dissolve. This creates a smoother filling and helps prevent that raw cornstarch taste.
Step 3: Roll Out the Bottom Crust
Take one disk of dough from the fridge and let it sit on the counter for about 5 minutes – this makes it easier to roll. On a floured surface, roll it out into a 12-inch circle, about ⅛-inch thick. I always roll from the center outward, rotating the dough as I go to keep it circular.
Carefully transfer the dough to a 9-inch pie pan. I like to fold it in quarters, place the point in the center of the pan, and unfold it. Gently press it into the bottom and sides, letting any excess hang over the edge. Don’t stretch it, or it’ll shrink when it bakes (learned that one the hard way too).
Step 4: Fill and Top Your Pie
Pour the cherry filling into the crust, spreading it evenly. Dot the top with those small pieces of butter – they add richness and help the filling bubble beautifully. Now for the fun part: the lattice top.
Roll out your second disk of dough to the same size. Cut it into 1-inch strips using a pizza cutter or knife. Lay half the strips across the pie in one direction, then weave the remaining strips perpendicular to create that classic lattice pattern. The first time I did this, it took me 20 minutes and looked wonky. Now it takes 8 minutes and looks professional. Practice makes perfect.
Trim the edges, fold the overhang under itself, and crimp with a fork or your fingers. Beat that egg with a tablespoon of water and brush it over the lattice and edges. Sprinkle with coarse sugar for that gorgeous sparkle.
Step 5: Bake to Golden Perfection
Preheat your oven to 425°F. Place the pie on a baking sheet (trust me, this catches drips and makes cleanup easier). Bake for 20 minutes at 425°F, then reduce the temperature to 350°F and continue baking for 35-45 minutes.
You’ll know it’s done when the crust is deep golden brown and the filling is bubbling vigorously through the lattice. Those bubbles should be thick and slow, not thin and watery. If the edges start browning too quickly, tent them with foil strips – I usually do this around the 35-minute mark.
The hardest part? Letting it cool completely before slicing. I know the temptation to cut into it while it’s warm, but the filling needs at least 4 hours to set properly. When I tried slicing one warm during my second attempt, the filling just ran all over the plate. Patience is key here.

My Favorite Ways to Serve This Beauty
Here’s how I typically serve this thanksgiving pies cherry masterpiece at our family gathering: I wait until everyone’s had their turkey and sides, let them digest for about 30 minutes, and then bring out dessert with fresh whipped cream and vanilla ice cream options.
The vanilla ice cream is non-negotiable in my house. The cold, creamy vanilla against the warm, tart cherries is absolute perfection. I usually make sure to have it slightly softened so it melts a little when it hits the warm pie.
I’ve also served this with:
- A dollop of mascarpone cheese sweetened with a little honey
- A scoop of butter pecan ice cream (my dad’s favorite combination)
- Just a simple dusting of powdered sugar for a more elegant presentation
For our last Thanksgiving, I actually made two of these pies and served one slightly warm with ice cream and one completely chilled with whipped cream. People could choose their preference, and it was a huge hit. The warm version disappeared first, for what it’s worth.
Pro Tips from Six Years of Cherry Pie Making
Should I use fresh or frozen cherries?
Honestly? I almost always use frozen. They’re available year-round, already pitted, and flash-frozen at peak ripeness. Fresh cherries can be amazing in July, but by November, frozen cherries are more reliable. I buy mine from Costco in the big bag and keep them in the freezer all year.
The secret to a crisp bottom crust
This was my biggest struggle for years. The trick is to place your pie on the lowest oven rack and use a dark or glass pie pan, which conducts heat better than ceramic. I also sometimes blind bake my crust for 10 minutes before adding the filling, but that’s only if I’m feeling extra particular.
Don’t skip the lemon juice
The lemon juice doesn’t make the pie taste lemony – it brightens the cherry flavor and balances the sweetness. I once made this without it (forgot it at the store), and the pie tasted flat and one-dimensional. That little bit of acid makes everything pop.
My foolproof timing trick
Set a timer on your phone for when your pie should come out of the oven, but also set one for 30 minutes before that to check on it. This is when I usually add the foil to protect the edges. Ovens vary so much, and this prevents that panic of realizing your crust is getting too dark.
Use room temperature ingredients for the filling
This might seem fussy, but I’ve noticed that if my cherries are completely frozen solid when I mix the filling, the cornstarch doesn’t incorporate as well. I let them sit out for 15-20 minutes before mixing everything together. Makes a real difference in texture.
The test for doneness
Besides looking for those thick bubbles, I also look at the color of the crust. It should be deep golden brown, not pale yellow. When I first started making this, I took pies out too early because I was nervous about burning them. A properly baked pie is deeply golden and smells incredible.
Storing and Reheating Your Thanksgiving Cherry Pie
One of the best things about this pie is how well it stores. I actually think it tastes better on day two or three because the flavors have time to meld together.
At Room Temperature
If you’re going to eat the pie within two days, you can leave it at room temperature, loosely covered with foil or plastic wrap. I usually just leave it in the pie pan with a clean kitchen towel draped over the top. The crust stays crisper this way than if you refrigerate it immediately.
Refrigerator Storage
For longer storage, cover the pie tightly with plastic wrap or aluminum foil and refrigerate. It’ll keep for up to 5 days. When I make this two days before Thanksgiving, I let it cool completely, cover it tightly, and stick it in the fridge. It actually slices better when it’s been chilled.
Freezing Instructions
You can absolutely freeze this pie! I’ve done it both ways – freezing the unbaked pie and freezing baked slices. For an unbaked pie, assemble everything, wrap it tightly in plastic wrap and then foil, and freeze for up to 3 months. Bake from frozen, adding about 15-20 minutes to the baking time.
For baked pie, let it cool completely, cut it into slices, wrap each slice individually, and freeze in a freezer bag. This is perfect for when you want just one slice later – I’ve been known to pull out a frozen slice and eat it for breakfast with my coffee.
Best Way to Reheat
If you want to serve the pie warm (and I highly recommend it), reheat individual slices in a 350°F oven for 10-15 minutes. Don’t use the microwave – it makes the crust soggy. I learned this lesson when my impatient brother-in-law microwaved a slice at our first Thanksgiving with this pie. The horror on everyone’s faces when he bit into that soggy crust!
For a whole pie, tent it with foil and reheat at 325°F for about 25-30 minutes until warmed through.
Recipe FAQs from My Kitchen Experience
Can I make the dough ahead of time?
Absolutely! I make my pie dough up to 3 days in advance and keep it refrigerated, or freeze it for up to 3 months. Just thaw overnight in the fridge before using. This is actually my standard approach for Thanksgiving week.
What if I don’t want to do a lattice crust?
No problem at all. You can do a full top crust (just cut a few slits for steam to escape), or even a crumble topping. I’ve done both when I’m short on time or just not feeling the lattice. The pie tastes exactly the same.
Can I reduce the sugar?
You can reduce it to ¾ cup if you’re using mostly sweet cherries, but I wouldn’t go lower than that. The sugar isn’t just for sweetness – it also helps create that gorgeous, glossy filling. I tried making a “healthier” version once with just ½ cup of sugar, and it was too tart for most people.
My filling is too runny – what happened?
This usually means either the cornstarch didn’t have enough time to activate (the pie needs to bake until those thick bubbles appear), or you cut into it too soon. The filling needs at least 4 hours to fully set. I know it’s torture to wait, but it’s necessary.
Can I use cherry pie filling from a can?
You can, but honestly, this homemade filling is so much better and just as easy. Canned filling has a weird, gummy texture and artificial flavor that I can taste immediately. Once you’ve made it from scratch, you won’t want to go back.
Why This Recipe Has Become My Thanksgiving Tradition
I never expected a cherry pie to become my signature Thanksgiving dish, but here we are. There’s something deeply satisfying about pulling this gorgeous pie from the oven, setting it on the cooling rack, and hearing my family’s reactions when they see it.
My mom still brings her famous pumpkin pie (it’s tradition, after all), but she’s admitted that she sneaks a slice of my cherry pie before dinner is even over. That’s the ultimate compliment in my book.
This thanksgiving pies cherry recipe represents everything I love about holiday baking – it’s beautiful, delicious, and brings people together. Plus, it’s given me this reputation as “the pie person” in my family, which I’m not mad about.
If you’re thinking about adding something new to your Thanksgiving dessert spread this year, I’m telling you – make this pie. Your family will remember it. They’ll request it next year. And you’ll be so glad you stepped outside the pumpkin pie box.
Now go forth and bake something beautiful! And when everyone asks for the recipe (they will), send them here. I’d love to hear how yours turns out – comment below with your results, questions, or even your own cherry pie tips. Happy Thanksgiving, friends!