9 Baby in Bloom Cake Ideas That Will WOW Your Shower Guests
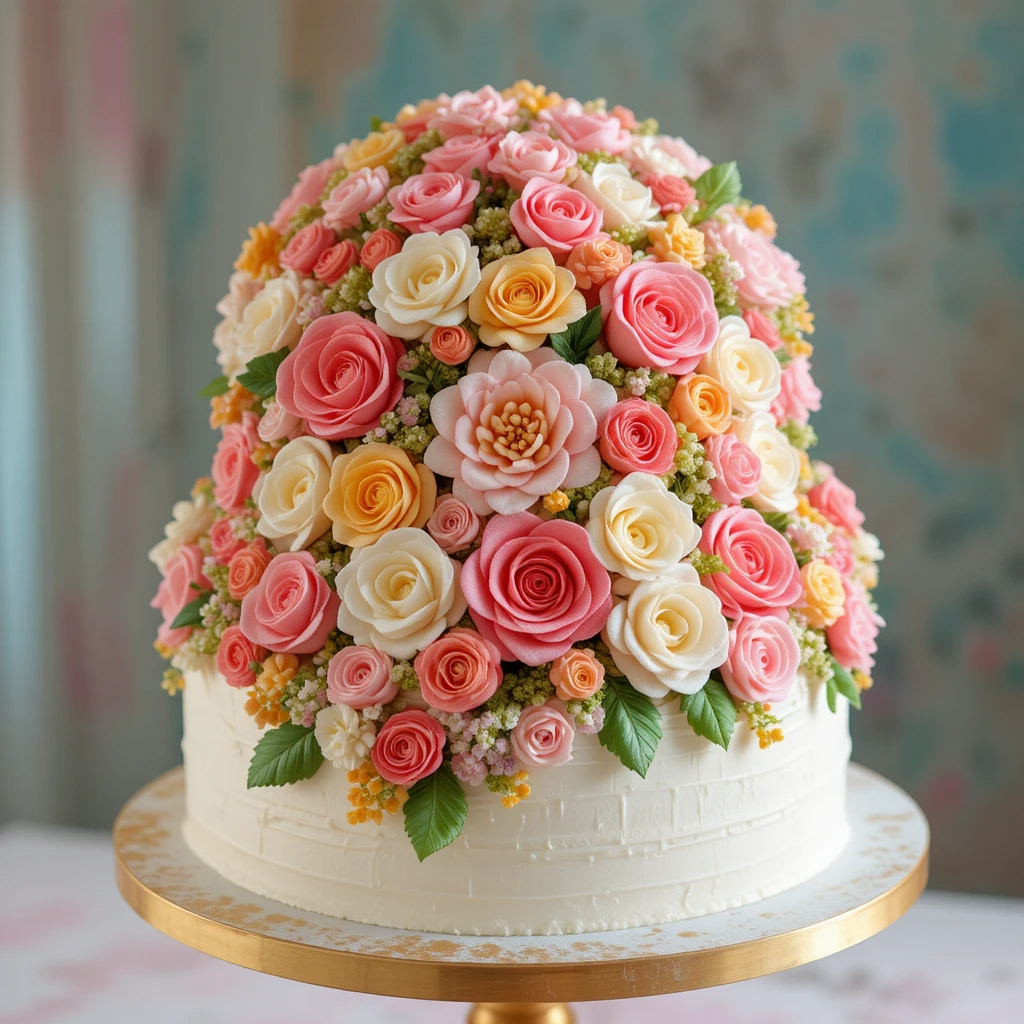
There’s something absolutely magical about celebrating new life with a cake adorned in beautiful blooms. Baby in bloom cakes have stolen my heart ever since I created my first one for my best friend’s shower last spring. These gorgeous floral creations capture the sweetness of a new arrival with delicate petals, soft colors, and that fresh garden feeling that makes everyone stop and say “wow!”
Whether you’re planning a spring shower or simply love the timeless beauty of flowers, these cakes bring together elegance and celebration in the most delicious way.
This recipe was produced fully by AI and has not been tested by us. Our goal is to be honest and helpful, and readers who tried other recipes from the site have shared encouraging experiences.
What is a Baby in Bloom Cake?
Ever wondered why we call these stunning creations “baby in bloom” cakes? The name is actually quite poetic when you think about it. Just like a flower blooming in spring, a new baby represents fresh beginnings, growth, and natural beauty unfolding before our eyes.
These cakes celebrate that precious new life with gardens of buttercream flowers, fresh petals, and botanical designs that make guests feel like they’ve stepped into a secret garden.
After all, they say the way to everyone’s heart is through something sweet, and these cakes definitely deliver! Trust me, once you try making one, you’ll understand why they’re the hottest trend in baby shower desserts.
Why You’ll Love Baby in Bloom Cakes
The main highlight that makes these cakes extraordinary is their stunning visual appeal combined with incredible flavor. Unlike fondant-heavy designs that look pretty but taste bland, baby in bloom cakes showcase buttercream flowers that are both gorgeous and absolutely delicious. Every single element is meant to be eaten and enjoyed!
Making a baby in bloom cake at home saves you a fortune compared to ordering from bakeries. Professional floral cakes can cost upwards of $150-300, but when you create your own, you’re looking at maybe $30-50 in ingredients. That’s serious savings that you can put toward other baby shower essentials. Plus, you have complete control over flavors, colors, and decorations to match your exact vision.
The flavorful components that make these cakes special include the variety of buttercream flavors you can infuse with vanilla, almond, lemon, or even rose water. Combined with moist cake layers in complementary flavors like strawberry, lemon, or classic vanilla, every bite is a celebration. If you loved my recent Strawberry Dream Cake tutorial, you’ll appreciate how these floral techniques take your decorating skills to the next level. Ready to create something truly memorable? Let’s dive into these ten stunning baby in bloom cake ideas!
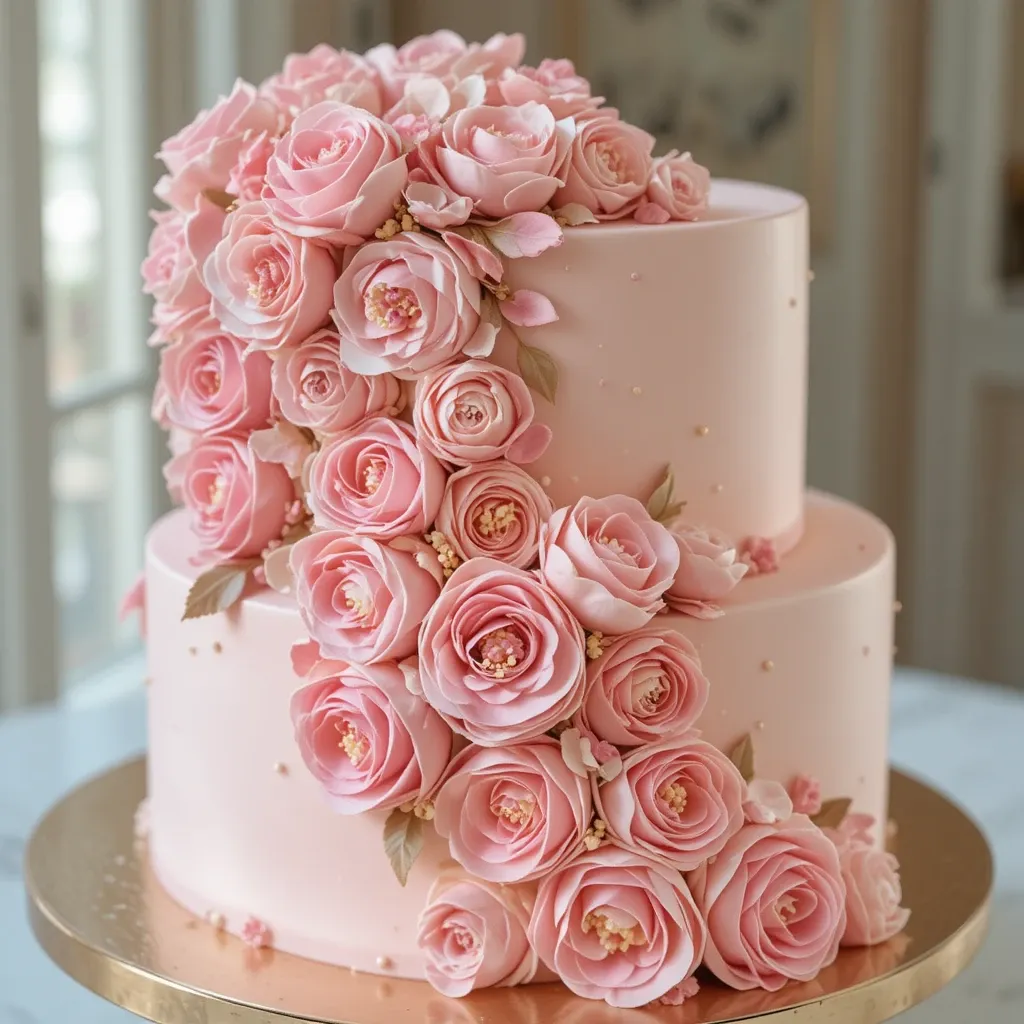
Recipe 1: Classic Pink Peony Baby in Bloom Cake
Quick Overview
This timeless design features soft pink buttercream peonies cascading down a two-tier cake. Perfect for celebrating a baby girl, this cake combines simple elegance with show-stopping beauty. The delicate peony flowers are surprisingly easy to pipe once you get the technique down.
Total Time: 3 hours 30 minutes Prep Time: 45 minutes Baking Time: 35 minutes Decorating Time: 2 hours 10 minutes Serves: 25-30 people
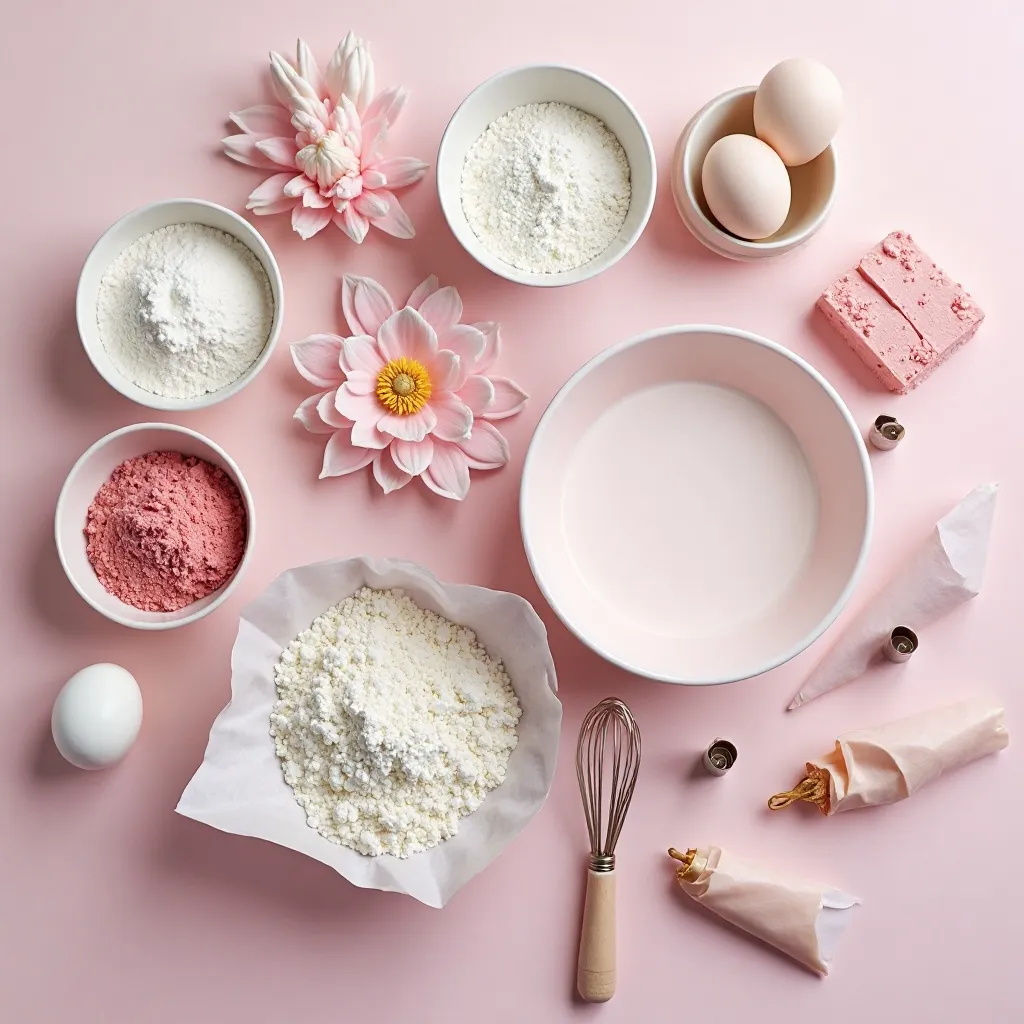
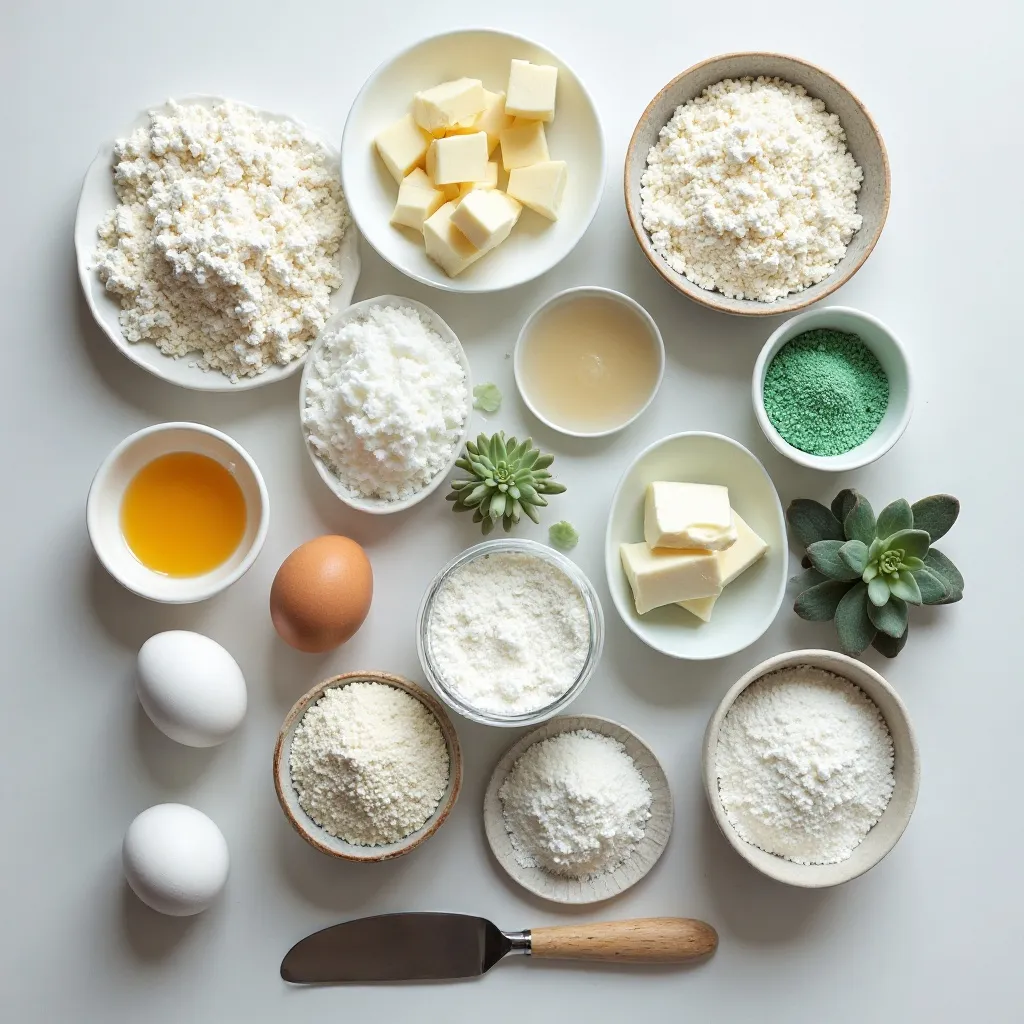
Key Ingredients for Classic Pink Peony Baby in Bloom Cake
For the Vanilla Cake:
- 3 cups all-purpose flour
- 2 ½ cups granulated sugar
- 1 cup unsalted butter, softened
- 4 large eggs, room temperature
- 1 cup whole milk
- 1 cup sour cream
- 2 teaspoons pure vanilla extract
- 1 tablespoon baking powder
- ½ teaspoon salt
For the Vanilla Buttercream:
- 2 cups unsalted butter, softened
- 8 cups powdered sugar
- ¼ cup heavy cream
- 2 teaspoons vanilla extract
- Pink gel food coloring (soft pink and deep rose shades)
For Decoration:
- 6-inch and 10-inch round cake pans
- Piping bags and petal tips (104, 125)
- Cake dowels for support
- Fresh baby’s breath (optional)
Step-by-Step Instructions
How to Make the Cake Layers
Preheat your oven to 350°F and prepare your cake pans by greasing them well and lining the bottoms with parchment paper. This prevents sticking and ensures beautiful layers.
In a large mixing bowl, cream together the softened butter and sugar until light and fluffy, about 4-5 minutes. This step is crucial for creating that tender crumb everyone loves. Add eggs one at a time, beating well after each addition.
In a separate bowl, whisk together flour, baking powder, and salt. In another bowl, combine milk, sour cream, and vanilla extract. Add the dry ingredients to the butter mixture alternately with the wet ingredients, beginning and ending with dry. Mix just until combined to avoid overworking the batter.
Divide the batter between your prepared pans, filling them about two-thirds full. Bake for 30-35 minutes or until a toothpick inserted in the center comes out clean. Let cakes cool in pans for 10 minutes before turning out onto wire racks to cool completely.
Making the Buttercream
Beat softened butter in a large bowl for about 5 minutes until pale and fluffy. Gradually add powdered sugar one cup at a time, beating well between additions. Add heavy cream and vanilla extract, then beat on high speed for another 3-4 minutes until light and airy.
Divide buttercream into portions. Keep one portion white, tint another soft pink, and make a smaller portion deep rose. This gives you variety for creating dimensional flowers.
Assembling and Decorating
Level your cake layers with a serrated knife to create flat surfaces. Place your bottom layer on a cake board, spread a generous layer of buttercream on top, then add the second layer. Repeat for your top tier.
Apply a thin crumb coat to both tiers and refrigerate for 30 minutes. This seals in crumbs and makes the final coat smooth. Apply your final coat of buttercream in soft pink, using a bench scraper for clean edges.
Stack your tiers using dowels for support. Insert 4-5 dowels into the bottom tier, mark the height, remove and cut them level, then reinsert and place the top tier carefully.
Now for the fun part! Using petal tip 104 or 125, pipe buttercream peonies directly onto the cake. Start at the center with a tight spiral, then pipe overlapping petals moving outward. Create at least 10-15 flowers in varying shades of pink, clustering them to cascade down one side of the cake.
Add small dots of buttercream between flowers using a round tip. Tuck in sprigs of fresh baby’s breath for an organic touch. Refrigerate until ready to serve.
What to Serve This Cake With
This elegant cake pairs beautifully with:
- Sparkling pink lemonade or champagne punch
- Fresh berry parfaits in individual cups
- Delicate cucumber sandwiches for a garden party feel
- Raspberry or strawberry compote on the side for extra fruity flavor
Top Tips for Perfecting Classic Pink Peony Baby in Bloom Cake
Use room temperature ingredients for the smoothest cake batter. Cold ingredients don’t blend as well and can create a denser texture.
Practice piping peonies on parchment paper before decorating your cake. Once you nail the technique, you’ll feel so much more confident. You can even refrigerate your practice flowers and transfer them onto the cake!
Don’t overmix your cake batter once you add the flour. Overmixing develops gluten which creates tough, dense cake instead of tender, fluffy layers.
If your buttercream is too soft to hold shape, refrigerate it for 15-20 minutes. If it’s too stiff, add a teaspoon of cream at a time until you reach the perfect consistency.
Chill your cake between decorating steps. Cold buttercream is easier to work with and creates cleaner lines and more defined flowers.
Storing and Reheating Tips
Store this cake in the refrigerator covered loosely with plastic wrap for up to 5 days. The buttercream will firm up when cold, so let the cake sit at room temperature for 1-2 hours before serving for the best texture and flavor.
You can freeze unfrosted cake layers wrapped tightly in plastic wrap and aluminum foil for up to 3 months. Thaw overnight in the refrigerator before frosting. Leftover frosted cake can also be frozen for up to 2 months, though the texture of flowers may soften slightly upon thawing.
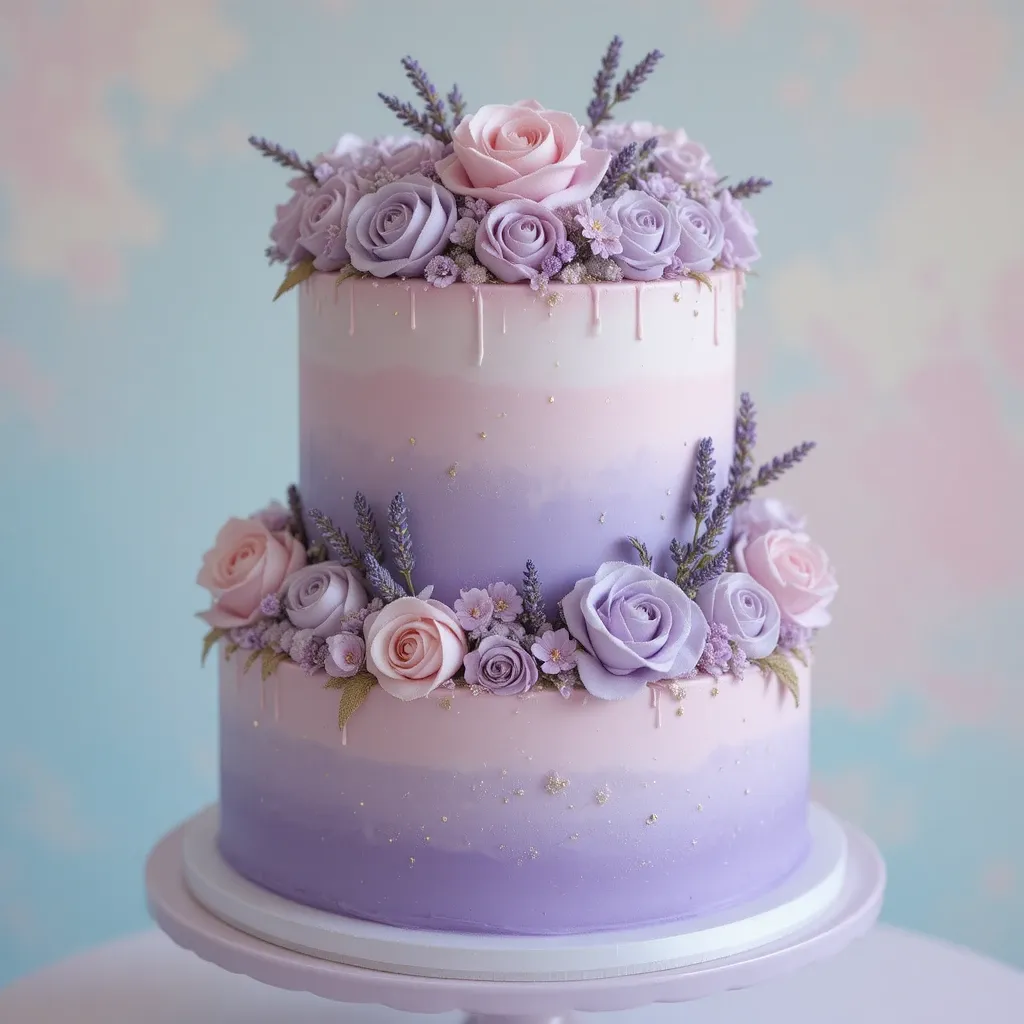
Recipe 2: Lavender Dreams Baby in Bloom Cake
Quick Overview
This sophisticated cake features stunning lavender buttercream roses and actual dried lavender buds. The subtle floral flavor combined with lemon cake creates an unforgettable taste experience. Perfect for a garden-themed shower or for parents who love unique, elegant flavors.
Total Time: 3 hours 45 minutes Prep Time: 50 minutes Baking Time: 38 minutes Decorating Time: 2 hours 17 minutes Serves: 20-25 people
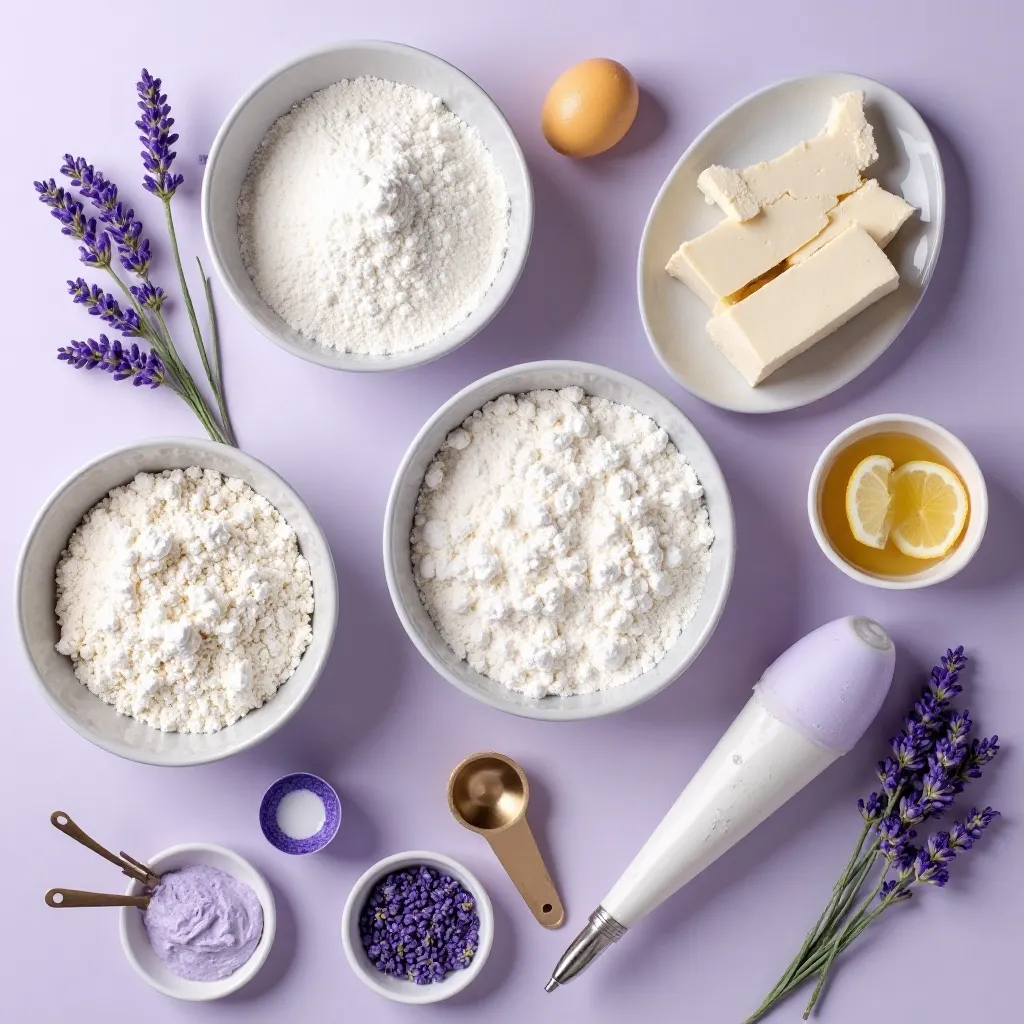
Key Ingredients for Lavender Dreams Baby in Bloom Cake
For the Lemon Cake:
- 2 ¾ cups cake flour
- 2 cups granulated sugar
- ¾ cup unsalted butter, softened
- 4 large eggs
- 1 cup buttermilk
- ½ cup vegetable oil
- Zest of 3 lemons
- ¼ cup fresh lemon juice
- 1 tablespoon baking powder
- ½ teaspoon salt
- 1 teaspoon vanilla extract
For the Lavender Buttercream:
- 1 ½ cups unsalted butter, softened
- 6 cups powdered sugar
- 3 tablespoons heavy cream
- 1 teaspoon vanilla extract
- 2 teaspoons culinary lavender extract
- Purple gel food coloring (lavender and deep purple)
For Decoration:
- 2 tablespoons dried culinary lavender buds
- Fresh lavender sprigs
- Edible gold leaf (optional)
- Piping tips (1M, 2D for roses)
Step-by-Step Instructions
Making the Lemon Cake
Preheat your oven to 350°F. Grease three 8-inch round pans and line with parchment circles. Lemon cakes can stick easily, so don’t skip this step!
Cream butter and sugar together for 5 minutes until incredibly fluffy and pale. Add eggs one at a time, mixing well after each. The mixture might look slightly curdled – that’s completely normal.
Combine lemon zest, juice, vanilla, buttermilk, and oil in a measuring cup. In another bowl, sift together cake flour, baking powder, and salt. Add dry ingredients to butter mixture alternately with lemon mixture, starting and ending with dry ingredients.
Pour batter evenly into prepared pans. Bake for 35-38 minutes until golden and a toothpick comes out with just a few moist crumbs. Cool in pans for 15 minutes, then turn out onto racks.
Creating Lavender Buttercream
Beat butter for 6-7 minutes until extremely light and fluffy. This extra time makes all the difference in creating silky buttercream. Add powdered sugar gradually, beating between additions.
Mix in heavy cream, vanilla extract, and lavender extract. Divide buttercream into three portions: keep one white, tint one soft lavender, and make one deep purple.
Decorating Your Lavender Masterpiece
Level and layer your cakes with white buttercream between each layer. Apply a crumb coat to the entire cake and refrigerate for 45 minutes.
Frost the outside with lavender buttercream, creating a smooth finish with a bench scraper. For added dimension, try an ombré effect by applying darker purple at the bottom and blending up to lighter lavender at the top.
Using piping tip 1M or 2D, pipe buttercream roses around the bottom and top edges of the cake. Create roses by holding your tip at a 90-degree angle, piping a central cone, then wrapping petals around it in a circular motion.
Sprinkle dried lavender buds between roses. Tuck fresh lavender sprigs around the roses for a natural garden look. If using gold leaf, carefully apply small pieces between flowers for a luxurious touch.
What to Serve This Cake With
Complement this elegant cake with:
- Earl Grey tea or lavender-infused lemonade
- Lemon curd tarts or lavender shortbread cookies
- Fresh berries with whipped cream
- Honey-drizzled goat cheese and crackers for a sophisticated contrast
Top Tips for Perfecting Lavender Dreams Baby in Bloom Cake
Use culinary lavender extract, not essential oil. Essential oils are too concentrated and can taste soapy or medicinal. Start with less lavender flavor than you think you need. You can always add more, but you can’t take it away.
Room temperature eggs and buttermilk are essential for lemon cake. They create a better emulsion and produce more even, tender layers.
When creating ombré buttercream, apply your darkest shade first at the bottom, then lighter shades as you work up. Blend where colors meet using a clean spatula for seamless transitions.
Test your lavender flavor on a small amount of buttercream first. Some lavender extracts are stronger than others, and you want delicate floral notes, not overpowering perfume.
Storing and Reheating Tips
This cake stores beautifully in an airtight container in the refrigerator for up to 6 days. The lemon flavor actually intensifies slightly over time, making day-two cake even more delicious!
Bring to room temperature 2 hours before serving for the softest texture. Freeze unfrosted cake layers for up to 3 months wrapped well in plastic and foil. Frosted cake can be frozen for up to 6 weeks.
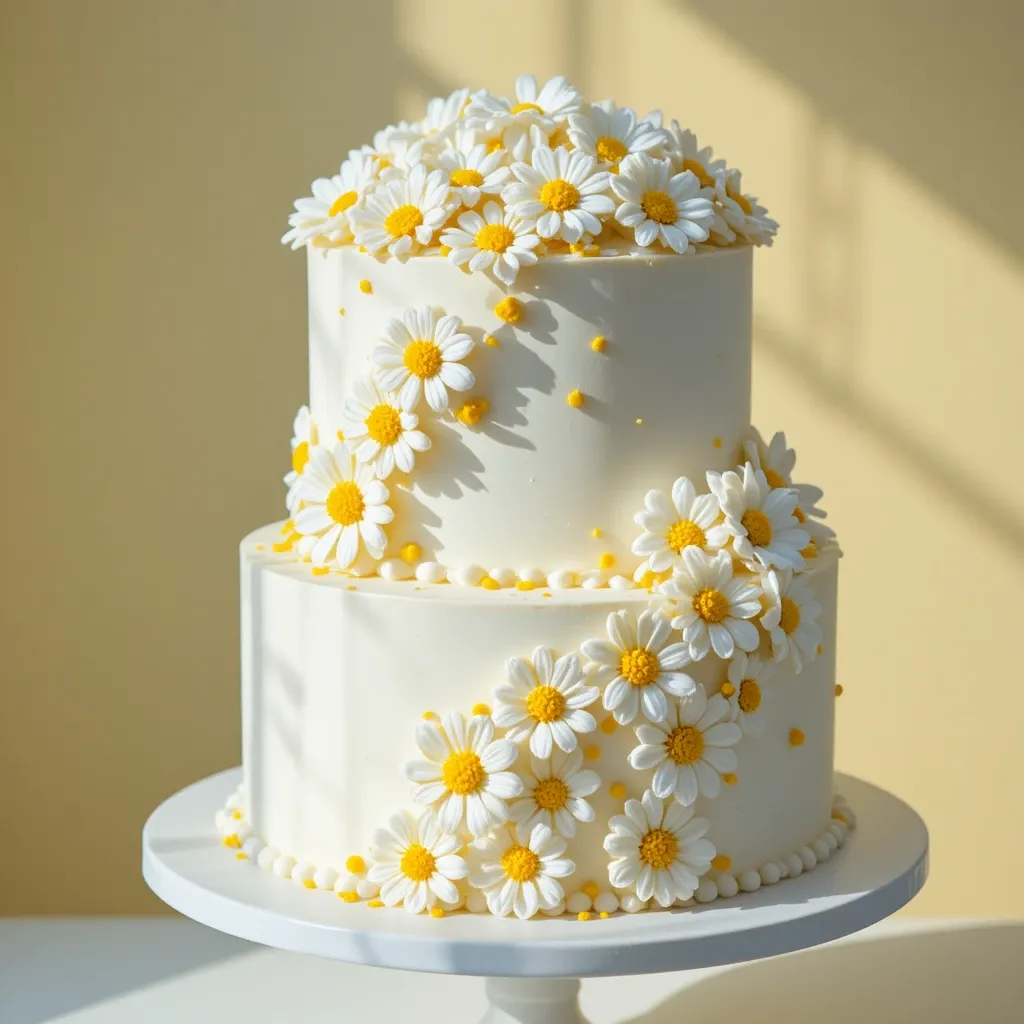
Recipe 3: Sunshine Daisy Baby in Bloom Cake
Quick Overview
Bright, cheerful, and perfect for a gender-neutral shower, this sunny cake features white buttercream daisies with yellow centers. The vanilla-almond cake is light and crowd-pleasing, while the simple daisy design is achievable even for beginners.
Total Time: 3 hours 15 minutes Prep Time: 40 minutes Baking Time: 32 minutes Decorating Time: 2 hours 3 minutes Serves: 18-22 people
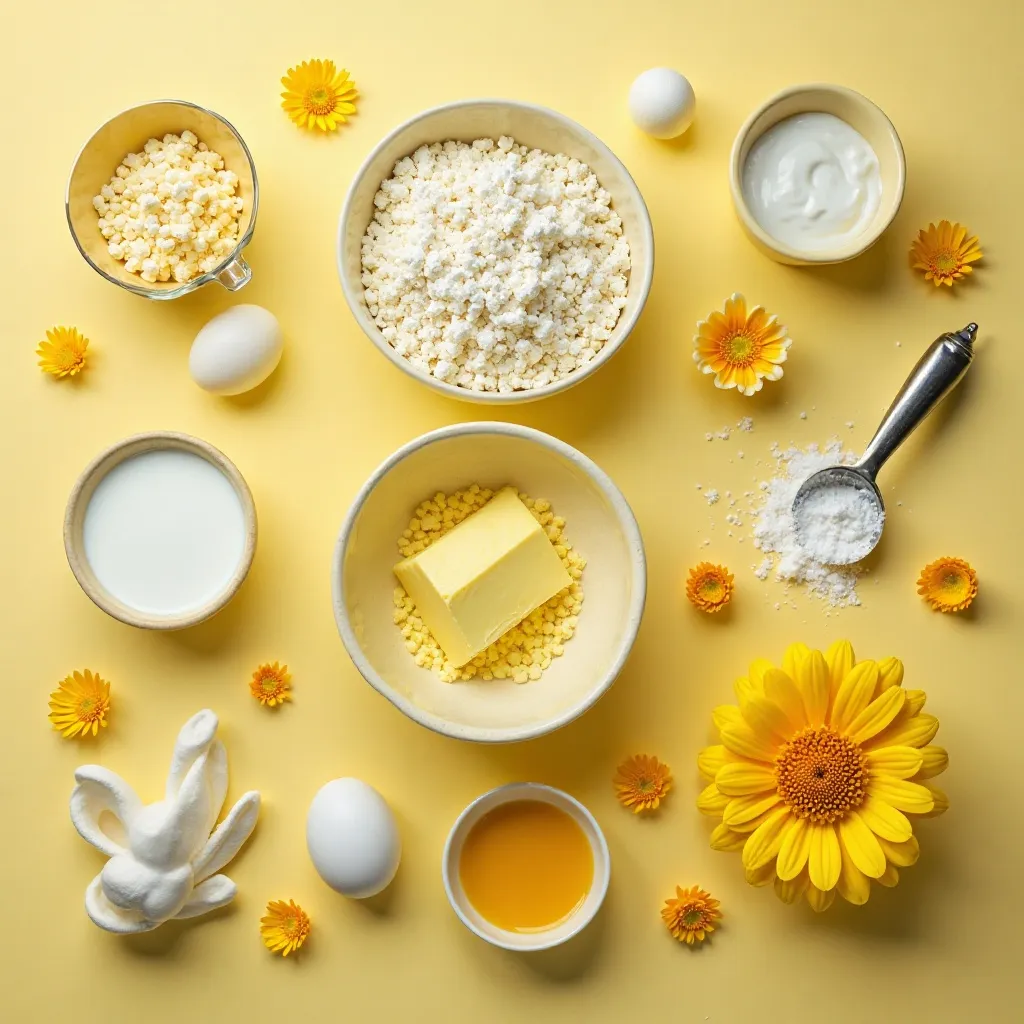
Key Ingredients for Sunshine Daisy Baby in Bloom Cake
For the Vanilla-Almond Cake:
- 3 cups all-purpose flour
- 2 cups granulated sugar
- 1 cup unsalted butter, softened
- 4 large eggs, room temperature
- 1 cup whole milk
- ½ cup sour cream
- 2 teaspoons vanilla extract
- 1 teaspoon almond extract
- 1 tablespoon baking powder
- ½ teaspoon salt
For the Buttercream:
- 2 cups unsalted butter, softened
- 7 cups powdered sugar
- 5 tablespoons heavy cream
- 1 teaspoon vanilla extract
- Yellow gel food coloring
For Decoration:
- Two 9-inch round pans
- Petal tip 104
- Round tip 5
- Flower nail
Step-by-Step Instructions
Baking Your Cake Layers
Preheat oven to 350°F and prepare two 9-inch pans with butter and parchment paper. The almond flavor in this cake makes it extra special.
Cream butter and sugar for 4-5 minutes until fluffy. Add eggs one at a time, beating thoroughly after each. This incorporates air for a lighter cake.
Whisk together flour, baking powder, and salt. Combine milk, sour cream, vanilla, and almond extracts. Add dry and wet ingredients alternately to creamed mixture, starting and ending with dry.
Divide batter between pans and bake 30-32 minutes until golden and springy to touch. Cool completely before frosting.
Preparing Buttercream and Daisies
Beat butter for 6 minutes until very pale. Add powdered sugar gradually, then cream and vanilla. Beat on high for 3 more minutes.
Remove 2 cups of buttercream and tint it bright yellow. Keep remaining buttercream white.
To make daisies ahead, use a flower nail covered with wax paper. Hold petal tip 104 with wide end at center. Pipe petals radiating out from center in a star pattern. Pipe a yellow dot in the center with tip 5. Make 20-25 daisies and refrigerate until firm.
Assembling Your Daisy Cake
Level cakes and fill with white buttercream. Apply crumb coat and chill 30 minutes.
Frost entire cake with smooth white buttercream. Use a bench scraper for ultra-smooth sides.
Carefully peel your premade daisies from wax paper and arrange them around the cake. Cluster some at the top, scatter others down the sides. Add small dots of yellow buttercream between flowers for pops of color.
For an extra touch, add a “Baby in Bloom” cake topper or fresh daisies around the base.
What to Serve This Cake With
This cheerful cake pairs wonderfully with:
- Fresh lemonade or iced tea with lemon slices
- Fruit kabobs with melon, pineapple, and strawberries
- Lemon bars or sugar cookies
- Light chicken salad sandwiches
Top Tips for Perfecting Sunshine Daisy Baby in Bloom Cake
Make your daisy flowers 1-2 days ahead. They store beautifully in the fridge and make decorating day much less stressful.
Use a flower nail to create consistent, professional-looking flowers. This simple tool costs just a few dollars but makes a huge difference.
Don’t make your daisy petals too long. Short, stubby petals look more realistic and hold their shape better than long thin ones.
If you’re nervous about almond extract, reduce it to ½ teaspoon. Some people love it, others find it overwhelming. Start conservatively.
Room temperature buttercream is crucial for piping flowers. Too cold and it won’t pipe smoothly; too warm and it won’t hold shape.
Storing and Reheating Tips
Store covered in the refrigerator for up to 5 days. Almond cake actually improves after a day as flavors meld.
Let sit at room temperature 1-2 hours before serving. Cake layers can be frozen for 3 months, and decorated cake for up to 1 month.
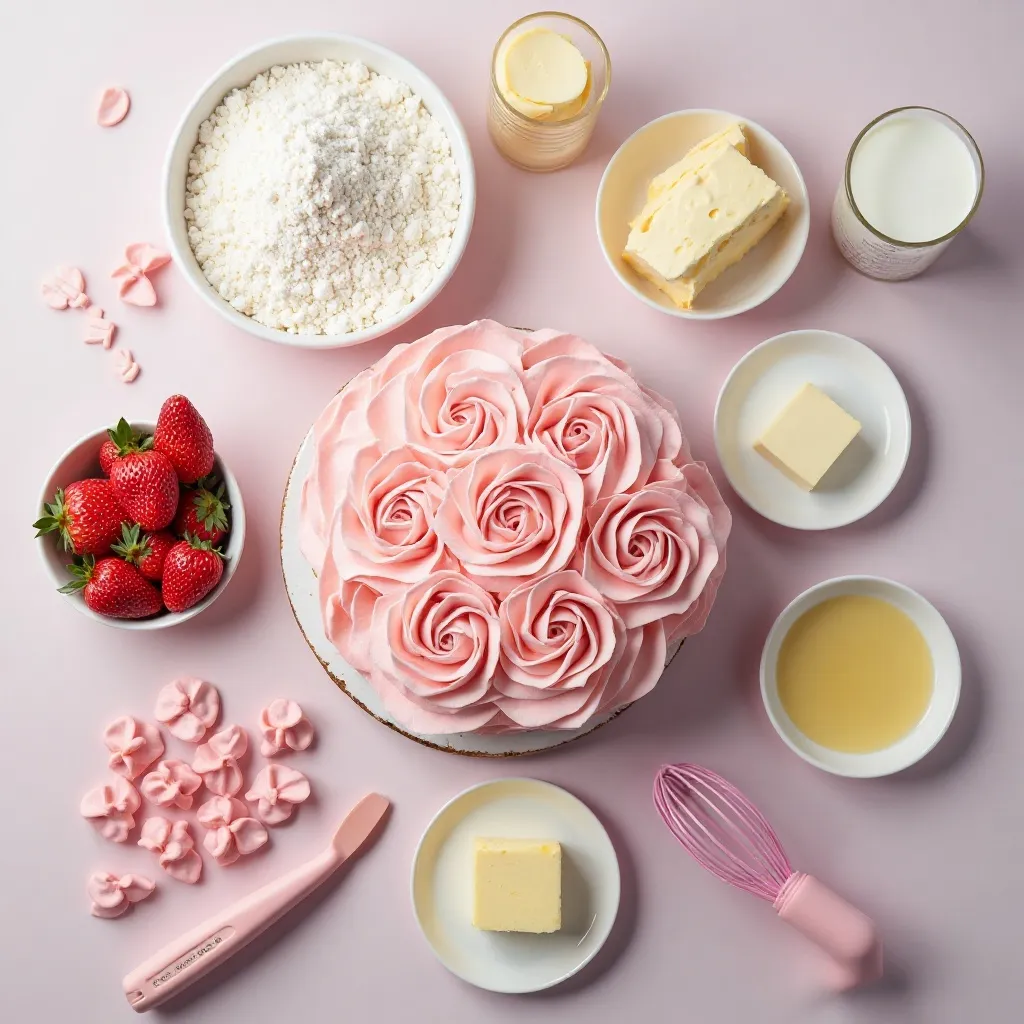
Recipe 4: Buttercream Bouquet Baby in Bloom Cake
Quick Overview
This show-stopping design features a full bouquet of mixed buttercream flowers on top of the cake, creating the look of an actual flower arrangement. Various piping techniques create roses, carnations, and filler flowers for incredible visual interest.
Total Time: 4 hours 30 minutes Prep Time: 1 hour Baking Time: 35 minutes Decorating Time: 3 hours Serves: 30-35 people
Key Ingredients for Buttercream Bouquet Baby in Bloom Cake
For the Strawberry Cake:
- 2 ½ cups all-purpose flour
- 2 cups granulated sugar
- ¾ cup unsalted butter, softened
- 4 large eggs
- 1 cup pureed fresh strawberries
- ½ cup whole milk
- ½ cup vegetable oil
- 1 tablespoon baking powder
- ½ teaspoon salt
- 1 teaspoon vanilla extract
- Pink gel food coloring (optional)
For the Cream Cheese Buttercream:
- 1 ½ cups unsalted butter, softened
- 8 oz cream cheese, softened
- 7 cups powdered sugar
- ¼ cup heavy cream
- 1 teaspoon vanilla extract
For the Floral Buttercream:
- 2 cups unsalted butter, softened
- 8 cups powdered sugar
- ⅓ cup heavy cream
- Food coloring in pink, coral, white, yellow, and green
For Decoration:
- Multiple piping tips (104, 81, 2D, 352, 3)
- Flower nails
- 10-inch cake base
Step-by-Step Instructions
Creating the Strawberry Cake
Preheat oven to 350°F. Prepare three 10-inch round pans with parchment and grease.
Puree fresh strawberries in a blender until smooth. You’ll need about 2 cups of whole berries to get 1 cup puree.
Cream butter and sugar until fluffy. Add eggs one at a time. Combine strawberry puree, milk, oil, and vanilla.
Mix flour, baking powder, and salt. Add to butter mixture alternating with strawberry mixture. Add a touch of pink coloring if desired for deeper color.
Bake 33-35 minutes until centers spring back. Cool completely.
Making Two Types of Buttercream
For cream cheese buttercream: Beat butter and cream cheese until smooth. Add powdered sugar gradually, then cream and vanilla. Beat until fluffy. This will be used for filling and crumb coating.
For floral buttercream: Beat butter until pale. Add powdered sugar and cream. Beat 5 minutes. Divide into portions and color as desired. This stiffer buttercream is perfect for holding flower shapes.
Building Your Bouquet
Level cakes and layer with cream cheese buttercream. Crumb coat entire cake and chill 45 minutes. Apply final coat of white or pale buttercream.
Now create your bouquet! Make at least 15-20 flowers in various sizes and types:
- Roses using tip 104
- Carnations using tip 81
- Rosettes using tip 2D
- Leaves using tip 352
- Filler flowers using tip 3
Arrange flowers on top of cake starting from the center and working outward. Create height and dimension by layering flowers. Add leaves between blooms. Some flowers can cascade down the sides.
Pipe a textured border around the base using a star tip or shell border.
What to Serve This Cake With
This stunning centerpiece pairs with:
- Strawberry lemonade or champagne
- Fresh fruit platters
- Savory quiches and finger sandwiches
- Individual fruit tarts
Top Tips for Perfecting Buttercream Bouquet Baby in Bloom Cake
Refrigerate each flower as you make it. Firm flowers are easier to handle and arrange without damaging them.
Create variety by using different colors and piping tips. A bouquet of identical flowers looks artificial.
Practice different flower techniques on parchment before committing to your cake. YouTube tutorials are incredibly helpful for visual learners.
Use real flower bouquets as inspiration. Look at how florists arrange height, color, and texture, then mimic those principles with buttercream.
Cream cheese buttercream doesn’t crust like American buttercream, so work with it while fresh. Don’t let it sit out too long before smoothing.
Storing and Reheating Tips
Because this contains cream cheese, store refrigerated and consume within 4 days for best quality. Bring to room temperature 2 hours before serving.
This cake is best enjoyed within 3-4 days. Cream cheese buttercream doesn’t freeze as well as regular buttercream.
Recipe 5: Watercolor Floral Baby in Bloom Cake
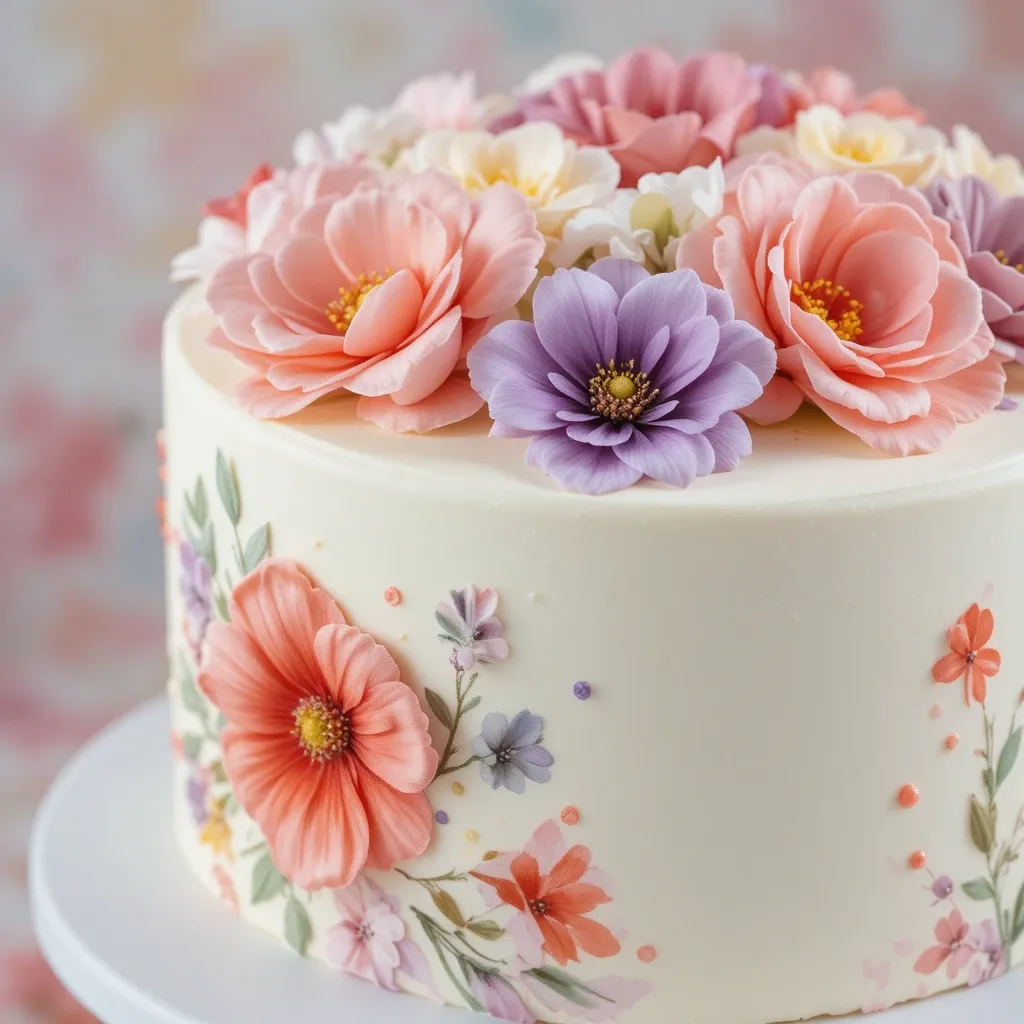
Quick Overview
This artistic cake features hand-painted watercolor flowers on white buttercream. Using edible food colors, you’ll create beautiful, soft florals that look like watercolor paintings. It’s easier than it looks and absolutely stunning!
Total Time: 3 hours 30 minutes Prep Time: 45 minutes Baking Time: 35 minutes Decorating Time: 2 hours 10 minutes Serves: 20-25 people
Key Ingredients for Watercolor Floral Baby in Bloom Cake
For the Almond Cake:
- 2 ¾ cups cake flour
- 2 cups granulated sugar
- ¾ cup unsalted butter, softened
- 4 large eggs
- 1 cup sour cream
- ½ cup almond milk
- 1 tablespoon almond extract
- 1 ½ teaspoons vanilla extract
- 1 tablespoon baking powder
- ½ teaspoon salt
For the Buttercream:
- 2 cups unsalted butter, softened
- 8 cups powdered sugar
- ¼ cup heavy cream
- 2 teaspoons vanilla extract
For Watercolor Painting:
- Gel food colors in pink, coral, purple, yellow, and green
- Vodka or clear vanilla extract
- Small paint brushes (food-safe only)
- Small paint palette or dishes
Step-by-Step Instructions
Making the Almond Cake
Preheat oven to 350°F. Prepare three 8-inch round pans.
Cream butter and sugar until pale and fluffy, about 5 minutes. Add eggs one at a time, beating well.
Combine almond milk, sour cream, almond extract, and vanilla. Sift flour, baking powder, and salt together.
Alternate adding dry ingredients and wet ingredients to butter mixture. Mix just until combined.
Bake 32-35 minutes until golden and springy. Cool completely.
Creating Smooth White Buttercream
Beat butter for 7 minutes until extremely pale and fluffy. This extra time ensures silky texture.
Add powdered sugar one cup at a time, beating between additions. Add cream and vanilla. Beat on high for 4 minutes.
Your buttercream should be bright white and incredibly smooth. This is your canvas!
Painting Your Floral Masterpiece
Level and layer cakes with buttercream. Apply crumb coat and refrigerate 40 minutes.
Apply final coat of white buttercream. Use a bench scraper to get sides as smooth as possible. Chill again for 20 minutes so buttercream firms up.
In small dishes, mix gel food colors with vodka or clear extract to create a paint consistency. Start with very little liquid and add more as needed.
Using clean, food-safe brushes, paint watercolor flowers directly onto the buttercream. Start with light washes of color, building up intensity. Create roses, peonies, or abstract florals.
Blend colors while wet for a true watercolor effect. Let some colors run into each other naturally. Add leaves and stems in green.
Work in sections and let areas dry before adding adjacent flowers to prevent unwanted bleeding.
What to Serve This Cake With
This artistic cake pairs beautifully with:
- Sparkling water with fruit
- Light cucumber sandwiches
- Macarons in coordinating colors
- Fresh fruit tarts
Top Tips for Perfecting Watercolor Floral Baby in Bloom Cake
Practice your watercolor technique on paper first if you’re nervous. The same principles apply!
Use vodka instead of water for your “paint” – it evaporates quickly and won’t break down buttercream. Clear extract works too.
Work on chilled buttercream. Warm buttercream will cause colors to bleed too much and ruin your design.
Start with pale colors and build up. It’s easier to darken than lighten, and soft colors are more watercolor-like anyway.
Don’t try to create perfect, detailed flowers. The beauty is in the loose, artistic interpretation. Embrace imperfection!
Storing and Reheating Tips
Store in refrigerator for up to 5 days. The painted design holds up beautifully, though it may dull slightly.
Let sit at room temperature 2 hours before serving. Cake layers freeze well for 3 months. Don’t freeze painted cake as condensation may affect the artwork.
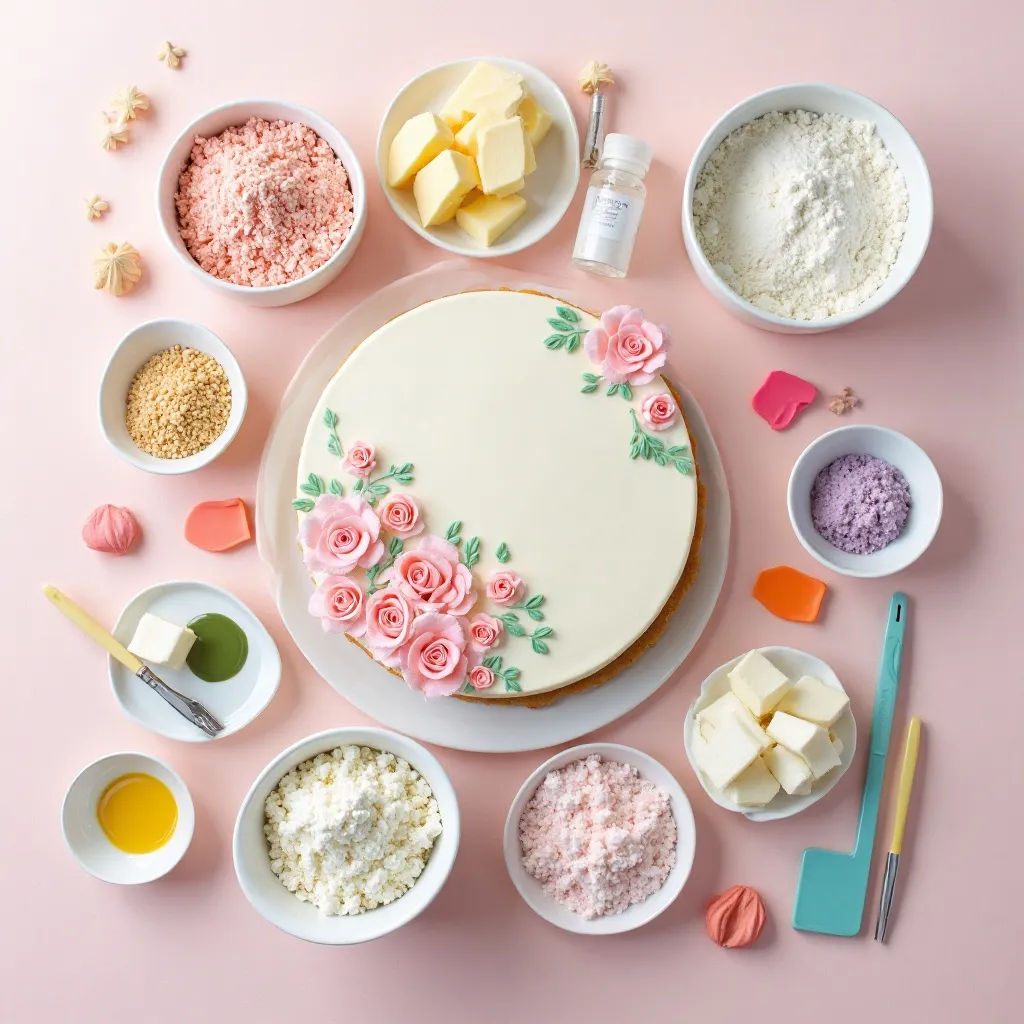
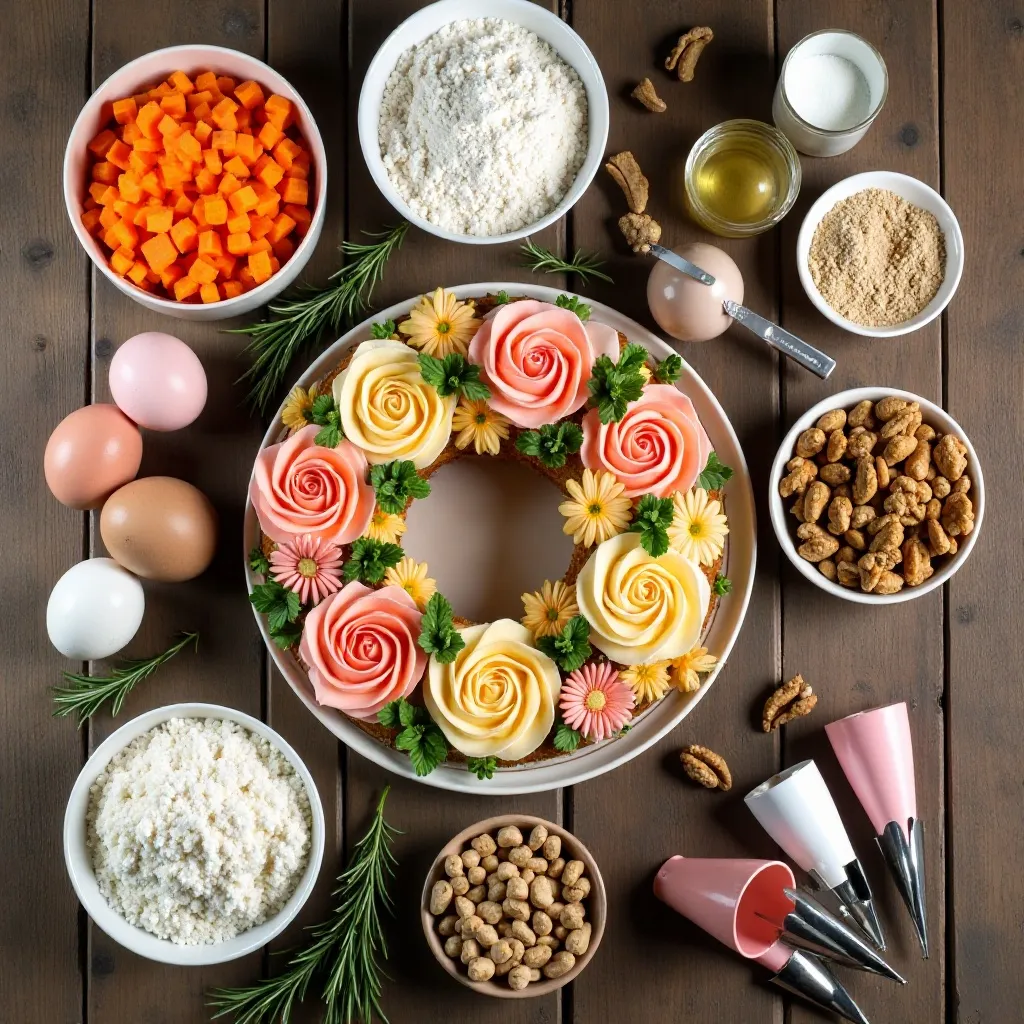
Recipe 6: Rustic Buttercream Flower Wreath Cake
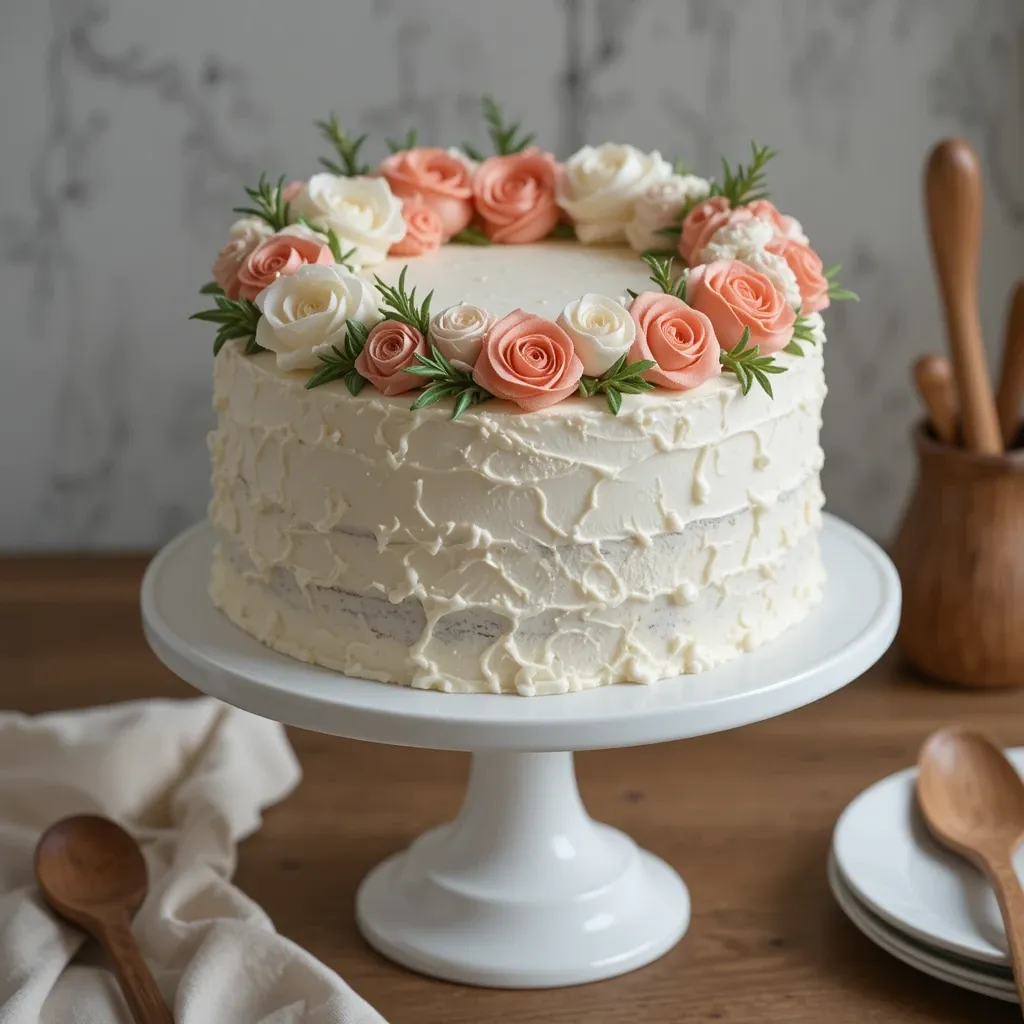
Quick Overview
This charming design features buttercream flowers arranged in a wreath shape around the top of a single-tier cake. Perfect for smaller gatherings, it has a farmhouse-chic vibe that’s both elegant and approachable. Great for beginners!
Total Time: 2 hours 50 minutes Prep Time: 35 minutes Baking Time: 40 minutes Decorating Time: 1 hour 35 minutes Serves: 12-16 people
Key Ingredients for Rustic Buttercream Flower Wreath Cake
For the Carrot Cake:
- 2 cups all-purpose flour
- 2 cups granulated sugar
- 1 cup vegetable oil
- 4 large eggs
- 3 cups grated carrots (about 6 medium carrots)
- 1 cup crushed pineapple, drained
- 1 cup chopped walnuts (optional)
- 2 teaspoons cinnamon
- 1 teaspoon baking soda
- 1 teaspoon baking powder
- ½ teaspoon salt
- 1 teaspoon vanilla extract
For the Cream Cheese Frosting:
- ¾ cup unsalted butter, softened
- 8 oz cream cheese, softened
- 4 cups powdered sugar
- 1 teaspoon vanilla extract
- 2 tablespoons heavy cream
For Floral Decoration:
- Food coloring in pink, coral, and white
- Piping tips (104, 2D, 352)
- Fresh herbs like rosemary for greenery
Step-by-Step Instructions
Baking the Carrot Cake
Preheat oven to 350°F. Grease one 9-inch round springform pan well and line with parchment.
In a large bowl, whisk together flour, cinnamon, baking soda, baking powder, and salt. This spiced cake base is naturally moist and delicious.
In another bowl, beat eggs and sugar for 2 minutes. Add oil and vanilla, beating until combined. The oil keeps this cake incredibly moist!
Fold in grated carrots and drained pineapple. Then add dry ingredients and mix just until no flour streaks remain. Fold in walnuts if using.
Pour into prepared pan and bake 38-40 minutes until a toothpick comes out with just a few moist crumbs. Carrot cake continues cooking after you remove it from the oven, so don’t overbake!
Cool in pan 15 minutes, then turn out onto a wire rack to cool completely.
Making Cream Cheese Frosting
Beat softened butter and cream cheese together for 3 minutes until completely smooth and fluffy. Any lumps will show in your final frosting!
Add powdered sugar one cup at a time, beating well between additions. Add vanilla and cream. Beat on high speed for 4 minutes until light and fluffy.
Remove 2 cups of frosting and divide into portions for coloring (pink, coral, white for flowers). Keep remaining frosting white for covering the cake.
Creating Your Flower Wreath
Place cooled cake on a serving plate or cake stand. Frost the entire cake with a thin, rustic coat of white cream cheese frosting. You want some texture showing through for that farmhouse look.
Using your colored frosting and various piping tips, create small flowers around the top edge of the cake in a wreath formation. Mix rose sizes and colors for visual interest.
Pipe roses using tip 104, small rosettes with tip 2D, and add leaves between flowers using tip 352. Leave the center of the cake open, creating that classic wreath shape.
Tuck in small sprigs of fresh rosemary or other herbs between buttercream flowers for a natural, organic touch. You can also add a few edible flower petals if desired.
What to Serve This Cake With
This cozy cake pairs wonderfully with:
- Hot coffee or spiced chai tea
- Maple roasted nuts
- Cream cheese mints
- Apple cider (cold or warm)
Top Tips for Perfecting Rustic Buttercream Flower Wreath Cake
Use freshly grated carrots, not pre-shredded. Pre-shredded carrots are often dry and can make your cake less moist. Fresh carrots have more moisture and flavor.
Drain your crushed pineapple very well. Excess liquid can make the cake soggy. Press it in a fine mesh strainer to remove as much liquid as possible.
Cream cheese frosting softens quickly at room temperature. If you’re working in a warm kitchen, refrigerate your frosted cake between decorating steps.
Don’t worry about making perfect flowers. The rustic style embraces imperfection! Varied sizes and slightly irregular shapes add to the charm.
If your cream cheese frosting is too soft to pipe, refrigerate it for 20 minutes. If it’s too stiff, add cream one teaspoon at a time until it reaches the right consistency.
Storing and Reheating Tips
Because this cake contains cream cheese frosting, store it covered in the refrigerator. It will stay fresh for up to 5 days. The carrot cake actually tastes better on day two as the flavors meld!
Bring to room temperature for 1-2 hours before serving for the best texture and flavor. This cake doesn’t freeze well once decorated due to the cream cheese frosting, but unfrosted layers can be frozen for up to 2 months.
Recipe 7: Cascading Roses Baby in Bloom Cake
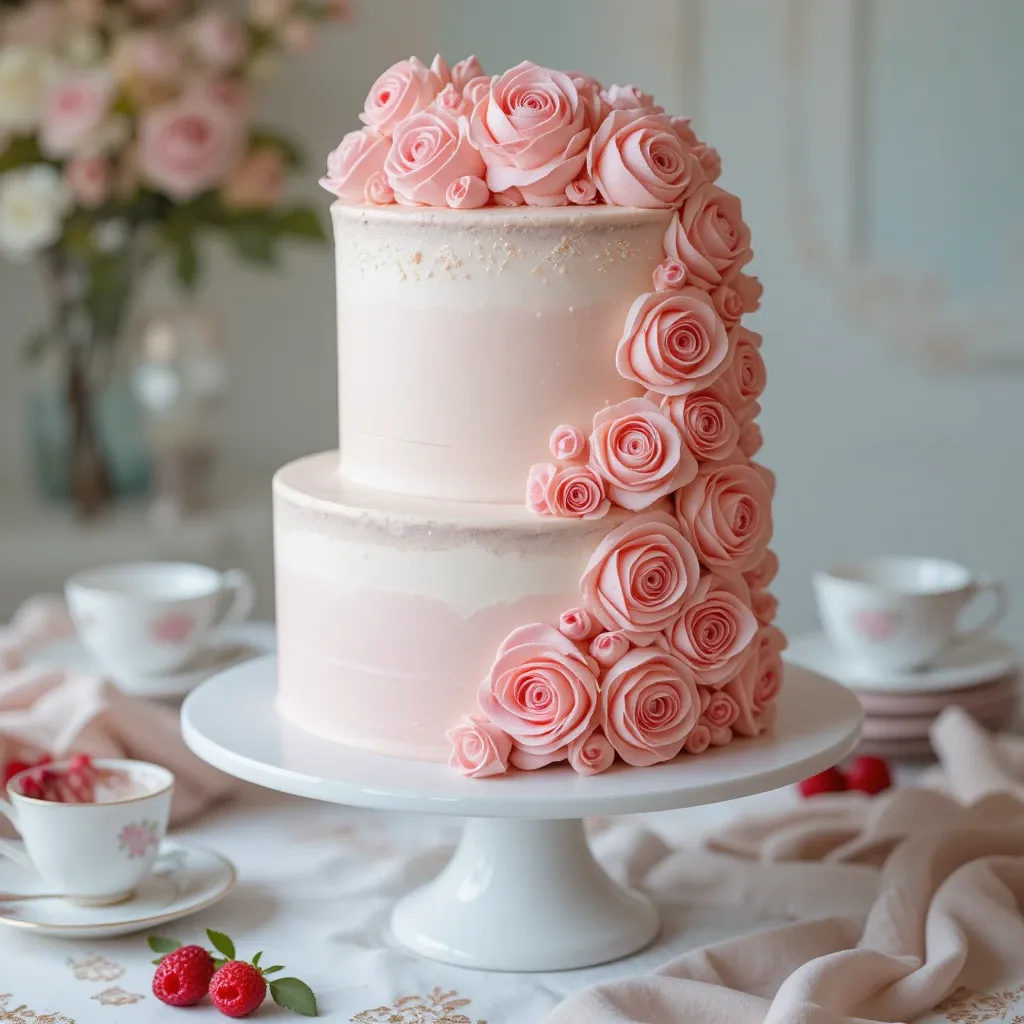
Quick Overview
Elegant and timeless, this two-tier cake features buttercream roses in graduating shades cascading down from top to bottom. The ombré effect creates stunning visual flow. This is perfect for a formal baby shower or afternoon tea celebration.
Total Time: 4 hours 15 minutes Prep Time: 55 minutes Baking Time: 35 minutes Decorating Time: 2 hours 45 minutes Serves: 35-40 people
Key Ingredients for Cascading Roses Baby in Bloom Cake
For the Champagne Cake:
- 3 cups cake flour
- 2 cups granulated sugar
- 1 cup unsalted butter, softened
- 4 large egg whites
- 1 cup champagne (or sparkling grape juice)
- ½ cup whole milk
- ½ cup sour cream
- 2 teaspoons vanilla extract
- 1 tablespoon baking powder
- ½ teaspoon salt
For the Buttercream:
- 2 ½ cups unsalted butter, softened
- 10 cups powdered sugar
- ⅓ cup heavy cream
- 2 teaspoons vanilla extract
- Pink and rose gel food coloring
For Assembly:
- 6-inch and 10-inch round pans (2 of each size)
- Piping tip 104
- Flower nails
- Cake dowels

Step-by-Step Instructions
Creating Champagne Cake Layers
Preheat oven to 350°F. Prepare four pans (two 6-inch and two 10-inch) with parchment and grease.
Cream butter and sugar for 5 minutes until very light. Add egg whites one at a time, beating well after each addition. The egg whites keep this cake tender and light.
Combine champagne, milk, sour cream, and vanilla. Mix flour, baking powder, and salt in another bowl.
Add dry ingredients alternately with wet ingredients to butter mixture, beginning and ending with dry. Don’t worry if the batter looks slightly curdled when you add champagne – it will smooth out.
Divide batter among pans, filling each about two-thirds full. Bake 30-35 minutes for larger layers, 25-28 minutes for smaller layers. Cool completely.
Making Gradient Buttercream Roses
Beat butter for 7 minutes until extremely pale and fluffy. Add powdered sugar gradually, then cream and vanilla. Beat on high for 5 minutes.
Divide buttercream into 5 portions. Leave one white, then create four shades from lightest pink to deep rose. This gradient effect is key to the cascading look.
Using tip 104 and flower nails, pipe at least 40-50 roses in varying shades. Start each rose with a tight center cone, then wrap overlapping petals around it. Refrigerate roses as you make them.
Assembling Your Cascading Masterpiece
Level all cake layers. Stack and fill each tier separately with buttercream. Apply crumb coats to both tiers and refrigerate 45 minutes.
Frost both tiers smoothly with white or pale pink buttercream. Use a bench scraper for clean edges.
Insert dowels into bottom tier (mark height, cut, reinsert). Carefully stack top tier on bottom.
Now arrange your roses! Start at the top of the upper tier with your lightest pink roses. Work your way down, gradually transitioning to deeper shades. Let roses cascade down the side of the bottom tier, ending with the deepest rose color.
Create a flowing, organic pattern rather than rigid lines. Cluster roses together with some gaps for visual interest. Fill gaps with small dots of buttercream or pearl sprinkles.
What to Serve This Cake With
This elegant cake pairs with:
- Champagne or sparkling cider
- Fresh berries with whipped cream
- Petit fours or macarons
- Delicate tea sandwiches
Top Tips for Perfecting Cascading Roses Baby in Bloom Cake
Make all your roses 1-2 days ahead. Store them on parchment-lined baking sheets in the refrigerator. This makes assembly day so much easier!
Use a turntable when applying roses. It allows you to see all angles and create better flow in your design.
Real champagne adds subtle flavor and helps with cake tenderness. Non-alcoholic sparkling grape juice works perfectly if you prefer.
Practice your gradient coloring technique. Each shade should transition smoothly into the next. Have all five shades ready before you start piping.
Use more roses than you think you need. It’s better to have extras than run out mid-cascade!
Storing and Reheating Tips
Store in the refrigerator for up to 5 days. Cover loosely to avoid smudging roses. Let sit at room temperature 2-3 hours before serving.
This cake freezes beautifully! Freeze decorated cake for up to 1 month in an airtight container. Thaw overnight in refrigerator.
Recipe 8: Simple Succulent Baby in Bloom Cake
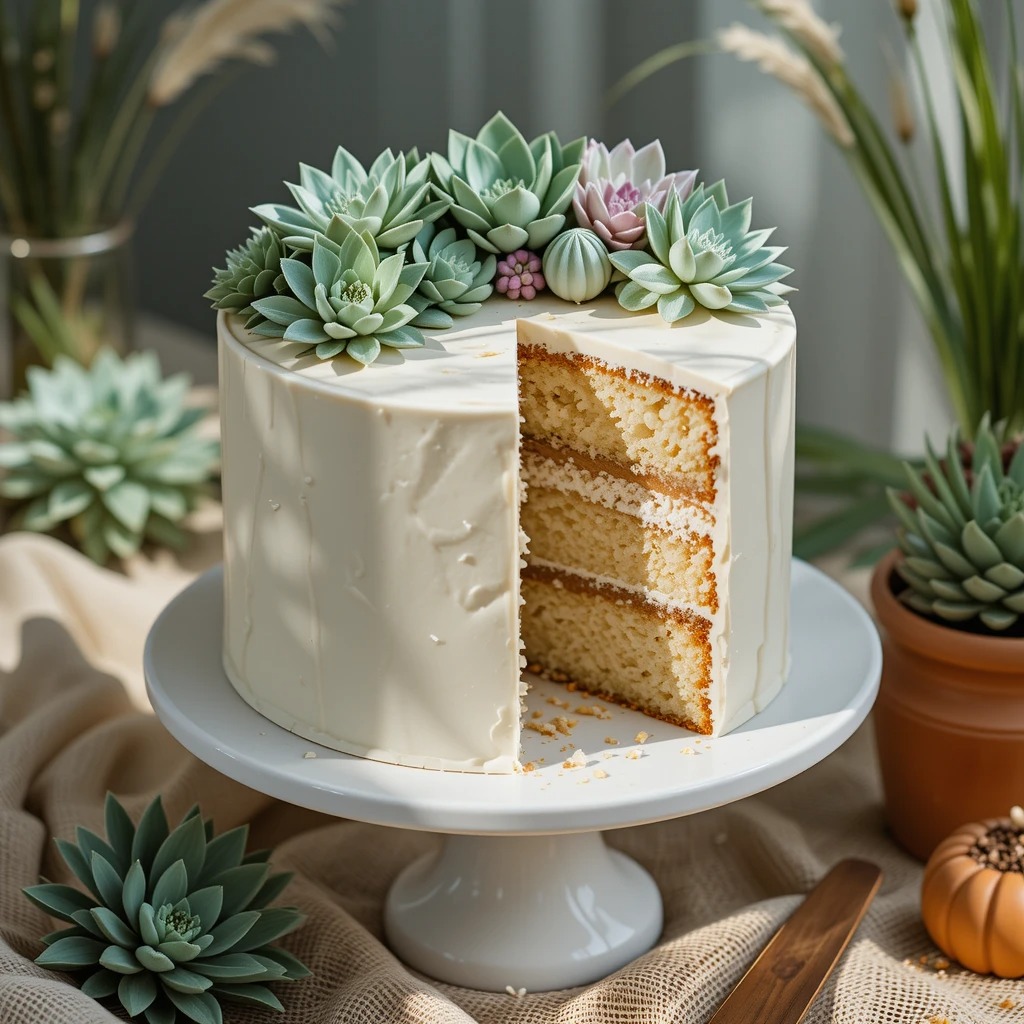
Quick Overview
Trendy and modern, this cake features buttercream succulents instead of traditional flowers. The southwestern-inspired design is perfect for a boho shower. Succulents are surprisingly easy to pipe and create dramatic impact!
Total Time: 3 hours 20 minutes Prep Time: 40 minutes Baking Time: 35 minutes Decorating Time: 2 hours 5 minutes Serves: 20-25 people
Key Ingredients for Simple Succulent Baby in Bloom Cake
For the Coconut Cake:
- 2 ½ cups all-purpose flour
- 2 cups granulated sugar
- ¾ cup unsalted butter, softened
- 4 large eggs
- 1 cup coconut milk
- ½ cup sour cream
- 2 teaspoons coconut extract
- 1 teaspoon vanilla extract
- 1 ½ cups sweetened shredded coconut
- 1 tablespoon baking powder
- ½ teaspoon salt
For the Buttercream:
- 2 cups unsalted butter, softened
- 8 cups powdered sugar
- ¼ cup heavy cream
- 1 teaspoon vanilla extract
- Green gel food coloring (sage, forest, teal)
- Pink or purple gel food coloring
For Decoration:
- Piping tips (104, 81, 352)
- Small offset spatula
Step-by-Step Instructions
Baking Coconut Cake
Preheat oven to 350°F. Prepare three 8-inch round pans with parchment and grease.
Cream butter and sugar for 5 minutes until light. Add eggs one at a time, beating thoroughly after each.
Toast shredded coconut in a dry pan until lightly golden for deeper flavor. Let cool slightly.
Combine coconut milk, sour cream, coconut extract, and vanilla. Mix flour, baking powder, and salt.
Add dry ingredients alternately with wet ingredients. Fold in toasted coconut at the end.
Bake 32-35 minutes until golden and springy. Cool completely.
Creating Succulent Buttercream
Beat butter for 6 minutes until very pale. Add powdered sugar gradually, then cream and vanilla. Beat on high 4 minutes.
Divide buttercream into portions. Create various shades of green from sage to deep forest. Also tint small portions pink/purple for flower varieties.
Piping Your Succulents
Level and layer cakes with white buttercream filling. Crumb coat and refrigerate 40 minutes. Frost with smooth buttercream in a neutral tone (white, cream, or pale green).
To pipe succulents directly on the cake:
- Use tip 104 for petal-style succulents. Start at center, pipe overlapping petals spiraling outward
- Use tip 81 for spiky succulents. Pipe pointed leaves radiating from center
- Add small rosettes with tip 352 for variety
Create clusters of succulents on top of cake. Vary sizes and shades of green for realism. Add a few pink or purple succulents for pops of color.
Use a small offset spatula to add texture to some succulents, mimicking the natural dusty coating on real plants.
What to Serve This Cake With
This modern cake pairs with:
- Iced green tea or agua fresca
- Fresh guacamole and chips
- Tropical fruit salad
- Cactus-themed cookies
Top Tips for Perfecting Simple Succulent Baby in Bloom Cake
Study photos of real succulents for inspiration. There are dozens of varieties with different shapes and colors.
Use gel food coloring to achieve realistic plant colors. Wilton makes excellent greens like moss, sage, and forest.
Succulents should look slightly imperfect and organic. Don’t stress about making them too neat!
Toast your coconut before adding to batter. This deepens the flavor and prevents the cake from tasting artificial.
Pipe succulents while buttercream is cool but not cold. Too warm and they’ll lose shape; too cold and they won’t pipe smoothly.
Storing and Reheating Tips
Store covered in refrigerator for up to 5 days. The coconut keeps the cake incredibly moist.
Let sit at room temperature 2 hours before serving. Cake layers freeze well for 3 months. Decorated cake can be frozen for up to 6 weeks.
Recipe 9: Mini Floral Baby in Bloom Cakes
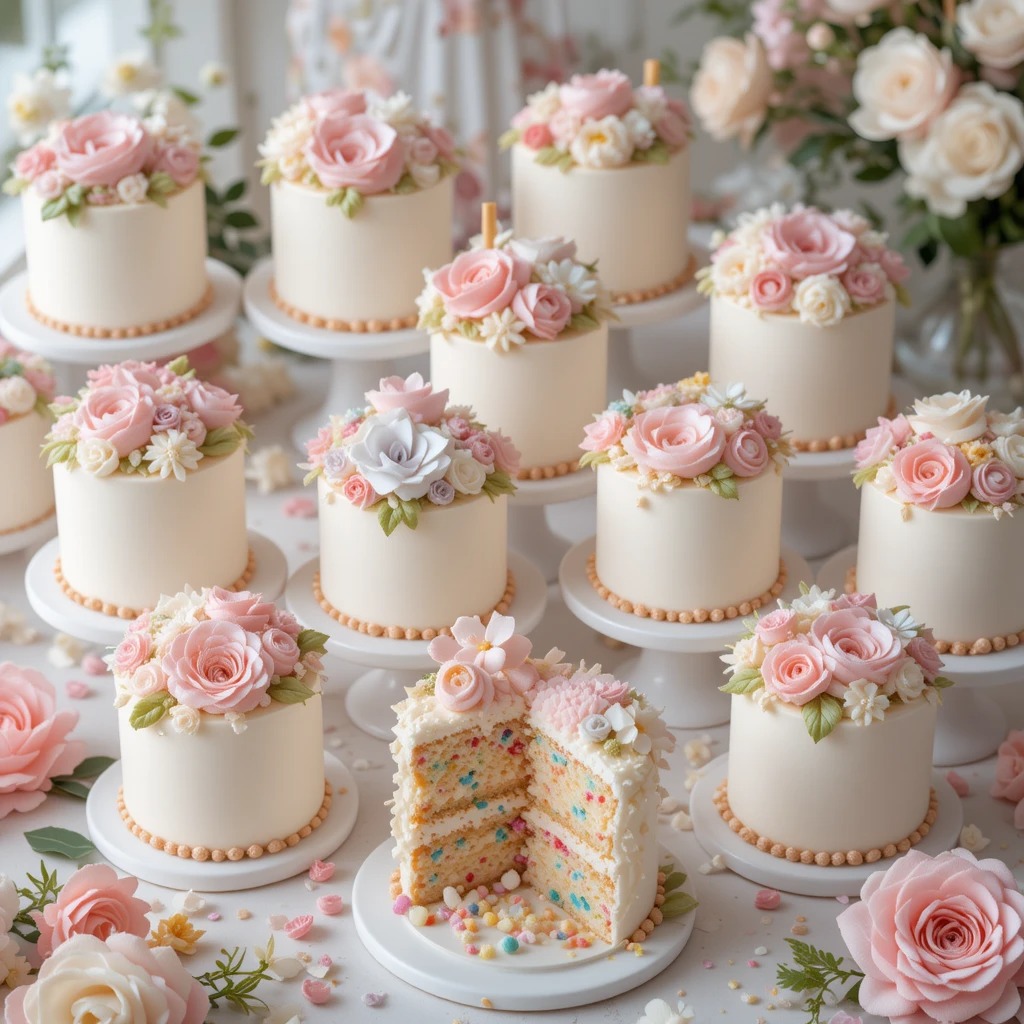
Quick Overview
Individual mini cakes decorated with buttercream flowers make adorable party favors or personal servings. Each guest gets their own beautifully decorated cake! These are surprisingly easy to make in batches.
Total Time: 3 hours 45 minutes Prep Time: 50 minutes Baking Time: 20 minutes Decorating Time: 2 hours 35 minutes Makes: 12 mini cakes
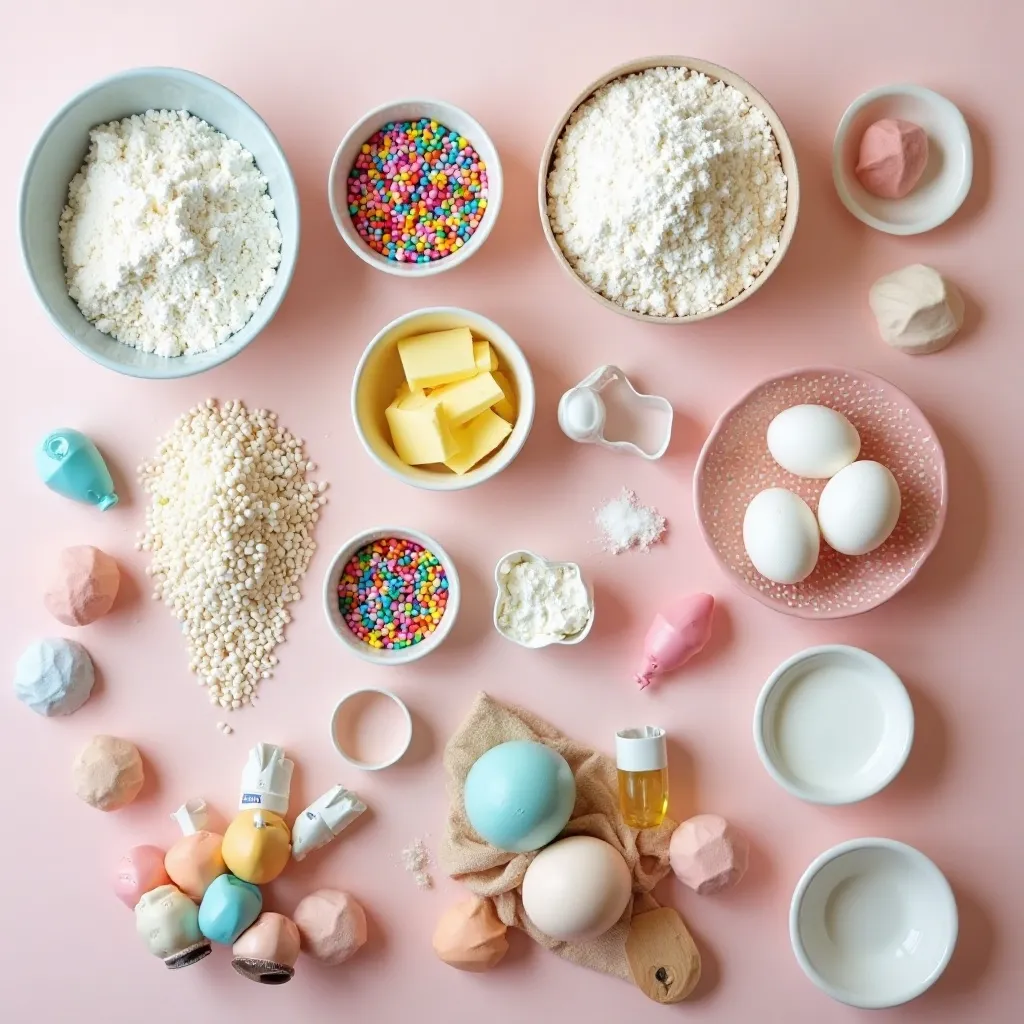
Key Ingredients for Mini Floral Baby in Bloom Cakes
For the Funfetti Cake:
- 2 cups all-purpose flour
- 1 ½ cups granulated sugar
- ½ cup unsalted butter, softened
- 3 large eggs
- ¾ cup buttermilk
- ⅓ cup vegetable oil
- 2 teaspoons vanilla extract
- 1 tablespoon baking powder
- ½ teaspoon salt
- ½ cup rainbow sprinkles
For the Buttercream:
- 2 cups unsalted butter, softened
- 8 cups powdered sugar
- ¼ cup heavy cream
- 2 teaspoons vanilla extract
- Various gel food colorings
For Assembly:
- 12 mini cake pans (4-inch round) or one 9×13 pan
- 3-inch round cookie cutter
- Piping tips (various sizes)
Step-by-Step Instructions
Baking Mini Layers
Preheat oven to 350°F. If using mini pans, grease all 12. If using a sheet pan, grease and line with parchment.
Cream butter and sugar for 4 minutes. Add eggs one at a time. Combine buttermilk, oil, and vanilla.
Mix flour, baking powder, and salt. Add to butter mixture alternately with buttermilk mixture.
Gently fold in sprinkles last. Don’t overmix or colors will bleed.
If using mini pans: Fill each two-thirds full. Bake 18-20 minutes. If using sheet pan: Pour batter evenly. Bake 22-25 minutes. Once cooled, use 3-inch cutter to cut out 24 rounds.
Cool completely before decorating.
Making Rainbow Buttercream
Beat butter for 7 minutes until extremely pale. Add powdered sugar gradually. Add cream and vanilla. Beat on high 5 minutes.
Divide buttercream into 6-8 portions and color each differently. Keep one portion white.
Decorating Your Minis
Stack two cake rounds for each mini cake. Spread buttercream between layers.
Apply a thin crumb coat to each mini cake. This is time-consuming but worth it for neat results! Refrigerate 30 minutes.
Frost each mini cake smoothly with white or pastel buttercream.
Now decorate each cake uniquely! Pipe different flowers on each one:
- Roses on some
- Daisies on others
- Mixed flower bouquets
- Simple rosette borders
Add small leaves and details with green buttercream. Make each mini cake special and unique.
Place on individual cake boards or in cupcake boxes for easy serving and gifting.
What to Serve These Mini Cakes With
These adorable minis are perfect as:
- Individual party favors
- Dessert table centerpieces
- Take-home gifts wrapped in cellophane
- An alternative to traditional cupcakes
Top Tips for Perfecting Mini Floral Baby in Bloom Cakes
Using a sheet pan and cookie cutter is faster than individual mini pans. You’ll get more uniform sizes too.
Work assembly-line style. Crumb coat all cakes, then final frost all cakes, then decorate all cakes. This is much more efficient than completing one at a time.
Keep decorated mini cakes in muffin tins in the refrigerator to prevent them from touching and smudging each other.
Funfetti adds fun pops of color when you cut into the cake, delighting guests!
These are perfect for practicing piping techniques since you have 12 canvases to work with.
Storing and Reheating Tips
Store mini cakes in airtight containers in the refrigerator for up to 5 days. Individual plastic containers or cupcake boxes work perfectly.
These freeze beautifully for up to 2 months. Freeze individually wrapped, then thaw in refrigerator overnight before serving.
Let sit at room temperature 1 hour before serving for best texture and flavor.
Common Baking Mistakes to Avoid
Mistake 1: Using Cold Ingredients
Room temperature ingredients emulsify better, creating lighter, more tender cakes. Cold eggs, butter, or milk create a dense, heavy texture. Set ingredients out 1-2 hours before baking.
Mistake 2: Overmixing Batter
Once flour is added, mix just until combined. Overmixing develops gluten, resulting in tough, chewy cake instead of tender layers. It’s okay if a few small flour streaks remain!
Mistake 3: Opening Oven Door Too Early
Resist the urge to check on your cake before the minimum baking time. Opening the door releases heat and can cause cakes to sink in the middle. Use the oven light to peek instead.
Mistake 4: Not Leveling Cakes
Domed cake layers create unstable stacks that lean or slide. Always use a serrated knife or cake leveler to create flat surfaces before stacking.
Mistake 5: Skipping the Crumb Coat
Trying to apply final frosting without a crumb coat pulls up cake crumbs and creates a messy appearance. That thin first layer seals everything in perfectly.
Mistake 6: Using Buttercream at Wrong Temperature
Too warm and it won’t hold shape. Too cold and it won’t pipe smoothly. Ideal buttercream should be cool but spreadable, similar to thick peanut butter.
Mistake 7: Not Doweling Tiered Cakes
Without dowels, upper tiers sink into lower tiers, ruining your design. Always use dowels or bubble tea straws to provide structural support.
Mistake 8: Frosting Warm Cake
Wait until cakes are completely cool before frosting. Warm cake melts buttercream, causing it to slide off and creating a mess. Be patient!
Frequently Asked Questions
What flowers are safe to use on baby shower cakes?
Only use pesticide-free, food-safe flowers. Safe options include roses, pansies, violets, carnations, and baby’s breath. Always avoid toxic varieties like lilies, daffodils, and hydrangeas. When in doubt, use buttercream flowers instead or create a barrier with floral tape or picks.
How far in advance can I make a baby in bloom cake?
Bake cake layers 2-3 days ahead and store wrapped at room temperature or freeze for up to 3 months. Make buttercream flowers 1-2 weeks ahead and refrigerate. Assemble and decorate the cake 1-2 days before the event for best results. Fully decorated cakes stay fresh refrigerated for 4-5 days.
What piping tips create the most realistic flowers?
For roses, use tip 104 or 125. For peonies, use tip 104. For daisies, use tip 104 with a flower nail. For leaves, use tip 352 or 67. For filler flowers and dots, use round tips 3-5. Having these basic tips allows you to create beautiful variety.
Can I use store-bought frosting for baby in bloom cakes?
While possible, homemade buttercream pipes much better and holds shape longer than store-bought. Store varieties often contain more stabilizers that make piping difficult. If you must use store-bought, add 1-2 cups of powdered sugar to stiffen it for better flower piping.
How do I transport a decorated baby in bloom cake?
Place the cake on a sturdy cake board. Refrigerate until very cold so buttercream firms up. Place in a large cake box or carrier with enough height clearance. Drive carefully, avoiding sudden stops. Keep the car cool. For tiered cakes, transport tiers separately and stack at the venue.
What’s the best frosting for summer baby showers?
Swiss meringue buttercream or cream cheese frosting hold up better in heat than American buttercream. You can also add cornstarch to American buttercream (1-2 tablespoons per batch) to help it stabilize. Keep the cake refrigerated until the last possible moment and display in air conditioning.
How do I fix buttercream that’s too soft or too stiff?
If too soft, refrigerate for 15-20 minutes or add 1 cup of powdered sugar at a time until it reaches piping consistency. If too stiff, add heavy cream one teaspoon at a time, beating well between additions. Buttercream should hold soft peaks but spread easily.
Can I make a baby in bloom cake without special piping tips?
Yes! Use a simple round tip to create dot flowers or rosettes. Cut a plastic bag corner for makeshift petals. Use a fork to create texture. Even spreading buttercream with a spoon and adding fresh flowers creates a beautiful baby in bloom effect. Don’t let lack of equipment stop you!
Nutrition Information (Approximate per serving – Recipe 1)
| Nutrient | Amount |
|---|---|
| Calories | 380 |
| Total Fat | 18g |
| Saturated Fat | 11g |
| Cholesterol | 85mg |
| Sodium | 180mg |
| Total Carbohydrates | 52g |
| Dietary Fiber | 0g |
| Sugars | 42g |
| Protein | 3g |
Note: Nutrition values vary by recipe and serving size. This is an estimate for a standard slice of buttercream-frosted vanilla cake.
These ten baby in bloom cake ideas offer something for everyone, from beginners to advanced bakers. Whether you choose elegant roses, cheerful daisies, or modern succulents, your creation will be the centerpiece of the celebration.
The beauty of these cakes lies not just in their appearance but in the love and care you put into creating them. Each piped petal represents the excitement of welcoming new life. Each color choice reflects the joy and hope that comes with a baby’s arrival.
Don’t be afraid to make these recipes your own. Swap flavors, mix color palettes, combine techniques from different designs. The best baby in bloom cake is the one that comes from your heart and makes the parents-to-be feel celebrated.
I’d love to see your baby in bloom creations! Share your photos and let me know which design you tried. Happy baking, and congratulations to all the growing families out there!