20 Baby in Bloom Cookies Ideas That Will Steal the Shower
There’s something magical about celebrating a new life with flowers and sweetness combined. Baby in bloom cookies bring together delicate florals, soft pastels, and buttery sugar cookies in the most enchanting way. I still remember the first time I made these for my sister’s baby shower last spring—the table looked like a garden had bloomed right there in her living room!
These cookies aren’t just desserts; they’re edible works of art that make guests smile before they even take a bite. The combination of fresh floral designs with classic baby shower themes creates something truly special and memorable. If you love decorated cookies like my Classic Royal Icing Sugar Cookies, you’ll absolutely adore these botanical beauties.
This recipe is fully AI-written and untested at home by our team. We share it with care, and many in our community have reported good outcomes from other recipes on the site.
What Are Baby in Bloom Cookies?
Ever wonder why these cookies have such a poetic name? Baby in bloom cookies are sugar cookies decorated with floral designs that celebrate a baby’s arrival—like a little one blossoming into the world! The name captures that beautiful moment when life is just beginning, fresh and full of promise.
They typically feature hand-painted flowers, botanical prints, sweet onesies adorned with blooms, or delicate flower arrangements in soft nursery colors. As they say, the way to a heart is through beautiful, delicious treats, and these cookies certainly open hearts at every baby shower. Why not give them a try and watch your guests light up with joy?
Why You’ll Love These Baby in Bloom Cookies
The main highlight is their stunning visual appeal. Each cookie becomes a miniature canvas where pastel icing meets hand-painted florals, creating Instagram-worthy treats that taste as amazing as they look. The soft vanilla sugar cookie base pairs perfectly with smooth royal icing, creating a melt-in-your-mouth texture that guests can’t resist.
Making these at home saves you a fortune. Professional cookie decorators charge between $60 to $180 for just two dozen decorated cookies. When you make them yourself, you spend a fraction of that cost while adding your personal touch to every petal and leaf.
The floral designs make these cookies incredibly special. From hand-painted wildflowers to stenciled blossoms, you can customize each cookie to match your shower theme perfectly. Whether you’re going for soft pinks and creams, sage greens and whites, or sunny yellows and peaches, the flower designs adapt beautifully.
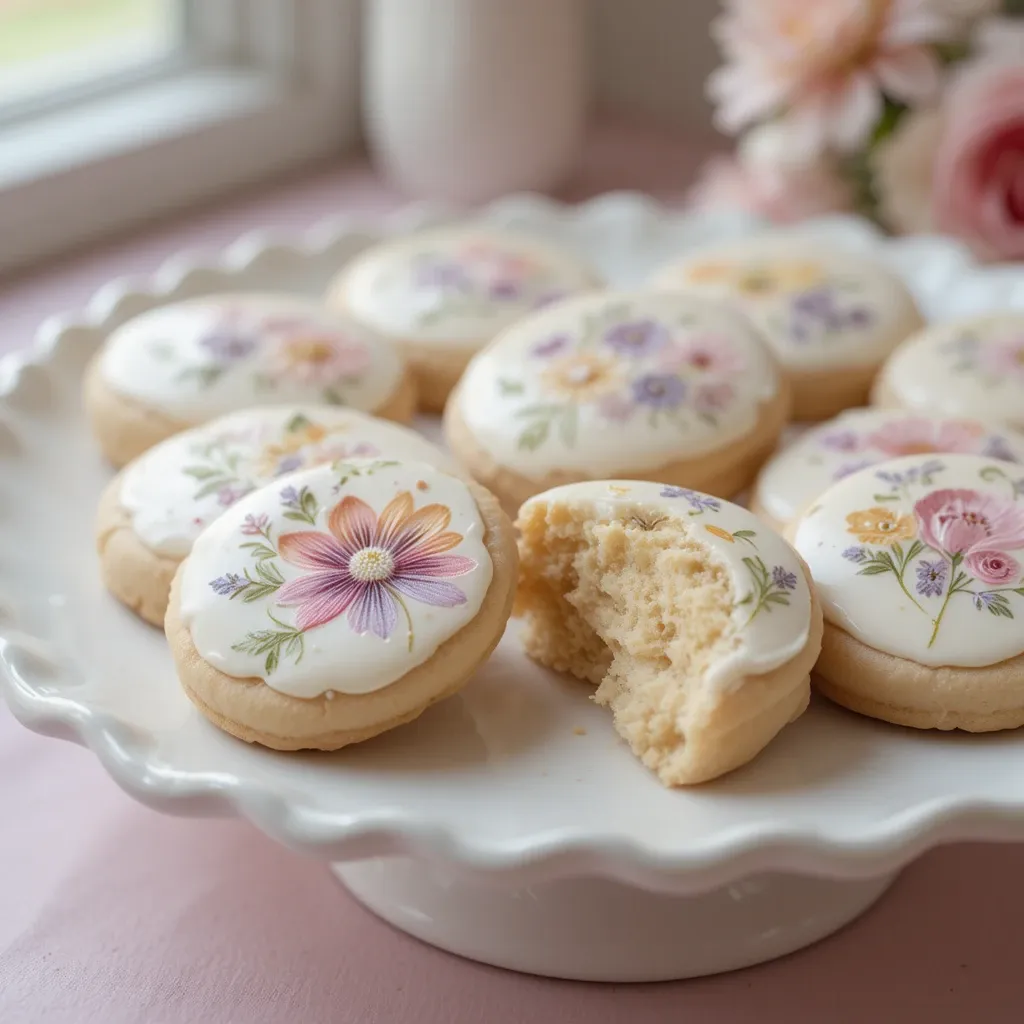
Recipe #1: Hand-Painted Wildflower Round Cookies
These delicate round cookies feature watercolor-style wildflowers perfect for any baby shower theme.
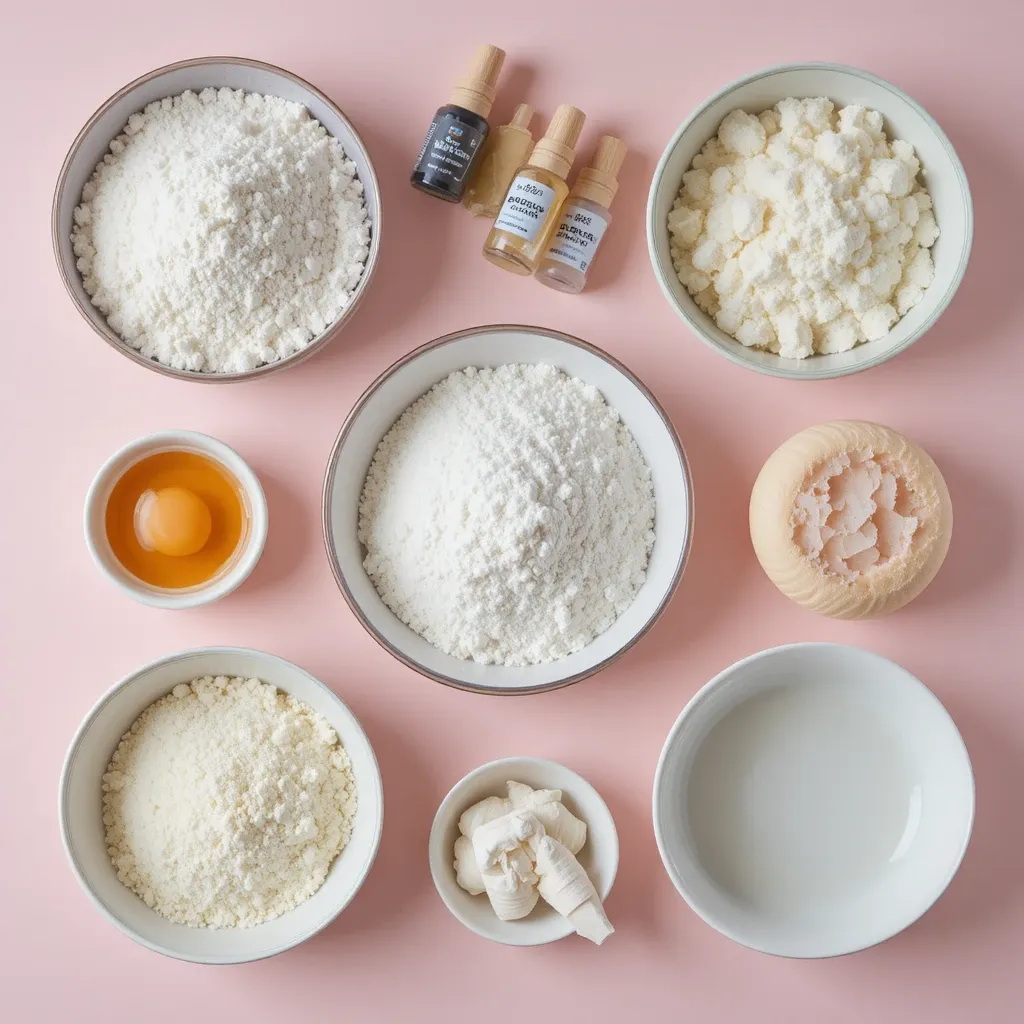
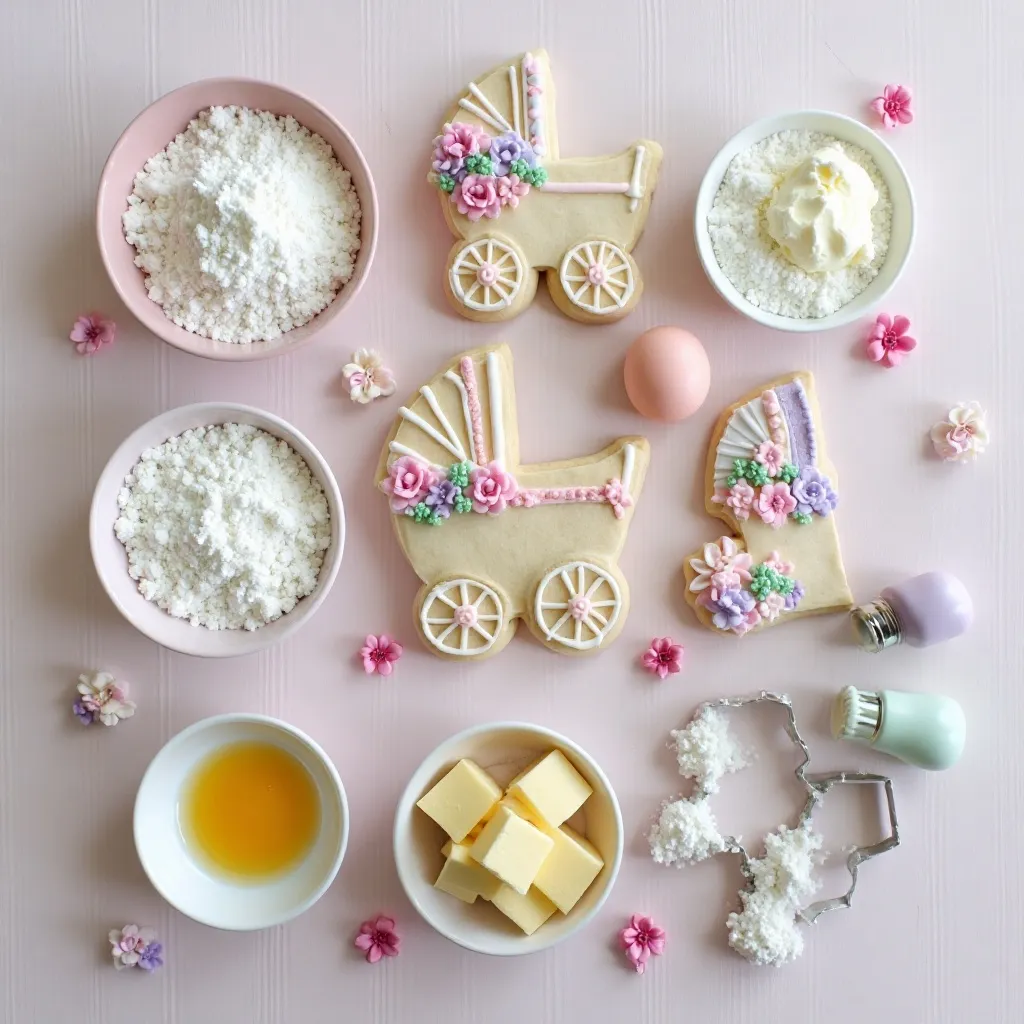
Ingredients
For the Sugar Cookies:
- 3 cups all-purpose flour
- 1 teaspoon baking powder
- 1/2 teaspoon salt
- 1 cup unsalted butter, softened
- 1 cup granulated sugar
- 1 large egg
- 2 teaspoons vanilla extract
- 1/2 teaspoon almond extract
For Royal Icing:
- 4 cups powdered sugar, sifted
- 3 tablespoons meringue powder
- 6-7 tablespoons warm water
- Gel food colors: soft pink, lavender, yellow, sage green
For Painting:
- Small food-safe paintbrushes
- Additional gel colors thinned with clear extract
Prep Time: 2 hours 30 minutes Decorating Time: 3 hours Total Time: 24 hours (with drying) Yield: 24 cookies
Step-by-Step Instructions
Making the Cookie Dough
Whisk together flour, baking powder, and salt in a medium bowl. Set this aside while you work on the wet ingredients.
Beat butter and sugar in a large bowl using an electric mixer on medium speed for 3 minutes until light and fluffy. The mixture should look pale and airy.
Add egg, vanilla, and almond extract. Beat on low until fully combined and smooth throughout.
Gradually add flour mixture one cup at a time, mixing on low speed. Stop as soon as dough comes together to avoid tough cookies.
Divide dough into two disks, wrap in plastic, and refrigerate for 2 hours minimum.
Rolling and Baking
Preheat oven to 350°F. Line baking sheets with parchment paper.
Roll chilled dough on floured surface to exactly 1/4 inch thickness. Use a 3-inch round cutter to cut circles.
Place cookies 1 inch apart on prepared sheets. Bake for 9-11 minutes until edges barely begin to turn golden.
Cool on baking sheet for 5 minutes, then transfer to wire rack to cool completely.
Making and Applying Royal Icing
Combine powdered sugar and meringue powder in stand mixer bowl.
Add 6 tablespoons warm water and mix on low for 30 seconds. Increase to medium-high and beat 5-7 minutes until stiff peaks form.
Test consistency by lifting beater—icing should hold a peak that slowly relaxes. Thin slightly with water for flooding consistency.
Divide icing into bowls. Tint one portion soft cream or white for the base, keeping the rest white for now.
Outline each cookie with a #2 piping tip, creating a border 1/4 inch from edge. Let set 15 minutes.
Flood the interior with thinned icing. Use a toothpick to guide icing into corners and pop air bubbles.
Let dry completely for 6-8 hours or overnight.
Hand-Painting Wildflowers
Thin gel food colors with a few drops of clear extract or lemon juice to watercolor consistency.
Using a fine paintbrush, paint small wildflower petals in clusters of 3-5 flowers per cookie. Use soft pink, lavender, and yellow.
Add sage green stems and tiny leaves between flowers using light brushstrokes.
Create depth by layering colors—paint base petals, let dry slightly, then add darker centers.
Let all painted details dry completely for 6 hours before packaging.
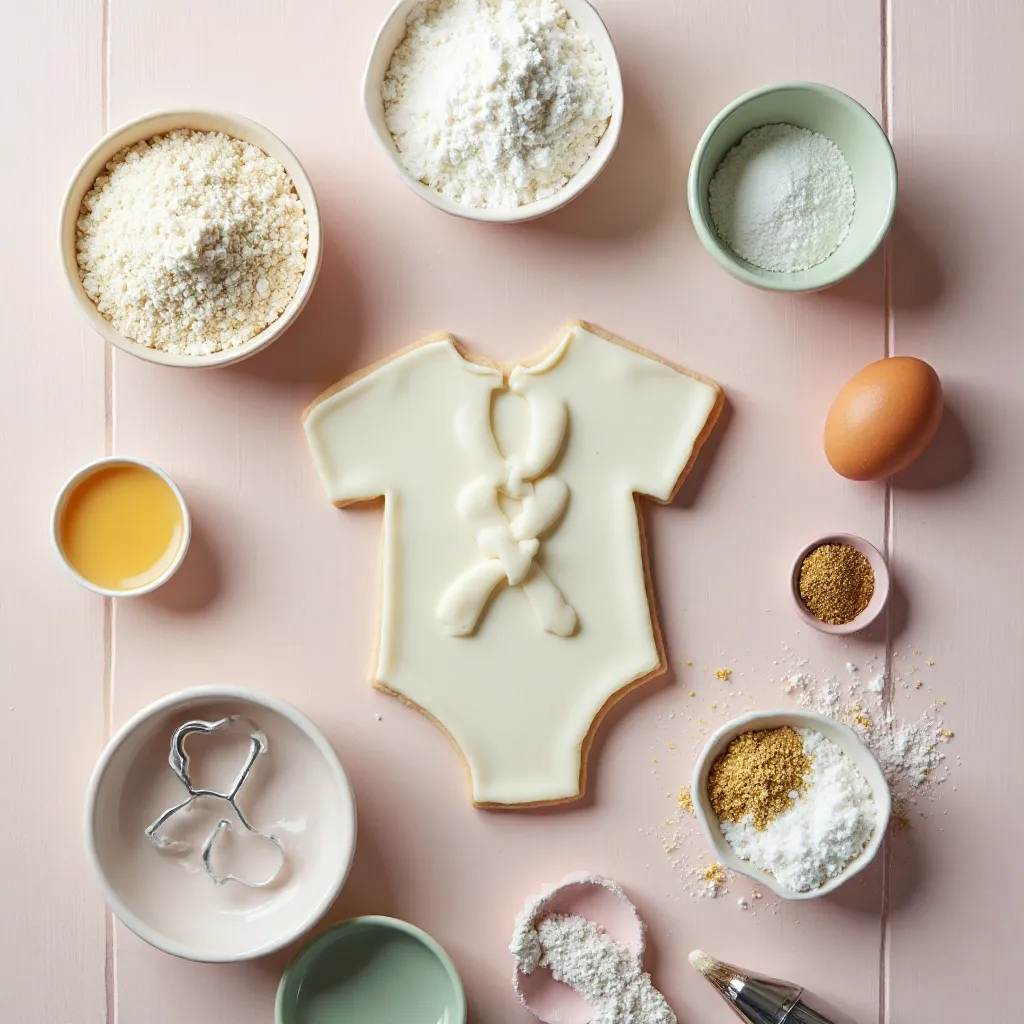
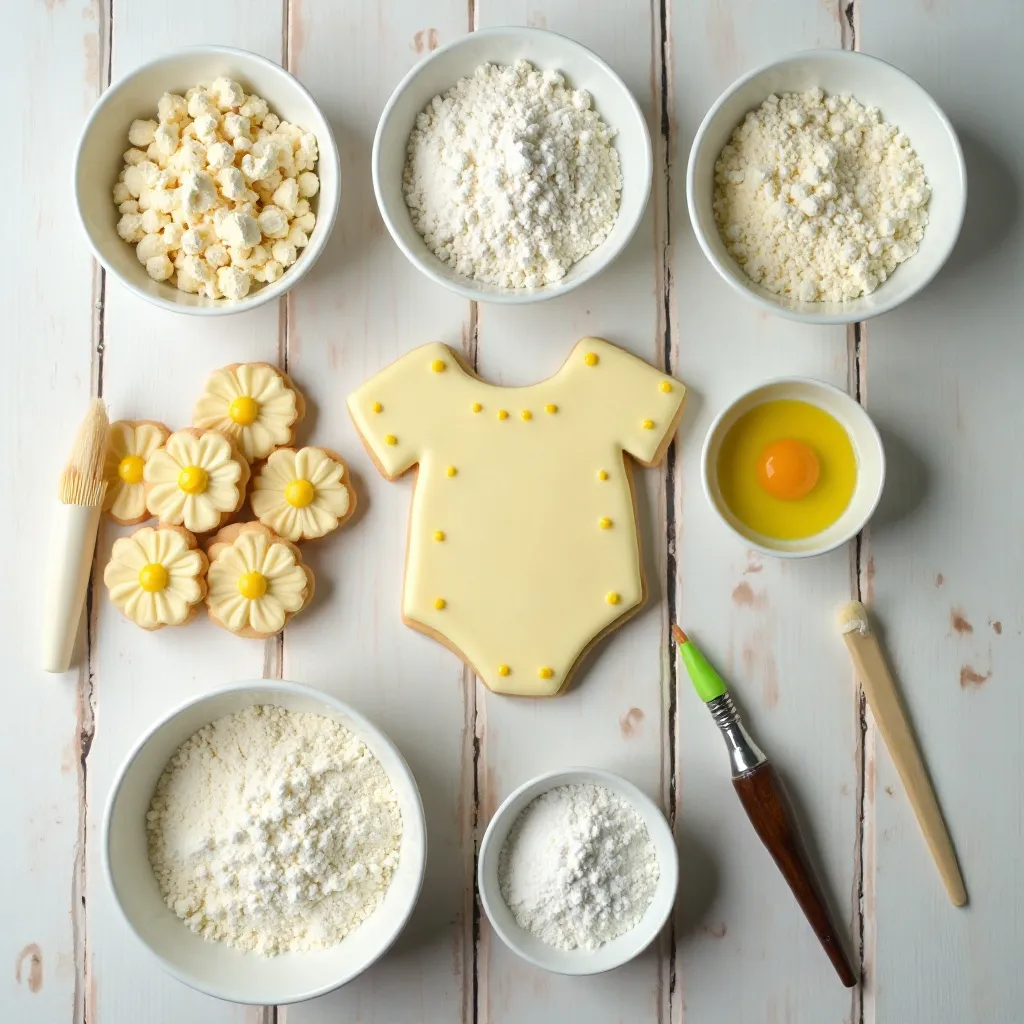
Recipe #2: Floral Onesie Cookies
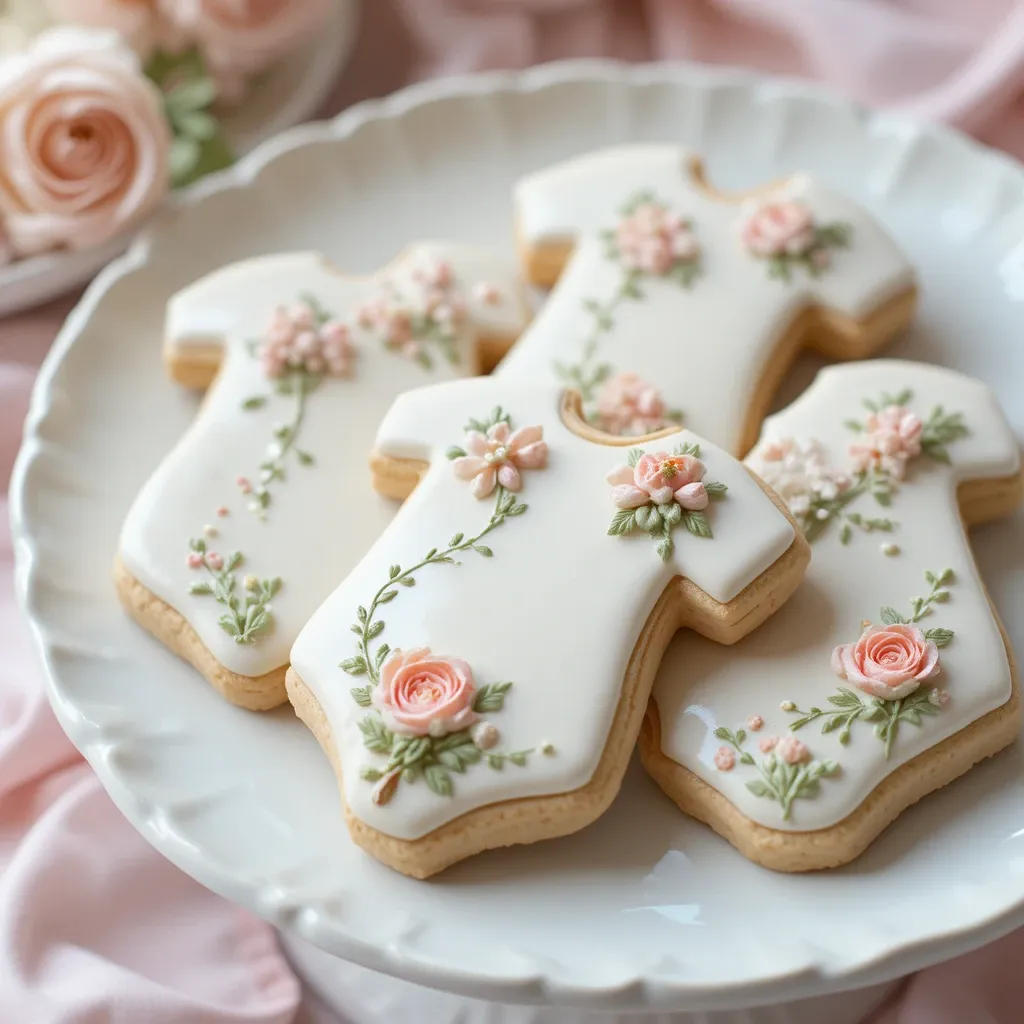
Sweet onesie-shaped cookies with scattered painted flowers across the front.
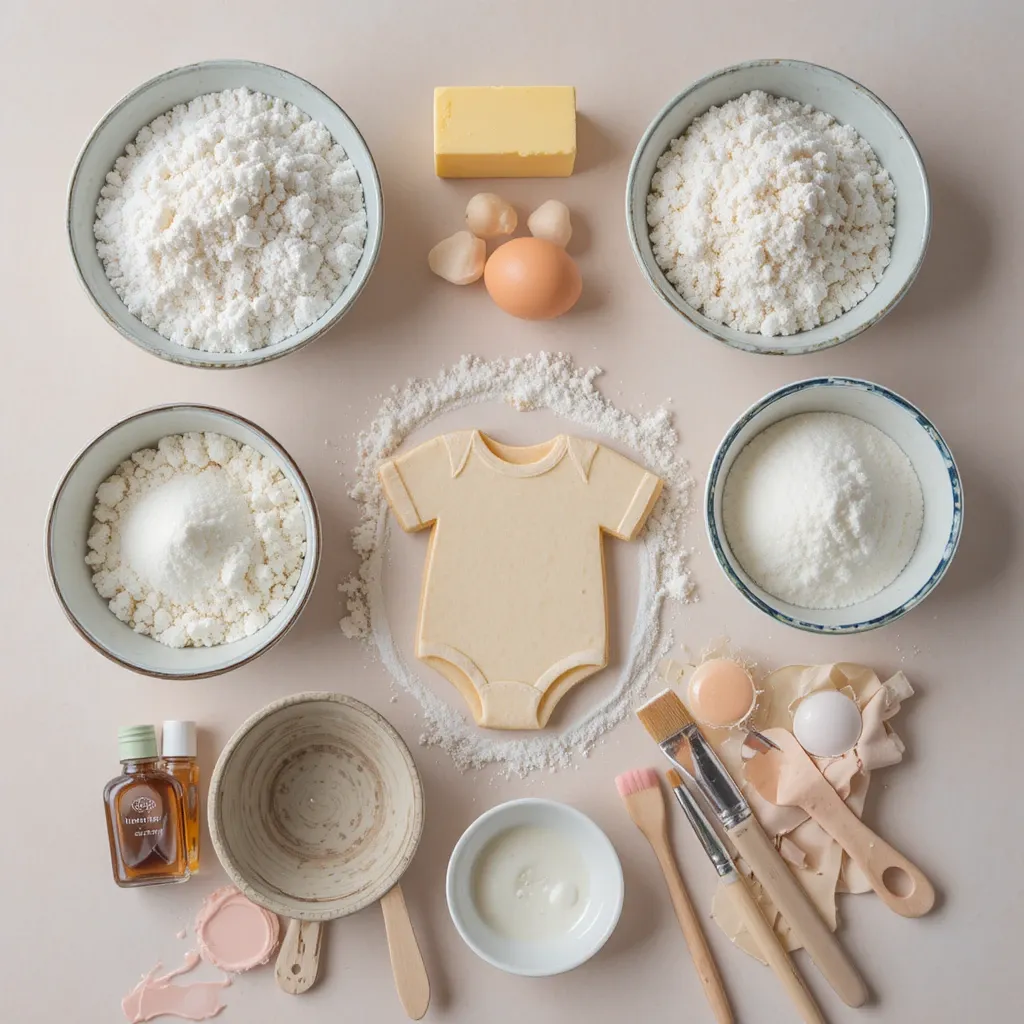
Ingredients
For Cookies:
- 3 cups all-purpose flour
- 1 teaspoon baking powder
- 1/2 teaspoon salt
- 1 cup unsalted butter, softened
- 1 cup granulated sugar
- 1 large egg
- 2 teaspoons vanilla extract
For Royal Icing:
- 4 cups powdered sugar
- 3 tablespoons meringue powder
- 6-8 tablespoons warm water
- Gel colors: white, soft pink, peach, green
Prep Time: 2 hours 30 minutes Decorating Time: 4 hours Total Time: 26 hours Yield: 20 onesie cookies
Step-by-Step Instructions
Preparing the Dough
Mix flour, baking powder, and salt in a bowl. Whisk thoroughly and set aside.
Cream butter and sugar in mixer for 3 minutes until pale and fluffy. The texture should be light and airy.
Beat in egg and vanilla on low speed until smooth and evenly combined.
Add flour mixture gradually, about 1 cup at a time, mixing just until dough forms.
Wrap dough in two flat disks, refrigerate for at least 2 hours or overnight.
Cutting and Baking Onesies
Heat oven to 350°F and prepare baking sheets with parchment.
Roll dough to 1/4 inch thickness on floured surface. Cut with onesie-shaped cutter.
Place cut cookies on sheets, spacing 1 inch apart. Refrigerate cut cookies for 10 minutes before baking.
Bake 10-12 minutes until barely golden at edges. Centers should look slightly underbaked.
Cool on pan 5 minutes, then move to wire rack to cool completely.
Decorating with Florals
Make royal icing by beating powdered sugar, meringue powder, and water for 5-7 minutes until stiff.
Divide and tint: white for base, soft pink, peach, and green for flowers.
Outline onesie shape with white icing using #2 tip. Let set 15 minutes.
Flood onesie with thinned white icing. Smooth with toothpick and let dry 8 hours.
Thin pink, peach, and green icing to painting consistency with water.
Hand-paint small 5-petal flowers randomly across dried onesie using fine brush.
Add green leaves and small dots for flower centers.
Pipe three tiny dots at bottom of onesie for snap details using #1 tip.
Dry completely for 12 hours before handling.
Recipe #3: Blooming Baby Bottle Cookies
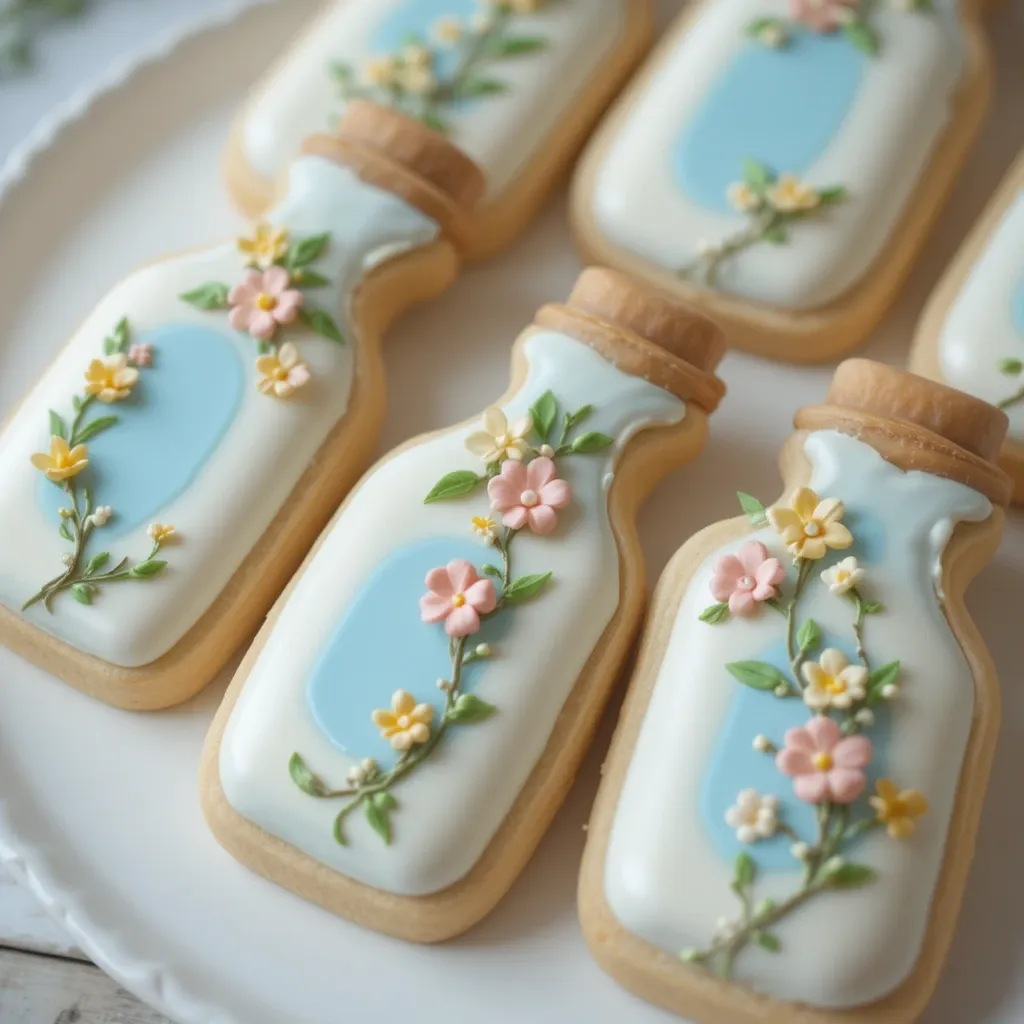
Baby bottles with flowers climbing up the sides in a whimsical garden style.
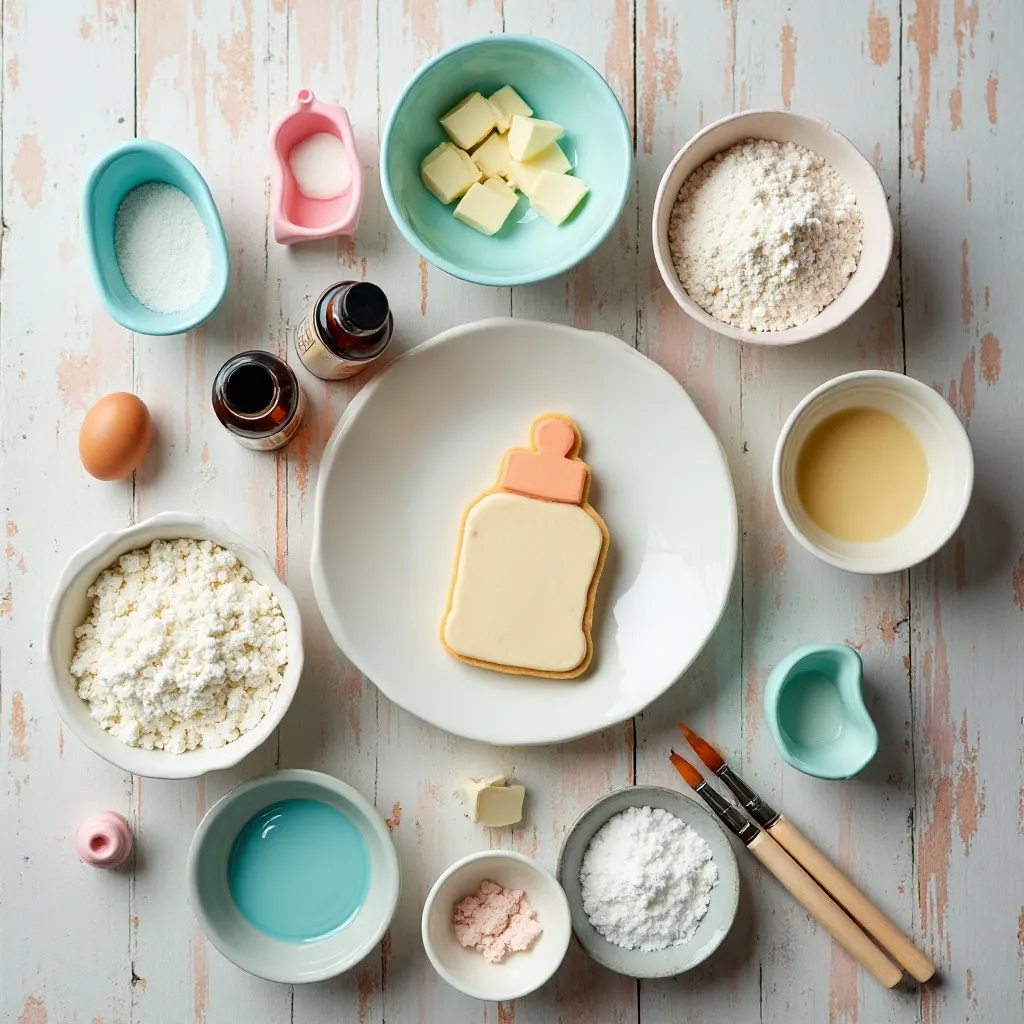
Ingredients
For Sugar Cookies:
- 3 cups all-purpose flour
- 1 teaspoon baking powder
- 1/2 teaspoon salt
- 1 cup butter, softened
- 1 cup granulated sugar
- 1 egg
- 2 teaspoons vanilla extract
For Icing and Decoration:
- 4 cups powdered sugar
- 3 tablespoons meringue powder
- 7 tablespoons warm water
- Gel colors: white, sky blue, pink, green, yellow
Prep Time: 2 hours 30 minutes Decorating Time: 3 hours 30 minutes Total Time: 24 hours Yield: 18 bottle cookies
Step-by-Step Instructions
Cookie Preparation
Combine flour, baking powder, and salt. Whisk and set aside.
Beat butter and sugar on medium for 3 minutes until fluffy and pale colored.
Add egg and vanilla, mixing on low until fully incorporated.
Mix in flour gradually until dough just comes together without overmixing.
Form into two disks, wrap, and chill for 2 hours.
Shaping and Baking
Preheat to 350°F. Line sheets with parchment.
Roll dough to 1/4 inch and cut with baby bottle cutter.
Place on sheets 1 inch apart. Bake 9-11 minutes until edges start to barely color.
Cool on pan 5 minutes, transfer to rack.
Creating the Floral Bottle Design
Make royal icing and divide into portions: white for bottle, sky blue for liquid, pink/green/yellow for flowers.
Outline bottle shape with white icing using #2 tip, leaving center area open for “milk.” Set 15 minutes.
Flood bottle with white icing. Immediately flood center section with sky blue for milk effect.
Let dry 8 hours until hard.
Mix pink, green, and yellow icing to thin painting consistency.
Paint small climbing flowers up one side of bottle using fine brush. Start at bottom and work up.
Add green vine and leaves connecting the flowers.
Paint small dots in flower centers with yellow.
Let dry 12 hours before packaging.
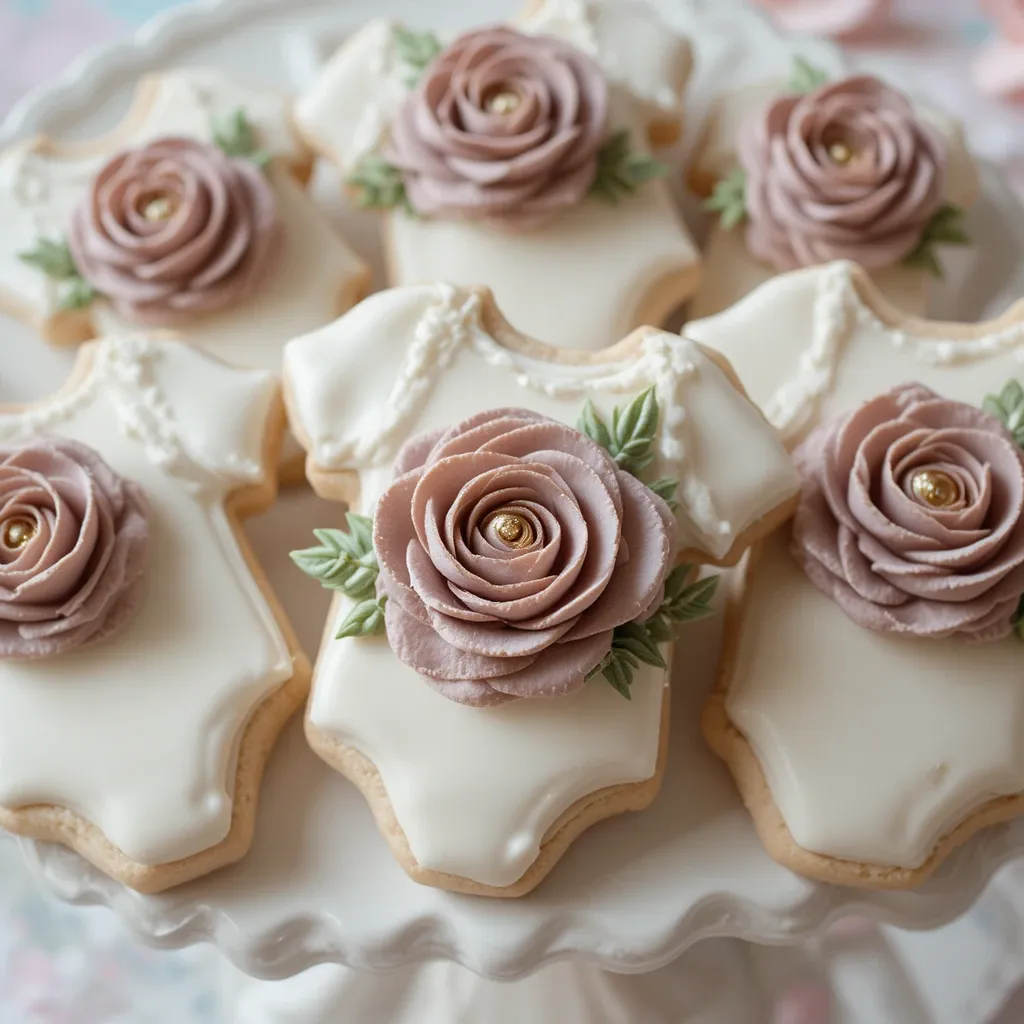
Recipe #4: Knotted Onesie with Single Large Bloom
Modern knotted onesie cookies featuring one statement flower.
Ingredients
For Cookies:
- 3 cups all-purpose flour
- 1 teaspoon baking powder
- 1/2 teaspoon salt
- 1 cup butter, softened
- 1 cup sugar
- 1 egg
- 2 teaspoons vanilla
For Decoration:
- 4 cups powdered sugar
- 3 tablespoons meringue powder
- 6-7 tablespoons water
- Gel colors: cream, dusty rose, green, gold luster dust
Prep Time: 2 hours 30 minutes Decorating Time: 4 hours Total Time: 26 hours Yield: 18 cookies
Step-by-Step Instructions
Making the Base Cookies
Mix dry ingredients (flour, baking powder, salt) in bowl.
Cream butter and sugar for 3 minutes until pale and fluffy.
Beat in egg and vanilla until smooth.
Add flour mixture gradually, mixing just until combined.
Chill dough in two disks for 2 hours.
Baking Knotted Onesies
Heat oven to 350°F with parchment-lined sheets ready.
Roll to 1/4 inch thickness and cut with knotted onesie cutter.
Space cookies 1 inch apart on sheets. Bake 10-11 minutes.
Cool 5 minutes on pan, then move to rack.
Decorating with Elegant Bloom
Prepare royal icing to stiff peak consistency.
Tint majority cream or soft ivory for base.
Outline knotted onesie with #2 tip in cream icing. Set 15 minutes.
Flood with cream icing and smooth. Dry 8 hours.
Mix dusty rose and green icing to medium consistency.
Using #104 petal tip, pipe large layered flower in center of onesie. Start with base petals, pipe 5-6 petals in circle.
Add second layer of slightly smaller petals on top.
Pipe green leaves on either side of flower with #352 leaf tip.
Add tiny green stem details.
Brush gold luster dust on flower center for elegant shimmer.
Dry 12 hours completely.
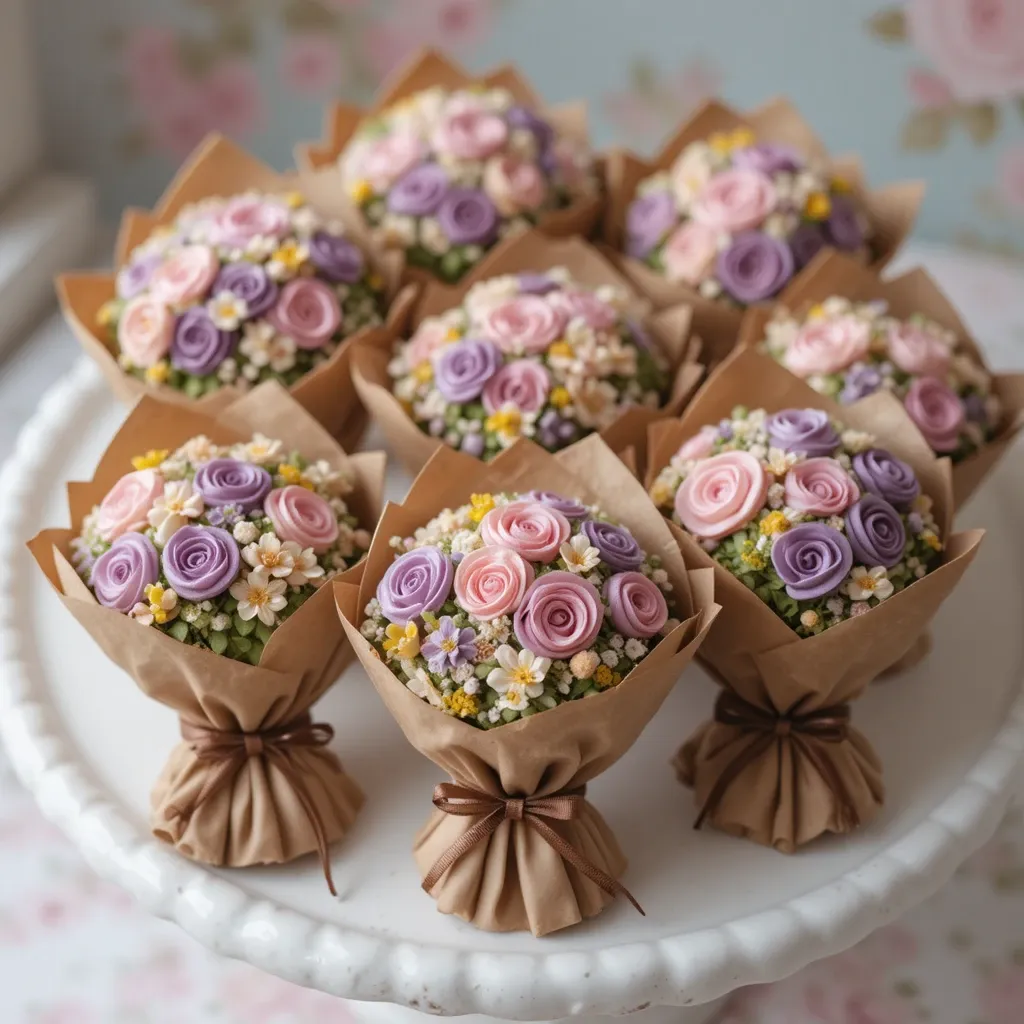
Recipe #5: Flower Bouquet Wrapped Cookies
Cookies shaped like wrapped flower bouquets with detailed piped flowers.
Ingredients
For Sugar Cookies:
- 3 cups flour
- 1 teaspoon baking powder
- 1/2 teaspoon salt
- 1 cup butter, softened
- 1 cup sugar
- 1 egg
- 2 teaspoons vanilla
For Royal Icing:
- 4 cups powdered sugar, sifted
- 3 tablespoons meringue powder
- 7 tablespoons warm water
- Gel colors: white, pink, purple, yellow, green, brown
Prep Time: 2 hours 30 minutes Decorating Time: 5 hours Total Time: 28 hours Yield: 16 bouquet cookies
Step-by-Step Instructions
Cookie Base Preparation
Whisk flour, baking powder, and salt together.
Cream butter and sugar 3 minutes until fluffy.
Add egg and vanilla, beat until smooth.
Gradually mix in flour until dough forms.
Wrap and chill 2 hours.
Baking Bouquet Shapes
Preheat oven to 350°F with parchment-lined sheets.
Roll dough 1/4 inch thick. Cut with bouquet or cone-shaped cutter.
Space 1 inch apart on sheets. Bake 9-11 minutes.
Cool 5 minutes on pan, then transfer to rack.
Creating Layered Bouquet Design
Make royal icing to stiff consistency.
Divide and tint: white, pink, purple, yellow, green, brown.
Outline bouquet wrapper section with brown icing. Outline top flower area separately.
Flood wrapper with brown thinned icing. Let set 30 minutes.
Using #2 tip, pipe lines on wrapper for paper texture. Dry 6 hours.
With #104 petal tip, pipe small roses at top in pink and purple. Pipe 5-6 small roses clustered together.
Add yellow dot flowers between roses using #2 tip.
Pipe green leaves throughout using #352 leaf tip.
Add small filler flowers with white icing dots.
Pipe brown ribbon or string at base of bouquet.
Dry completely 12 hours before moving.
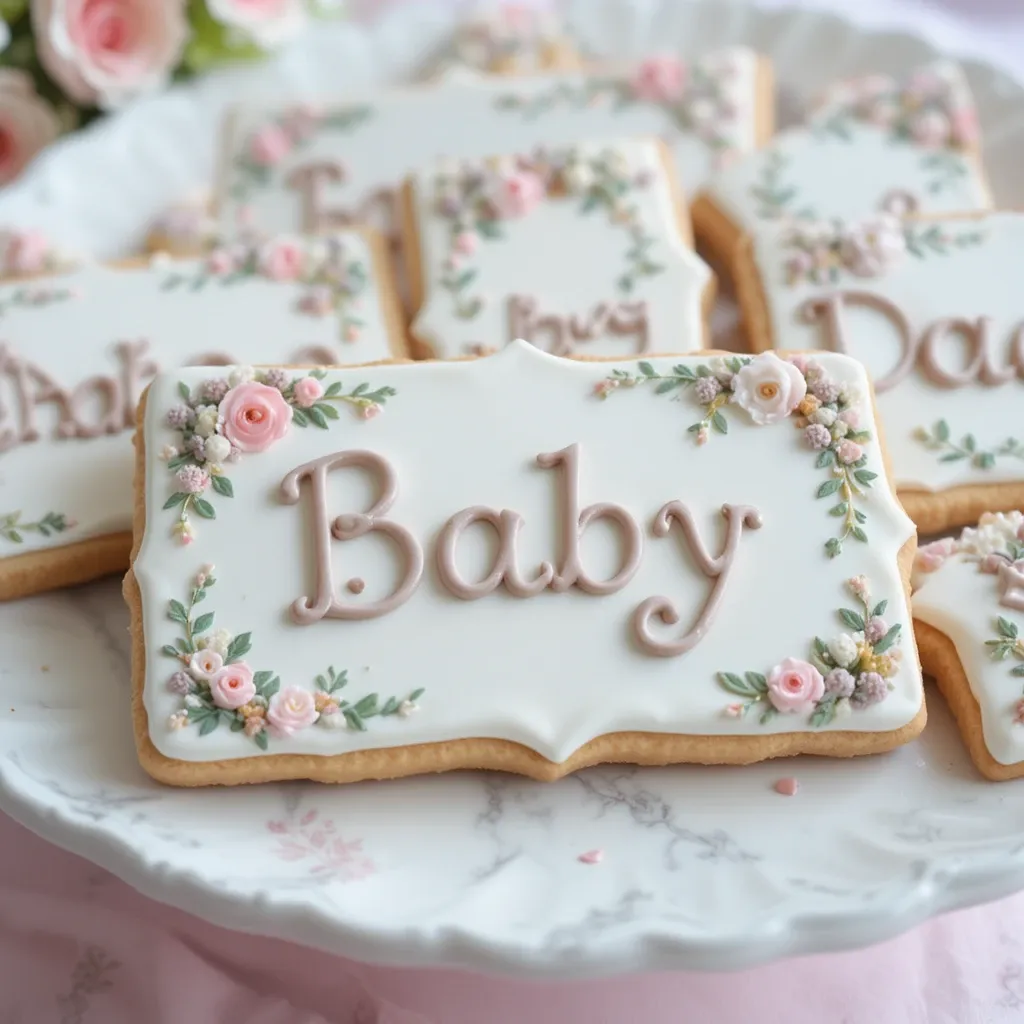
Recipe #6: Baby Name Plaque with Floral Border
Rectangular plaque cookies personalized with baby’s name and painted flowers.
Ingredients
For Cookies:
- 3 cups flour
- 1 teaspoon baking powder
- 1/2 teaspoon salt
- 1 cup butter, softened
- 1 cup sugar
- 1 egg
- 2 teaspoons vanilla
For Icing:
- 4 cups powdered sugar
- 3 tablespoons meringue powder
- 6-7 tablespoons water
- Gel colors: white, soft pink, lavender, green
- Edible marker or food coloring pen
Prep Time: 2 hours 30 minutes Decorating Time: 4 hours Total Time: 26 hours Yield: 12-15 plaque cookies

Step-by-Step Instructions
Preparing Plaque Cookies
Mix flour, baking powder, and salt thoroughly.
Beat butter and sugar 3 minutes until pale and fluffy.
Mix in egg and vanilla until combined.
Add flour gradually, mixing just until dough forms.
Chill dough 2 hours in wrapped disks.
Cutting and Baking
Heat oven to 350°F and line sheets with parchment.
Roll dough 1/4 inch thick and cut rectangular plaques (approximately 3×4 inches).
Place on sheets 1 inch apart. Bake 11-12 minutes until barely golden.
Cool 5 minutes on pan, then move to rack.
Decorating Name Plaques
Prepare royal icing to stiff peaks.
Tint white or soft cream for base.
Outline plaque edges with #2 tip. Set 15 minutes.
Flood entire cookie with white icing. Smooth and dry 8 hours.
Thin pink, lavender, and green icing for painting.
Hand-paint small flowers around edges of plaque leaving center open.
Paint flowers in corners and along sides using soft pink and lavender.
Add green leaves and small vine details between flowers.
Let painted flowers dry 2 hours.
Write baby name in center using edible marker or piped icing with #1 tip.
Dry completely 8 hours.
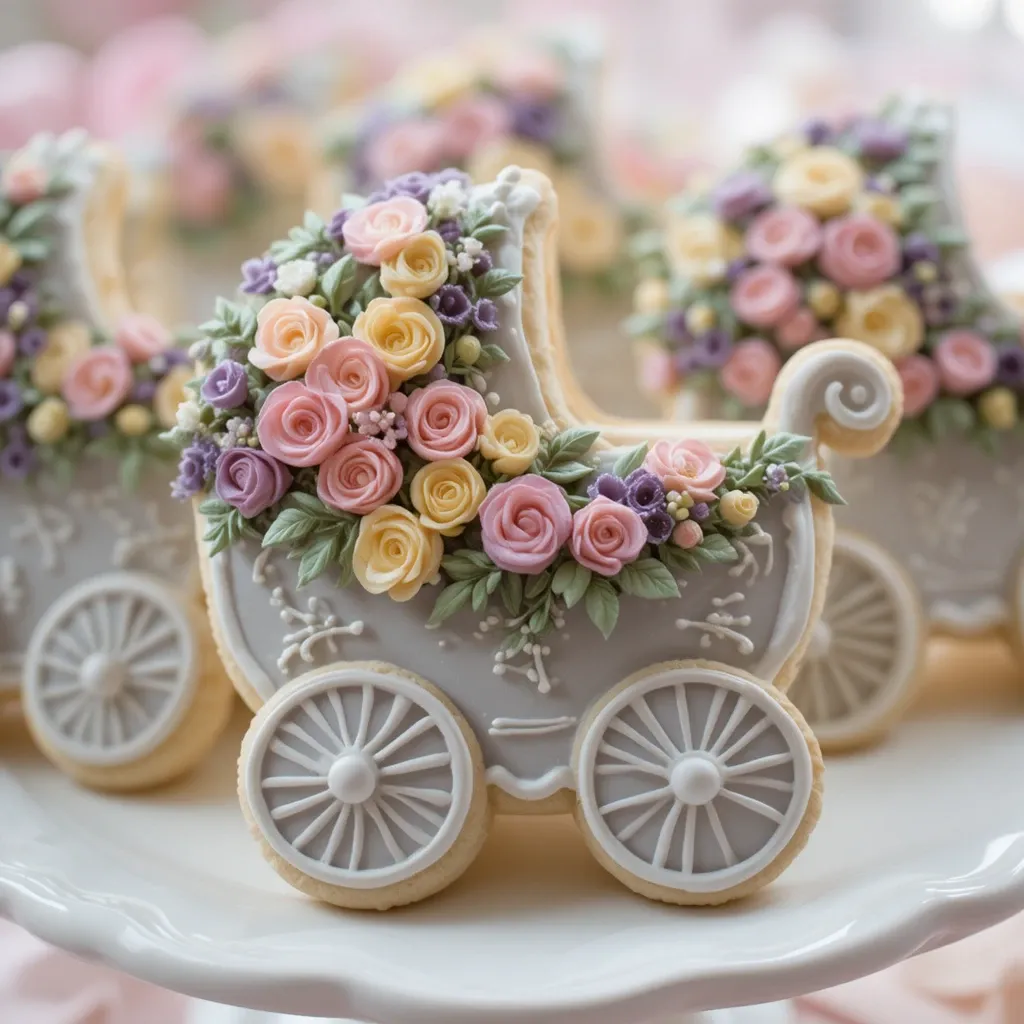
Recipe #7: Floral Baby Carriage Cookies
Vintage-style baby carriage with flowers overflowing from the top.
Ingredients
For Sugar Cookies:
- 3 cups all-purpose flour
- 1 teaspoon baking powder
- 1/2 teaspoon salt
- 1 cup butter, softened
- 1 cup granulated sugar
- 1 egg
- 2 teaspoons vanilla extract
For Royal Icing:
- 4 cups powdered sugar
- 3 tablespoons meringue powder
- 7 tablespoons warm water
- Gel colors: white, silver/gray, pink, purple, yellow, green
Prep Time: 2 hours 30 minutes Decorating Time: 5 hours Total Time: 28 hours Yield: 14 carriage cookies
Step-by-Step Instructions
Cookie Dough
Combine flour, baking powder, and salt in bowl.
Cream butter and sugar 3 minutes until light and fluffy.
Beat in egg and vanilla until smooth.
Mix in flour gradually until just combined.
Wrap dough and refrigerate 2 hours.
Baking Carriages
Preheat to 350°F with parchment-lined sheets ready.
Roll dough 1/4 inch thick and cut with baby carriage cutter.
Space cookies 1 inch apart on sheets. Bake 10-12 minutes.
Cool on pan 5 minutes, then transfer to cooling rack.
Detailed Carriage Decoration
Make royal icing and divide into colors: white/gray for carriage, colors for flowers.
Outline carriage body with white or gray icing using #2 tip. Set 15 minutes.
Flood carriage body with thinned icing. Dry 6 hours.
Outline and flood wheels separately in gray or black. Let dry.
Using #104 petal tip, pipe small flowers overflowing from top of carriage. Pipe 8-10 tiny roses in pink and purple.
Add yellow dot centers to flowers.
Pipe green leaves and stems throughout flowers.
Add handle detail on carriage with gray icing and #2 tip.
Pipe spokes on wheels using #1 tip.
Dry completely 12 hours.
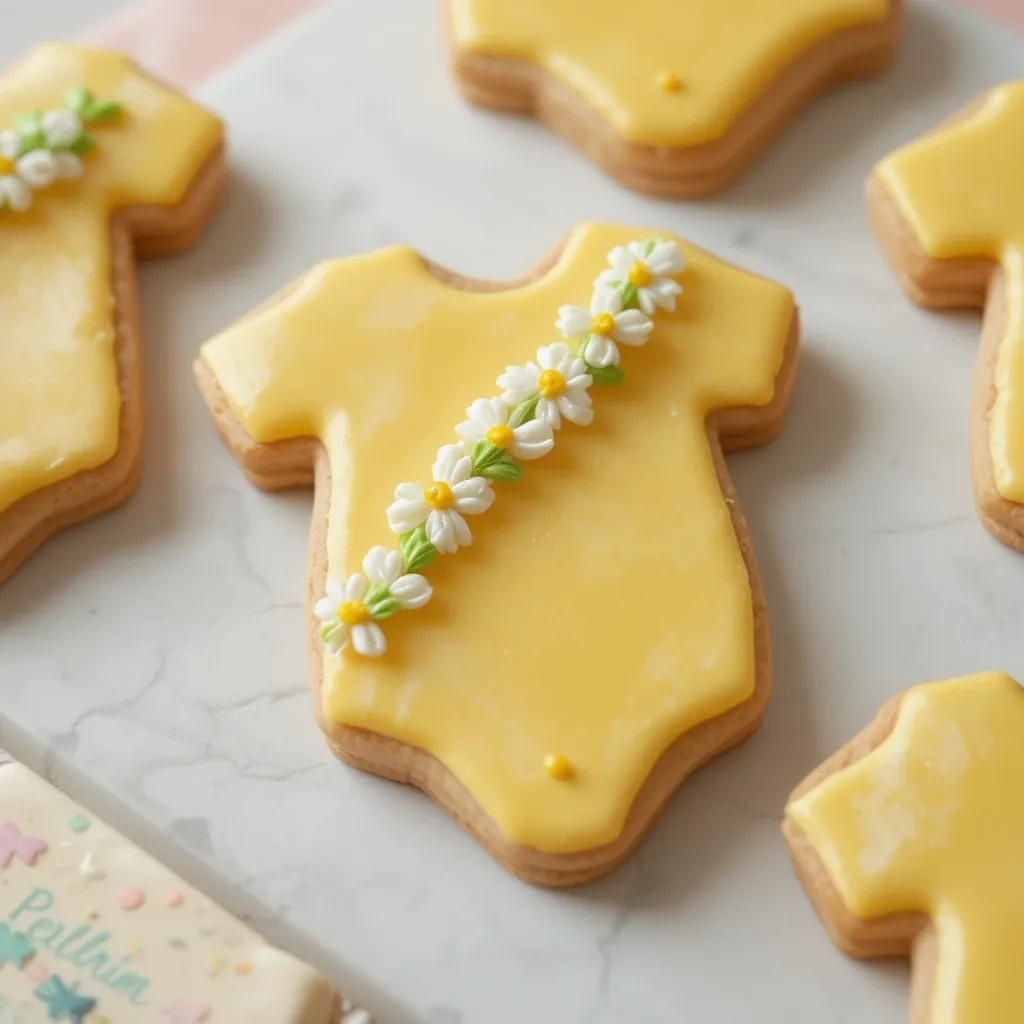
Recipe #8: Daisy Chain Onesie Cookies
Simple, cheerful onesies with daisy chain pattern across the front.
Ingredients
For Cookies:
- 3 cups flour
- 1 teaspoon baking powder
- 1/2 teaspoon salt
- 1 cup butter, softened
- 1 cup sugar
- 1 egg
- 2 teaspoons vanilla
For Decoration:
- 4 cups powdered sugar
- 3 tablespoons meringue powder
- 6-7 tablespoons water
- Gel colors: soft yellow, white, bright yellow, green
Prep Time: 2 hours 30 minutes Decorating Time: 3 hours Total Time: 24 hours Yield: 20 onesie cookies
Step-by-Step Instructions
Making Cookie Dough
Whisk together flour, baking powder, and salt.
Beat butter and sugar 3 minutes until pale and fluffy.
Add egg and vanilla, mixing until combined.
Gradually add flour, mixing just until dough forms.
Chill wrapped dough 2 hours.
Baking Process
Heat oven to 350°F and line sheets with parchment.
Roll dough 1/4 inch thick and cut onesie shapes.
Place 1 inch apart on sheets. Bake 10-11 minutes.
Cool 5 minutes on sheet, then move to rack.
Creating Daisy Chain Design
Prepare royal icing to stiff peaks.
Tint soft yellow for onesie base, white and bright yellow for daisies, green for leaves.
Outline onesie with soft yellow using #2 tip. Set 15 minutes.
Flood with soft yellow icing. Smooth and dry 8 hours.
Using #1 or #2 tip, pipe small white daisies in chain pattern diagonally across onesie. Pipe 5 petals per daisy.
Add bright yellow centers to each daisy.
Pipe green leaves and small stems connecting daisies.
Pipe three dots at bottom for snaps.
Dry completely 8 hours.
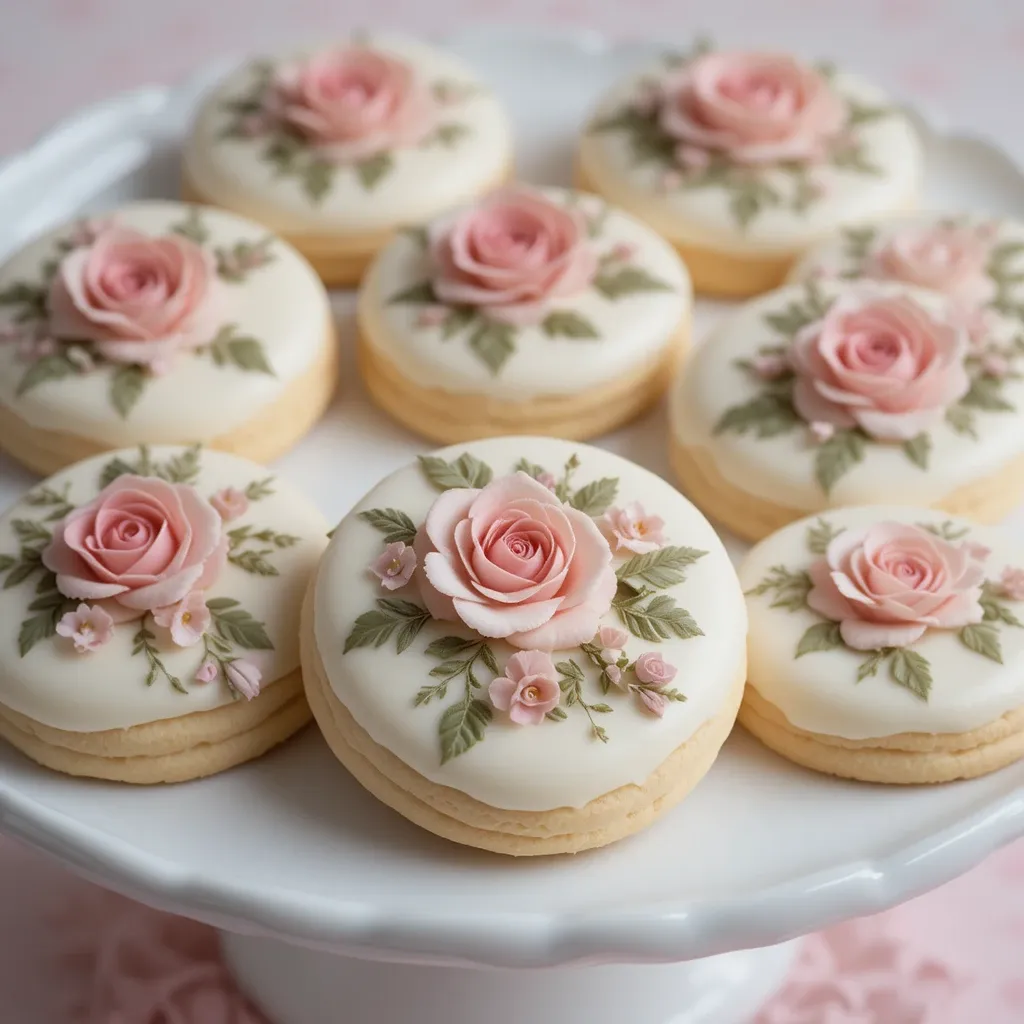
Recipe #9: Rose Garden Round Cookies
Elegant round cookies with hand-painted roses in various bloom stages.
Ingredients
For Sugar Cookies:
- 3 cups flour
- 1 teaspoon baking powder
- 1/2 teaspoon salt
- 1 cup butter, softened
- 1 cup sugar
- 1 egg
- 2 teaspoons vanilla
For Royal Icing:
- 4 cups powdered sugar
- 3 tablespoons meringue powder
- 6-7 tablespoons water
- Gel colors: cream, various pinks, green
Prep Time: 2 hours 30 minutes Decorating Time: 4 hours Total Time: 26 hours Yield: 24 round cookies
Step-by-Step Instructions
Cookie Preparation
Mix flour, baking powder, and salt in bowl.
Cream butter and sugar 3 minutes until fluffy.
Beat in egg and vanilla until smooth.
Add flour gradually until dough forms.
Wrap and chill 2 hours.
Baking Rounds
Preheat to 350°F with prepared sheets.
Roll 1/4 inch thick and cut 3-inch rounds.
Space 1 inch apart and bake 9-11 minutes.
Cool 5 minutes, then transfer to rack.
Hand-Painting Roses
Make royal icing and tint cream for base.
Outline rounds with #2 tip. Set 15 minutes.
Flood with cream icing. Dry 8 hours.
Mix various shades of pink icing (light, medium, dark) to thin painting consistency.
Using fine brush, paint roses in different stages: buds, half-open, full blooms.
Start with light pink base layers, add darker pink shadows for depth.
Paint 3-5 roses per cookie in scattered arrangement.
Add green leaves around roses with various shades of green.
Create soft shadows with diluted colors for dimension.
Dry 8-12 hours completely.
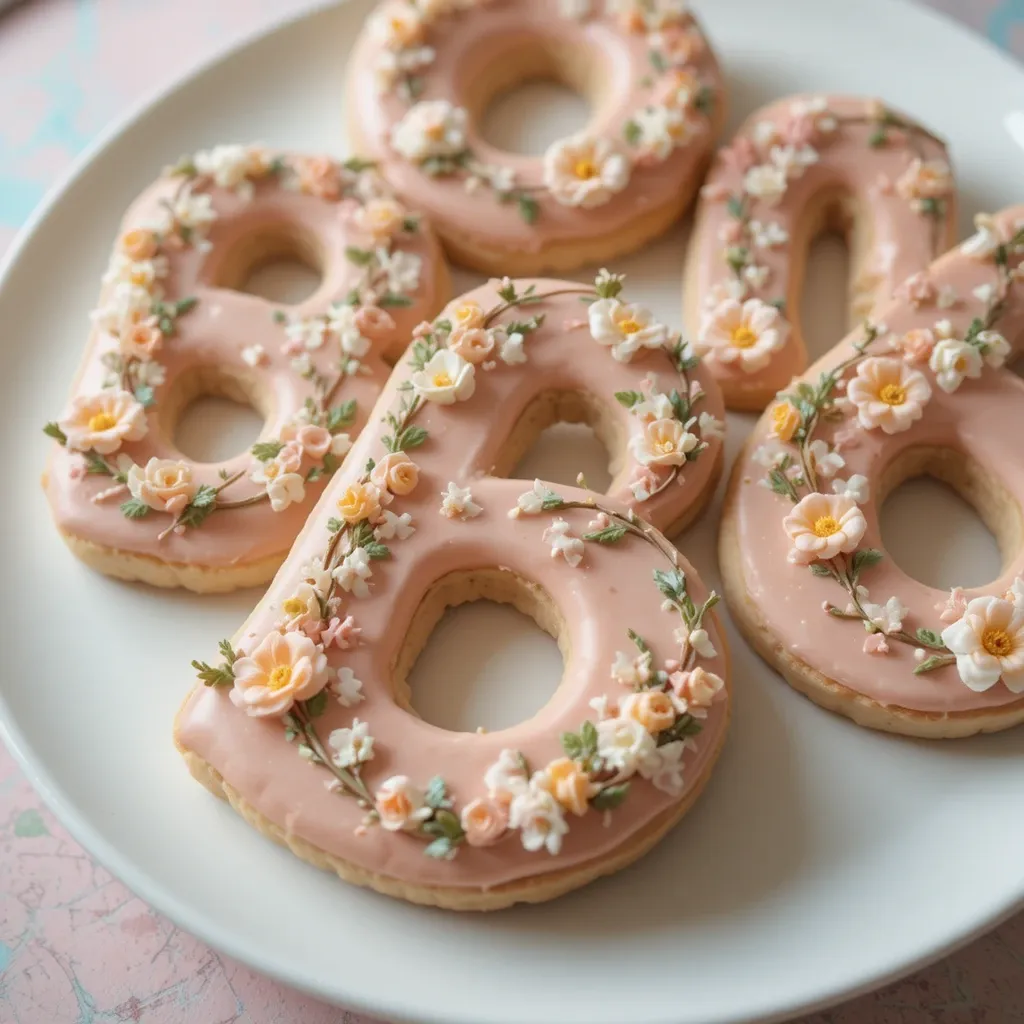
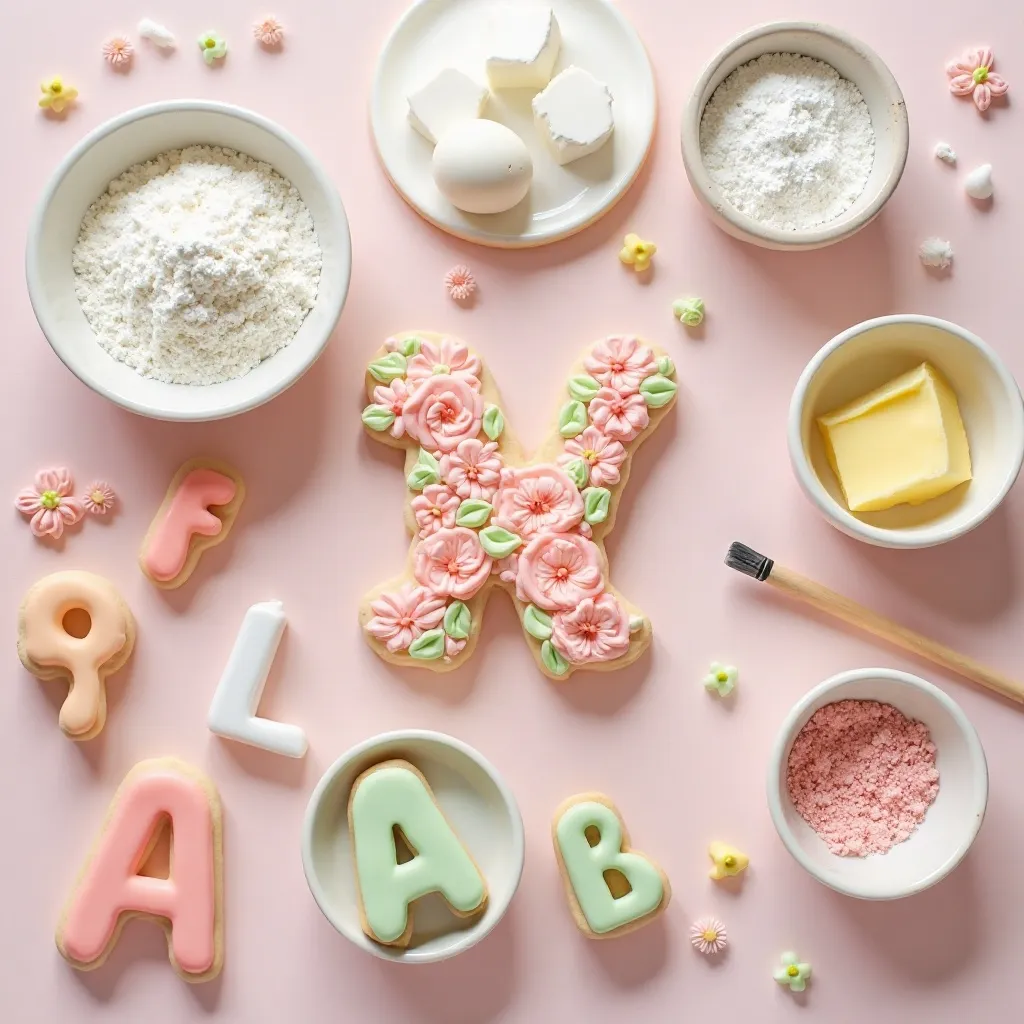
Recipe #10: Floral Initial Cookies
Large letter cookies personalized with baby’s initial and surrounded by painted flowers.
Ingredients
For Cookies:
- 3 cups flour
- 1 teaspoon baking powder
- 1/2 teaspoon salt
- 1 cup butter, softened
- 1 cup sugar
- 1 egg
- 2 teaspoons vanilla
For Icing:
- 4 cups powdered sugar
- 3 tablespoons meringue powder
- 6-7 tablespoons water
- Gel colors: soft pink, white, peach, yellow, green
Prep Time: 2 hours 30 minutes Decorating Time: 4 hours Total Time: 26 hours Yield: 12-15 letter cookies
Step-by-Step Instructions
Dough Preparation
Whisk flour, baking powder, and salt together.
Beat butter and sugar 3 minutes.
Mix in egg and vanilla.
Add flour until combined.
Chill 2 hours wrapped.
Baking Letters
Heat oven to 350°F with parchment-lined sheets.
Roll 1/4 inch thick and cut letter shapes (3-4 inches tall).
Space apart and bake 11-13 minutes.
Cool 5 minutes, transfer to rack.
Floral Letter Design
Make royal icing and tint soft pink for letter base.
Outline letter with #2 tip. Set 15 minutes.
Flood letter with soft pink icing. Dry 8 hours.
Thin white, peach, yellow, and green icing for painting.
Paint small flowers around outer edges of letter.
Create clusters of 3-4 flowers in corners and curves.
Add yellow centers to flowers.
Paint green leaves and vines flowing around letter.
Leave center of letter clean for visibility.
Dry 8 hours.
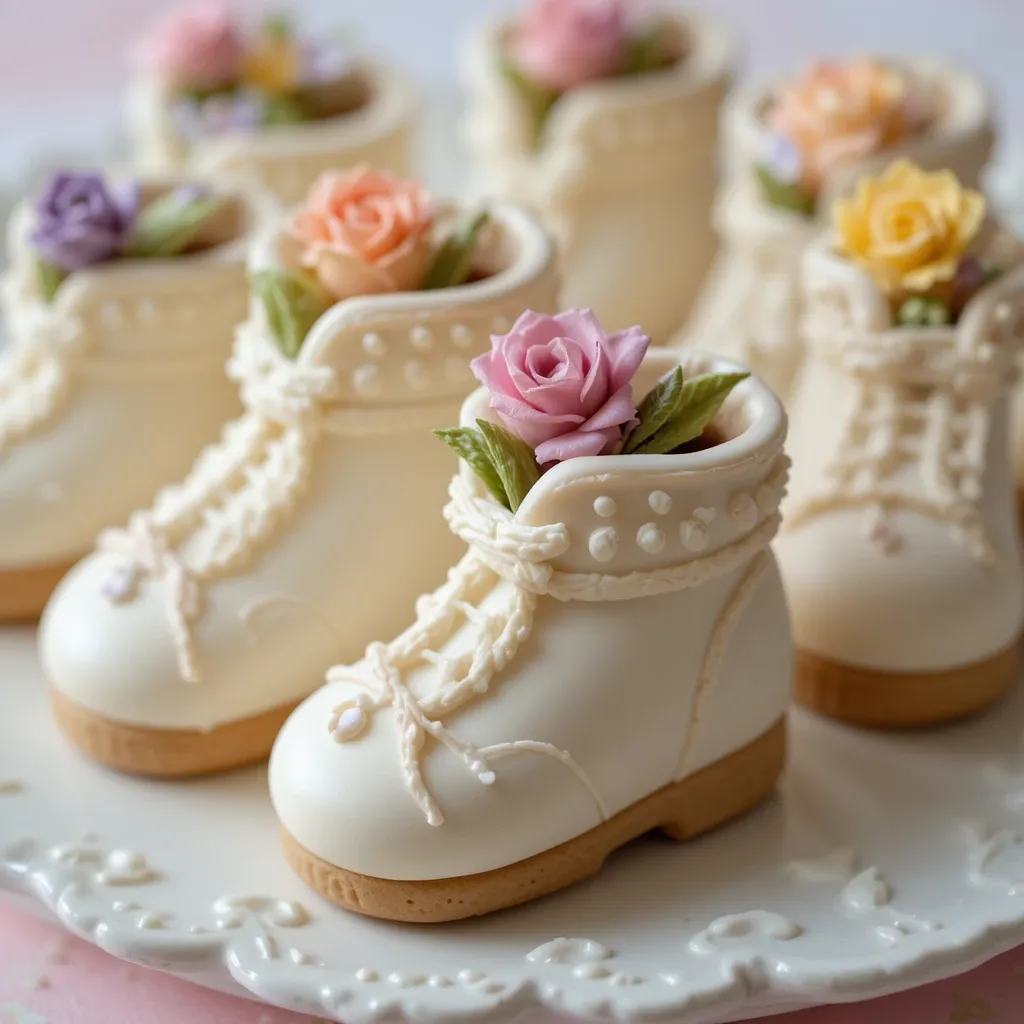
Recipe #11: Baby Bootie with Blossoms
Tiny baby bootie cookies with flowers blooming from the top opening.
Ingredients
For Cookies:
- 3 cups flour
- 1 teaspoon baking powder
- 1/2 teaspoon salt
- 1 cup butter, softened
- 1 cup sugar
- 1 egg
- 2 teaspoons vanilla
For Icing:
- 4 cups powdered sugar
- 3 tablespoons meringue powder
- 7 tablespoons water
- Gel colors: white, pink, purple, yellow, green
Prep Time: 2 hours 30 minutes Decorating Time: 4 hours Total Time: 26 hours Yield: 20 bootie cookies
Step-by-Step Instructions
Making Cookies
Mix flour, baking powder, and salt.
Cream butter and sugar 3 minutes.
Add egg and vanilla, mix smooth.
Add flour gradually.
Chill 2 hours.
Baking Booties
Preheat to 350°F with parchment.
Roll 1/4 inch and cut bootie shapes.
Bake 9-10 minutes.
Cool 5 minutes, transfer.
Bootie and Bloom Decoration
Make royal icing and tint white for bootie base.
Outline bootie with #2 tip. Set 15 minutes.
Flood white icing, dry 8 hours.
Using #101 or #104 small petal tip, pipe tiny flowers coming out of bootie opening.
Pipe 4-5 small flowers in pink, purple, yellow.
Add green leaves between flowers.
Pipe small laces on bootie with white icing.
Add stitch details around bootie edges with #1 tip.
Dry 8 hours.
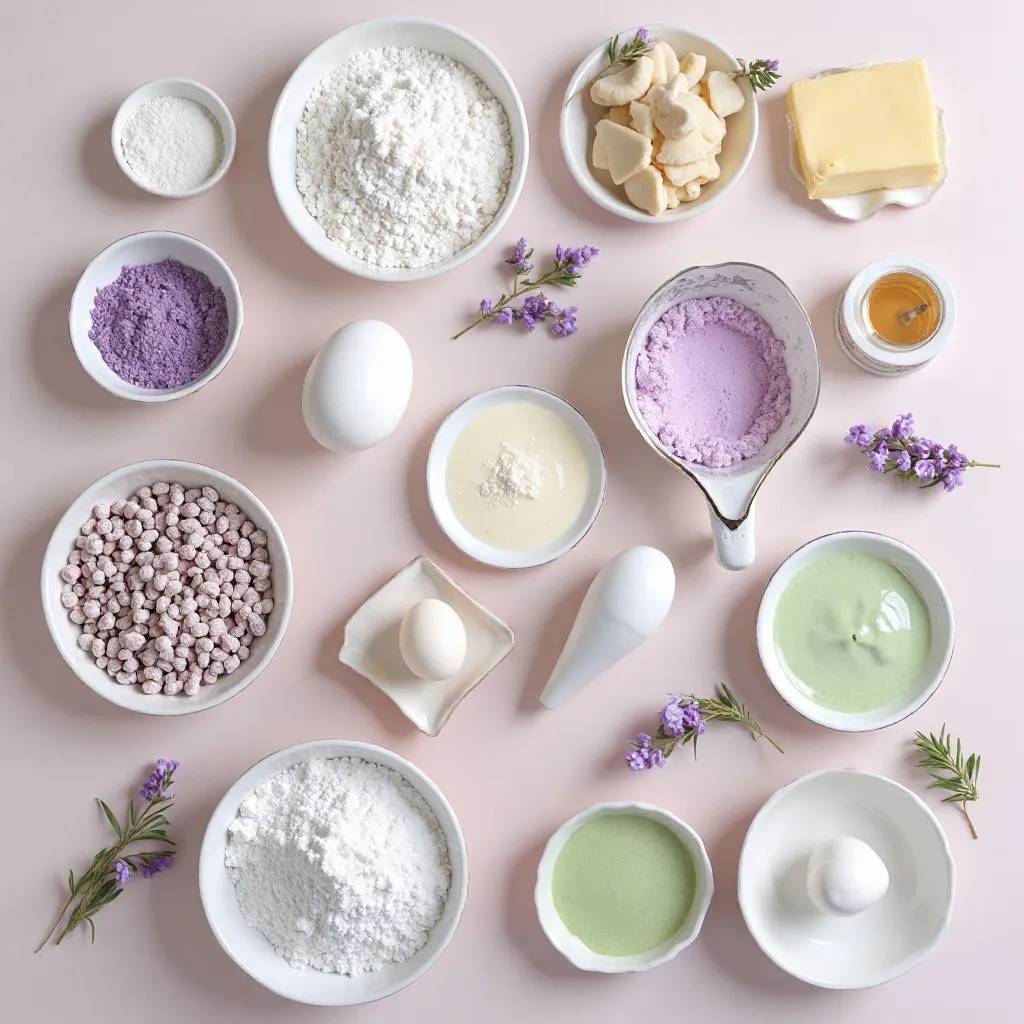
Recipe #12: Lavender Sprig Design Cookies

Sophisticated cookies featuring delicate painted lavender sprigs.
Ingredients
For Sugar Cookies:
- 3 cups flour
- 1 teaspoon baking powder
- 1/2 teaspoon salt
- 1 cup butter, softened
- 1 cup sugar
- 1 egg
- 2 teaspoons vanilla
For Decoration:
- 4 cups powdered sugar
- 3 tablespoons meringue powder
- 6-7 tablespoons water
- Gel colors: soft purple/lavender, cream, green
Prep Time: 2 hours 30 minutes Decorating Time: 3 hours 30 minutes Total Time: 24 hours Yield: 24 cookies
Step-by-Step Instructions
Cookie Base
Combine flour, baking powder, salt.
Beat butter and sugar 3 minutes.
Mix in egg and vanilla.
Add flour gradually.
Chill 2 hours.
Baking
Preheat 350°F with parchment sheets.
Roll 1/4 inch and cut rounds or rectangles.
Bake 9-11 minutes.
Cool completely.
Lavender Painting
Make royal icing and tint soft cream for base.
Outline and flood cookies. Dry 8 hours.
Thin lavender and green icing to painting consistency.
Using fine brush, paint lavender stem starting at bottom.
Paint small dots in clusters along stem for lavender buds.
Create 2-3 lavender sprigs per cookie at angles.
Add thin green stems and small leaves.
Paint very light purple shadows for depth.
Dry 8 hours.
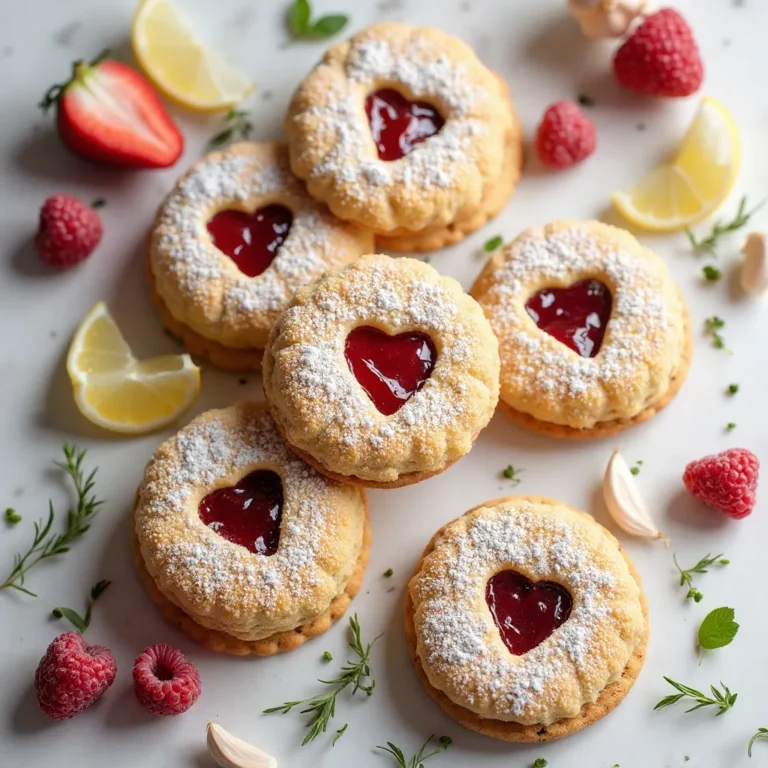
Recipe #13: Floral Heart Cookies
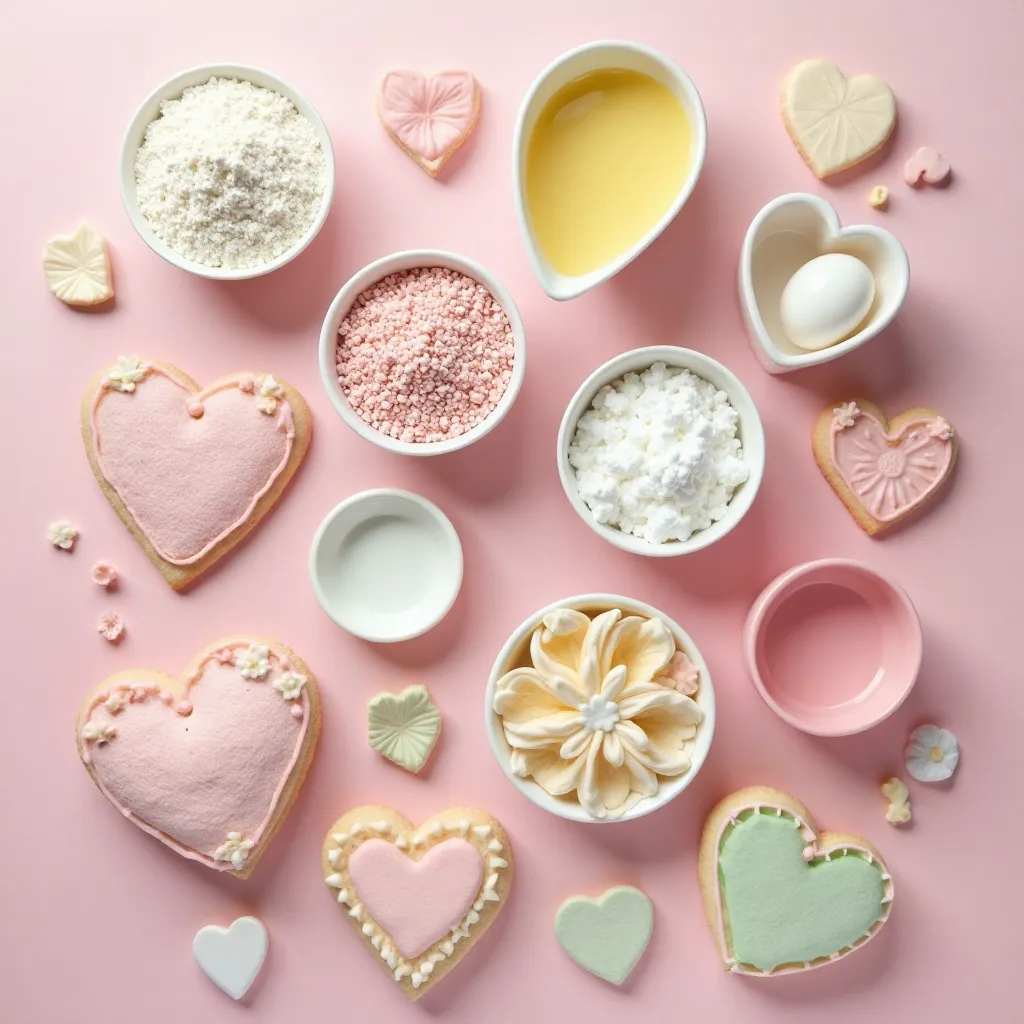
Simple heart-shaped cookies with wreath of tiny flowers around edge.
Ingredients
For Cookies:
- 3 cups flour
- 1 teaspoon baking powder
- 1/2 teaspoon salt
- 1 cup butter, softened
- 1 cup sugar
- 1 egg
- 2 teaspoons vanilla
For Icing:
- 4 cups powdered sugar
- 3 tablespoons meringue powder
- 6-7 tablespoons water
- Gel colors: soft pink, white, yellow, green
Prep Time: 2 hours 30 minutes Decorating Time: 3 hours Total Time: 24 hours Yield: 22 heart cookies

Step-by-Step Instructions
Preparing Dough
Mix flour, baking powder, and salt.
Cream butter and sugar 3 minutes.
Beat in egg and vanilla.
Add flour until combined.
Chill 2 hours.
Baking Hearts
Heat to 350°F with parchment.
Roll 1/4 inch and cut hearts.
Bake 9-11 minutes.
Cool completely.
Floral Wreath Design
Make royal icing and tint soft pink for base.
Outline heart with #2 tip. Set 15 minutes.
Flood with pink. Dry 8 hours.
Using #2 tip, pipe tiny white flowers around outer edge of heart in wreath pattern.
Pipe 5 petals per flower, spacing evenly.
Add yellow dots for flower centers.
Pipe green leaves between flowers.
Keep center of heart clear.
Dry 8 hours.
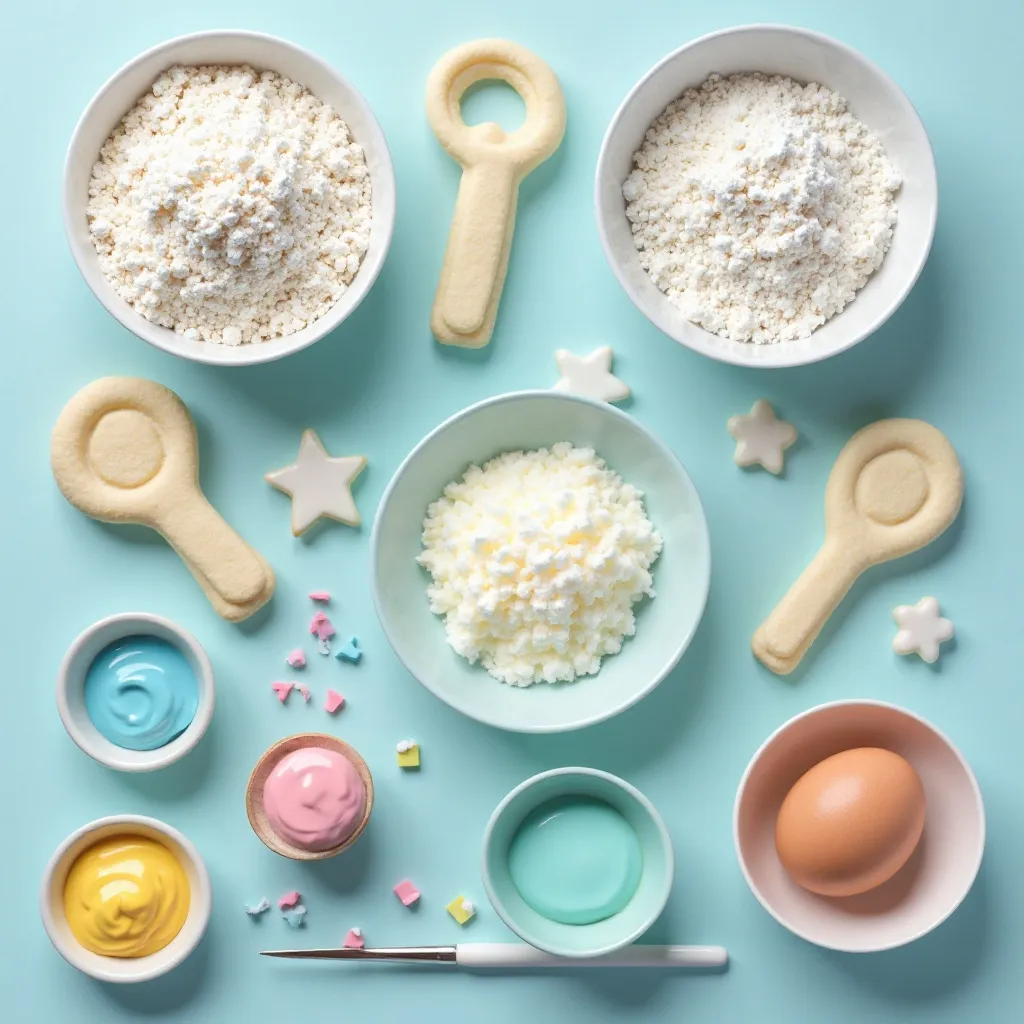
Recipe #14: Baby Rattle with Blooms
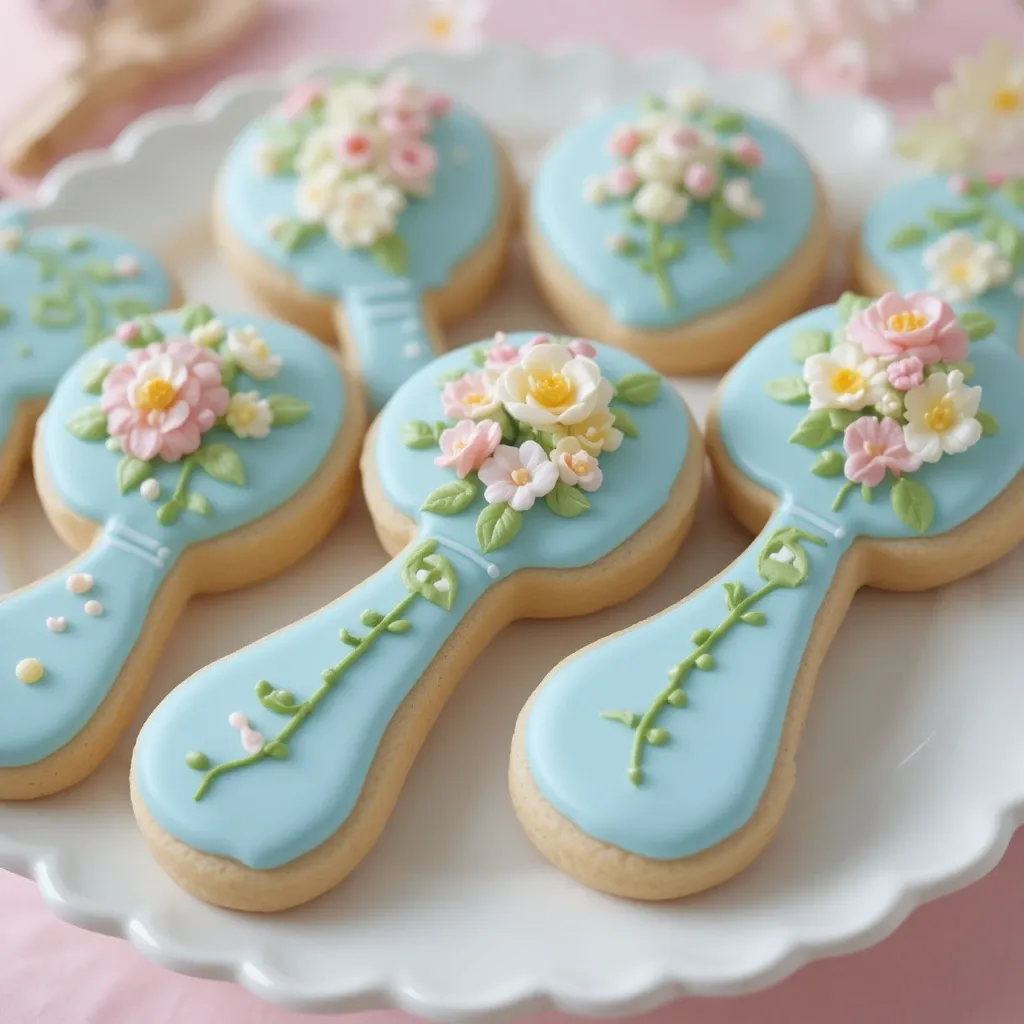
Rattle-shaped cookies with flowers on handle or surrounding the round part.
Ingredients
For Cookies:
- 3 cups flour
- 1 teaspoon baking powder
- 1/2 teaspoon salt
- 1 cup butter, softened
- 1 cup sugar
- 1 egg
- 2 teaspoons vanilla
For Icing:
- 4 cups powdered sugar
- 3 tablespoons meringue powder
- 7 tablespoons water
- Gel colors: white, pink, blue, yellow, green
Prep Time: 2 hours 30 minutes Decorating Time: 4 hours Total Time: 26 hours Yield: 18 rattle cookies
Step-by-Step Instructions
Cookie Making
Whisk flour, baking powder, and salt.
Beat butter and sugar 3 minutes.
Add egg and vanilla.
Mix in flour.
Chill 2 hours.
Baking Rattles
Preheat to 350°F with parchment.
Roll 1/4 inch and cut rattle shapes.
Bake 10-11 minutes.
Cool completely.
Decorating Flowered Rattle
Make royal icing and divide into colors.
Outline rattle head with white or light blue using #2 tip.
Outline handle separately.
Flood rattle head and handle. Dry 8 hours.
Hand-paint or pipe small flowers on handle.
Paint 3-4 tiny flowers climbing up handle.
Add green leaves and vine.
Pipe details on rattle head (dots, stripes).
Add flower in center of rattle head if desired.
Dry 8 hours.
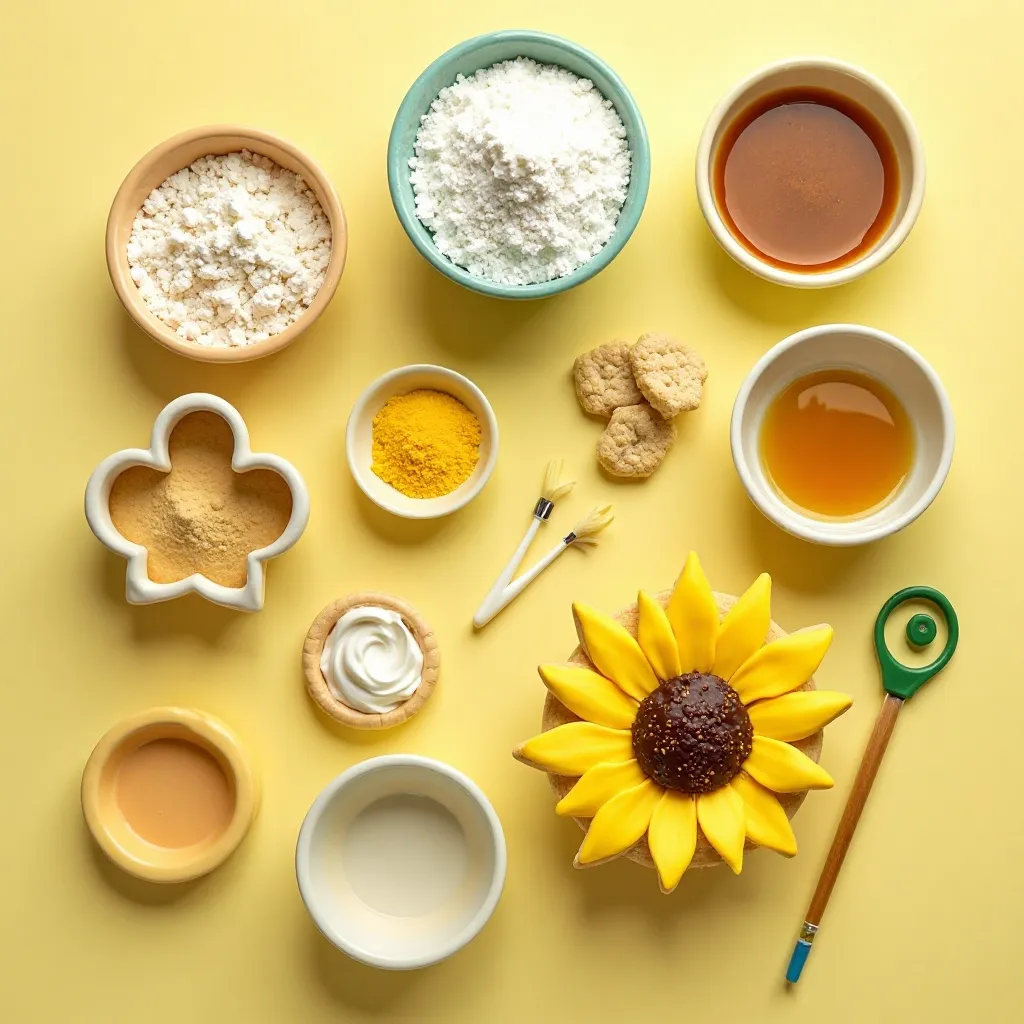
Recipe #15: Sunflower Baby Cookies

Cheerful round cookies featuring bright sunflowers perfect for summer baby showers.
Ingredients
For Sugar Cookies:
- 3 cups flour
- 1 teaspoon baking powder
- 1/2 teaspoon salt
- 1 cup butter, softened
- 1 cup sugar
- 1 egg
- 2 teaspoons vanilla
For Royal Icing:
- 4 cups powdered sugar
- 3 tablespoons meringue powder
- 6-7 tablespoons water
- Gel colors: bright yellow, brown, green, orange
Prep Time: 2 hours 30 minutes Decorating Time: 4 hours Total Time: 26 hours Yield: 20 cookies
Step-by-Step Instructions
Making Cookie Dough
Combine flour, baking powder, and salt in bowl.
Cream butter and sugar for 3 minutes until light and fluffy.
Beat in egg and vanilla until well combined.
Add flour mixture gradually, mixing just until dough comes together.
Divide into two disks, wrap in plastic, and refrigerate 2 hours.
Baking the Cookies
Preheat oven to 350°F and line baking sheets with parchment paper.
Roll chilled dough to 1/4 inch thickness on floured surface.
Cut 3-inch rounds and place 1 inch apart on prepared sheets.
Bake for 9-11 minutes until edges barely start to turn golden.
Cool on pan for 5 minutes, then transfer to wire rack.
Decorating with Sunflowers
Make royal icing and divide into portions: white or cream for base, bright yellow, brown, green, and orange.
Outline each cookie with #2 tip using cream icing. Let set 15 minutes.
Flood cookie with cream or pale yellow icing. Smooth and let dry 8 hours.
Using #104 petal tip, pipe sunflower petals in bright yellow. Start at center and pipe outward, creating 10-12 petals in a circle.
Pipe a second layer of petals between the first layer for fullness.
Fill center with brown icing using #3 tip, creating a circular dome.
Add texture to center by piping small brown dots using #1 tip.
Mix brown with orange for shading and add around edge of center.
Paint or pipe green leaves on two sides of sunflower.
Dry completely for 8-10 hours.
Recipe #16: Footprint with Florals
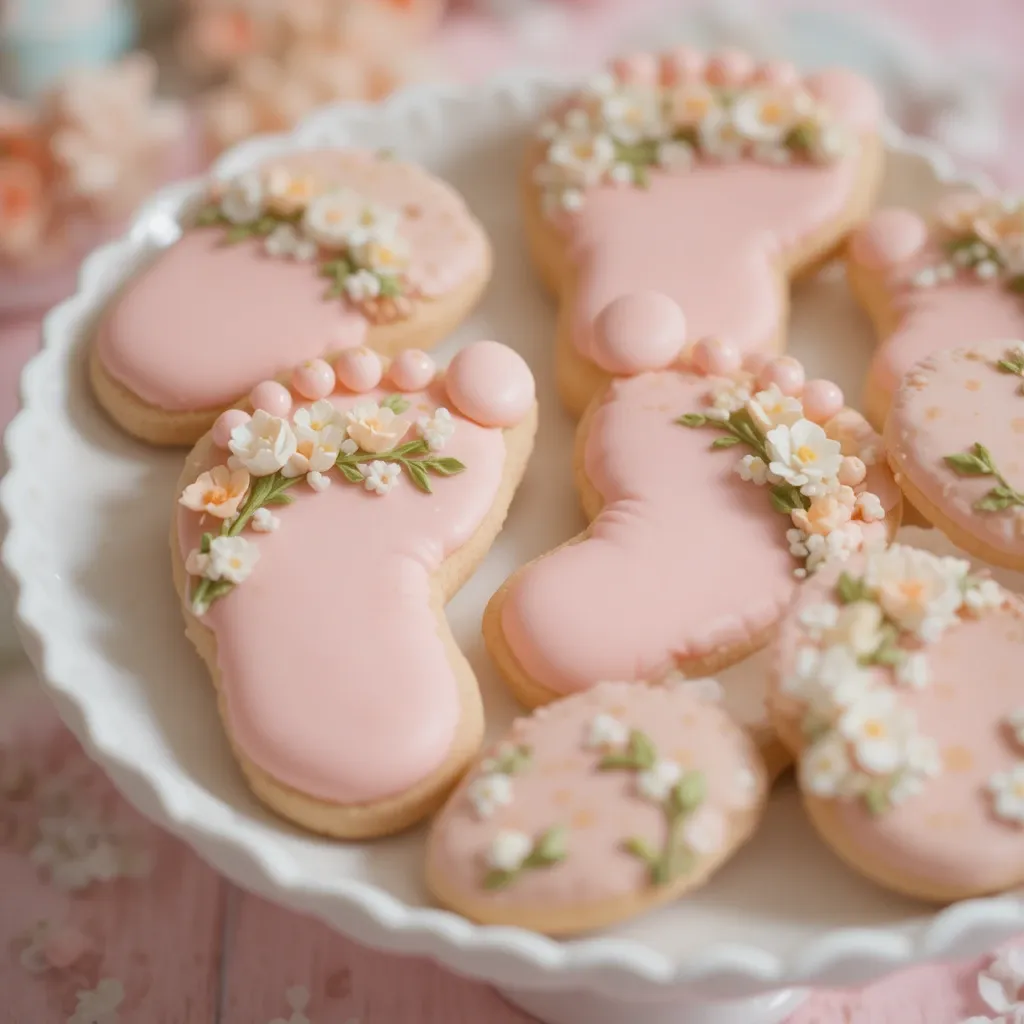
Baby footprint cookies with painted flowers in half-wreath design.
Ingredients
For Cookies:
- 3 cups flour
- 1 teaspoon baking powder
- 1/2 teaspoon salt
- 1 cup butter, softened
- 1 cup sugar
- 1 egg
- 2 teaspoons vanilla
For Decoration:
- 4 cups powdered sugar
- 3 tablespoons meringue powder
- 6-7 tablespoons water
- Gel colors: soft pink, white, peach, green, yellow
Prep Time: 2 hours 30 minutes Decorating Time: 4 hours Total Time: 26 hours Yield: 24 footprint cookies
Step-by-Step Instructions
Cookie Preparation
Mix flour, baking powder, and salt in medium bowl.
Beat butter and sugar in large bowl for 3 minutes until fluffy.
Add egg and vanilla, mixing until smooth.
Gradually add flour mixture, mixing just until combined.
Wrap dough and refrigerate for 2 hours minimum.
Baking Footprints
Heat oven to 350°F with parchment-lined baking sheets ready.
Roll dough to 1/4 inch thickness and cut with baby footprint cutter.
Place cookies 1 inch apart on sheets.
Bake for 9-10 minutes until barely golden at edges.
Cool on pan 5 minutes, then move to cooling rack.
Floral Footprint Design
Prepare royal icing and tint soft pink for footprint base.
Outline footprint shape with #2 tip. Let set 15 minutes.
Flood entire footprint with soft pink icing. Smooth and dry 8 hours.
Thin white, peach, yellow, and green icing to painting consistency.
Hand-paint small flowers in half-wreath pattern along one side of footprint.
Paint 5-7 small flowers clustered together.
Add green leaves and delicate stems between flowers.
Add tiny yellow dots for flower centers.
Create depth with layered painting technique.
Let dry completely for 8 hours before handling.
Recipe #17: Floral Bib Cookies
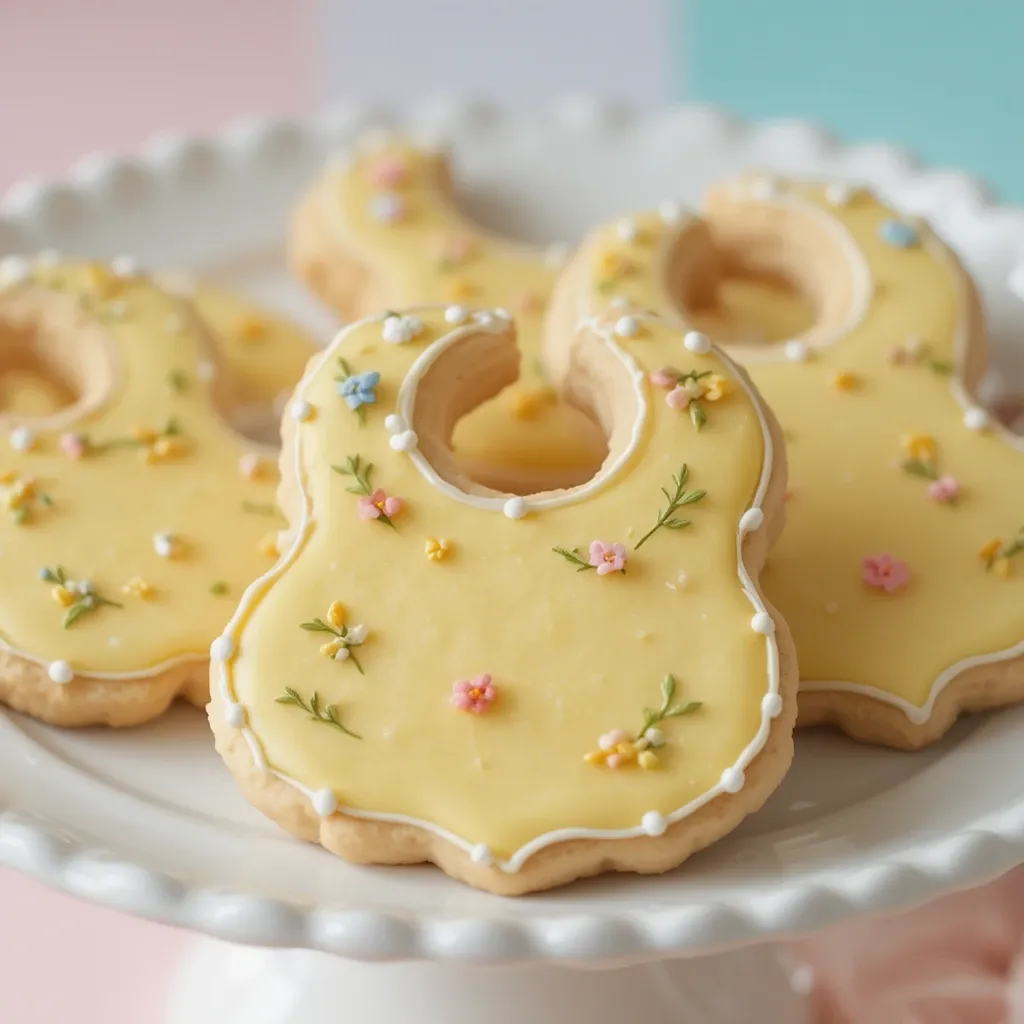
Baby bib-shaped cookies with scattered flowers and scalloped edge details.
Ingredients
For Sugar Cookies:
- 3 cups flour
- 1 teaspoon baking powder
- 1/2 teaspoon salt
- 1 cup butter, softened
- 1 cup sugar
- 1 egg
- 2 teaspoons vanilla
For Royal Icing:
- 4 cups powdered sugar
- 3 tablespoons meringue powder
- 7 tablespoons water
- Gel colors: white, soft yellow, pink, green
Prep Time: 2 hours 30 minutes Decorating Time: 4 hours 30 minutes Total Time: 26 hours Yield: 18 bib cookies
Step-by-Step Instructions
Dough Making
Whisk together flour, baking powder, and salt.
Cream butter and sugar on medium speed for 3 minutes.
Beat in egg and vanilla until fully incorporated.
Add flour gradually, mixing on low just until dough forms.
Divide, wrap, and chill dough for 2 hours.
Cutting and Baking
Preheat oven to 350°F and prepare baking sheets.
Roll dough to 1/4 inch thickness on floured surface.
Cut bib shapes using cookie cutter.
Place 1 inch apart on parchment-lined sheets.
Bake 10-11 minutes until edges just start to color.
Cool on pan 5 minutes before transferring to rack.
Creating Floral Bib Design
Make royal icing to stiff peak consistency.
Tint white or soft yellow for bib base.
Outline bib shape with #2 tip, including neck opening. Set 15 minutes.
Flood bib with thinned icing. Let dry 8 hours.
Using #2 tip, pipe scalloped edge detail around outer edge of bib in white.
Pipe small dot border along neck opening.
Thin pink, yellow, and green icing for painting.
Hand-paint small scattered flowers across bib surface.
Paint 6-8 tiny flowers randomly placed.
Add green leaves and small stems between flowers.
Dry completely 8 hours.
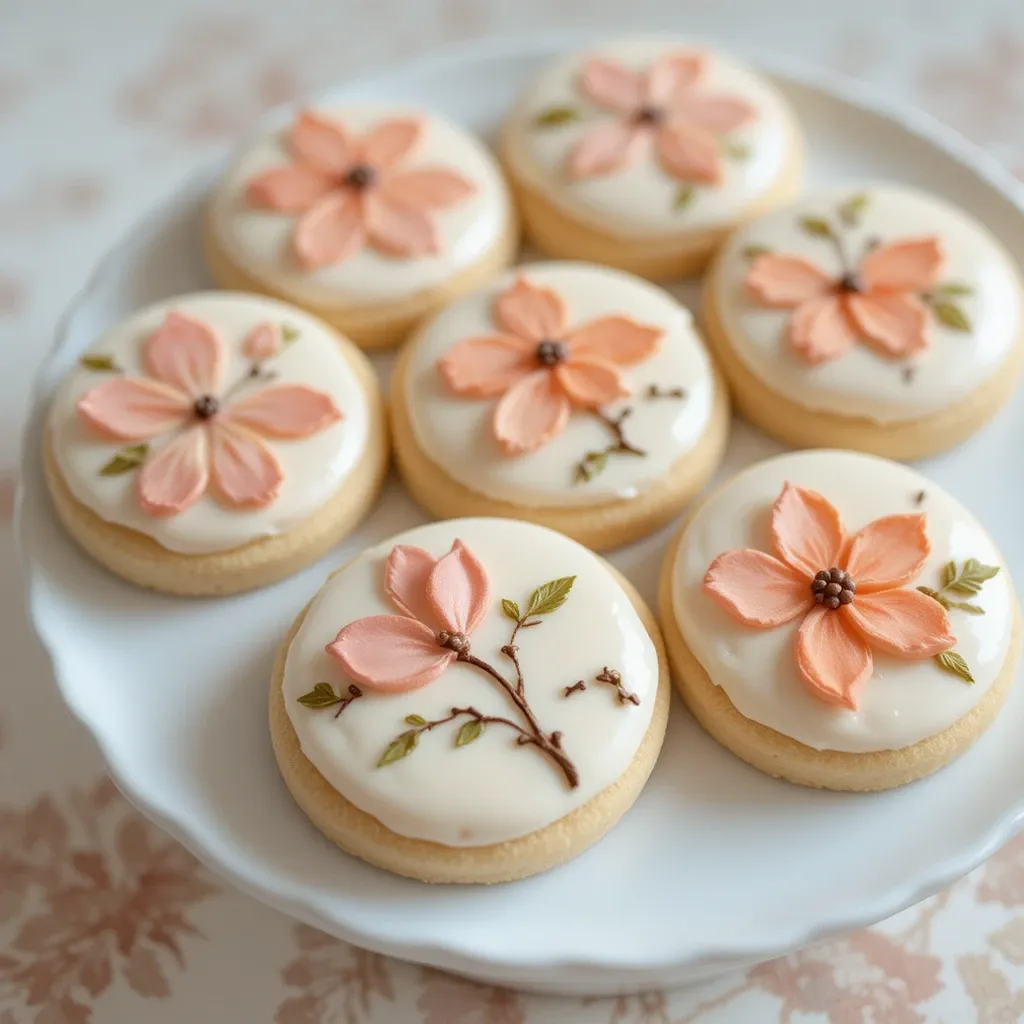
Recipe #18: Peach Blossom Round Cookies
Delicate round cookies with soft peach blossoms on cream background.
Ingredients
For Cookies:
- 3 cups flour
- 1 teaspoon baking powder
- 1/2 teaspoon salt
- 1 cup butter, softened
- 1 cup sugar
- 1 egg
- 2 teaspoons vanilla
For Icing:
- 4 cups powdered sugar
- 3 tablespoons meringue powder
- 6-7 tablespoons water
- Gel colors: cream, peach, coral, brown, green
Prep Time: 2 hours 30 minutes Decorating Time: 3 hours 30 minutes Total Time: 24 hours Yield: 24 round cookies
Step-by-Step Instructions
Cookie Base
Mix flour, baking powder, and salt in bowl.
Beat butter and sugar 3 minutes until pale and fluffy.
Add egg and vanilla, mixing until smooth.
Gradually add flour until dough just comes together.
Wrap and refrigerate 2 hours.
Baking Process
Heat oven to 350°F with parchment-lined sheets.
Roll dough 1/4 inch thick and cut 3-inch rounds.
Space 1 inch apart on sheets.
Bake 9-11 minutes until barely golden.
Cool 5 minutes, then transfer to wire rack.
Painting Peach Blossoms
Make royal icing and tint cream for base.
Outline rounds with #2 tip. Set 15 minutes.
Flood with cream icing. Dry 8 hours.
Mix peach and coral icing to thin painting consistency.
Using fine brush, paint delicate 5-petal blossoms.
Paint 3-4 blossoms per cookie in soft peach tones.
Add darker coral shading on petal edges for dimension.
Paint thin brown branches connecting blossoms.
Add tiny brown dots for flower centers.
Paint small green leaves on branches.
Create soft watercolor effect by blending colors.
Dry 8 hours completely.
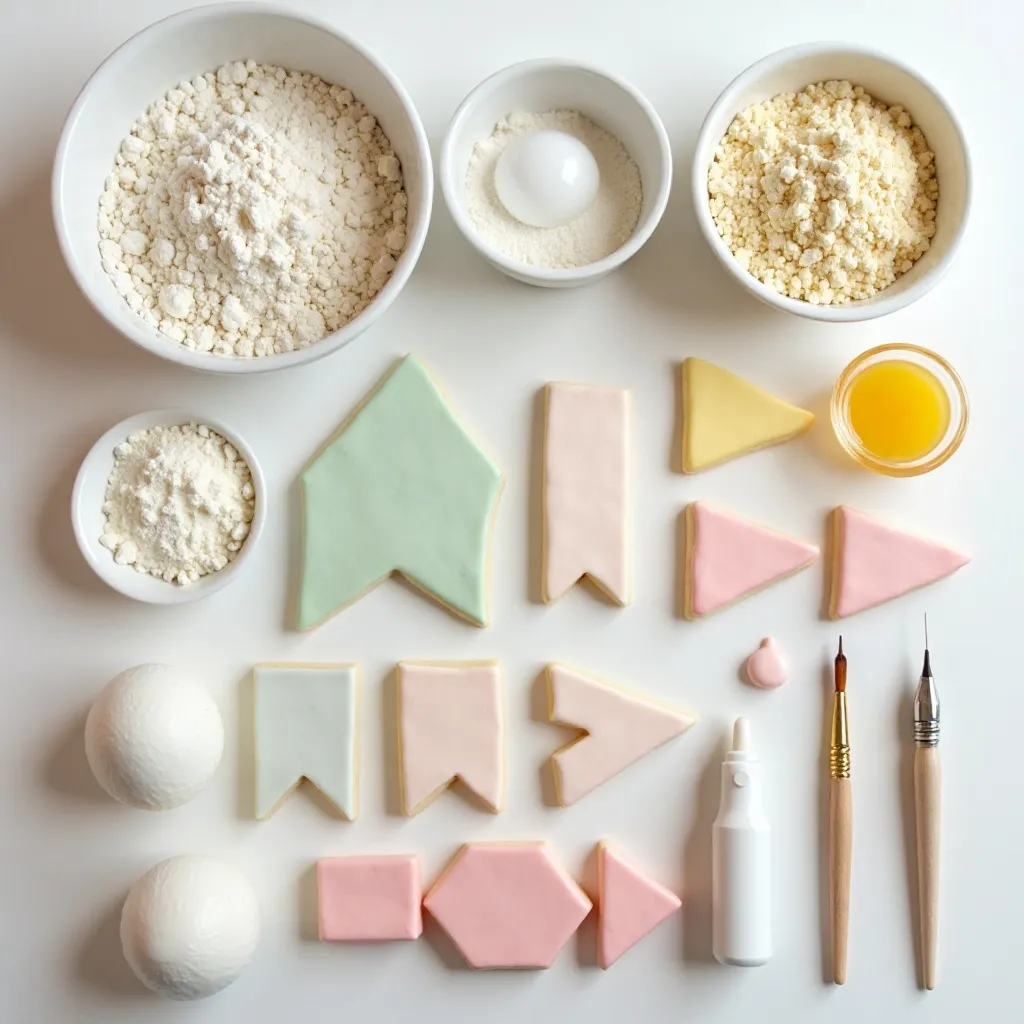
Recipe #19: Baby in Bloom Banner Cookies

Pennant-shaped cookies forming a “Baby in Bloom” banner.
Ingredients
For Sugar Cookies:
- 3 cups flour
- 1 teaspoon baking powder
- 1/2 teaspoon salt
- 1 cup butter, softened
- 1 cup sugar
- 1 egg
- 2 teaspoons vanilla
For Royal Icing:
- 4 cups powdered sugar
- 3 tablespoons meringue powder
- 7 tablespoons water
- Gel colors: white, soft pink, mint green, yellow, peach
- Food-safe markers or edible ink pens
Prep Time: 2 hours 30 minutes Decorating Time: 5 hours Total Time: 28 hours Yield: 15-18 banner cookies
Step-by-Step Instructions
Making the Dough
Combine flour, baking powder, and salt in medium bowl.
Cream butter and sugar in mixer for 3 minutes until fluffy.
Beat in egg and vanilla on low speed until combined.
Add flour mixture gradually, mixing just until dough forms.
Divide into disks, wrap, and chill 2 hours.
Baking Banner Shapes
Preheat oven to 350°F with parchment-lined sheets ready.
Roll dough to 1/4 inch thickness.
Cut pennant or banner shapes (triangles or rectangles with notched bottoms).
Place 1 inch apart on prepared sheets.
Bake 10-11 minutes until edges barely start to color.
Cool on pan 5 minutes before transferring.
Decorating Banner Cookies
Make royal icing and divide into pastel colors: soft pink, mint green, yellow, peach, white.
Outline each banner cookie with #2 tip in chosen color. Set 15 minutes.
Flood with same color icing. Dry 8 hours.
Thin remaining icing colors for painting details.
Hand-paint small flowers on corners or sides of each banner.
Paint 2-3 tiny flowers per banner in contrasting colors.
Add green leaves and delicate vine details.
Let painted florals dry 2 hours.
Using edible marker or #1 tip with contrasting icing, write one letter per banner to spell “BABY IN BLOOM.”
Alternatively, write “Welcome Baby” or baby’s name across banners.
Add small decorative dots or details around letters.
Dry completely 8 hours before stringing or displaying.
Recipe #20: Garden Watering Can Cookies
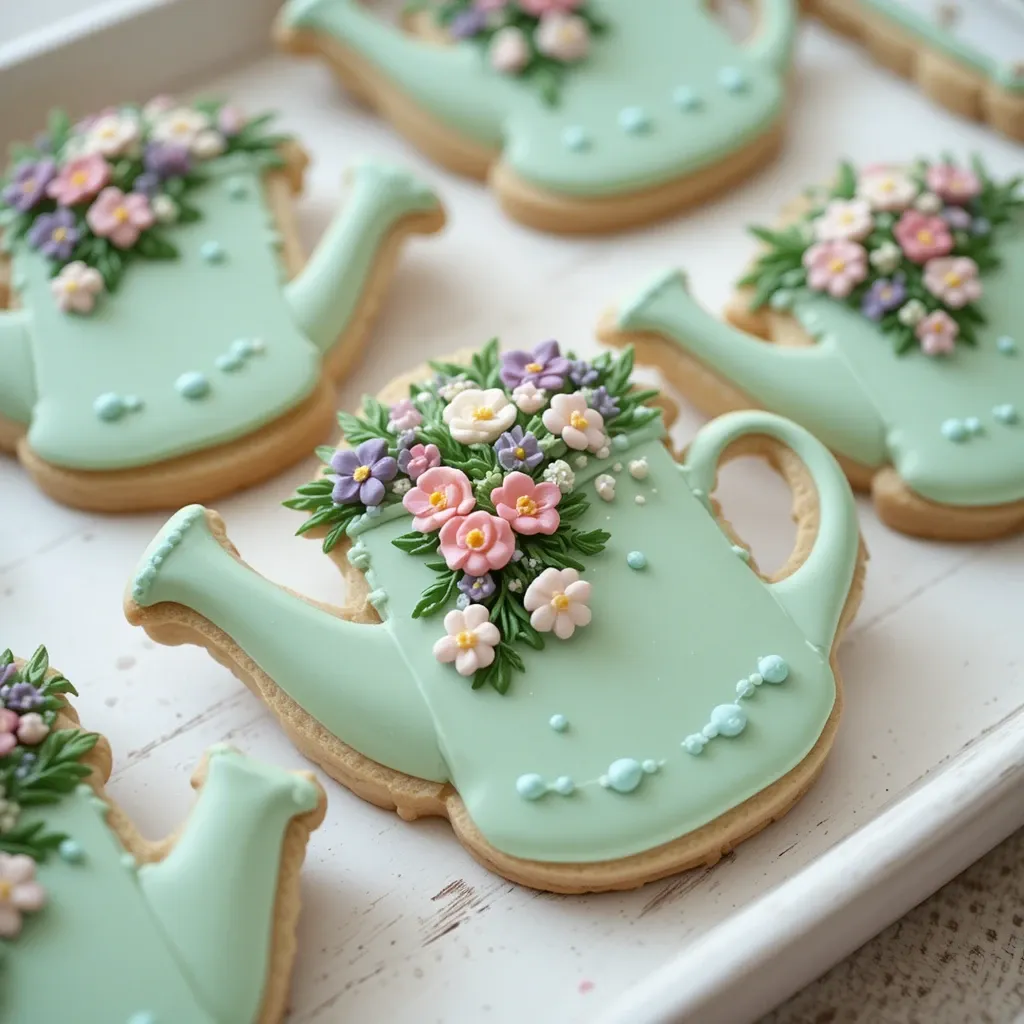
Whimsical watering can cookies with flowers “growing” from the spout.
Ingredients
For Sugar Cookies:
- 3 cups flour
- 1 teaspoon baking powder
- 1/2 teaspoon salt
- 1 cup butter, softened
- 1 cup sugar
- 1 egg
- 2 teaspoons vanilla
For Royal Icing:
- 4 cups powdered sugar
- 3 tablespoons meringue powder
- 7 tablespoons water
- Gel colors: mint green or sage, white, pink, purple, yellow, darker green
Prep Time: 2 hours 30 minutes Decorating Time: 5 hours Total Time: 28 hours Yield: 14-16 watering can cookies
Step-by-Step Instructions
Cookie Preparation
Mix flour, baking powder, and salt thoroughly in bowl.
Beat butter and sugar on medium speed for 3 minutes until light and fluffy.
Add egg and vanilla, beating until smooth and combined.
Gradually mix in flour on low speed just until dough comes together.
Form into two flat disks, wrap in plastic, and refrigerate 2 hours.
Baking Watering Cans
Heat oven to 350°F and line baking sheets with parchment paper.
Roll chilled dough to 1/4 inch thickness on lightly floured surface.
Cut watering can shapes with cookie cutter.
Place cookies 1 inch apart on prepared sheets.
Bake 10-12 minutes until edges barely begin to turn golden.
Cool on baking sheet for 5 minutes, then transfer to wire rack.
Detailed Watering Can Decoration
Prepare royal icing and tint mint green or sage for watering can base.
Outline watering can body with #2 tip. Set 15 minutes.
Flood can body with thinned green icing. Smooth and dry 6-8 hours.
Outline and flood handle and spout separately if desired for dimension.
Using #104 or #103 petal tip, pipe small flowers coming out of the spout.
Pipe 5-6 tiny roses or simple flowers in pink, purple, and white.
Create cascade effect with flowers flowing from spout downward.
Add yellow dot centers to flowers using #2 tip.
Pipe green leaves and stems throughout the floral cascade.
Add water droplet details near spout with light blue icing dots.
Pipe decorative details on watering can body (dots, stripes, or small painted flowers).
Add handle details and dimension with darker green icing lines.
Dry completely for 12 hours before handling or packaging.
What to Serve Baby in Bloom Cookies With
These elegant cookies deserve a beautiful presentation that matches their botanical charm.
Pair them with herbal teas like chamomile, lavender Earl Grey, or rose petal tea for a sophisticated touch. The floral flavors complement the vanilla sweetness perfectly.
Create a stunning dessert table by displaying these cookies on vintage cake stands surrounded by fresh flowers in matching colors. Add height variation with different sized stands for visual interest.
Serve alongside fresh fruit platters featuring berries, melon, and grapes. The fresh fruit provides a light, refreshing contrast to the sweet cookies.
Offer sparkling lemonade or fruit-infused water with cucumber and mint. For something special, serve peach or strawberry mocktails garnished with edible flowers.
Complement the cookies with light finger sandwiches, mini quiches, and cheese boards for a complete baby shower menu. The savory items balance the sweetness beautifully.
Add other desserts like fruit tarts, macarons, or a simple floral cake to create a dessert spread that feels abundant without overwhelming guests.
Consider serving warm beverages like cappuccinos or lattes with heart-shaped foam art to tie into the baby celebration theme.
Top Tips for Perfecting Baby in Bloom Cookies
Achieving Perfect Cookie Shape Every Time
Roll your dough to exactly 1/4 inch thickness using rolling pin guides or wooden dowels stacked on each side. This ensures every cookie bakes evenly and looks professional.
Chill cut cookies on the baking sheet for 10 minutes before baking if your kitchen is warm. This prevents spreading and keeps intricate shapes perfectly defined.
Use sharp metal cookie cutters and press down firmly in one motion without twisting. Twisting seals the edges and makes dough stick to the cutter.
Flour your work surface lightly and dust cutters between cuts. Too much flour makes cookies tough, but too little causes sticking.
Royal Icing Consistency Mastery
Learn the “10-second rule” for perfect flooding consistency. When you drag a knife through properly thinned icing, the line should disappear within 10 seconds.
Make icing colors the day before decorating. Gel food colors deepen overnight, saving you from adjusting colors mid-project.
Always cover icing bowls and bottles with damp paper towels or plastic wrap. Even brief air exposure creates a crust that clogs piping tips.
Test your consistency on parchment paper before applying to cookies. This prevents wasting perfectly baked cookies on icing that’s too thick or thin.
Add water one teaspoon at a time when thinning icing. It’s much easier to thin than thicken, so go slowly.
Hand-Painting Floral Techniques
Practice flower designs on parchment paper before painting on cookies. This builds muscle memory and confidence.
Thin royal icing to watercolor consistency for painting. It should flow easily from the brush but not be transparent or runny.
Use very light brushstrokes when painting petals. Build up color gradually in layers rather than trying to achieve full color in one stroke.
Keep a paper towel nearby to blot excess icing from brushes. Too much icing creates blobs instead of delicate details.
Start with lightest colors first, then add darker shades for depth and shadows. This makes corrections easier.
Let each color dry slightly before adding adjacent colors to prevent bleeding. Use a fan on low speed to accelerate drying between layers.
Color Selection and Coordination
Choose 3-4 main colors maximum for a cohesive look. Classic combinations include soft pink with sage green and cream, or lavender with butter yellow and white.
Always make white icing first, then tint portions of it. This ensures all colors have identical consistency.
Test colors on a scrap piece of dried icing before committing. Colors look different wet versus dry, and some intensify after drying.
Use cream or ivory instead of stark white for bases. It creates a softer, more elegant look that makes painted florals pop.
Storage and Humidity Management
Store decorated cookies in airtight containers at room temperature for up to two weeks. Never refrigerate royal icing cookies.
Place parchment or wax paper between layers to prevent decorated surfaces from touching and smudging.
Add food-safe silica gel packets to storage containers in humid climates. This absorbs excess moisture and keeps icing crisp.
Keep cookies away from direct sunlight, which fades colors, especially reds, pinks, and purples.
Time Management for Large Batches
Bake all cookies one day, let cool overnight, then decorate the next day. This breaks the project into manageable chunks.
Set up an assembly line for decorating: outline all cookies first, let set, then flood all at once. This is more efficient than completing one cookie at a time.
Use squeeze bottles instead of piping bags for flooding. They’re easier to control and create less hand fatigue for large batches.
Prepare all icing colors and consistencies before starting decoration. Stopping to mix more colors disrupts workflow.
Troubleshooting Common Issues
If royal icing is too thick and won’t flow, add water one teaspoon at a time. If too thin and running off edges, add sifted powdered sugar gradually.
Air bubbles in flooded icing? Tap the cookie firmly on counter 3-4 times immediately after flooding. Pop remaining bubbles with a toothpick.
Colors bleeding together? Let each layer dry completely (6-8 hours) before adding adjacent colors or details.
Icing taking forever to dry? Use a fan to circulate air, or work in a less humid environment. Dehumidifiers help in damp climates.
Cookies spreading during baking? Dough wasn’t chilled long enough, or butter was too soft. Always chill dough minimum 2 hours and use properly softened (not melted) butter.
Storing and Reheating Tips
Store decorated baby in bloom cookies in airtight containers at room temperature for up to two weeks. These cookies taste best at room temperature and do not require reheating.
Layer cookies with parchment paper or wax paper between each layer to prevent decorated surfaces from touching. This protects your detailed artwork.
Keep containers in a cool, dry place away from direct sunlight and heat sources. Sunlight fades royal icing colors, especially pinks, purples, and reds.
Never refrigerate cookies decorated with royal icing. Refrigerator humidity causes icing to weep, become sticky, and lose its beautiful crisp finish.
For longer storage, freeze undecorated baked cookies in freezer-safe containers or bags for up to three months. Thaw completely at room temperature inside sealed containers before decorating to prevent condensation.
In humid climates, add food-safe silica gel packets to storage containers. These absorb excess moisture and keep royal icing from becoming tacky.
For gifting, package each fully dried cookie in cellophane bags tied with ribbon 1-2 days before the event. The sealed bags keep cookies fresh and protect delicate decorations.
Transport cookies in single layers in shallow containers. Never stack decorated cookies directly on top of each other, even with parchment between layers, as pressure can damage details.
If cookies become slightly soft in humid weather, place them on a baking sheet in a 200°F oven for 3-5 minutes to crisp up the icing. Cool completely before packaging.
Decorated cookies can be frozen for up to one month if absolutely necessary. Wrap individually in plastic wrap, then place in airtight container. Thaw unwrapped at room temperature.
Tips for Avoiding Common Baking Mistakes
Preventing Cookie Spread
The number one cause of spreading is dough that’s too warm. Always chill dough for the full 2 hours minimum. If your kitchen runs warm, chill cut cookies on the baking sheet for an additional 10 minutes before baking.
Avoid using butter that’s too soft or melted. Properly softened butter should be cool to the touch and leave an indent when pressed, but not be greasy or shiny.
Don’t skip the baking powder. It helps cookies hold their shape by providing structure early in the baking process.
Measure flour correctly by spooning it into the measuring cup and leveling off. Scooping directly from the bag packs flour, leading to dry dough that spreads.
Avoiding Hard, Tough Cookies
Overbaking is the main culprit. Remove cookies when edges barely begin to color and centers still look slightly underbaked. They continue cooking on the hot pan.
Don’t overmix the dough after adding flour. Mix just until flour disappears. Overmixing develops gluten, making cookies tough.
Use fresh baking powder that hasn’t expired. Old leavening agents don’t work properly and affect texture.
Let cookies cool on the baking sheet for only 5 minutes before transferring. Leaving them on the hot pan too long continues cooking.
Fixing Lumpy Royal Icing
Always sift powdered sugar before making royal icing. Lumps won’t dissolve and will clog piping tips constantly.
If you forget to sift, strain finished icing through a fine-mesh sieve before using. This removes lumps and creates smooth icing.
Don’t use powdered sugar that’s been in your pantry for months. It can develop lumps that are harder to dissolve.
Mix icing on medium-high speed for the full 5-7 minutes. This incorporates air and helps dissolve sugar completely.
Preventing Icing Bleeding
Colors bleed when wet icing touches wet icing. Always let your base layer dry completely (6-8 hours minimum) before adding painted details or additional piped decorations.
Use a fan on low speed to accelerate drying time if needed. Position it so it blows across cookies gently without disturbing them.
In humid climates, extend drying time to 12 hours before adding details. Humidity slows royal icing drying significantly.
Test dryness by gently touching the center of a flooded cookie. If it feels sticky or indents, it needs more time.
Avoiding Broken Cookies
Thin edges and protruding parts break easily. Choose cookie cutter designs without extremely delicate features, or reinforce thin areas.
Let cookies cool completely on the baking sheet for 5 minutes before moving. Hot cookies are fragile and crack easily.
Use a thin metal spatula to transfer cookies. Slide it completely under the cookie in one smooth motion.
Don’t force cookies off the baking sheet. If they stick, slide the entire parchment paper with cookies onto the cooling rack.
Preventing Air Bubbles in Icing
Air bubbles create holes and imperfections in smooth icing surfaces. After flooding a cookie, immediately tap it firmly on the counter 3-4 times.
This brings bubbles to the surface where you can pop them with a toothpick or scribe tool.
Stir royal icing gently when preparing it for flooding. Vigorous stirring incorporates more air.
Fill squeeze bottles or piping bags slowly to minimize air pockets forming in the icing.
Fixing Sticky Royal Icing
Royal icing becomes sticky in high humidity. Store decorated cookies with food-safe silica gel packets in containers to absorb moisture.
Use a dehumidifier in your decorating and storage space if you live in humid climates.
Never add corn syrup or glycerin to royal icing. These ingredients make icing stay soft and sticky.
Ensure cookies are completely cooled before decorating. Warm cookies create condensation under icing, making it sticky.
Avoiding Faded Colors
UV rays fade royal icing colors, especially reds, pinks, and purples. Store finished cookies in opaque containers or cover with a cloth.
Keep cookies away from windows and direct sunlight at all times.
Use quality gel food colors from professional brands like AmeriColor or Chefmaster for longer-lasting, more stable colors.
Don’t display cookies in bright sunlight during parties. Set up dessert tables in shaded areas or indoors.
Frequently Asked Questions
How far in advance can I make baby in bloom cookies?
You can bake undecorated cookies up to 3 months ahead and freeze them in airtight containers. Decorated cookies stay fresh at room temperature for up to 2 weeks when stored properly. For the best taste and appearance, I recommend decorating 3-5 days before your event. This ensures cookies are completely dry and at their freshest.
Can I use store-bought royal icing?
Yes, store-bought royal icing works in a pinch, but homemade tastes better and provides smoother, more consistent results. If using store-bought, you’ll likely need to adjust consistency by adding water for flooding or sifted powdered sugar for thicker piping. The texture won’t be quite as professional as homemade.
What food coloring works best for baby in bloom cookies?
Gel food coloring is absolutely the best choice. It provides vibrant, concentrated color without thinning your icing like liquid food coloring does. Professional brands like AmeriColor, Chefmaster, and Wilton give beautiful, true-to-color results. Avoid liquid food coloring from grocery stores as it makes icing too thin and colors appear washed out.
How do I prevent my cookies from spreading during baking?
The key is properly chilled dough. Always refrigerate your dough for at least 2 hours before rolling and cutting. If your kitchen is warm, place cut cookies back in the refrigerator for 10 minutes before baking. Using cold butter (softened but still cool) rather than melted butter also prevents spreading. Don’t skip the chilling step.
Can I make these cookies gluten-free?
Yes! Use a good quality 1-to-1 gluten-free flour blend that contains xanthan gum. The texture will be slightly more delicate, so handle the dough gently and chill it well before cutting. Bakers report success with Bob’s Red Mill 1-to-1 Baking Flour or King Arthur Measure for Measure Flour. The decorating process remains exactly the same.
Why is my royal icing not drying?
Several factors affect drying time. High humidity is the biggest culprit—royal icing can take 24 hours or longer to dry in humid conditions. Try using a fan to circulate air or run a dehumidifier. Also check that you used enough powdered sugar and didn’t add too much liquid. Royal icing made with fresh egg whites takes longer to dry than icing made with meringue powder.
How do I achieve smooth royal icing without streaks or lines?
The secret is proper flooding consistency and patience. Your icing should be thin enough to self-level and smooth out within 10-15 seconds when you drag a knife through it. After flooding a cookie, let it sit completely undisturbed—don’t keep trying to fix it with a toothpick. Make sure your base cookie surface is smooth before decorating, as bumps show through icing.
Can I paint on royal icing with regular liquid food coloring?
No, regular liquid food coloring is too thin and will bead up on dried royal icing rather than creating smooth painted details. For hand-painting flowers, thin gel food coloring with a tiny bit of clear alcohol (like vodka) or lemon extract. Alternatively, thin royal icing itself to watercolor consistency. This creates the perfect consistency for paintbrush work.
What’s the best way to transport decorated cookies?
Place completely dry cookies in a single layer in shallow, sturdy containers. Never stack decorated cookies directly on top of each other. If you must stack, use parchment paper between layers and ensure bottom cookies can support the weight. For transport, place containers on a flat surface in your vehicle, preferably on the floor, and avoid stacking anything on top. Cookie carriers with individual compartments work best for traveling.
How do I fix mistakes on decorated cookies?
For small mistakes while the icing is wet, use a damp toothpick to gently remove the error. For mistakes on dried icing, carefully scrape off the error with a sharp knife or scraper tool and re-ice that spot. For hand-painted designs, let the mistake dry completely, then paint over it with the correct design. Royal icing is quite forgiving—most small errors become invisible once everything dries completely.
Do I need special equipment to make these cookies?
Not really! Basic equipment includes cookie cutters, rolling pin, parchment paper, mixer, piping bags or squeeze bottles, and piping tips (#1, #2, #3, #104). For hand-painting, you need food-safe paintbrushes from craft stores. Everything else is standard baking equipment you likely already own. As you gain experience, you might want to invest in specialized tools like a scribe tool, airbrushing kit, or more piping tips.
Can I make egg-free or vegan royal icing?
Traditional royal icing requires egg whites or meringue powder (which contains egg). For egg-free icing, aquafaba (liquid from canned chickpeas) can substitute for egg whites in a 1:1 ratio. However, aquafaba royal icing takes much longer to dry and may not achieve the same crisp finish. For truly vegan cookies, you’ll also need to veganize the cookie dough by using plant-based butter and egg replacer.
Nutrition Information
| Nutrient | Amount Per Cookie |
|---|---|
| Calories | 145 |
| Total Fat | 6g |
| Saturated Fat | 4g |
| Trans Fat | 0g |
| Cholesterol | 25mg |
| Sodium | 65mg |
| Total Carbohydrates | 22g |
| Dietary Fiber | 0g |
| Sugars | 16g |
| Protein | 1g |
| Vitamin D | 0mcg |
| Calcium | 15mg |
| Iron | 0.5mg |
| Potassium | 20mg |
Note: Nutrition information is approximate and based on one decorated cookie. Values may vary depending on size of cookies and amount of icing used. Recipe yields approximately 24-28 cookies depending on cutter sizes.
Final Thoughts
Baby in bloom cookies transform any baby shower into an elegant garden celebration that guests will remember for years. The combination of buttery sugar cookies, smooth royal icing, and delicate hand-painted florals creates treats that are as beautiful as they are delicious.
Each of these 20 designs offers something special, from simple wildflower rounds to intricate floral carriages. Whether you’re a seasoned cookie decorator or trying this craft for the first time, these botanical beauties will make your celebration unforgettable.
The best part about making baby in bloom cookies yourself is the personal touch that comes through in every petal and leaf. Each painted detail and piped flower carries love and thoughtfulness that simply can’t be replicated in store-bought treats. Your guests will taste the care you put into creating these edible works of art.
Don’t be intimidated by the detailed designs. Start with simpler patterns like the wildflower rounds or daisy chain onesies, then work your way up to more complex designs as your confidence grows. Remember that practice makes progress, and even imperfect cookies made with love are beautiful.
The joy on guests’ faces when they see these stunning cookies makes every minute of decorating time worthwhile. Whether displayed on an elegant dessert table or packaged as individual party favors, baby in bloom cookies add that special touch that makes baby showers truly magical.
So gather your cookie cutters, mix up some icing, and let your creativity bloom. Your baby shower guests will be talking about these beautiful cookies long after the celebration ends. Happy baking!