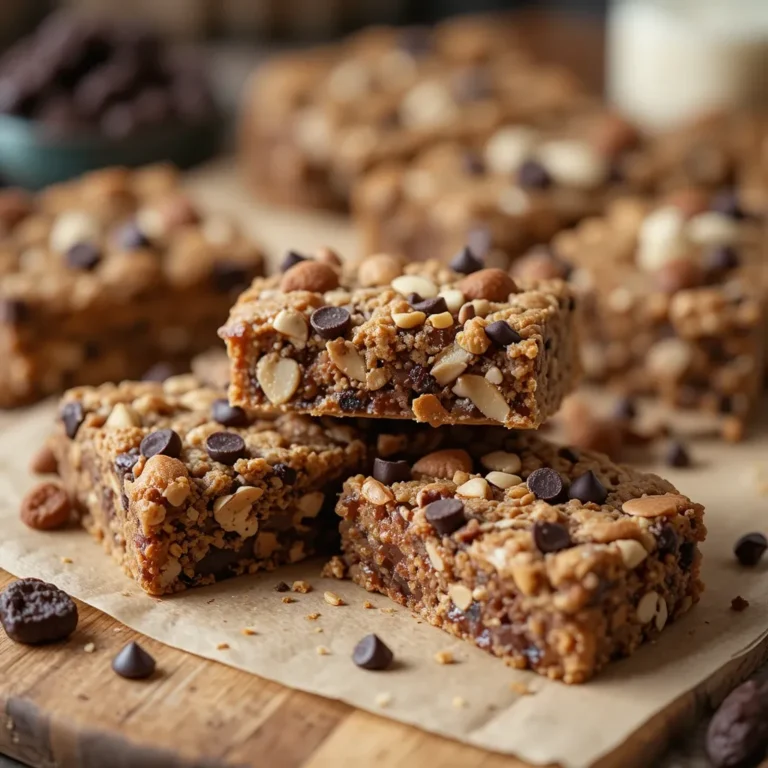
Easy Banana Protein Bars – Perfect Post-Workout Snack
Craving something sweet but healthy? These banana protein bars are your answer! Soft, naturally sweet, and packed with nutrition, they’re the ideal snack for busy mornings, post-workout fuel, or afternoon energy boosts. I stumbled upon this recipe during my marathon training days when I desperately needed something portable and filling.
Unlike store-bought bars loaded with mysterious ingredients, these homemade beauties use real bananas, oats, and protein powder. They remind me of our popular peanut butter energy bites, but with that irresistible banana bread flavor everyone loves. Ready in just 30 minutes, these bars will become your new meal-prep obsession!
This recipe is AI-created and has not been personally tested by us. We care about our website family, and readers who’ve tried other recipes from our site share good experiences.
What Are Banana Protein Bars?
Ever wondered why banana protein bars have taken over the healthy snacking world? Well, they’re basically banana bread’s fitness-obsessed cousin! These chewy, satisfying bars combine the natural sweetness of ripe bananas with protein powder to create a snack that actually keeps you full.
As the classic saying goes, “the way to a man’s heart is through his stomach,” and honestly, these bars win hearts everywhere. They’re proof that healthy eating doesn’t mean sacrificing flavor. Trust me, once you make your first batch, you’ll never go back to those expensive store versions!
Why You’ll Love This Banana Protein Bars Recipe
They’re Ridiculously Easy and Nutritious
The best part about these banana protein bars? They practically make themselves! You’ll mix everything in one bowl, press it into a pan, and bake. No fancy equipment needed, no complicated techniques to master. Each bar delivers a perfect balance of carbohydrates from bananas and oats, protein from your favorite powder, and healthy fats from nuts or nut butter.
Save Money While Eating Better
Store-bought protein bars cost anywhere from $2 to $4 each—that’s insane! Making these at home costs less than a dollar per bar, and you control exactly what goes in. No weird preservatives, no artificial sweeteners, no ingredients you can’t pronounce. Just real food that fuels your body properly.
Customize to Your Heart’s Content
Add chocolate chips for a treat, throw in some dried fruit for extra sweetness, or mix in your favorite nuts for crunch. You can use vanilla, chocolate, or even peanut butter protein powder. Speaking of customization, if you love these, you’ll also adore our chocolate protein muffins—they use similar ingredients but with a completely different texture! Whether you’re vegan, gluten-free, or just health-conscious, these bars adapt to your needs. Go ahead and make them your own!
How to Make Banana Protein Bars
Quick Overview
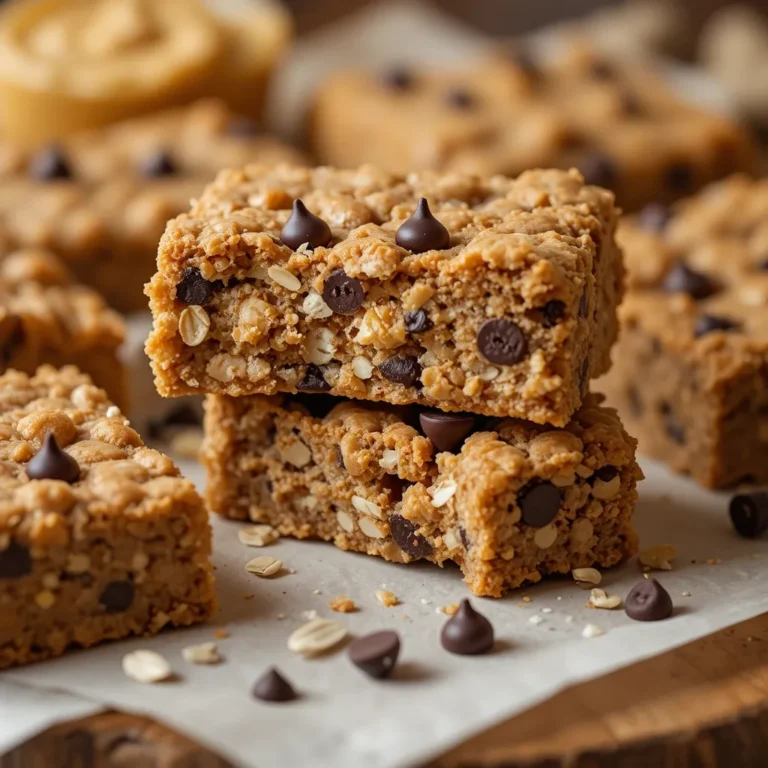
These banana protein bars are wonderfully simple to prepare. The combination of mashed bananas, oats, and protein powder creates a chewy texture that’s somewhere between a granola bar and banana bread. The natural banana sweetness means you need minimal added sugar. Best of all, they’re ready from start to finish in about 30-35 minutes, with only 20-25 minutes of actual baking time. Perfect for Sunday meal prep!
Time Breakdown:
- Prep Time: 10 minutes
- Baking Time: 20-25 minutes
- Cooling Time: 15 minutes
- Total Time: 45 minutes
- Yield: 12-16 bars
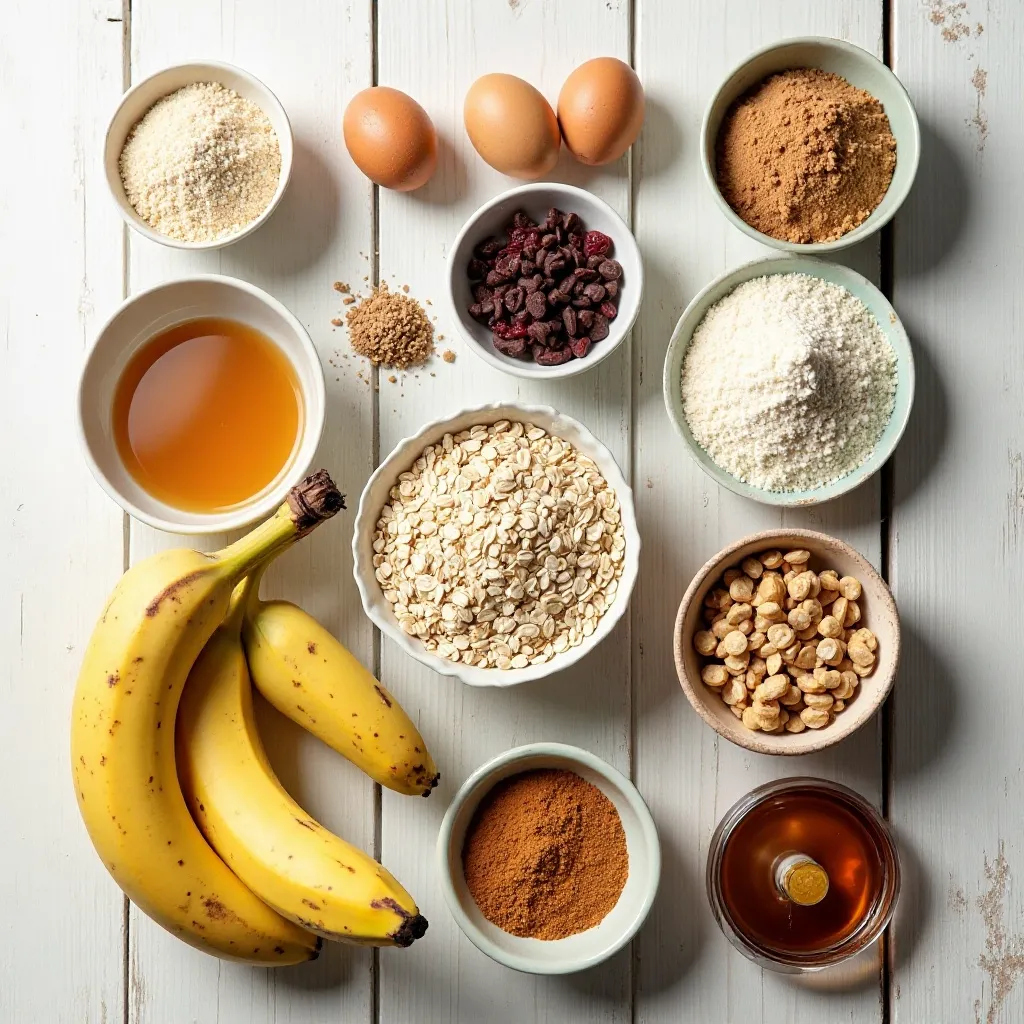
Key Ingredients for Banana Protein Bars
Here’s everything you need to make these amazing protein-packed snacks:
Dry Ingredients:
- 2 cups rolled oats (old-fashioned, not instant)
- 1/2 cup protein powder (vanilla or chocolate works great)
- 1/3 cup ground flaxseed or chia seeds
- 1 teaspoon ground cinnamon
- 1/2 teaspoon baking powder
- 1/4 teaspoon salt
Wet Ingredients:
- 3 large ripe bananas (about 1 1/2 cups mashed)
- 1/3 cup natural nut butter (almond or peanut)
- 1/4 cup honey or maple syrup
- 2 large eggs (or flax eggs for vegan option)
- 1 teaspoon pure vanilla extract
Optional Add-ins:
- 1/2 cup dark chocolate chips
- 1/3 cup chopped walnuts or almonds
- 1/4 cup dried cranberries or raisins
- 2 tablespoons hemp seeds
The riper your bananas, the sweeter and more flavorful your bars will be. Those brown-spotted bananas you were about to throw away? They’re perfect here!
Step-by-Step Instructions
Prepare Your Baking Setup
Start by preheating your oven to 350°F (175°C). Line an 8×8-inch or 9×9-inch baking pan with parchment paper, leaving some overhang on the sides. This makes removing the bars super easy later. You can also lightly grease the pan with coconut oil if you prefer.
Mix the Dry Ingredients
In a large mixing bowl, combine the rolled oats, protein powder, ground flaxseed, cinnamon, baking powder, and salt. Whisk everything together thoroughly to ensure even distribution. This step prevents clumps of protein powder in your final bars. Set this bowl aside for now.
Prepare the Wet Mixture
In a separate medium bowl, mash your ripe bananas with a fork until mostly smooth. A few small lumps are perfectly fine and add nice texture. Add the nut butter, honey, eggs, and vanilla extract to the mashed bananas. Whisk everything together until well combined and smooth. The mixture should look creamy and unified.
Combine Everything Together
Pour the wet ingredients into the bowl with the dry ingredients. Using a sturdy spoon or spatula, fold everything together gently but thoroughly. Mix until no dry pockets remain, but don’t overmix—this can make your bars tough. The batter will be thick and slightly sticky. If you’re adding chocolate chips, nuts, or dried fruit, fold them in now.
Transfer to Baking Pan
Scoop the batter into your prepared baking pan. Using a spatula or the back of a spoon, press the mixture down firmly and evenly into the pan. Make sure to get it into all the corners and create an even layer. The more firmly you pack it, the better your bars will hold together after baking.
Bake to Perfection
Place the pan in your preheated oven and bake for 20-25 minutes. The bars are done when the edges are golden brown and the center feels firm to a gentle touch. A toothpick inserted in the center should come out mostly clean with just a few moist crumbs. Don’t overbake, or they’ll become dry instead of chewy.
Cool and Cut
This is the hardest part—waiting! Remove the pan from the oven and let it cool in the pan for at least 15-20 minutes. Then, using the parchment paper overhang, lift the entire block out of the pan and place it on a cutting board. Let it cool completely before cutting into 12-16 bars with a sharp knife. Cooling completely ensures clean cuts and prevents crumbling.
What to Serve Banana Protein Bars With
These versatile bars pair wonderfully with so many things! For breakfast, enjoy them alongside a cup of Greek yogurt and fresh berries for a complete protein-packed meal. They’re also perfect with your morning coffee or a matcha latte for an energizing start.
Post-workout, pair them with a protein smoothie or chocolate milk to maximize recovery. The combination of carbs and protein helps your muscles rebuild after training.
For afternoon snacks, serve them with apple slices and almond butter for extra staying power. A handful of raw nuts and some cheese cubes make them feel like a complete mini-meal.
Kids love these bars with a glass of milk and some orange slices. Pack them in lunchboxes with a sandwich and veggies for a balanced meal. They also travel beautifully for hiking, road trips, or any on-the-go adventure!
Top Tips for Perfecting Banana Protein Bars
Use Properly Ripe Bananas
The ripeness of your bananas makes or breaks this recipe. You want bananas with plenty of brown spots—they should be very soft and fragrant. Underripe bananas lack sweetness and won’t mash properly, leaving you with hard chunks. If your bananas aren’t ripe enough, place them in a paper bag for a day or two, or bake them in their peels at 300°F for 15 minutes to speed up ripening.
Choose the Right Protein Powder
Not all protein powders behave the same in baking. Whey protein tends to make bars slightly denser but holds moisture well. Plant-based proteins (pea, rice, hemp) can sometimes make bars drier, so you might need to add an extra tablespoon of nut butter. Casein protein creates a chewier texture. Stick with unflavored, vanilla, or chocolate varieties—avoid anything with too many added ingredients or artificial sweeteners that might taste strange when baked.

Don’t Skip the Flaxseed
Ground flaxseed or chia seeds do more than add nutrition. They absorb moisture and help bind everything together, making your bars less crumbly. If you don’t have either, you can substitute with an extra 2 tablespoons of oats, but the bars might be slightly more fragile.
Pack the Batter Firmly
This tip cannot be overstated! When pressing your batter into the pan, use real pressure. Press down hard with your spatula or use the bottom of a measuring cup to compress everything. Firmly packed bars hold together beautifully when you bite into them. Loosely packed ones crumble apart frustratingly.
Adjust Sweetness to Taste
If your bananas are super ripe and you’re using vanilla protein powder (which often contains sweeteners), you might find the bars sweet enough without the full amount of honey or maple syrup. Start with 3 tablespoons instead of 1/4 cup and taste the batter. Remember, bananas lose some sweetness when baked, so they should taste a bit sweeter raw than you want the final product.
Let Them Cool Completely
I know it’s tempting to cut into warm bars, but patience pays off here. Warm bars are soft and will fall apart. As they cool, they firm up and the ingredients bind together properly. If you’re really impatient, pop them in the fridge for 30 minutes after they’ve cooled for 15 minutes at room temperature.
Storing and Reheating Tips
Room Temperature Storage These banana protein bars stay fresh at room temperature for 3-4 days when stored in an airtight container. Place parchment or wax paper between layers to prevent sticking. Keep them in a cool, dry place away from direct sunlight. This method works best if you’ll eat them quickly and live in a climate that’s not too humid.
Refrigerator Storage For longer freshness, store bars in the refrigerator for up to 10 days. Place them in an airtight container or resealable bag, again with parchment paper between layers. Cold bars are actually quite delicious—they become firmer and almost fudgy in texture. Let them sit at room temperature for 5-10 minutes before eating if you prefer softer bars.
Freezer Storage These bars freeze beautifully for up to 3 months! Wrap each bar individually in plastic wrap or parchment paper, then place them all in a freezer-safe container or bag. This way, you can grab one whenever you need it. They thaw quickly at room temperature in about 20-30 minutes, or you can microwave a frozen bar for 20-30 seconds for a warm treat.
Reheating Instructions While these bars are delicious cold or at room temperature, warming them takes them to another level. Microwave individual bars for 15-20 seconds until just warm—not hot. You can also wrap a bar in foil and warm it in a 300°F oven for 5-7 minutes. The warmth brings out the banana flavor and makes any chocolate chips delightfully melty. Perfect for cozy mornings!
Tips for Avoiding Common Baking Mistakes
Mistake #1: Using Instant Oats Always use old-fashioned rolled oats, never instant oats. Instant oats are too fine and absorbent, resulting in dry, crumbly bars. If you only have instant oats, reduce the amount by 1/4 cup and add 2 extra tablespoons of mashed banana.
Mistake #2: Overmixing the Batter Once you combine wet and dry ingredients, mix just until everything is incorporated. Overmixing develops gluten in any wheat-based protein powder and can make bars tough and dense instead of tender and chewy. Fold gently with a spatula rather than beating vigorously.
Mistake #3: Wrong Pan Size Pan size matters more than you think! An 8×8 or 9×9-inch pan gives you the perfect thickness. Using a 9×13-inch pan will make thin, crispy bars that lack chewiness. If you only have a larger pan, double the recipe to maintain proper thickness.
Mistake #4: Not Testing for Doneness Don’t rely solely on time—ovens vary widely. Your bars are done when the edges are golden and pulling slightly away from the pan, and the center springs back when gently pressed. A toothpick should come out with a few moist crumbs, not wet batter. Underbaked bars will be too soft and fall apart; overbaked ones become dry.
Mistake #5: Cutting Too Soon This is probably the most common mistake! Cutting warm bars causes them to crumble and fall apart. The binding process happens as they cool. Wait at least 15 minutes in the pan, then another 10-15 minutes after removing from the pan. For the cleanest cuts, refrigerate for 30 minutes before slicing.
Mistake #6: Skipping the Parchment Paper Even with a greased pan, these bars can stick stubbornly. Parchment paper with overhang is your best friend—it allows you to lift the entire block out for easy cutting. If you don’t have parchment, use aluminum foil sprayed generously with cooking spray.
Mistake #7: Using Green or Yellow Bananas Those perfectly yellow bananas might look pretty, but they won’t work here. You need very ripe, spotty bananas that mash easily and provide natural sweetness. Underripe bananas are starchy rather than sweet and won’t bind the ingredients properly. When in doubt, wait another day or two for those brown spots to appear!
Frequently Asked Questions
Can I make these banana protein bars vegan?
Absolutely! Replace the eggs with flax eggs (2 tablespoons ground flaxseed mixed with 6 tablespoons water, let sit for 5 minutes) or use commercial egg replacer. Choose a plant-based protein powder and make sure your nut butter doesn’t contain honey. Use maple syrup instead of honey as your sweetener. The bars turn out wonderfully with these substitutions!
What’s the best protein powder for banana protein bars?
Vanilla whey protein is my personal favorite—it blends seamlessly with banana flavor. Chocolate protein powder creates a delicious chocolate-banana combination. For plant-based options, vanilla pea protein or brown rice protein work well. Avoid protein powders with strong artificial sweeteners or flavors as they can taste off when baked.
Why are my protein bars falling apart?
Crumbly bars usually result from three issues: not packing the batter firmly enough into the pan, cutting them before they’ve completely cooled, or using too much protein powder relative to wet ingredients. Make sure to press the mixture down very firmly, let bars cool completely, and follow the ingredient ratios exactly. Adding an extra tablespoon of nut butter can also help with binding.
Can I use frozen bananas?
Yes! Thaw frozen bananas completely and drain excess liquid before mashing. Frozen-then-thawed bananas are actually extra soft and easy to mash. Just make sure to measure your mashed banana quantity accurately, as frozen bananas can release extra moisture.
How can I make these bars less sweet?
Reduce or eliminate the honey/maple syrup entirely if your bananas are very ripe. You can also use unflavored or unsweetened protein powder. Some people find adding a pinch of extra salt helps balance sweetness. Remember that banana flavor becomes less intense after baking, so don’t reduce sweetness too much.
Can I substitute the oats?
For a gluten-free version, use certified gluten-free oats. You cannot substitute with oat flour, as it will make the bars too dense. Quinoa flakes work as a substitute but create a slightly different texture. For a nut-free grain-free option, try using a mix of coconut flakes and puffed rice, though the texture will be quite different.
Do these bars need to be refrigerated?
Not necessarily, but it depends on your climate and how long you want to store them. At room temperature in an airtight container, they’ll stay fresh for 3-4 days. Refrigeration extends their life to 10 days and gives them a firmer, fudgier texture. In hot or humid weather, refrigeration is recommended to prevent mold growth.
Can I add protein powder to my regular banana bread recipe?
This requires caution! Protein powder absorbs liquid differently than flour. If adding to banana bread, replace no more than 1/4 of the flour with protein powder, and add an extra 2-3 tablespoons of liquid (milk or mashed banana). These bars are specifically formulated for the protein powder ratio, which is why they work so well.
Nutrition Information
| Nutrient | Per Bar (1/12 recipe) |
|---|---|
| Calories | 180 |
| Protein | 10g |
| Carbohydrates | 24g |
| Fiber | 4g |
| Sugar | 10g |
| Fat | 6g |
| Saturated Fat | 1g |
| Sodium | 85mg |
| Potassium | 220mg |
Note: Nutrition facts are estimates based on standard ingredients. Values may vary depending on specific brands and add-ins used.
Final Thoughts
These banana protein bars have truly transformed my snacking routine. They’ve saved me countless dollars, kept me fueled through busy mornings, and satisfied my sweet tooth without guilt. The beauty of this recipe lies in its flexibility—you can adapt it to your dietary needs, taste preferences, and whatever ingredients you have on hand.
Whether you’re an athlete needing portable fuel, a parent looking for healthy kid snacks, or simply someone who wants to eat better without sacrificing flavor, these bars deliver. The combination of natural banana sweetness, hearty oats, and quality protein creates something special—nutritious enough to feel good about, but delicious enough that you’ll actually want to eat them.
Make a batch this weekend. Store them in your fridge or freezer. Grab one when you’re rushing out the door, need a pre-workout boost, or want an afternoon pick-me-up. Your body and taste buds will thank you!
Have you tried this banana protein bars recipe? I’d love to hear how they turned out! Leave a comment below with any variations you tried or questions you have. Don’t forget to share your creations on social media—tag me so I can see your beautiful bars!