Easy Cereal Bars Recipe Ready in 25 Minutes
There’s something magical about biting into a perfectly chewy, slightly crispy cereal bar that just melts in your mouth. These homemade cereal bars are the answer to your snack cravings, combining wholesome ingredients with that irresistible sweet crunch we all love.
Here’s a fun fact: cereal bars weren’t always the healthy snack we know today—they started as a convenient breakfast option in the 1970s! What makes these bars special is their incredible simplicity and versatility. You can whip them up in under 30 minutes with ingredients you probably already have in your pantry.
Unlike store-bought versions packed with preservatives, these are fresh, customizable, and absolutely delicious. If you loved my homemade granola recipe, you’ll adore these cereal bars even more!
This recipe was created by AI and has not been personally tested by us. We truly care about our readers, and feedback from those who’ve tried different recipes on the site has been encouraging.
What Are Cereal Bars?
Ever wonder why we call them cereal bars and not “crunchy rectangle snacks”? Well, the name pretty much says it all—they’re bars made from cereal! But here’s the fun part: you can use any cereal your heart desires. Rice cereal, cornflakes, oats, or even your favorite chocolate cereal can transform into these delightful treats. I remember my grandmother saying, “the way to a person’s heart is through their stomach,” and she was absolutely right.
These bars have won over everyone in my household, from my picky toddler to my health-conscious husband. The beauty lies in their simplicity and the joy they bring to snack time. Ready to make your kitchen smell like happiness? Let’s get started!
Why You’ll Love This Cereal Bars Recipe
Perfect Grab-and-Go Snack
Life gets busy, and we all need quick, nutritious options that don’t compromise on taste. These cereal bars are your new best friend for hectic mornings, afternoon slumps, or post-workout fuel. They’re portable, mess-free, and packed with energy to keep you going throughout the day.
Budget-Friendly Homemade Goodness
Let’s talk money for a second. Store-bought cereal bars can cost anywhere from three to five dollars for a small box. When you make them at home, you’re looking at less than half that cost for twice the quantity! Plus, you control exactly what goes into them—no mysterious additives or unpronounceable ingredients. You get pure, wholesome goodness that your family deserves.
Endless Customization Options
The flavor possibilities are absolutely endless with these cereal bars. Want to add chocolate chips? Go for it! Craving some dried cranberries or chopped nuts? Toss them in! You can create a different version every week and never get bored. The sticky-sweet marshmallow and butter mixture holds everything together beautifully, creating that perfect chewy texture we all crave. If you enjoyed experimenting with my energy balls recipe, you’ll have a blast customizing these bars to your taste preferences.
Making these at home means you’re in complete control. You decide the sweetness level, the add-ins, and even the size of each bar. Try making them tonight and discover why homemade always beats store-bought!
How to Make Cereal Bars
Quick Overview
These cereal bars are incredibly straightforward to make, requiring minimal cooking skills and just a few simple steps. The magic happens when you melt butter and marshmallows together, creating a gooey binder that coats your cereal perfectly.
The result? Chewy, slightly crispy bars with just the right amount of sweetness.
The best part is the speed—from start to finish, you’ll have these ready in about 20-25 minutes, with only 10 minutes of active cooking time.
Prep Time: 10 minutes
Cook Time: 5 minutes
Setting Time: 10 minutes
Total Time: 25 minutes
Servings: 16 bars
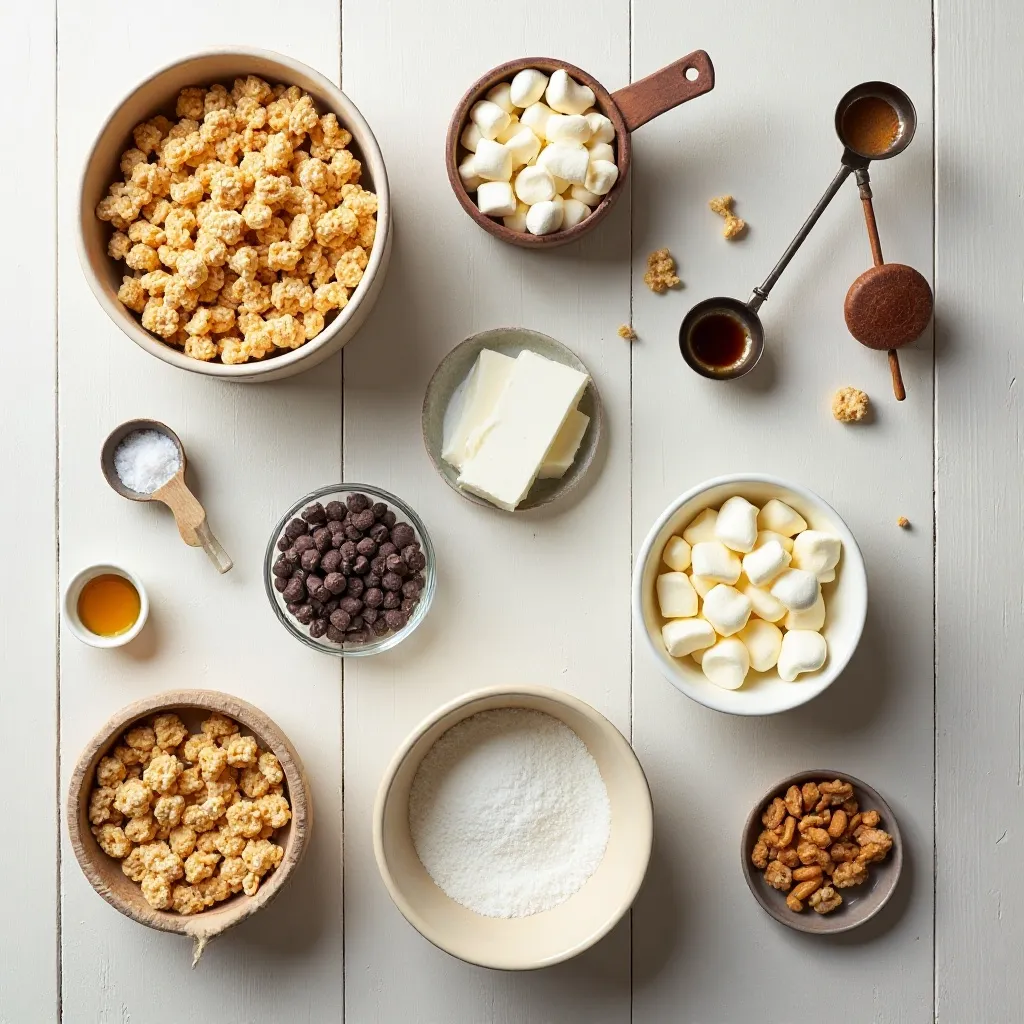
Key Ingredients for Cereal Bars
Here’s everything you need to create these delicious homemade cereal bars:
- 6 cups crispy rice cereal (or your favorite cereal)
- 3 tablespoons unsalted butter (half a stick)
- 5.5 cups mini marshmallows (about 10 ounces)
- 1 teaspoon pure vanilla extract (for that warm, sweet aroma)
- Pinch of salt (enhances all the flavors)
- Optional add-ins: 1 cup chocolate chips, dried fruit, nuts, or seeds
Pro tip: Have all your ingredients measured and ready before you start. Once that marshmallow mixture melts, you need to work quickly!
Step-by-Step Instructions
Step 1: Prepare Your Pan
Start by lining a 9×13 inch baking pan with parchment paper, leaving some overhang on the sides. This overhang will be your best friend later when you need to lift the bars out. Lightly grease the parchment paper with butter or cooking spray. Trust me, this step prevents sticky situations and makes cleanup a breeze.
Step 2: Measure Your Cereal
Pour your 6 cups of cereal into a large mixing bowl. If you’re adding any dry mix-ins like chocolate chips or dried fruit, add them to the cereal now and give everything a gentle toss. Make sure your bowl is large enough because you’ll be mixing in the melted marshmallow mixture soon, and you need room to work.
Step 3: Melt the Butter
Place a large saucepan over medium-low heat and add your butter. Let it melt completely, swirling the pan occasionally to ensure even melting. Don’t rush this step with high heat—patience is key to preventing burning. Once melted, the butter should look clear and golden.
Step 4: Add the Marshmallows
Pour all the mini marshmallows into the melted butter. Stir constantly with a wooden spoon or heat-resistant spatula. Watch as they slowly start to melt and transform into a smooth, glossy mixture. This usually takes about 3-4 minutes. Keep stirring to prevent any hot spots or burning at the bottom of the pan.
Step 5: Add Vanilla and Salt
Once your marshmallows are completely melted and smooth, remove the pan from heat immediately. Quickly stir in the vanilla extract and pinch of salt. The vanilla adds incredible depth of flavor, while the salt balances the sweetness perfectly. Mix until everything is well combined.
Step 6: Combine with Cereal
Pour the hot marshmallow mixture over your cereal. Here’s where you need to work fast but carefully—the mixture will start to cool and stiffen. Using a buttered spatula or your hands (lightly greased with butter), fold and mix everything together until every piece of cereal is coated with the marshmallow mixture. This should take about 30-45 seconds of good mixing.
Step 7: Press into Pan
Transfer the mixture to your prepared pan. Using your buttered spatula or buttered hands, press the mixture firmly and evenly into the pan. Apply even pressure across the entire surface to ensure uniform thickness. The firmer you press, the better your bars will hold together when cut. Don’t be shy—really pack it down!
Step 8: Let It Set
Allow the mixture to cool at room temperature for at least 10-15 minutes. If you’re in a hurry, you can pop the pan in the refrigerator for 5-7 minutes to speed up the setting process. The bars should feel firm to the touch when ready.
Step 9: Cut into Bars
Using the parchment paper overhang, lift the entire slab out of the pan and place it on a cutting board. With a sharp knife (lightly greased with butter to prevent sticking), cut into 16 equal bars. Wipe your knife clean between cuts for the cleanest edges.
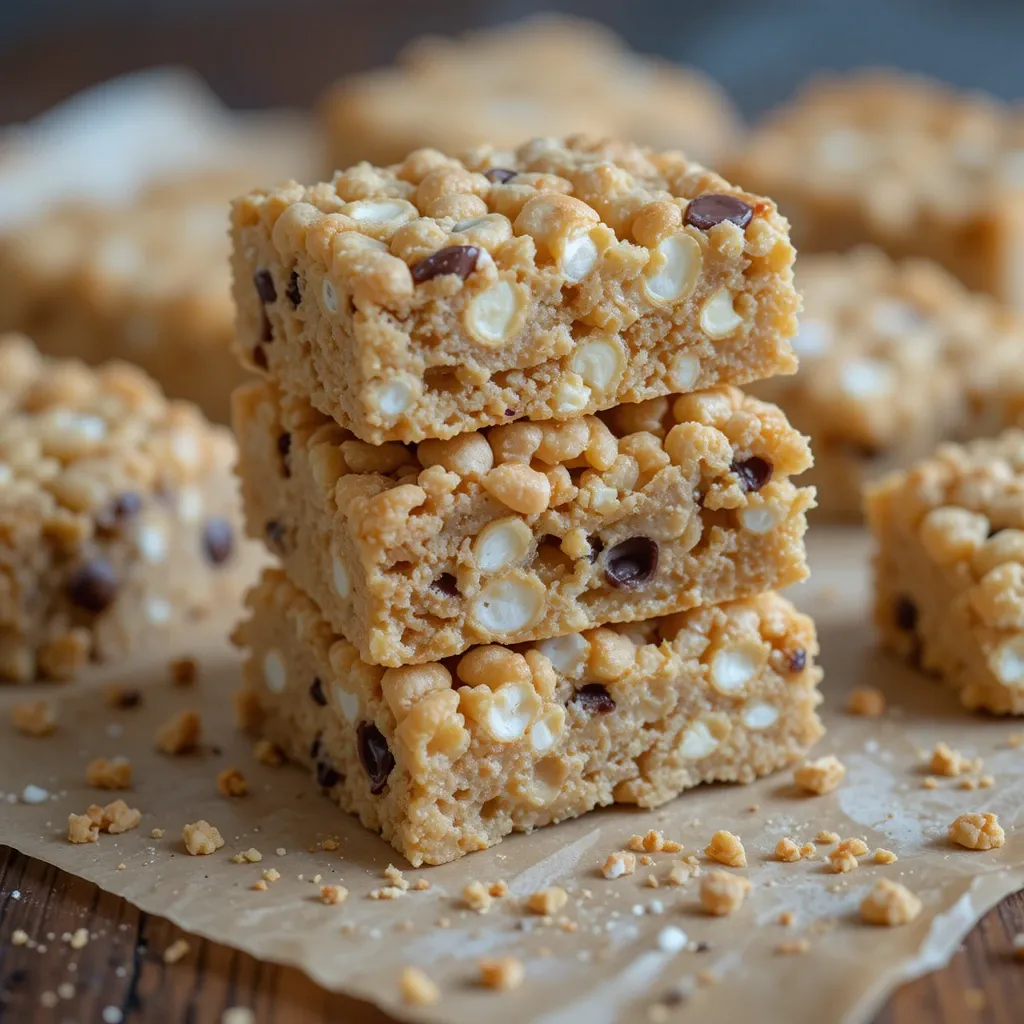
Step 10: Serve and Enjoy
Your homemade cereal bars are ready to devour! Arrange them on a serving plate or store them away for later. The satisfaction of biting into something you made from scratch is absolutely unmatched.
What to Serve Cereal Bars With
These versatile treats pair beautifully with so many options. For breakfast, serve them alongside fresh fruit salad and a glass of cold milk or your favorite plant-based milk alternative. They’re perfect with a hot cup of coffee or tea during afternoon break time.
Pack them in lunchboxes with some baby carrots, cheese cubes, and apple slices for a balanced midday meal. After school, kids love them with a smoothie or fresh juice.
For a fun dessert twist, serve slightly warmed bars with a scoop of vanilla ice cream on top. They also make excellent companions to hot chocolate on cozy evenings.
The beauty of cereal bars is their flexibility—they fit seamlessly into any part of your day!
Top Tips for Perfecting Cereal Bars
Use Fresh Marshmallows
Always check the expiration date on your marshmallows. Fresh marshmallows melt smoothly and create that perfect gooey texture. Old, dried-out marshmallows won’t melt properly and can make your bars crumbly.
Don’t Overheat the Mixture
Keep your heat on medium-low when melting butter and marshmallows. High heat can cause the marshmallows to seize up or burn, resulting in tough, chewy bars instead of soft, tender ones.
Work Quickly
Once you add the cereal to the marshmallow mixture, work fast. The mixture cools quickly and becomes harder to mix and press into the pan. Have everything ready before you start melting your marshmallows.
Press Firmly but Gently
When pressing the mixture into the pan, use firm, even pressure. However, don’t press so hard that you crush the cereal. You want compact bars that hold together without being dense and hard.
Butter Is Your Friend
Lightly butter your spatula, hands, and knife. This prevents sticking and makes the entire process much smoother. Keep a small bowl of melted butter nearby for easy access.
Experiment with Cereals
Don’t limit yourself to rice cereal. Try cornflakes for extra crunch, multigrain cereal for added nutrition, or even mix different cereals together for unique textures and flavors.
Add Mix-ins Wisely
If adding chocolate chips, wait until the marshmallow mixture cools slightly before mixing in the cereal. This prevents the chocolate from completely melting. For nuts or dried fruit, add them to the dry cereal first.
Storing and Reheating Tips
Proper storage keeps your cereal bars fresh and delicious for days. Once completely cooled, store them in an airtight container at room temperature. They’ll stay fresh for up to 5 days this way. Layer parchment paper between bars if stacking them to prevent sticking.
For longer storage, wrap individual bars in plastic wrap and place them in a freezer-safe container or bag. They freeze beautifully for up to 2 months. When you’re ready to enjoy one, simply let it thaw at room temperature for about 10 minutes.
These bars are best enjoyed at room temperature or slightly chilled. If they’ve been refrigerated and feel too firm, let them sit out for a few minutes to soften. Avoid microwaving them as this can make the marshmallow mixture too soft and sticky.
For lunch boxes, pack them directly from room temperature storage. They’ll stay fresh for several hours without refrigeration, making them perfect for on-the-go snacking.
Common Baking Mistakes to Avoid
Mistake #1: Using Too Much Heat
This is the number one mistake people make. High heat causes marshmallows to become tough and stringy. Always use medium-low heat and be patient during the melting process.
Mistake #2: Not Greasing Properly
Forgetting to grease your pan, spatula, and hands leads to frustrating sticky situations. Take the extra minute to butter everything—it makes all the difference.
Mistake #3: Cutting Too Soon
If you cut the bars while they’re still warm, they’ll fall apart and lose their shape. Always wait until they’re completely set and cooled before cutting.
Mistake #4: Overmixing
Once you combine the cereal with the marshmallow mixture, mix just until coated. Overmixing can break down the cereal and create a dense, tough texture.
Mistake #5: Using Stale Cereal
Fresh, crispy cereal is essential. Stale cereal absorbs moisture differently and can result in bars that don’t set properly or taste off.
Mistake #6: Incorrect Measurements
Baking is science! Measure your marshmallows and cereal accurately. Too many marshmallows make overly sticky bars; too few result in crumbly ones.
Mistake #7: Skipping the Vanilla
That teaspoon of vanilla might seem optional, but it adds incredible flavor depth. Never skip it—it transforms the taste from good to amazing.
Frequently Asked Questions
Can I use regular-sized marshmallows instead of mini marshmallows?
Yes, you absolutely can! Use the same weight (about 10 ounces). Just know that regular marshmallows take slightly longer to melt. You can also cut them into smaller pieces to speed up the melting process.
Why are my cereal bars hard and crunchy instead of chewy?
This usually happens when the marshmallow mixture is overheated or cooked too long. The heat causes the sugars to caramelize, creating a harder texture. Always use low heat and remove from heat as soon as everything melts.
Can I make these bars gluten-free?
Definitely! Just use certified gluten-free cereal. Rice cereal is naturally gluten-free, but always check the label to ensure it’s processed in a gluten-free facility if you have celiac disease.
How do I prevent my cereal bars from falling apart?
Make sure you’re pressing the mixture firmly into the pan and allowing adequate cooling time. Using fresh marshmallows and the correct cereal-to-marshmallow ratio also helps bars hold together perfectly.
Can I reduce the amount of butter or marshmallows?
I don’t recommend it. The recipe is carefully balanced. Reducing butter makes the mixture harder to work with, and reducing marshmallows results in crumbly bars that won’t stick together.
What’s the best cereal to use for cereal bars?
Rice cereal is classic and creates that familiar texture we love. However, cornflakes offer extra crunch, while multigrain cereals add nutritional value. Experiment to find your favorite!
Can I add protein powder to make these more nutritious?
Yes! Add 1/4 to 1/2 cup of unflavored or vanilla protein powder to the cereal before adding the marshmallow mixture. This boosts the protein content significantly.
Why are my bars too sticky?
If your bars are overly sticky, you may have used too many marshmallows or not enough cereal. Make sure you’re measuring accurately. Also, allow them to set completely before cutting.
Nutrition Information
| Nutrient | Per Bar (1/16 recipe) |
|---|---|
| Calories | 130 |
| Total Fat | 3g |
| Saturated Fat | 2g |
| Cholesterol | 8mg |
| Sodium | 95mg |
| Total Carbohydrates | 25g |
| Dietary Fiber | 0g |
| Sugars | 12g |
| Protein | 1g |
| Vitamin D | 0mcg |
| Calcium | 15mg |
| Iron | 2mg |
| Potassium | 20mg |
Note: Nutrition information is approximate and may vary based on specific ingredients used and portion sizes.
Final Thoughts
Making homemade cereal bars is one of those simple pleasures that brings so much joy to your kitchen. Whether you’re preparing snacks for the week, surprising your kids with an after-school treat, or just satisfying your own sweet tooth, these bars deliver every single time.
The best part about this recipe is how it invites creativity. Once you master the basic version, you’ll find yourself experimenting with different cereals, mix-ins, and flavor combinations. Each batch becomes an opportunity to create something new and exciting.
I love making a double batch on Sunday afternoons and storing them for the busy week ahead. They’ve saved me countless times when hunger strikes and I need something quick, satisfying, and homemade.
So grab your cereal, marshmallows, and butter, and let’s make some magic happen in your kitchen. Your future self will thank you for having these delicious bars ready to grab whenever you need them. Happy baking!