Perfect Chocolate Chip Scones Recipe – Bakery-Style at Home
There’s something magical about biting into a warm, freshly baked scone studded with melty chocolate chips. These chocolate chip scones are buttery, flaky, and absolutely irresistible – perfect for breakfast, afternoon tea, or anytime you crave something special.
I still remember the first time I made these for my family on a lazy Sunday morning. The aroma filled our entire kitchen, and within minutes, the whole batch disappeared! What makes these scones truly special is their tender crumb and golden exterior that shatters perfectly with each bite.
They’re surprisingly simple to make, taking less than 30 minutes from start to finish, making them ideal for both busy weekday mornings and leisurely weekend brunches.
This recipe was generated entirely by AI and has not been tried in our kitchen. We value our community, and many readers have shared good results from other recipes featured on the site.
What Are Chocolate Chip Scones?
Ever wondered why these triangular treats have captured hearts worldwide? Chocolate chip scones are the delightful marriage of British baking tradition and American chocolate obsession. Think of them as the sophisticated cousin of your favorite chocolate chip cookie – but for breakfast!
They’re tender, slightly sweet pastries that crumble perfectly in your hands while those chocolate chips create pockets of pure bliss. As the saying goes, “the way to a man’s heart is through his stomach,” and trust me, these scones have won over countless hearts in my kitchen. Ready to create your own batch of happiness?
Why You’ll Love These Chocolate Chip Scones
The Perfect Morning Indulgence
These chocolate chip scones deliver bakery-quality results without the bakery price tag. The buttery layers practically melt on your tongue while those chocolate chips add just the right amount of sweetness. Each bite offers that perfect balance between tender and crumbly – a texture that’s truly addictive.
Budget-Friendly Baking
Making scones at home costs a fraction of what you’d pay at your local café. With basic pantry staples and some chocolate chips, you can create a whole batch that feeds your family without breaking the bank. Plus, you control the quality of ingredients, ensuring every bite is worth it.
Endless Customization Options
The beauty of these chocolate chip scones lies in their versatility. You can swap dark chocolate for milk chocolate, add a handful of nuts, or even throw in some dried fruit. The base recipe is forgiving and welcomes your creative touches. If you loved my blueberry muffin recipe, you’ll appreciate how these scones offer similar comfort with a more elegant presentation.
Making these at home means you can enjoy them fresh from the oven, still warm and perfectly crispy on the outside. Why settle for day-old scones when you can have them at their absolute best?
How to Make Chocolate Chip Scones
Quick Overview
These chocolate chip scones are wonderfully simple to prepare, requiring just one bowl and minimal hands-on time. The secret to their incredible flaky texture lies in keeping your ingredients cold and handling the dough gently. You’ll love how the buttery layers develop and how those chocolate chips stay perfectly distributed throughout. With just 10 minutes of prep and 15 minutes of baking, you’ll have golden, aromatic scones ready to devour.
Time Breakdown:
- Prep Time: 10 minutes
- Baking Time: 15-18 minutes
- Total Time: 25-28 minutes
- Yield: 8 large scones
Key Ingredients for Chocolate Chip Scones
Dry Ingredients:
- 2 cups all-purpose flour
- 1/3 cup granulated sugar
- 1 tablespoon baking powder
- 1/2 teaspoon salt
Wet Ingredients:
- 1/2 cup cold unsalted butter, cubed
- 1/2 cup heavy cream (plus extra for brushing)
- 1 large egg
- 1 teaspoon pure vanilla extract
Mix-ins:
- 3/4 cup chocolate chips (semi-sweet or your preference)
Topping:
- 1 tablespoon coarse sugar (optional, for sprinkling)
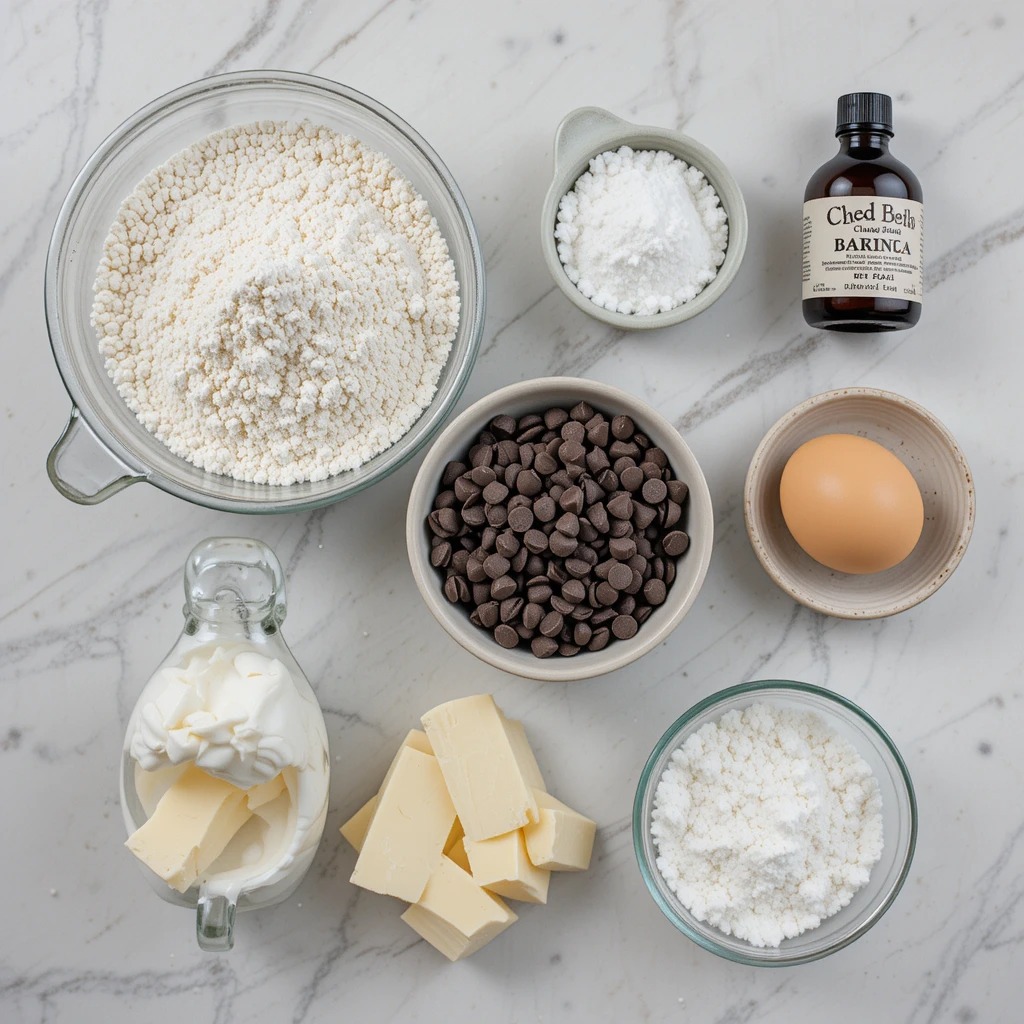
The key to perfect scones is using cold butter straight from the refrigerator. This creates those coveted flaky layers. Choose quality chocolate chips – they’re the star of the show! I prefer semi-sweet, but milk chocolate lovers can absolutely swap them out.
Step-by-Step Instructions
Prepare Your Workspace
Start by preheating your oven to 400°F (200°C). Line a large baking sheet with parchment paper or a silicone baking mat. This prevents sticking and ensures even browning. Having everything ready before you start mixing helps keep your butter cold, which is crucial for flaky scones.
Mix the Dry Ingredients
In a large mixing bowl, whisk together your flour, sugar, baking powder, and salt until well combined. This step ensures even distribution of the leavening agents, so every scone rises perfectly. Make sure there are no clumps in your baking powder – sift it if needed.
Cut in the Butter
Add your cold, cubed butter to the flour mixture. Using a pastry cutter, two knives, or your fingertips, work the butter into the flour until the mixture resembles coarse crumbs with some pea-sized butter pieces remaining. These little butter pockets are what create those beautiful flaky layers. Work quickly to prevent the butter from warming up. If your kitchen is warm, pop the bowl in the freezer for 5 minutes.
Prepare the Wet Mixture
In a separate small bowl, whisk together the heavy cream, egg, and vanilla extract until smooth. This creates a uniform liquid that will hydrate your dough evenly. The vanilla adds a subtle warmth that complements the chocolate beautifully.
Combine and Add Chocolate
Pour the wet ingredients into your flour-butter mixture. Add the chocolate chips at the same time. Using a rubber spatula or wooden spoon, gently fold everything together until just combined. The dough will look shaggy and slightly dry – that’s perfect! Overmixing leads to tough scones, so stop as soon as you no longer see dry flour streaks.
Shape the Dough
Turn the dough out onto a lightly floured surface. Gently pat it into a circle about 7-8 inches in diameter and roughly 1 inch thick. The dough might feel a bit crumbly – that’s normal. Just press it together gently. If it’s too sticky, dust with a tiny bit more flour, but don’t overdo it.
Cut into Wedges
Using a sharp knife or bench scraper, cut the circle into 8 equal wedges, like cutting a pizza. For cleaner cuts, wipe your knife between each slice. Carefully transfer each scone to your prepared baking sheet, leaving about 2 inches of space between them.
Add Finishing Touches
Brush the tops of each scone with a little heavy cream using a pastry brush. This creates that gorgeous golden-brown finish. If you’re using coarse sugar, sprinkle it generously over the tops now. The sugar adds a delightful crunch and makes them look professionally made.
Bake to Perfection
Place your baking sheet in the preheated oven and bake for 15-18 minutes, or until the scones are golden brown on top and around the edges. The chocolate chips should be slightly melty and gooey. Your kitchen will smell absolutely incredible! The scones are done when they feel firm to the touch and a toothpick inserted in the center comes out clean (aside from melted chocolate).
Cool and Enjoy
Remove from the oven and let the scones cool on the baking sheet for 5 minutes before transferring to a wire rack. This brief resting period helps them set up properly. They’re absolutely divine eaten warm, when the chocolate is still melty!
What to Serve Chocolate Chip Scones With
These chocolate chip scones are incredibly versatile and pair beautifully with various accompaniments.
Morning Beverages: Serve them alongside your favorite hot coffee, a frothy cappuccino, or a steaming cup of tea. English breakfast tea is traditional, but herbal teas like chamomile or mint work wonderfully too. Hot chocolate takes the chocolate experience to another level!
Spreads and Toppings: While delicious on their own, these scones are heavenly with a smear of softened butter, cream cheese, or even Nutella for extra chocolate indulgence. Strawberry jam adds a fruity contrast that cuts through the richness.
Brunch Spread: Make them part of a larger brunch spread with scrambled eggs, fresh fruit salad, and yogurt parfaits. The scones add a sweet element that balances savory breakfast items perfectly.
Afternoon Tea: Embrace British tradition by serving these with clotted cream and preserves for an elegant afternoon tea experience. Add some cucumber sandwiches and fresh berries for a complete spread.

Top Tips for Perfecting Chocolate Chip Scones
Keep Everything Cold
The secret to supremely flaky scones is temperature control. Keep your butter refrigerated until the moment you need it. Some bakers even freeze their butter and grate it into the flour! If your kitchen is warm, chill your mixing bowl and flour for 10 minutes before starting. Cold ingredients prevent the butter from melting before baking, which is essential for creating those tender, flaky layers.
Don’t Overmix the Dough
Once you add the wet ingredients, mix only until the dough just comes together. You should still see some flour streaks – they’ll incorporate as you shape the dough. Overmixing develops gluten, which makes scones tough and dense instead of tender and crumbly. Think of it like mixing muffin batter – a light hand is key.
Use a Sharp Knife
When cutting your scones, use a sharp knife in a swift downward motion. Don’t twist or saw, as this seals the edges and prevents proper rising. Clean your knife between cuts for the neatest wedges. Alternatively, use a bench scraper for perfectly clean cuts.
Quality Chocolate Matters
Since chocolate chips are a main ingredient, use good quality ones. They should contain real cocoa butter for the best flavor and melting properties. I prefer semi-sweet, but experiment with dark chocolate for a more sophisticated taste or milk chocolate for sweeter scones. Mini chocolate chips distribute more evenly if you prefer chocolate in every bite.
The Right Flour
All-purpose flour works perfectly for this recipe. Avoid using bread flour, which has too much protein and will make your scones tough. If you only have cake flour, you can use it, but your scones will be more delicate and crumbly.
Proper Spacing
Place scones at least 2 inches apart on your baking sheet. As they bake, they’ll expand slightly, and you want air to circulate around them for even browning. Crowded scones can end up with pale, soft sides instead of golden, crispy edges.
Don’t Skip the Egg Wash
Brushing the tops with cream creates that beautiful golden color and adds richness. If you don’t have extra cream, use milk or even a beaten egg. The liquid helps the coarse sugar stick and creates a glossy finish.
Storing and Reheating Tips
Room Temperature Storage
Freshly baked chocolate chip scones taste best the day they’re made, but they’ll stay fresh at room temperature for up to 2 days. Store them in an airtight container lined with paper towels to absorb any moisture. Keep them away from direct sunlight and heat sources. The paper towels prevent the bottoms from getting soggy while maintaining the crispy exterior.
Refrigeration Guidelines
If you need to keep scones longer, refrigerate them in an airtight container for up to 5 days. The cold temperature will firm them up slightly, but they’ll still taste delicious. Let them come to room temperature for 15 minutes before eating, or warm them briefly for the best experience.
Freezing for Later
These scones freeze beautifully! Once completely cooled, wrap each scone individually in plastic wrap, then place them all in a freezer-safe bag. They’ll stay fresh for up to 3 months. This is perfect for meal prep – bake a double batch and freeze half for busy mornings. You can also freeze unbaked scones: shape and cut them, freeze on a baking sheet until solid, then transfer to a freezer bag. Bake from frozen, adding 2-3 extra minutes to the baking time.
Reheating Instructions
To recapture that fresh-from-the-oven experience, reheat scones in a 300°F oven for 5-7 minutes. This crisps up the exterior while warming the interior perfectly. The microwave works in a pinch (15-20 seconds), but it can make them slightly soggy. For frozen scones, thaw at room temperature for an hour, then reheat as directed. The chocolate chips will get melty again – pure heaven!
Tips for Avoiding Common Baking Mistakes
Mistake: Overworking the Dough
Many bakers knead scone dough like bread, but this develops too much gluten and results in tough, chewy scones. The solution? Handle the dough as little as possible. Mix only until ingredients are barely combined, and use a light touch when shaping. If your dough feels too dry and crumbly to hold together, add cream one teaspoon at a time rather than overmixing.
Mistake: Using Warm Butter
Room temperature or melted butter ruins the flaky texture that makes scones special. Cold butter creates steam pockets as it melts during baking, producing those coveted layers. Always use butter straight from the fridge, cut into small cubes. If your butter starts warming up while you’re working, pop the bowl in the freezer for a few minutes.
Mistake: Incorrect Oven Temperature
Baking at too low a temperature means scones spread before they set, resulting in flat, dense disks. Too high, and they brown on the outside while staying raw inside. Always preheat your oven fully and use an oven thermometer to verify the temperature. Every oven is different – mine runs hot, so I bake at 390°F instead of 400°F.
Mistake: Uneven Scone Sizes
When your scones are different sizes, they bake unevenly – some burn while others stay undercooked. Take an extra moment to measure your dough circle and cut equal wedges. Use a ruler if needed! Consistent sizing ensures everything bakes at the same rate.
Mistake: Opening the Oven Too Soon
I know it’s tempting to peek, but opening the oven door releases heat and can cause scones to collapse. Trust the process and wait until at least 12 minutes have passed before checking. Use your oven light to peek if you’re anxious!
Mistake: Skipping the Resting Time
Baking immediately after shaping can lead to spread. For even better results, pop your shaped scones in the freezer for 10 minutes before baking. This firms up the butter and helps them hold their shape beautifully.
Mistake: Using Old Baking Powder
Expired baking powder won’t give you the rise you need. Test yours by mixing a teaspoon with hot water – it should fizz vigorously. If it doesn’t, get fresh baking powder. This simple step makes a huge difference in scone height and texture.
Frequently Asked Questions
Why are my chocolate chip scones dry and crumbly?
Dry scones usually result from too much flour or overbaking. When measuring flour, use the spoon-and-level method rather than scooping directly from the bag, which packs it down. Also, take your scones out of the oven as soon as they’re golden and just set – they’ll continue cooking slightly as they cool. If your dough seems dry before baking, add an extra tablespoon of cream.
Can I make chocolate chip scones without heavy cream?
Absolutely! While heavy cream creates the richest, most tender scones, you can substitute half-and-half or even whole milk in a pinch. For a dairy-free version, use full-fat coconut cream or a combination of non-dairy milk and a tablespoon of oil. The texture will be slightly different but still delicious.
How do I prevent chocolate chips from sinking to the bottom?
Toss your chocolate chips in a tablespoon of flour before adding them to the dough. This light coating helps suspend them throughout the scone. Also, make sure your dough is thick enough – if it’s too wet, chips will sink. Using mini chocolate chips instead of regular-sized ones also helps with distribution.
Can I use whole wheat flour instead of all-purpose flour?
You can substitute up to half the all-purpose flour with whole wheat flour for a nuttier flavor and added nutrition. Going 100% whole wheat makes scones denser and less tender. For best results, use white whole wheat flour, which has a milder flavor than traditional whole wheat.
Why didn’t my scones rise properly?
Several factors affect rise: old baking powder, warm butter, overmixing, or not preheating the oven fully. Make sure your baking powder is fresh and active. Keep your ingredients cold, handle the dough gently, and ensure your oven has reached the full temperature before baking.
Can I add other mix-ins besides chocolate chips?
Definitely! These scones are incredibly versatile. Try adding chopped nuts like pecans or walnuts, dried cranberries, white chocolate chips, or even a combination. Just keep the total mix-in amount around 3/4 to 1 cup so the scones hold together properly.
How can I make my scones more flaky?
The key to flakiness is cold, visible butter pieces in your dough. Don’t mix the butter in completely – you want to see pea-sized chunks throughout. You can also try folding and stacking the dough a few times before shaping, similar to making puff pastry, which creates extra layers.
Is it better to use salted or unsalted butter?
Unsalted butter is preferred because it lets you control the salt level in your recipe. If you only have salted butter, reduce the added salt to 1/4 teaspoon. The difference is subtle, so don’t worry if you need to substitute.
Nutrition Information
| Nutrient | Per Scone (1 of 8) |
|---|---|
| Calories | 285 |
| Total Fat | 14g |
| Saturated Fat | 9g |
| Cholesterol | 55mg |
| Sodium | 220mg |
| Total Carbohydrates | 36g |
| Dietary Fiber | 1g |
| Sugars | 15g |
| Protein | 4g |
Note: Nutrition information is approximate and will vary based on specific ingredients used.
Final Thoughts
These chocolate chip scones have become a staple in my kitchen, and I hope they’ll become one in yours too. There’s something incredibly satisfying about pulling a tray of golden, chocolate-studded scones from your own oven. The aroma, the taste, the pride of making something from scratch – it all comes together in these simple pastries.
What I love most about this recipe is its forgiving nature. Even if you’re new to baking, you can achieve beautiful results. The key is keeping things cold, working gently, and not overthinking it. Your first batch might not be perfect, but I guarantee they’ll still taste amazing.
These scones have brightened countless mornings in my home. They’ve been rushed additions to bake sales, last-minute brunch contributions, and quiet weekend treats enjoyed with a good book. They’re proof that sometimes the simplest recipes bring the most joy.
So gather your ingredients, preheat that oven, and get ready to fill your kitchen with the most incredible aroma. Whether you’re baking for yourself, your family, or friends, these chocolate chip scones are sure to become a treasured recipe. Happy baking!