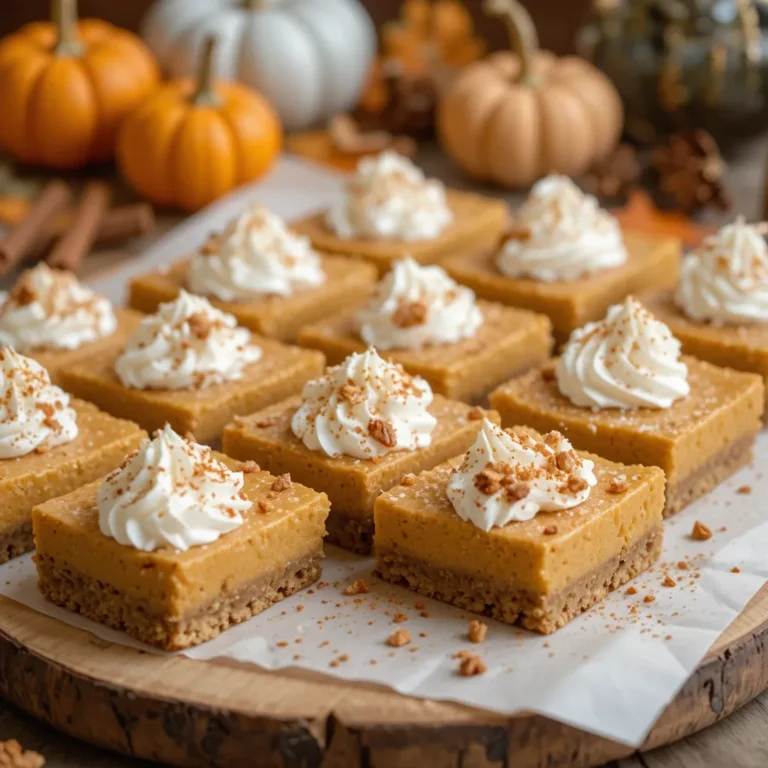
5 Naturally Sweet Date Bars You Can Make in Minutes
If you’re looking for a naturally sweet treat that’s chewy, wholesome, and incredibly satisfying, these date bars are about to become your new obsession. I still remember the first time I made date bars—I was skeptical about using dates as the main sweetener, but one bite changed everything.
These bars are perfect for busy mornings, afternoon snacks, or even dessert. They’re naturally sweet, require minimal ingredients, and come together faster than you’d think.
Much like my popular energy balls recipe, these date bars prove that healthy treats don’t have to be complicated or time-consuming. Get ready to fall in love with five incredible variations that range from nutty to fruity perfection!
This recipe is 100% AI-generated and has not been personally tested by us. We care deeply about our readers, and feedback from people who’ve tried other recipes on our site has been positive.
What Are Date Bars?
So, what exactly are date bars, and why do they have such a simple name? Think of them as nature’s candy bar—chewy, naturally sweetened squares that pack serious flavor and energy into every bite. These aren’t your typical sugar-loaded desserts. Instead, they rely on the natural caramelized sweetness of dates to create something truly magical. You know what they say: the way to anyone’s heart is through their stomach, and these bars definitely prove it!
Whether you’re serving them to family, friends, or keeping them all to yourself (no judgment here), date bars are incredibly versatile and surprisingly easy to make. Ready to discover which variation will become your favorite?
Why You’ll Love These Date Bars
Naturally Sweet Without Refined Sugar
The beauty of date bars lies in their wholesome sweetness. Dates are packed with natural sugars, fiber, and essential minerals like potassium and magnesium. When you bite into one of these bars, you’re getting a treat that actually nourishes your body. The chewy texture combined with crunchy nuts or creamy additions creates a perfect balance that satisfies any craving.
Budget-Friendly and Pantry-Staple Friendly
Making date bars at home saves you serious money compared to buying expensive energy bars or health snacks at the store. Most of the ingredients are pantry staples you probably already have—oats, nuts, coconut, and of course, dates. A batch of these bars costs just a fraction of what you’d pay for store-bought alternatives, and they taste infinitely better.
Endless Flavor Combinations
What I love most about date bars is how customizable they are. From tropical coconut vibes to rich chocolate indulgence, each variation offers something unique. If you enjoyed my no-bake granola bars recipe, you’ll appreciate how these date bars take that concept to an even more delicious level. The toppings and mix-ins transform simple ingredients into five completely different taste experiences. Go ahead and make a batch this weekend—your future self will thank you!
How to Make Date Bars
Quick Overview
These date bars are surprisingly simple to make, even if you’re new to baking. Each variation follows a similar base method: process the dates, mix with complementary ingredients, press into a pan, and chill. The result? Perfectly chewy, naturally sweet bars that hold together beautifully.
Time breakdown:
- Prep time: 15-20 minutes
- Chill time: 1-2 hours (or 30 minutes in freezer)
- Total time: Approximately 2 hours
- Makes: 12-16 bars depending on size
No baking required for most versions, which means less cleanup and more time enjoying your delicious creation!
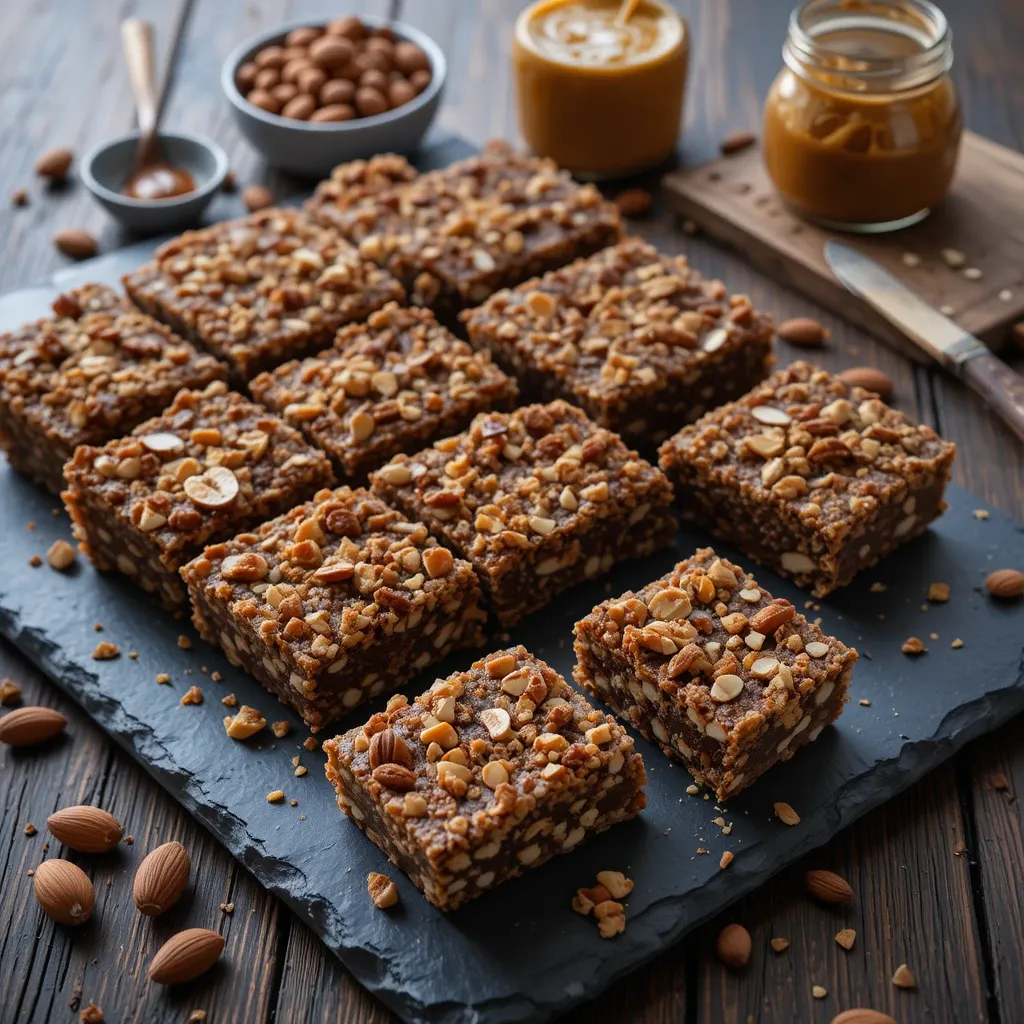
Recipe 1: Date Bars with Oatmeal
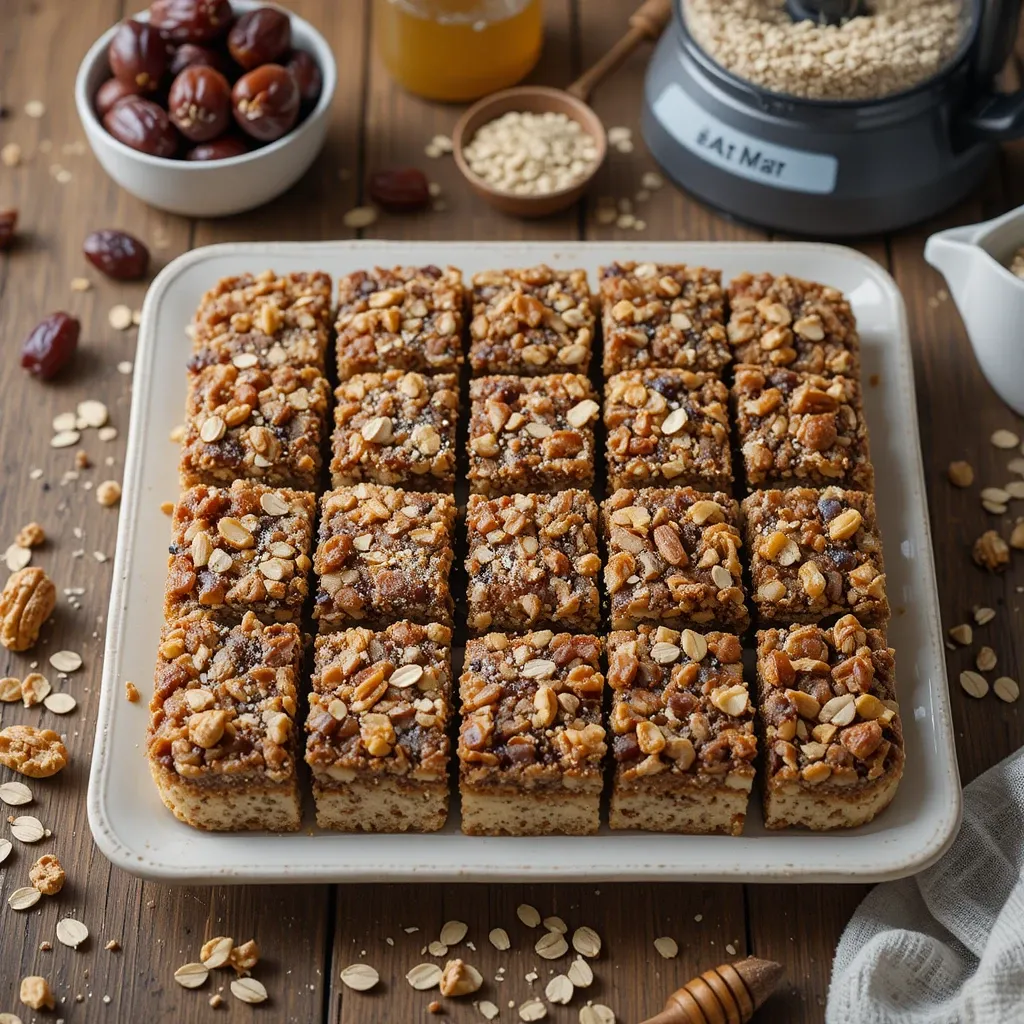
Key Ingredients for Date Bars with Oatmeal
- 2 cups pitted Medjool dates (about 300g)
- 1½ cups rolled oats
- ½ cup chopped walnuts or almonds
- 2 tablespoons honey or maple syrup
- 1 teaspoon vanilla extract
- ½ teaspoon cinnamon
- Pinch of sea salt
- 2-3 tablespoons water (if needed)
Step-by-Step Instructions
Step 1: Prepare Your Dates
Start by checking your dates to ensure they’re soft and pliable. If they’re a bit dry, soak them in warm water for 10 minutes, then drain thoroughly. This step ensures your bars will have that perfect chewy texture we’re after.
Step 2: Process the Base
Add the dates to a food processor and pulse until they form a sticky paste. This usually takes about 1-2 minutes. You’ll know they’re ready when the mixture clumps together and sticks to the sides of the processor.
Step 3: Add the Oats and Nuts
Add the rolled oats, chopped nuts, cinnamon, and salt to the food processor. Pulse 8-10 times until everything is combined but still has some texture. You want small chunks of oats and nuts visible—don’t over-process into a powder.
Step 4: Mix in the Wet Ingredients
Drizzle in the honey and vanilla extract. Pulse a few more times to incorporate. If the mixture seems too dry and won’t hold together when pressed, add water one tablespoon at a time.
Step 5: Press and Shape
Line an 8×8 inch pan with parchment paper, leaving overhang on the sides for easy removal. Transfer the mixture to the pan and press down firmly using your hands or the bottom of a measuring cup. Really pack it down—this ensures your bars won’t crumble.
Step 6: Chill and Cut
Refrigerate for at least 2 hours or freeze for 30 minutes until firm. Once set, use the parchment overhang to lift the entire block out. Cut into 12-16 bars using a sharp knife. Clean the knife between cuts for neat edges.
Recipe 2: Coconut Date Bars
Key Ingredients for Coconut Date Bars
- 2 cups pitted Medjool dates
- 1 cup unsweetened shredded coconut
- ½ cup cashews or macadamia nuts
- ¼ cup coconut oil, melted
- 1 teaspoon vanilla extract
- ¼ teaspoon sea salt
- ½ cup coconut flakes for topping (optional)
Step-by-Step Instructions
Step 1: Toast the Coconut (Optional but Recommended)
For extra flavor, spread the shredded coconut on a baking sheet and toast at 325°F for 5-7 minutes until lightly golden. Watch carefully—coconut burns quickly! Let it cool before using. This step adds an incredible depth of flavor.
Step 2: Blend the Base
Place dates in your food processor and process until they form a sticky ball. This takes about 60-90 seconds. The dates should be completely smooth with no chunks remaining.
Step 3: Add Coconut and Nuts
Add the toasted coconut (or untoasted if you prefer), cashews, and salt. Process until the mixture is well combined but still has some texture from the coconut and nuts. The mixture should be sticky and hold together when pressed.
Step 4: Incorporate the Coconut Oil
With the processor running, drizzle in the melted coconut oil and vanilla extract. Process for another 10-15 seconds until everything is evenly distributed. The coconut oil helps bind everything together and adds richness.
Step 5: Form the Bars
Press the mixture firmly into a lined 8×8 inch pan. If desired, sprinkle coconut flakes on top and press them gently into the surface. This creates a beautiful presentation and adds extra tropical flavor.
Step 6: Set and Slice
Refrigerate for 2 hours or until completely firm. The coconut oil needs time to solidify. Once set, cut into bars. These have a slightly different texture than the oatmeal version—more dense and fudgy with delightful coconut throughout.
Recipe 3: Date and Nut Bars
Key Ingredients for Date and Nut Bars
- 2 cups pitted Medjool dates
- ½ cup almonds
- ½ cup walnuts
- ½ cup pecans
- 2 tablespoons almond butter
- 1 teaspoon vanilla extract
- ½ teaspoon cinnamon
- ¼ teaspoon sea salt
- Extra chopped nuts for topping
Step-by-Step Instructions
Step 1: Prepare the Nuts
Roughly chop your almonds, walnuts, and pecans. I like to keep them in varying sizes—some chunky pieces and some smaller bits. This creates amazing texture variation in every bite. Set aside about ¼ cup of chopped nuts for topping.
Step 2: Process the Dates
Add the dates to your food processor and blend until they form a sticky paste. Scrape down the sides as needed to ensure even processing. The dates are the glue that holds these bars together.
Step 3: Add Nuts and Spices
Add the chopped nuts (except the reserved topping nuts), cinnamon, and salt to the food processor. Pulse 6-8 times until the nuts are broken down but still chunky. You want visible nut pieces for that satisfying crunch.
Step 4: Mix in the Binding Ingredients
Add the almond butter and vanilla extract. Process until everything comes together into a thick, sticky mixture. The almond butter adds creaminess and helps bind the nuts together.
Step 5: Shape and Top
Transfer to a parchment-lined 8×8 inch pan and press down very firmly. Sprinkle the reserved chopped nuts on top and press them into the surface so they stick. This creates a gorgeous, professional-looking finish.
Step 6: Chill and Portion
Refrigerate for at least 2 hours. When ready to cut, use a sharp, heavy knife and a firm pressing motion rather than a sawing motion. This prevents the bars from crumbling and keeps all those beautiful nuts intact.
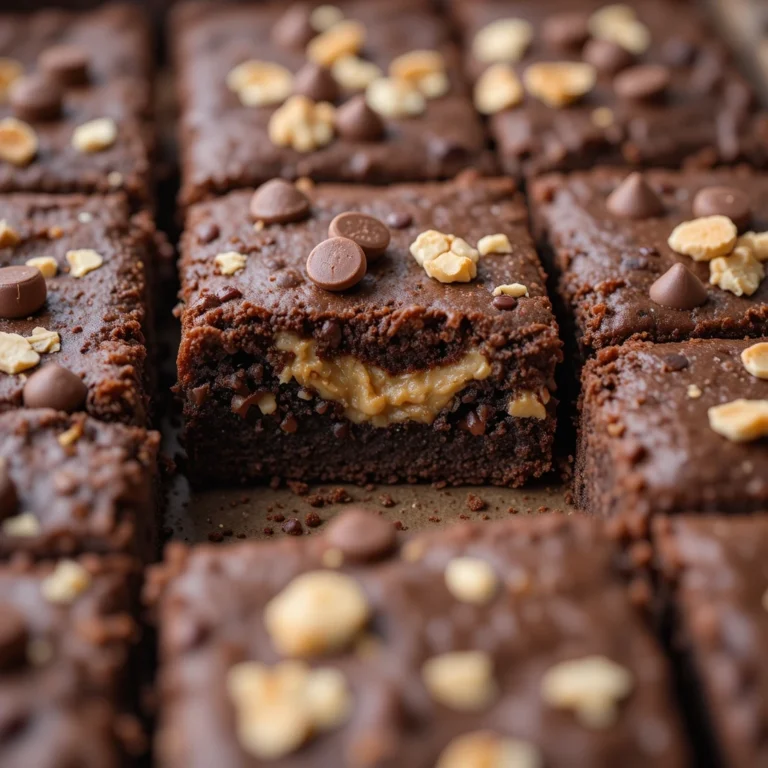
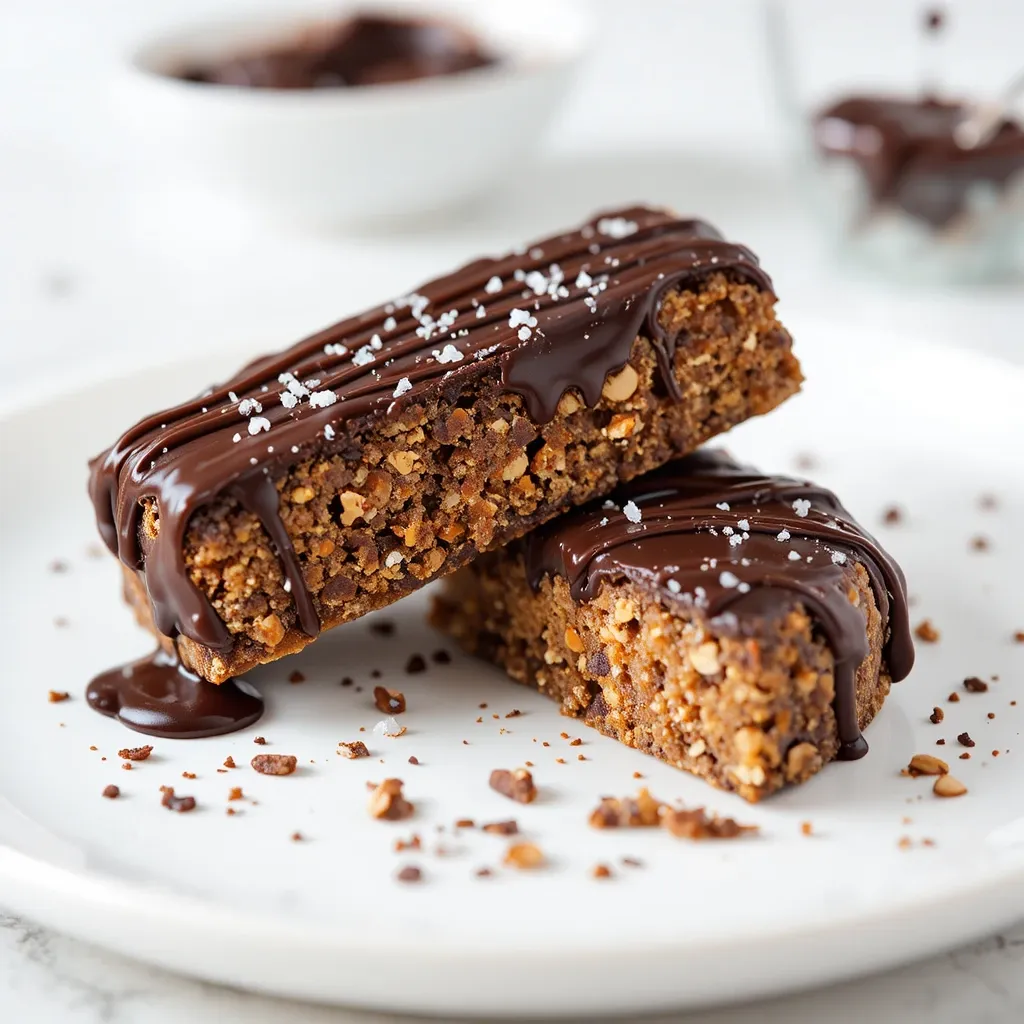
Recipe 4: Chocolate Drizzle Date Bars
Key Ingredients for Chocolate Drizzle Date Bars
- 2 cups pitted Medjool dates
- 1 cup rolled oats
- ½ cup almonds
- 3 tablespoons cocoa powder
- 2 tablespoons honey
- 1 teaspoon vanilla extract
- Pinch of sea salt
For the Chocolate Drizzle:
- ½ cup dark chocolate chips
- 1 tablespoon coconut oil
- Flaky sea salt for sprinkling (optional)
Step-by-Step Instructions
Step 1: Create the Base
Process the dates in a food processor until they form a paste. Add the oats, almonds, cocoa powder, and salt. Pulse until everything is combined but still has some texture. The cocoa powder gives these bars a rich, chocolatey flavor even before the drizzle.
Step 2: Add Moisture and Flavor
Drizzle in the honey and vanilla extract. Process until the mixture holds together when pressed between your fingers. If it’s too dry, add a tablespoon of water.
Step 3: Press into Pan
Line an 8×8 inch pan with parchment paper. Transfer the mixture and press down very firmly with your hands or a flat-bottomed glass. Make sure the surface is smooth and even—this helps the chocolate drizzle look beautiful.
Step 4: Make the Chocolate Drizzle
In a microwave-safe bowl, combine the chocolate chips and coconut oil. Microwave in 20-second intervals, stirring between each, until completely smooth and melted. The coconut oil helps thin the chocolate for perfect drizzling consistency.
Step 5: Drizzle and Decorate
Using a spoon or a piping bag, drizzle the melted chocolate over the pressed bars in a zigzag pattern. Work quickly before the chocolate sets. If desired, sprinkle with flaky sea salt immediately—the sweet-salty combination is irresistible.
Step 6: Set and Slice
Refrigerate for at least 2 hours until the chocolate is completely set and the bars are firm. When cutting, wipe your knife clean between cuts to keep the chocolate drizzle looking neat and professional.
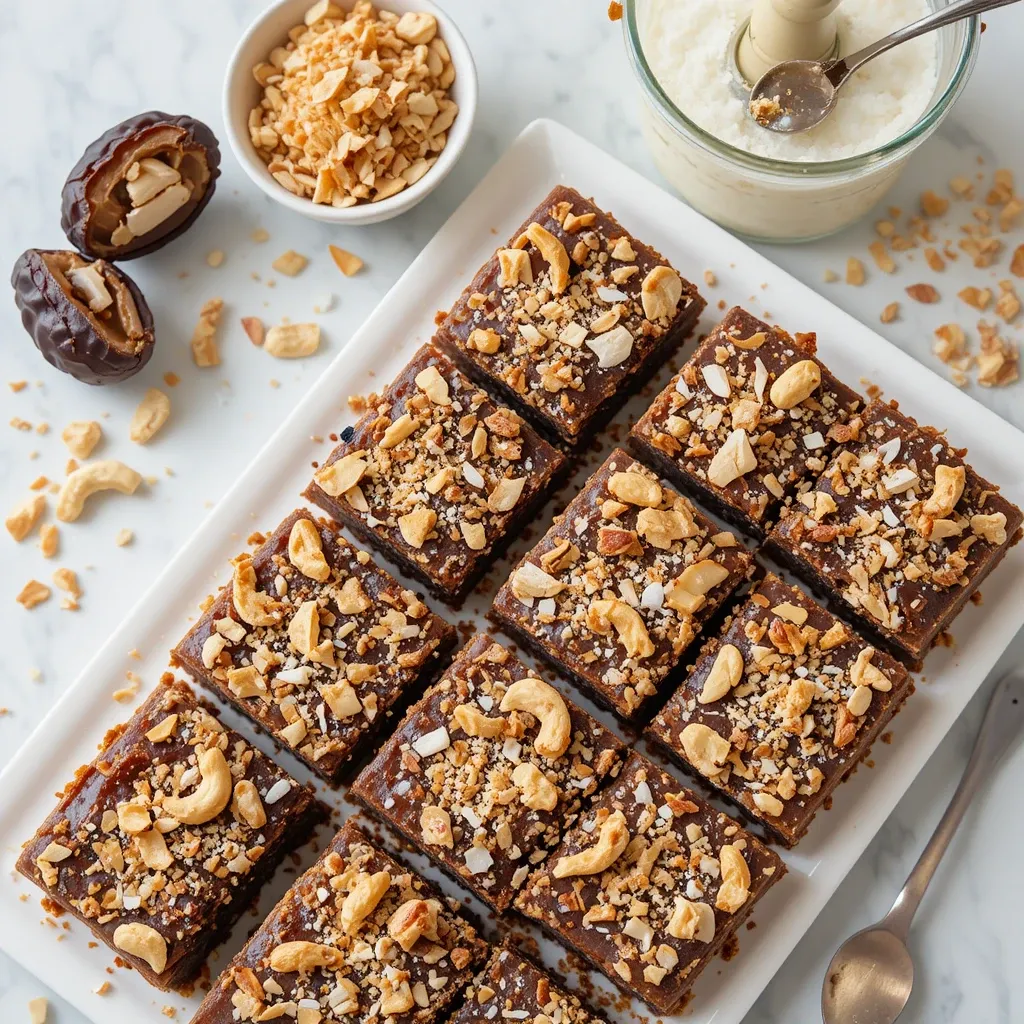
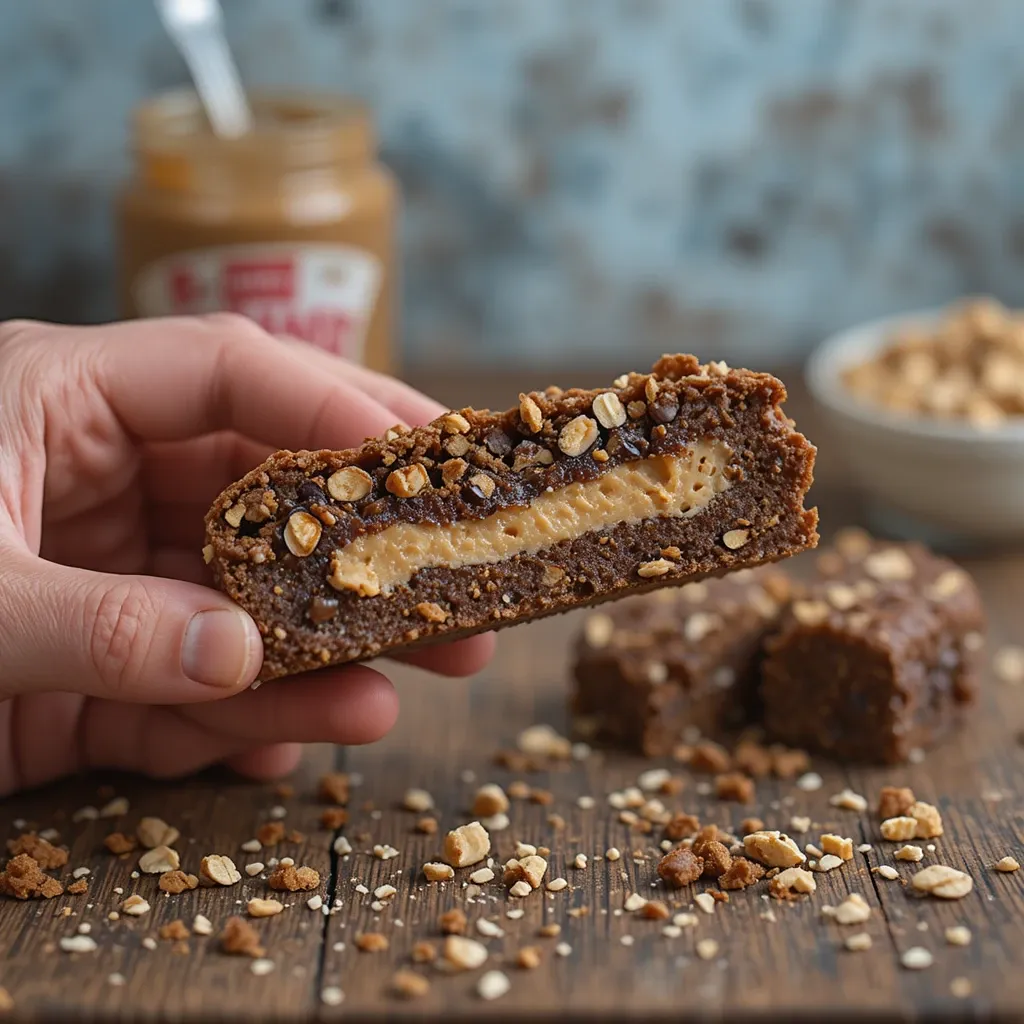
Recipe 5: Peanut Butter Date Bars
Key Ingredients for Peanut Butter Date Bars
- 2 cups pitted Medjool dates
- 1 cup rolled oats
- ½ cup natural peanut butter (creamy or crunchy)
- ¼ cup roasted peanuts, chopped
- 2 tablespoons honey
- 1 teaspoon vanilla extract
- ¼ teaspoon sea salt
- Extra peanuts for topping
Step-by-Step Instructions
Step 1: Process the Dates
Add dates to the food processor and blend until they form a sticky, uniform paste. This usually takes about 90 seconds. Make sure there are no large chunks remaining.
Step 2: Combine Dry Ingredients
Add the rolled oats, chopped peanuts, and salt to the food processor. Pulse 6-8 times until the oats are broken down but not powdered. Some texture is good here.
Step 3: Add the Star Ingredient
Add the peanut butter, honey, and vanilla extract. Process until everything is well combined and the mixture holds together when pressed. The peanut butter makes these bars incredibly creamy and protein-packed.
Step 4: Taste and Adjust
Here’s a pro tip: taste the mixture at this point (it’s safe since there are no raw eggs). If you want it sweeter, add another tablespoon of honey. If you want more peanut flavor, add more peanut butter. This is your chance to customize.
Step 5: Press and Top
Transfer to a parchment-lined 8×8 inch pan and press down firmly. Sprinkle extra chopped peanuts on top and press them in. You can even drizzle with a little extra peanut butter if you’re feeling indulgent.
Step 6: Chill and Cut
Refrigerate for at least 2 hours or until completely firm. These bars need adequate chill time because the peanut butter needs to firm up. Once set, cut into 12-16 bars. Store in an airtight container with parchment paper between layers to prevent sticking.
What to Serve Date Bars With
For Breakfast:
- Greek yogurt with fresh berries
- A smoothie bowl topped with granola
- Hot oatmeal with sliced bananas
- Fresh fruit salad with mint
For Snack Time:
- A cup of hot tea or coffee
- Fresh apple slices with almond butter
- A handful of mixed nuts
- Iced herbal tea with lemon
For Dessert:
- Vanilla ice cream (the contrast of cold and chewy is amazing)
- Fresh whipped cream and berries
- A glass of cold milk
- Warm spiced chai
These bars are versatile enough to fit any meal or occasion. I love packing them for hiking trips, keeping them in my gym bag, or enjoying them with my afternoon coffee.
Top Tips for Perfecting Date Bars
Choose the Right Dates
Always use Medjool dates for the best results. They’re softer, sweeter, and more caramel-like than other varieties. If your dates are dry or hard, soak them in warm water for 10-15 minutes before using. This makes a huge difference in the final texture.
Don’t Over-Process
When adding oats and nuts, pulse rather than continuously blending. You want texture in your bars, not a smooth paste. Stop processing when you still see visible pieces of oats and nuts.
Press Firmly
This is the number one mistake people make! Really pack that mixture down into the pan. Use your hands, a measuring cup, or even a small rolling pin. The firmer you press, the better your bars will hold together when cut.
Line Your Pan Properly
Always use parchment paper with overhang on at least two sides. This allows you to lift the entire block out of the pan before cutting, which makes clean slices so much easier. Trying to cut bars in the pan usually results in messy edges.
Chill Completely
I know it’s tempting to cut into them right away, but patience pays off here. Give the bars at least 2 hours in the fridge (or 30-45 minutes in the freezer if you’re in a hurry). Properly chilled bars cut cleanly and hold their shape.
Customize to Your Taste
Don’t be afraid to experiment! Add a tablespoon of chia seeds for extra nutrition, swap different nuts, or try different spices like cardamom or ginger. These recipes are flexible and forgiving.
Store Properly
Keep bars in an airtight container in the refrigerator. They’ll stay fresh for up to 10 days. You can also freeze them for up to 3 months—just separate layers with parchment paper.
Storing and Reheating Tips
Refrigerator Storage
Store your date bars in an airtight container in the refrigerator for up to 10 days. Place parchment paper between layers to prevent sticking, especially for the peanut butter and coconut versions. The cool temperature keeps them firm and fresh.
Freezer Storage
These bars freeze beautifully! Wrap individual bars in parchment paper, then place them in a freezer-safe container or bag. They’ll keep for up to 3 months. This is perfect for meal prep—make a double batch and have healthy snacks ready whenever you need them.
Thawing Instructions
When you’re ready to enjoy a frozen bar, simply remove it from the freezer and let it sit at room temperature for 15-20 minutes. They soften quickly and taste just as good as fresh. Some people (including me) actually prefer eating them slightly frozen on hot days—they’re like healthy fudge!
Room Temperature
If you prefer softer, chewier bars, you can keep them at room temperature for 2-3 days in a cool, dry place. However, in warm climates or during summer months, refrigeration is better to prevent them from becoming too soft or sticky.
Reheating
These bars are typically enjoyed cold or at room temperature, but if you want to warm them slightly, place a bar on a plate and microwave for 5-10 seconds. This makes them extra gooey and delicious, especially the chocolate drizzle version.
Tips for Avoiding Common Baking Mistakes
Mistake 1: Using Old, Dry Dates
Dates are the foundation of these bars, so quality matters. Old dates that have hardened won’t blend properly and will result in crumbly bars. Always check that your dates are soft and pliable. Give them a squeeze—they should feel sticky and moist, not firm and dry.
Mistake 2: Not Processing Long Enough
When making the date paste, don’t rush it. Process until the dates form a ball that sticks to the sides of the food processor. If there are still chunks, your bars won’t bind properly. Take your time with this step.
Mistake 3: Skipping the Chill Time
I get it—you’re excited to try your creation! But cutting into warm or room-temperature bars will result in a crumbly mess. The chilling time allows everything to firm up and bind together. Trust the process!
Mistake 4: Using a Dull Knife
A sharp knife makes all the difference when cutting bars. A dull knife will drag and create messy edges. Use a large, sharp chef’s knife and wipe it clean between cuts for professional-looking bars.
Mistake 5: Not Measuring the Pan
Using a different pan size than specified will affect the thickness of your bars. If you use a larger pan, they’ll be too thin and may crumble. If you use a smaller pan, they’ll be too thick and won’t set properly. Stick to the 8×8 inch pan recommended in these recipes.
Mistake 6: Forgetting to Taste and Adjust
Since you’re not baking these bars, it’s perfectly safe to taste the mixture before pressing it into the pan. This is your chance to add more sweetness, salt, or spices according to your preference. Don’t skip this step!
Mistake 7: Not Packing Firmly Enough
This bears repeating because it’s so important: press that mixture down with some serious force! Think of it like packing snow for a snowball. The firmer you pack, the better your bars will slice and the less likely they’ll crumble.
Frequently Asked Questions
Can I make date bars without a food processor?
While a food processor makes the job much easier, you can use a high-powered blender or even chop everything by hand if you have the patience. For the hand-chopping method, finely mince the dates with a sharp knife until they’re paste-like, then thoroughly mix all ingredients in a large bowl. It requires more elbow grease, but it’s definitely doable.
What type of dates work best for date bars?
Medjool dates are the gold standard for date bars because they’re naturally soft, sweet, and have a caramel-like flavor. Deglet Noor dates can work in a pinch, but they’re firmer and less sweet, so you may need to add extra sweetener and definitely soak them first.
How can I make my date bars softer or firmer?
For softer bars, add an extra tablespoon of liquid (water, honey, or nut butter) to the mixture. For firmer bars, add more oats or nuts to absorb moisture. You can also adjust firmness by changing the chill time—longer chilling creates firmer bars.
Are date bars healthy?
Yes! Date bars are packed with natural sweetness from dates, which provide fiber, potassium, and antioxidants. They’re free from refined sugars and processed ingredients. However, they’re still energy-dense, so enjoy them as part of a balanced diet. They make an excellent pre- or post-workout snack.
Can I substitute honey for maple syrup?
Absolutely! These two sweeteners are interchangeable in date bar recipes. Maple syrup is a great option if you’re keeping the recipe vegan. You can also try agave nectar, brown rice syrup, or even leave out the additional sweetener entirely—dates are naturally quite sweet on their own.
Why are my date bars falling apart?
The most common reasons are: not processing the dates enough (they need to form a sticky paste), not pressing firmly enough into the pan, or not chilling long enough. Make sure you’re really packing that mixture down and giving it adequate time to set in the refrigerator.
Can I add protein powder to date bars?
Yes! You can add 1-2 scoops of protein powder to any of these recipes. Add it with the dry ingredients and you may need to add a bit more liquid to compensate for the extra powder. This turns them into even more substantial post-workout snacks.
How long do date bars last?
When stored properly in an airtight container in the refrigerator, date bars will stay fresh for 7-10 days. In the freezer, they’ll keep for up to 3 months. Always check for any signs of mold or off smells before eating, especially if they’ve been stored for a while.
Nutrition Information (Per Bar – Based on 16 servings)
| Nutrient | Date Bars with Oatmeal | Coconut Date Bars | Date and Nut Bars | Chocolate Drizzle Date Bars | Peanut Butter Date Bars |
|---|---|---|---|---|---|
| Calories | 145 | 168 | 178 | 152 | 165 |
| Total Fat | 4g | 8g | 10g | 5g | 7g |
| Saturated Fat | 0.5g | 6g | 1g | 2g | 1g |
| Carbohydrates | 26g | 22g | 21g | 28g | 24g |
| Fiber | 3g | 3g | 3g | 4g | 3g |
| Sugar (Natural) | 18g | 16g | 15g | 19g | 17g |
| Protein | 3g | 2g | 4g | 3g | 5g |
Note: Nutritional values are approximate and will vary based on specific ingredients and portion sizes used.
Final Thoughts
These five date bar variations prove that healthy snacking doesn’t have to be boring or complicated. Whether you’re drawn to the wholesome simplicity of oatmeal date bars, the tropical escape of coconut, the satisfying crunch of mixed nuts, the indulgent decadence of chocolate, or the protein-packed goodness of peanut butter—there’s a perfect bar for every craving.
What I love most about these recipes is how they’ve become a staple in my kitchen. I make a double batch every Sunday and have healthy snacks ready for the entire week. My kids grab them for breakfast on busy school mornings, I pack them for afternoon pick-me-ups, and they’ve even become my go-to gift for friends and neighbors.
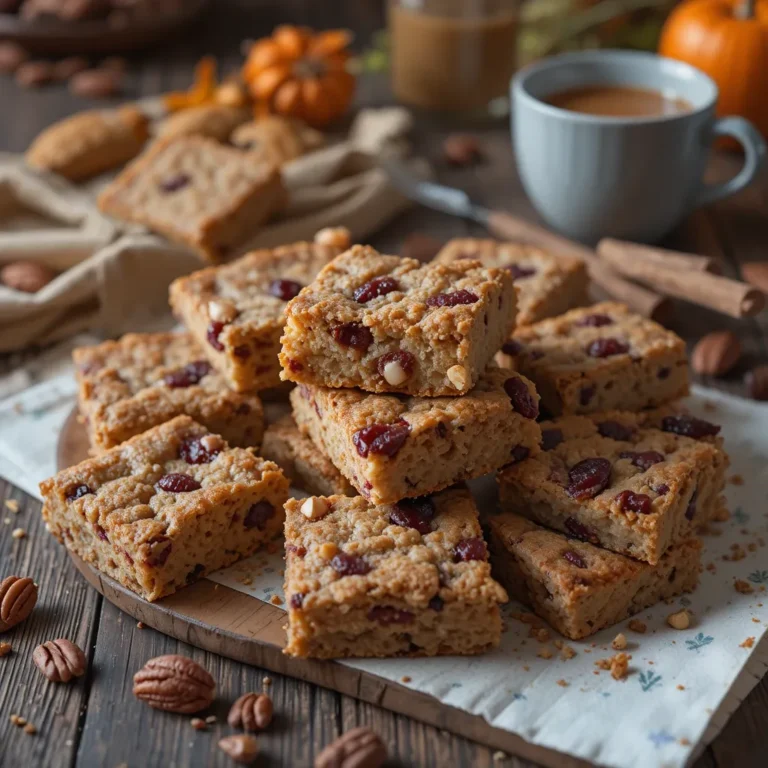
The beauty of date bars lies in their simplicity and versatility. Once you master the basic technique, you can experiment endlessly with different nuts, seeds, spices, and toppings. Try adding dried cranberries, pumpkin seeds, or even a pinch of cardamom. Make them your own!
So which variation will you try first? My personal favorite changes depending on my mood—lately, I’ve been obsessed with the chocolate drizzle version. But honestly, you can’t go wrong with any of these combinations. They’re all naturally sweet, satisfying, and made with real, wholesome ingredients you can feel good about.
Grab those dates from your pantry and get ready to transform them into something truly special. Your taste buds (and your body) will thank you. Happy snacking!