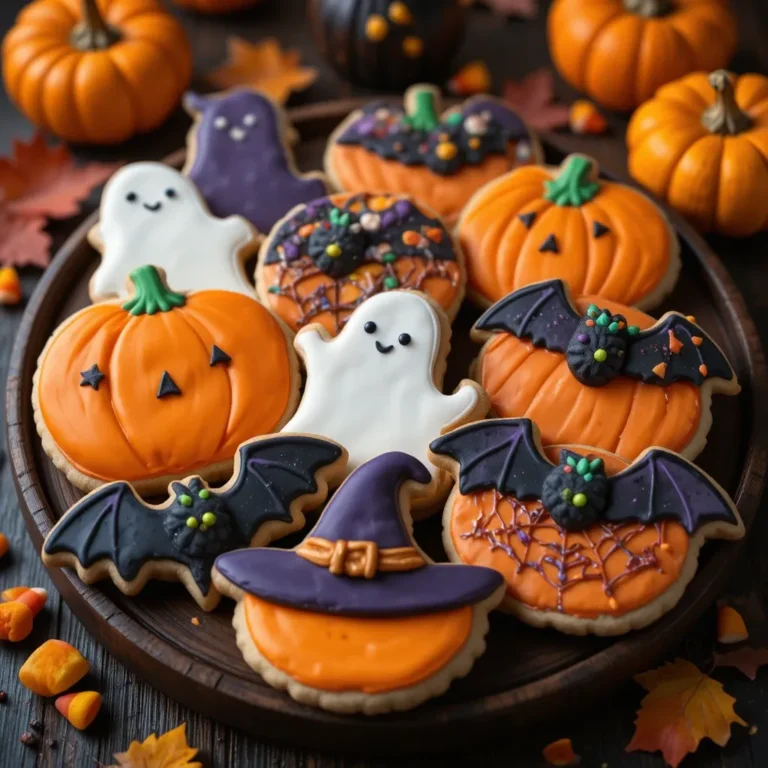
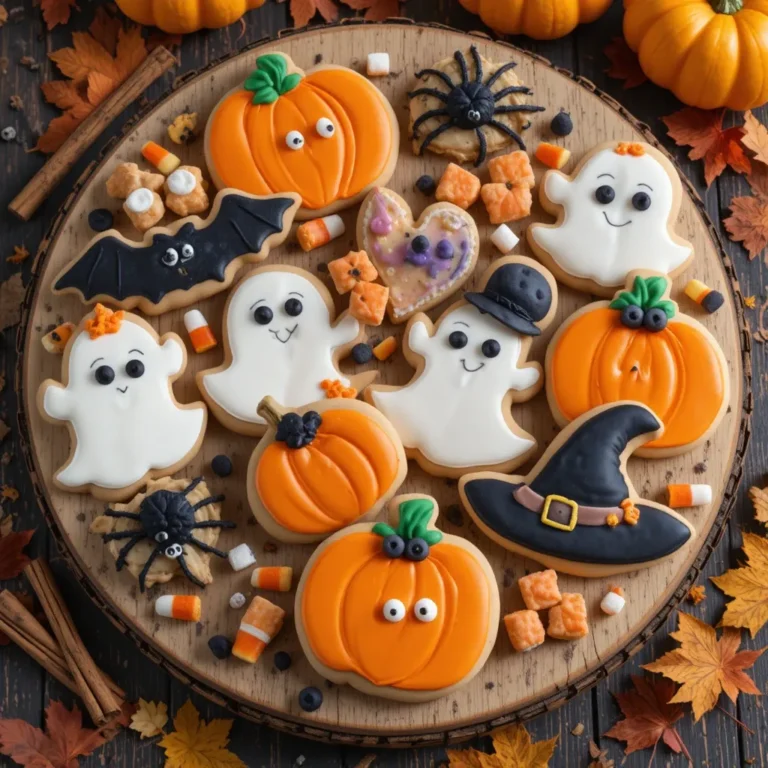
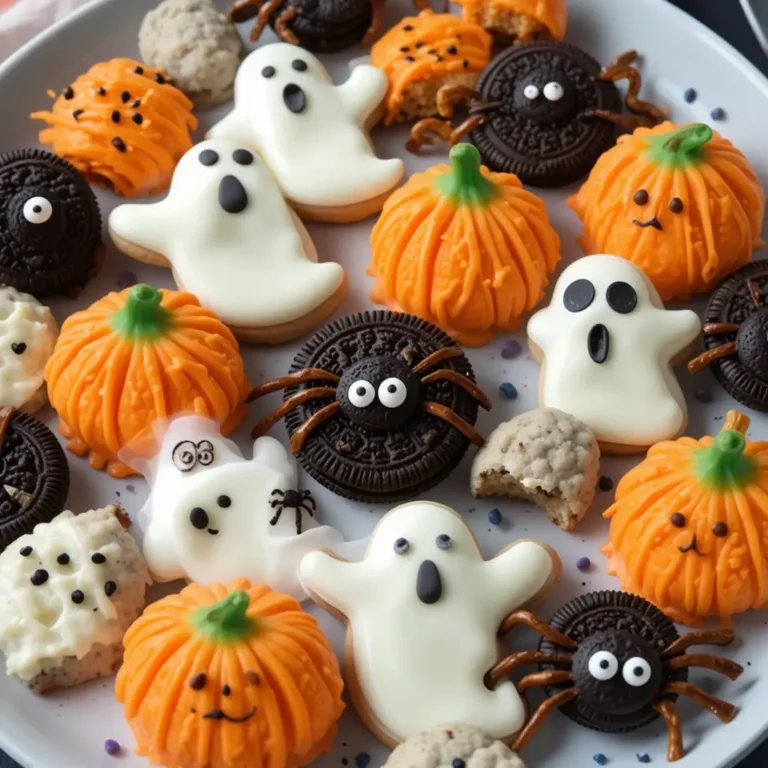
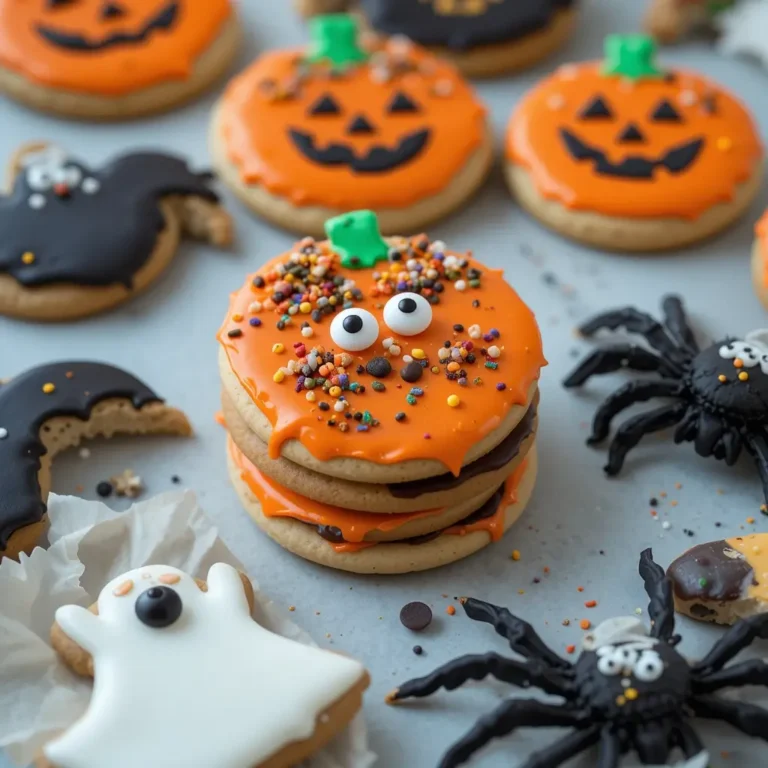
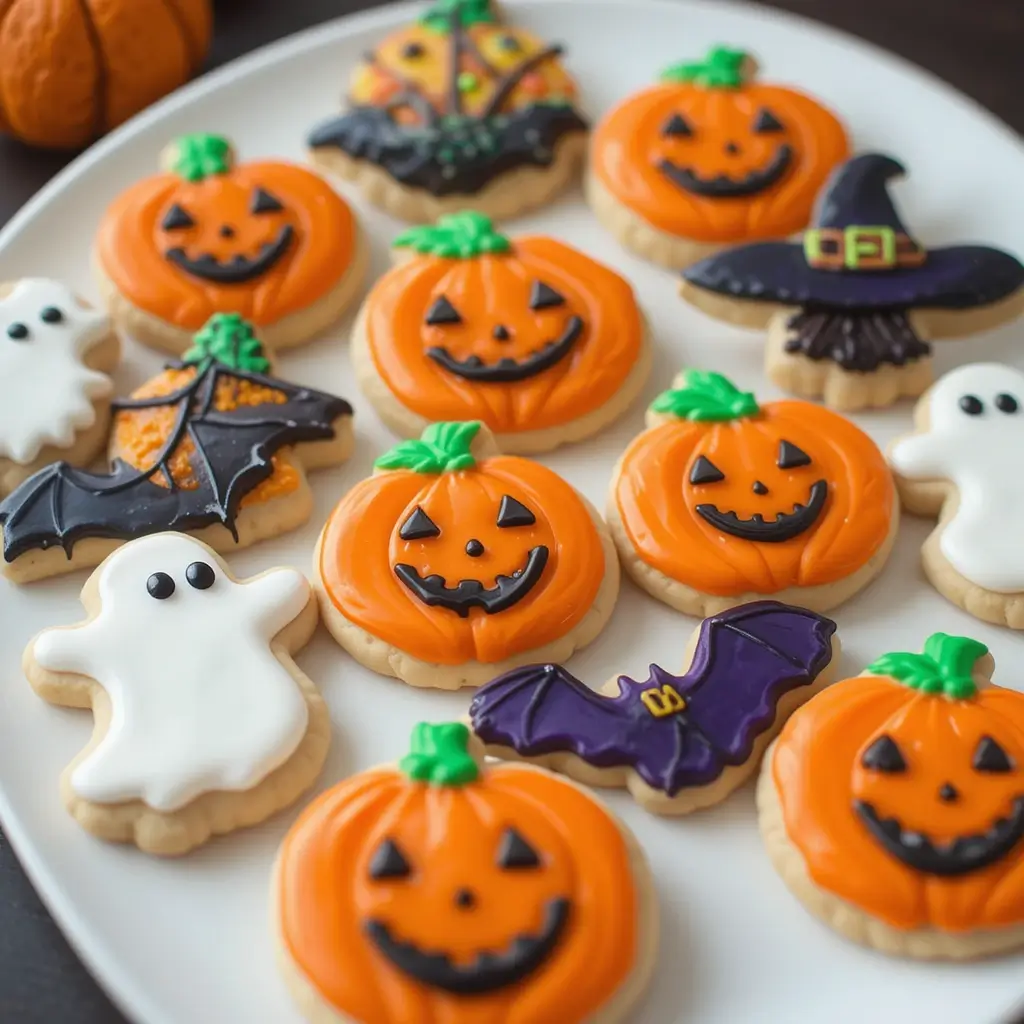
Easy Halloween Cookies Royal Icing
Get ready to cast a delicious spell with these enchanting Halloween cookies royal icing creations! These spook-tacular treats combine buttery, perfectly spiced cookies with smooth, vibrant royal icing that transforms ordinary baking into extraordinary Halloween magic.
Whether you’re hosting a monster mash party or surprising trick-or-treaters, these cookies are guaranteed crowd-pleasers. Just like our popular Christmas sugar cookies, these Halloween beauties are simple enough for beginners yet impressive enough to wow experienced bakers. Let’s dive into this bewitching recipe adventure!
What is Halloween Cookies Royal Icing?
Ever wondered why we call these treats “royal” icing cookies? Well, legend has it that royal icing got its fancy name because it was once served at royal weddings! But honestly, once you taste these Halloween cookies royal icing masterpieces, you’ll feel like royalty yourself.
These aren’t just cookies – they’re edible canvases waiting to be transformed into ghosts, pumpkins, bats, and witches. As they say, the way to a monster’s heart is through its stomach! Ready to become the neighborhood’s Halloween cookie royalty?
Why You’ll Love This Halloween Cookies Royal Icing Recipe
Perfect Canvas for Creativity
These Halloween cookies royal icing treats offer the ultimate creative playground for both kids and adults. The smooth, hard surface of royal icing provides the perfect base for intricate designs, from simple ghost faces to elaborate haunted house scenes. Your imagination is the only limit!
Budget-Friendly Halloween Magic
Skip the expensive store-bought Halloween treats! Making Halloween cookies royal icing at home costs a fraction of what you’d spend on fancy bakery cookies. With basic pantry ingredients, you can create dozens of professional-looking treats that rival any high-end confectionery.
Irresistible Flavor Combination
The tender, buttery cookie base paired with sweet, vanilla-kissed royal icing creates a texture and flavor combination that’s absolutely addictive. Unlike our popular snickerdoodles, these cookies offer a satisfying crunch followed by a melt-in-your-mouth cookie experience. Ready to transform your kitchen into a Halloween cookie factory?
How to Make Halloween Cookies Royal Icing
Quick Overview
This Halloween cookies royal icing recipe delivers professional bakery results with surprisingly simple techniques. The key is patience – allowing proper drying time between decorating steps creates those Instagram-worthy results.
Total Time: 4-6 hours (including drying time)
- Prep Time: 45 minutes
- Baking Time: 10-12 minutes per batch
- Decorating Time: 2-3 hours
- Drying Time: 2-4 hours
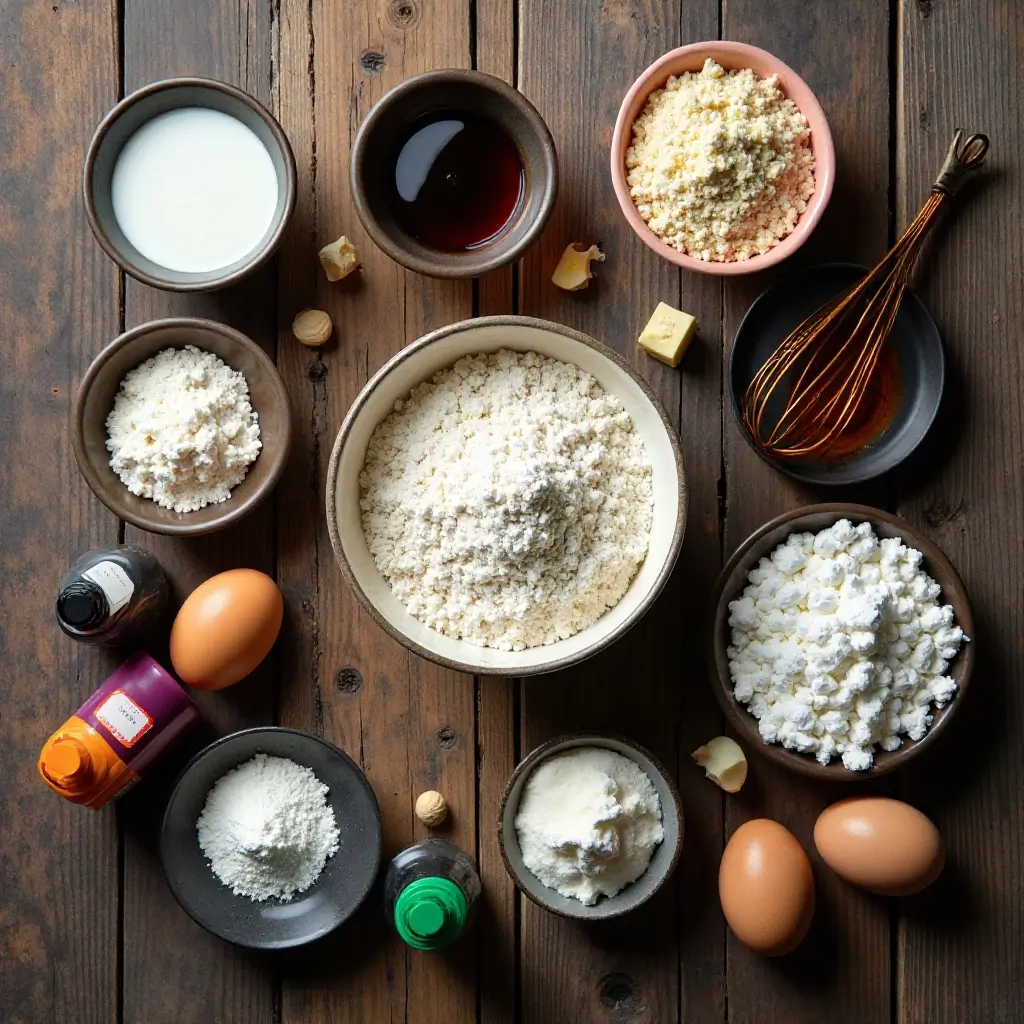
Key Ingredients for Halloween Cookies Royal Icing
For the Sugar Cookies:
- 3 cups all-purpose flour
- 1 teaspoon baking powder
- 1/2 teaspoon salt
- 1 cup unsalted butter, softened
- 3/4 cup granulated sugar
- 1 large egg
- 2 teaspoons vanilla extract
- 2-3 tablespoons milk
For the Royal Icing:
- 4 cups powdered sugar, sifted
- 3 large egg whites or 3 tablespoons meringue powder
- 1 teaspoon vanilla extract
- 2-4 tablespoons water
- Food coloring (orange, black, purple, green)
Step-by-Step Instructions
Making the Cookie Dough
- Combine dry ingredients: In a medium bowl, whisk together flour, baking powder, and salt. Set aside.
- Cream butter and sugar: Using an electric mixer, beat softened butter and sugar until light and fluffy, about 3-4 minutes.
- Add wet ingredients: Beat in egg and vanilla extract until well combined.
- Mix in flour mixture: Gradually add the flour mixture, mixing on low speed until just combined. Add milk as needed to form a cohesive dough.
- Chill the dough: Wrap dough in plastic wrap and refrigerate for at least 2 hours or overnight.
Rolling and Cutting Cookies
- Preheat oven: Set oven to 350°F (175°C) and line baking sheets with parchment paper.
- Roll dough: On a floured surface, roll chilled dough to 1/4-inch thickness.
- Cut shapes: Use Halloween-themed cookie cutters to create pumpkins, ghosts, bats, witches, and cats.
- Bake cookies: Place cookies 2 inches apart on prepared baking sheets. Bake 10-12 minutes until edges are lightly golden.
- Cool completely: Transfer to wire racks and cool completely before decorating.
Making Royal Icing
- Combine ingredients: In a large bowl, whisk together powdered sugar, egg whites (or meringue powder), and vanilla.
- Add water gradually: Slowly add water, beating constantly, until icing reaches desired consistency. For outlining, aim for thick toothpaste consistency. For flooding, thin with additional water until it flows smoothly.
- Divide and color: Separate icing into bowls and tint with food coloring as desired.
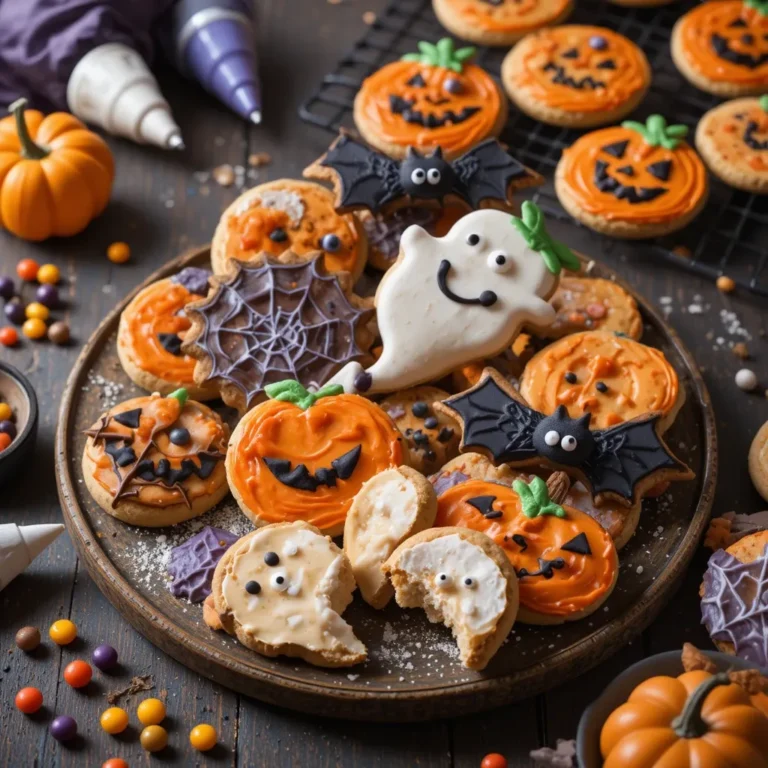
Decorating the Cookies
- Outline first: Using thick consistency icing in piping bags, create outlines of your designs.
- Flood sections: Fill outlined areas with thinned icing, using a toothpick to guide and smooth.
- Add details: Once base layers dry (about 2 hours), add facial features, patterns, and final details.
- Final drying: Allow decorated cookies to dry completely, 4-6 hours or overnight.
What to Serve Halloween Cookies Royal Icing With
These Halloween cookies royal icing treats pair beautifully with:
Hot Beverages:
- Spiced apple cider
- Hot chocolate with marshmallows
- Pumpkin spice latte
- Warm milk for little ghouls and goblins
Cold Treats:
- Vanilla ice cream
- Orange sherbet
- Halloween-themed milkshakes
Party Snacks:
- Caramel apples
- Candy corn
- Halloween trail mix
- Spooky popcorn

Top Tips for Perfecting Halloween Cookies Royal Icing
Achieving Perfect Icing Consistency
Test your royal icing consistency by lifting the whisk – the icing should ribbon back into itself and disappear within 10-12 seconds. Too thick? Add water drop by drop. Too thin? Gradually whisk in more powdered sugar.
Color Mixing Secrets
Always start with less food coloring than you think you need. Gel food coloring works best for vibrant colors without thinning the icing. For true black icing, start with chocolate brown and add black gradually.
Drying Time Management
Humidity affects drying time significantly. On humid days, allow extra drying time between decorating steps. Use a fan to speed up the process, but avoid direct heat which can cause cracking.
Storage During Decorating
Keep unused royal icing covered with damp paper towels and plastic wrap to prevent crusting. Stir gently before using if it has been sitting.
Storing and Reheating Tips
Short-term Storage: Store decorated Halloween cookies royal icing in airtight containers at room temperature for up to one week. Layer cookies between parchment paper to prevent sticking.
Long-term Storage: Freeze decorated cookies for up to 3 months. Wrap individually in plastic wrap, then place in freezer bags. Thaw at room temperature for 30 minutes before serving.
Undecorated Cookie Storage: Baked, undecorated cookies can be stored in airtight containers for up to 2 weeks or frozen for up to 3 months.
Royal Icing Storage: Unused royal icing can be refrigerated for up to one week in airtight containers. Re-whip before using and adjust consistency with water if needed.
Nutrition Information
| Nutrient | Per Cookie (1 medium) |
|---|---|
| Calories | 180 |
| Total Fat | 6g |
| Saturated Fat | 4g |
| Cholesterol | 25mg |
| Sodium | 85mg |
| Total Carbs | 30g |
| Sugars | 22g |
| Protein | 2g |
Nutritional values are approximate and may vary based on specific ingredients used.
Frequently Asked Questions
Can I make royal icing without raw eggs?
Absolutely! Use meringue powder instead of fresh egg whites for food safety. Mix 3 tablespoons meringue powder with the powdered sugar, then add water gradually until you reach the desired consistency.
How long does royal icing take to dry completely?
Royal icing typically takes 4-8 hours to dry completely, depending on humidity and thickness. The surface should be completely hard and not tacky to the touch when fully dried.
Can I use regular food coloring instead of gel?
While you can use liquid food coloring, gel food coloring is preferred because it won’t thin out your royal icing. If using liquid coloring, you may need to add extra powdered sugar to maintain consistency.
Why is my royal icing too runny?
Runny royal icing usually means you’ve added too much water. Gradually whisk in more sifted powdered sugar until you reach the correct consistency.
How do I prevent royal icing from cracking?
Cracking often occurs when icing dries too quickly. Avoid direct heat or fans while drying, and ensure your icing isn’t too thick when applied.
Can I make the cookie dough ahead of time?
Yes! Cookie dough can be made up to 3 days ahead and refrigerated, or frozen for up to 3 months. Thaw frozen dough overnight in the refrigerator before rolling.
What’s the best way to color royal icing black?
Start with chocolate brown icing and gradually add black gel food coloring. Pure black from white icing requires so much coloring that it can affect taste and consistency.
How do I fix air bubbles in my royal icing?
Tap your icing bowl on the counter and let it sit for a few minutes to allow bubbles to rise to the surface. Gently stir or use a toothpick to pop larger bubbles.
Pro Decorator Secrets
Creating Dimension: Use different consistencies of the same colored icing to create depth. Outline with thick icing, flood with medium, and add details with thick again.
Marbling Effects: Drop contrasting colors into wet royal icing and drag with a toothpick for marble or spider web effects.
Texture Techniques: Use different piping tips, combs, or textured tools to create interesting surface effects before the icing sets.
Color Bleeding Prevention: Allow each color to dry completely before adding adjacent colors to prevent bleeding and maintain clean lines.
These Halloween cookies royal icing creations will transform your kitchen into a spooky bakery and your guests into believers in your baking magic. Whether you’re a decorated cookie newbie or a seasoned pro, this recipe delivers consistent, impressive results that taste as amazing as they look. Happy haunting, and even happier baking!