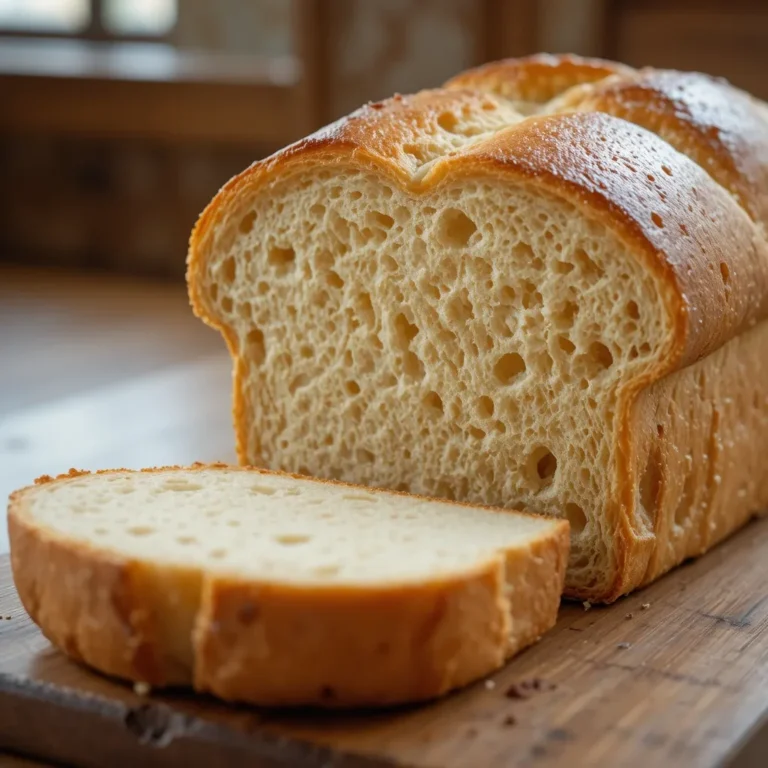
Homemade Hoagie Roll Recipe – Soft & Crusty Every Time
There’s something magical about pulling fresh hoagie rolls from your oven, their golden crusts crackling softly as they cool. These pillowy-soft, bakery-style rolls transform any sandwich into something extraordinary. I remember my first attempt at making these beauties ended with rock-hard bricks, but now?
They’re my go-to for weekend meal prep. Whether you’re planning game day subs or just craving that authentic deli experience, these rolls deliver every single time. They’re surprisingly simple to make, requiring just basic pantry staples and a little patience.
This recipe is 100% AI-generated and has not been personally prepared by us. We truly value our community, and readers who’ve cooked other recipes from our site often report positive experiences.
What Are Hoagie Rolls?
Ever wondered why they’re called “hoagies” and not just submarine sandwiches? Legend has it the name came from Philadelphia’s Hog Island shipyard workers who packed these oversized sandwiches for lunch. Some folks call them subs, grinders, or heroes, but here in my kitchen, they’re hoagies through and through.
After all, the way to anyone’s heart truly is through their stomach, and nothing says “I care” like fresh-baked bread. Trust me, once you make these from scratch, you’ll never go back to store-bought!
Why You’ll Love This Hoagie Roll Recipe
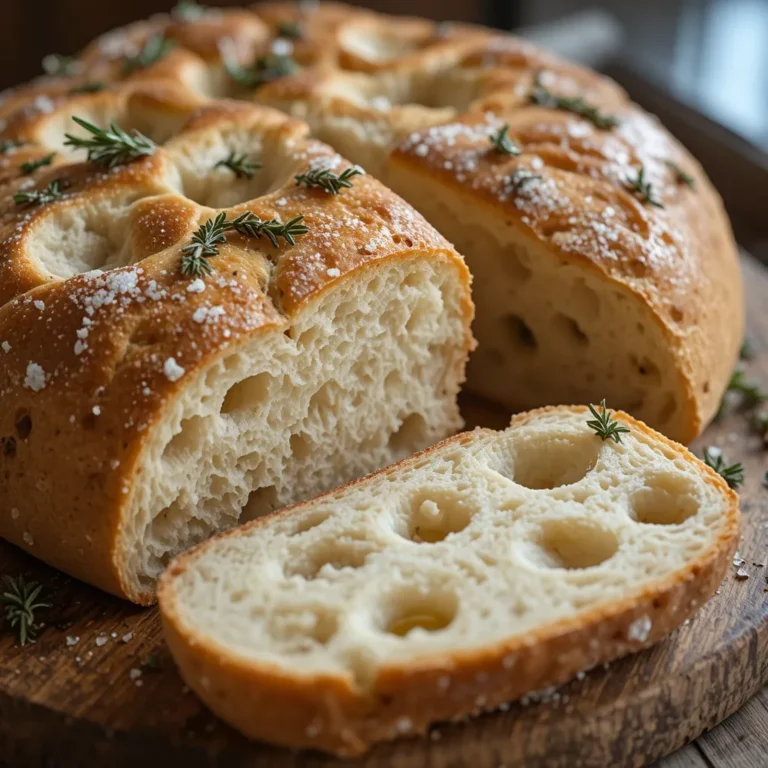
The absolute best thing about homemade hoagie rolls? That unbeatable texture. Crispy on the outside, cloud-soft on the inside, with just the right chew. You simply cannot buy this quality at the grocery store.
Making these at home saves you serious money too. A batch of six generous rolls costs about the same as buying two fancy bakery ones. Plus, you control exactly what goes into them—no preservatives, no mystery ingredients, just pure, wholesome bread.
The sesame seed topping adds that classic deli touch, though you can customize with poppy seeds, garlic, or leave them plain. These rolls are incredibly versatile. If you loved my Italian bread recipe, think of these as that bread’s sandwich-ready cousin. They hold up beautifully to wet fillings without getting soggy, which is honestly a game-changer for loaded sandwiches.
Once you nail this recipe, you’ll find yourself making hoagies for everything from meatball subs to pulled pork. Ready to turn your kitchen into a mini bakery? Let’s do this!
How to Make Hoagie Rolls
Quick Overview
This recipe creates six authentic hoagie rolls with that perfect bakery texture you’ve been craving. The dough is surprisingly forgiving, making it ideal for bread-making beginners. You’ll love how the steam in the oven creates that signature crispy crust while keeping the inside impossibly soft.
Total Time Breakdown:
- Prep Time: 20 minutes
- First Rise: 1 hour
- Shaping & Second Rise: 45 minutes
- Baking Time: 18-22 minutes
- Total Time: Approximately 2 hours 30 minutes
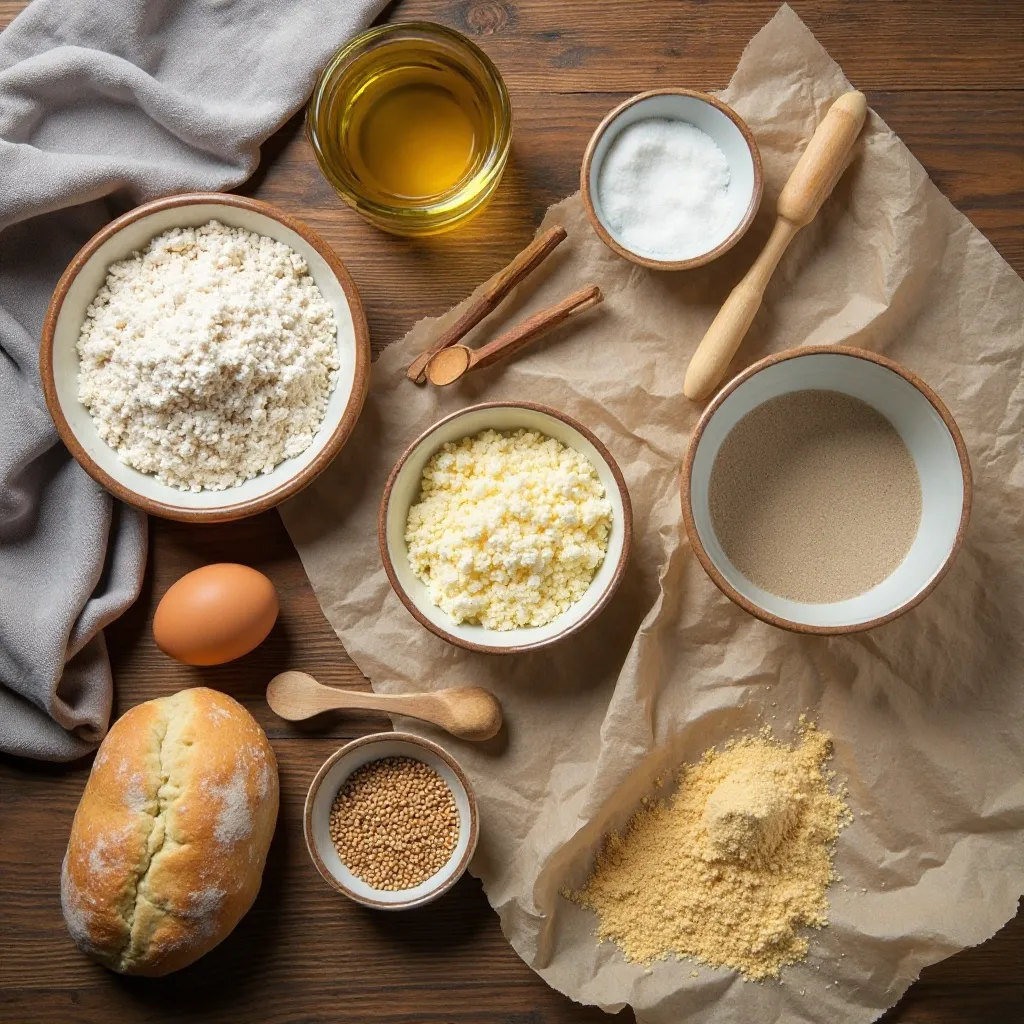
Key Ingredients for Hoagie Rolls
For the Dough:
- 4 cups (500g) all-purpose flour or bread flour
- 1½ cups (360ml) warm water (110°F/43°C)
- 2 tablespoons (25g) granulated sugar
- 2¼ teaspoons (7g) active dry yeast (one packet)
- 2 tablespoons (30ml) vegetable oil or olive oil
- 1½ teaspoons (9g) salt
For Topping:
- 1 egg white, lightly beaten
- 2 tablespoons sesame seeds (optional)
- Cornmeal for dusting the baking sheet
Equipment You’ll Need:
- Large mixing bowl
- Kitchen towel or plastic wrap
- Baking sheet
- Parchment paper
- Sharp knife or razor blade
Step-by-Step Instructions
How do I activate the yeast properly?
Start by combining your warm water and sugar in a large bowl. The water temperature is crucial here—it should feel like a comfortable bath, not hot. Sprinkle the yeast over the water and give it a gentle stir. Let this mixture sit for about 5 to 10 minutes.
You’ll know it’s ready when it becomes foamy and smells slightly sweet and yeasty. If nothing happens after 10 minutes, your yeast might be expired or your water was too hot. Start over with fresh yeast and properly tempered water.
How do I make the dough?
Once your yeast mixture is bubbly and active, add the oil and stir it in. Now add the flour and salt to the bowl. Using a wooden spoon or your hands, mix everything together until a shaggy dough forms.
The dough will look rough and messy at first. That’s completely normal. Keep mixing until no dry flour remains in the bowl. Don’t worry about it being perfectly smooth yet.
How long should I knead the dough?
Turn your dough out onto a lightly floured surface. Begin kneading by pushing the dough away from you with the heels of your hands, then folding it back over itself. Rotate the dough a quarter turn and repeat.
Knead for about 8 to 10 minutes total. The dough should transform from sticky and rough to smooth and elastic. You’ll know it’s ready when you poke it with your finger and the dough slowly springs back. This step develops the gluten that gives your rolls that perfect chewy texture.
If the dough sticks to your hands, dust with just a tiny bit more flour. But resist adding too much—slightly sticky dough makes softer rolls.
How do I let the dough rise?
Lightly grease your mixing bowl with a bit of oil. Place your smooth dough ball into the greased bowl and turn it over so all sides get coated with oil. This prevents a dry skin from forming.
Cover the bowl tightly with a clean kitchen towel or plastic wrap. Place it in a warm, draft-free spot. I like to use my oven with just the light on, or near a sunny window.
Let the dough rise for about 1 hour or until it doubles in size. Don’t rush this step. The longer, slower rise develops more flavor. You can test if it’s ready by poking it with your finger—if the indentation remains, it’s good to go.
How do I shape the hoagie rolls?
Gently punch down your risen dough to release the air bubbles. Turn it out onto your work surface and divide it into 6 equal pieces. I use a kitchen scale to make sure each piece weighs about 140-150 grams for perfectly uniform rolls.
Take one piece and flatten it slightly into a rectangle shape. Fold the long edges toward the center, overlapping them slightly. Pinch the seam to seal it closed. Now roll the dough gently back and forth under your palms to create an elongated roll about 6 to 7 inches long.
The ends should taper slightly, giving you that classic hoagie shape. Place each shaped roll seam-side down on a parchment-lined baking sheet that you’ve dusted with cornmeal. The cornmeal prevents sticking and adds texture to the bottom crust.
Space the rolls about 2 inches apart to allow for expansion during the second rise.
Do I need a second rise?
Absolutely! Cover your shaped rolls loosely with a kitchen towel. Let them rise again for about 40 to 45 minutes. They should look puffy and almost doubled in size.
This second rise ensures your rolls will be light and airy inside rather than dense. While they’re rising, preheat your oven to 425°F (220°C). Place an empty metal pan on the bottom rack of your oven—this is for creating steam later.
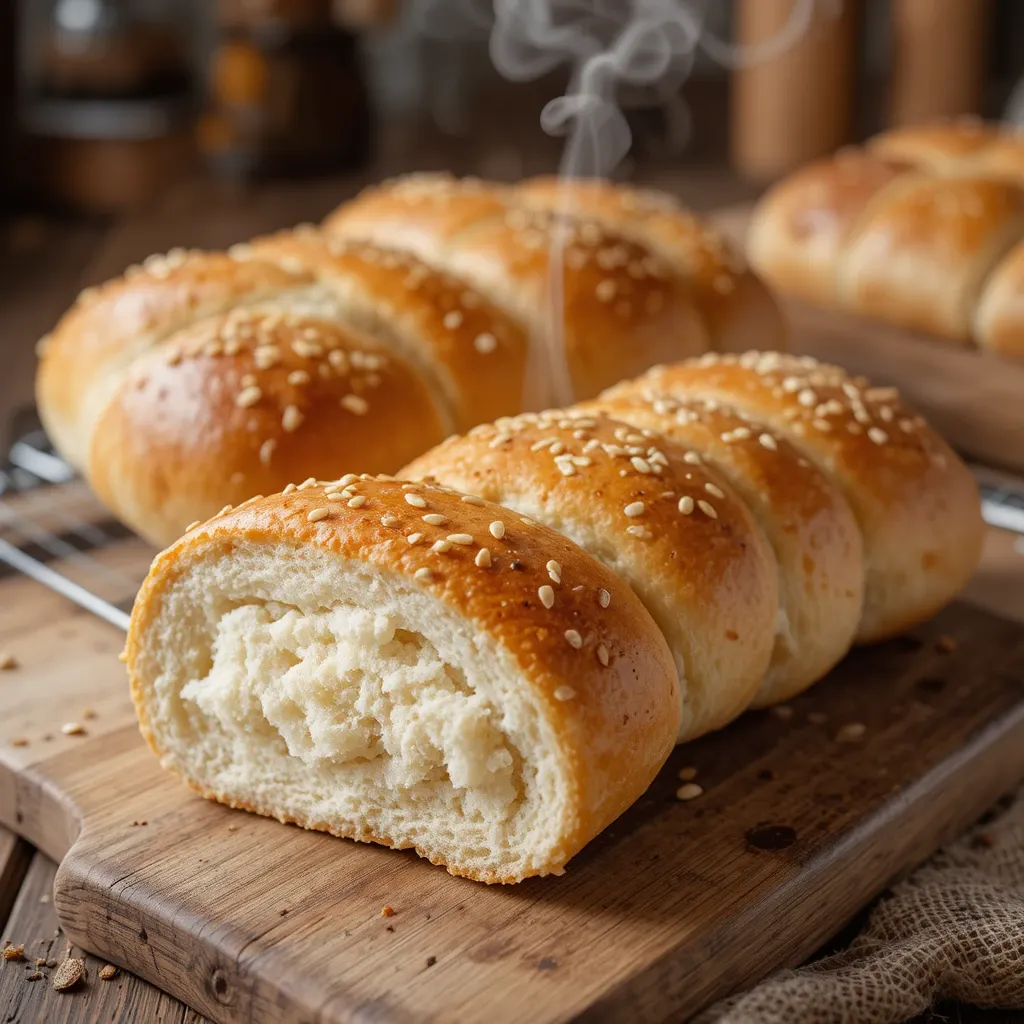
How do I get that bakery-style crust?
About 5 minutes before baking, use a sharp knife or razor blade to make 3 or 4 diagonal slashes across the top of each roll. Cut about ¼ inch deep. These slashes aren’t just for looks—they help the rolls expand properly in the oven.
Gently brush each roll with beaten egg white. This creates that gorgeous golden, shiny crust. Sprinkle sesame seeds over the top if you’re using them.
Right before you put the rolls in the oven, carefully pour about 1 cup of hot water into that empty pan on the bottom rack. Close the oven door quickly to trap the steam inside. This steam is the secret to getting a crispy, crackly crust while keeping the inside soft.
What’s the perfect baking time?
Bake your rolls for 18 to 22 minutes. They’re done when they turn a beautiful golden brown color and sound hollow when you tap the bottom.
Keep an eye on them during the last few minutes—every oven is different. If they’re browning too quickly on top, you can loosely tent them with aluminum foil for the final minutes.
Remove the rolls from the oven and transfer them to a wire cooling rack. Let them cool for at least 15 minutes before slicing. I know the wait is torture, but cutting into hot bread releases too much steam and can make the inside gummy.
What to Serve Hoagie Rolls With
These versatile rolls are waiting for your creativity! Classic Italian hoagies loaded with salami, capicola, provolone, lettuce, tomatoes, and oil and vinegar are always a winner. The authentic flavors really shine through.
Meatball subs are another fantastic option. Pile on those saucy meatballs with melted mozzarella and watch these rolls hold up beautifully without getting soggy.
Grilled chicken with pesto, roasted red peppers, and fresh mozzarella makes a lighter but equally delicious option. The rolls complement the fresh flavors perfectly.
For a vegetarian twist, try roasted vegetables with hummus and feta cheese. The sturdy texture of these rolls handles all that goodness without falling apart.
Don’t forget breakfast sandwiches! These rolls make incredible egg, cheese, and breakfast meat carriers. Warm them slightly and stuff with scrambled eggs and your favorite fixings.
Pulled pork or beef barbecue finds a perfect home in these rolls too. They soak up just enough sauce while maintaining their structure.
Top Tips for Perfecting Hoagie Rolls
Can I use different types of flour?
Bread flour creates chewier rolls with more structure due to its higher protein content. All-purpose flour works beautifully and creates slightly softer rolls. Both options are excellent—choose based on your texture preference.
Whole wheat flour can replace up to half the all-purpose flour for a heartier, nuttier roll. Just add an extra tablespoon or two of water since whole wheat absorbs more liquid.
What if my dough is too sticky or too dry?
Humidity affects flour differently every day. If your dough feels overly sticky after mixing, add flour one tablespoon at a time until it becomes manageable.
If it’s too dry and crumbly, add water one teaspoon at a time. The dough should be soft and slightly tacky to the touch but not stick to your hands.
Can I make the dough ahead of time?
Yes! After the first rise, punch down the dough and refrigerate it in a covered bowl for up to 24 hours. This slow fermentation actually develops more complex flavors.
When you’re ready to bake, let the cold dough sit at room temperature for about 30 minutes before shaping. Then proceed with shaping and the second rise as normal.
Why didn’t my rolls rise properly?
Check your yeast expiration date first. Old yeast simply won’t work no matter what you do. Make sure your rising environment isn’t too cold—dough needs warmth to rise properly.
If your kitchen is chilly, try placing the bowl in a turned-off oven with just the light on. That gentle warmth is perfect for rising.
How can I get a softer or crustier roll?
For softer rolls, skip the egg white wash and just brush with melted butter before baking. Cover the rolls loosely with foil during the last 5 minutes of baking.
For extra crusty rolls, use the steam method I mentioned and bake at the full temperature without covering. You can even extend baking time by 2 to 3 minutes.
Can I freeze the dough or baked rolls?
Absolutely! You can freeze shaped, unrisen rolls on a baking sheet, then transfer them to freezer bags once solid. When ready to use, let them thaw and rise at room temperature (this takes about 2 hours), then bake as normal.
Baked rolls freeze beautifully for up to 3 months. Wrap each roll individually in plastic wrap, then place in a freezer bag. Thaw at room temperature and refresh in a 350°F oven for 5 minutes.
Storing and Reheating Tips
Store your cooled hoagie rolls in an airtight container or plastic bag at room temperature for up to 3 days. Don’t refrigerate them—this actually makes bread go stale faster.
If your rolls lose their crispness, refresh them in a 350°F oven for 5 to 7 minutes. This revives that fresh-baked crust texture beautifully.
For longer storage, freeze the rolls as mentioned above. They maintain their quality for up to 3 months in the freezer.
To reheat frozen rolls, let them thaw at room temperature for about an hour. Then warm them in a 350°F oven for 8 to 10 minutes. They’ll taste just-baked!
If you’re making sandwiches with the rolls, you can slice them before freezing for even quicker prep. Just grab what you need and let them thaw while you prepare your fillings.
Frequently Asked Questions
Can I make these rolls without a stand mixer?
Absolutely! This recipe is designed for hand-mixing and hand-kneading. A stand mixer with a dough hook can make the process easier, but it’s definitely not necessary. Your hands work perfectly fine and give you a better feel for the dough’s texture.
Why do my hoagie rolls turn out dense?
Dense rolls usually result from not letting the dough rise long enough or adding too much flour. Make sure your dough doubles in size during both rises. Also check that your yeast is fresh and active. Under-kneading can also create dense bread, so make sure you knead for the full 8 to 10 minutes.
Can I add herbs or seasonings to the dough?
Yes! Italian seasoning, garlic powder, dried oregano, or even grated Parmesan cheese can be mixed into the dough for extra flavor. Add about 1 to 2 tablespoons of dried herbs or 2 to 3 tablespoons of grated cheese to the flour mixture.
What makes hoagie rolls different from regular bread?
Hoagie rolls have a specific shape and texture—elongated with tapered ends, crusty outside, and soft inside. They’re designed to hold substantial fillings without falling apart. The steam-baking method creates that signature crispy crust while the slightly enriched dough stays soft and chewy.
Can I make smaller or larger rolls?
Definitely! Divide the dough into 4 pieces for giant 12-inch subs, or 8 pieces for smaller 5-inch rolls perfect for kids. Adjust baking time slightly—smaller rolls need about 15 to 17 minutes, larger ones may need 23 to 25 minutes.
Do I have to use sesame seeds?
Not at all! Sesame seeds are traditional but completely optional. Try poppy seeds, “everything” bagel seasoning, or leave them plain. Each variation tastes fantastic.
My rolls spread out instead of rising up, what happened?
This usually means your dough was too wet or didn’t have enough gluten development. Make sure you knead properly to develop the gluten structure. Also, shape the rolls tightly with good surface tension. If your dough feels too soft, add a bit more flour next time.
Tips for Avoiding Common Baking Mistakes
Always measure your flour correctly by spooning it into the measuring cup and leveling it off. Scooping directly from the bag packs the flour and gives you too much, resulting in dry, tough rolls.
Don’t skip the yeast proofing step. Those few minutes confirm your yeast is alive before you invest time in the whole recipe.
Resist the urge to add too much flour during kneading. Slightly sticky dough is your friend—it creates softer, more tender rolls. Only add flour if the dough is unmanageably sticky.
Give your dough adequate time to rise in both stages. Rushing this process produces dense, flat rolls. Set a timer and be patient.
Make sure your oven is fully preheated before baking. An oven thermometer helps ensure accuracy since many ovens run hot or cold.
Don’t open the oven door during the first 15 minutes of baking. This releases the crucial steam and can cause your rolls to deflate.
Let the rolls cool before slicing. Cutting into hot bread releases steam that should stay inside, leaving you with gummy texture.
Nutrition Information
| Nutrient | Per Roll (1/6 of recipe) |
|---|---|
| Calories | 285 |
| Total Fat | 6g |
| Saturated Fat | 1g |
| Cholesterol | 0mg |
| Sodium | 585mg |
| Total Carbohydrates | 50g |
| Dietary Fiber | 2g |
| Sugars | 4g |
| Protein | 8g |
Note: Nutrition information is approximate and may vary based on specific ingredients used.
These hoagie rolls have become a weekly staple in my kitchen, and I hope they become one in yours too. There’s something deeply satisfying about creating bakery-quality bread in your own home. The aroma alone is worth the effort, but that first bite—with its perfect balance of crispy crust and pillowy interior—is pure magic.
Whether you’re feeding a crowd for game day or just elevating your weekday lunch routine, these rolls deliver every single time. Happy baking, and enjoy those incredible sandwiches!