Mini Fruit Tarts Custard Recipe – Bakery-Style Dessert at Home
There’s something absolutely magical about Mini Fruit Tarts Custard that makes every bite feel like a celebration. These adorable little beauties combine buttery pastry shells, silky vanilla custard, and vibrant fresh fruits into one irresistible package.
I still remember the first time I made these for my daughter’s birthday party—the kids and adults couldn’t stop reaching for “just one more!” What makes these tarts truly special is how they look fancy enough for special occasions yet are surprisingly simple to make at home.
With just 45 minutes of prep time, you’ll have a dessert that rivals anything from a French patisserie. If you loved my Classic Chocolate Éclairs, you’re going to be obsessed with these delicate tarts!
This recipe was generated entirely by AI and untested at home, and we want to be honest about that. Our readers are at the heart of what we do, and feedback from those who’ve tried other recipes has been positive.
What Are Mini Fruit Tarts Custard?
Ever wondered why something so small can create such big smiles? Mini Fruit Tarts Custard are bite-sized pastries featuring crisp tart shells filled with creamy vanilla custard and topped with colorful fresh fruits. They’re called “mini” because one is never enough—trust me, I’ve tested this theory multiple times!
These little gems prove that old saying right: the way to everyone’s heart really is through beautiful desserts. Whether you’re hosting a tea party, celebrating a milestone, or just treating yourself because it’s Tuesday, these tarts deserve a spot on your table. Go ahead and make a batch—your kitchen will smell like a dream!
Why You’ll Love This Mini Fruit Tarts Custard
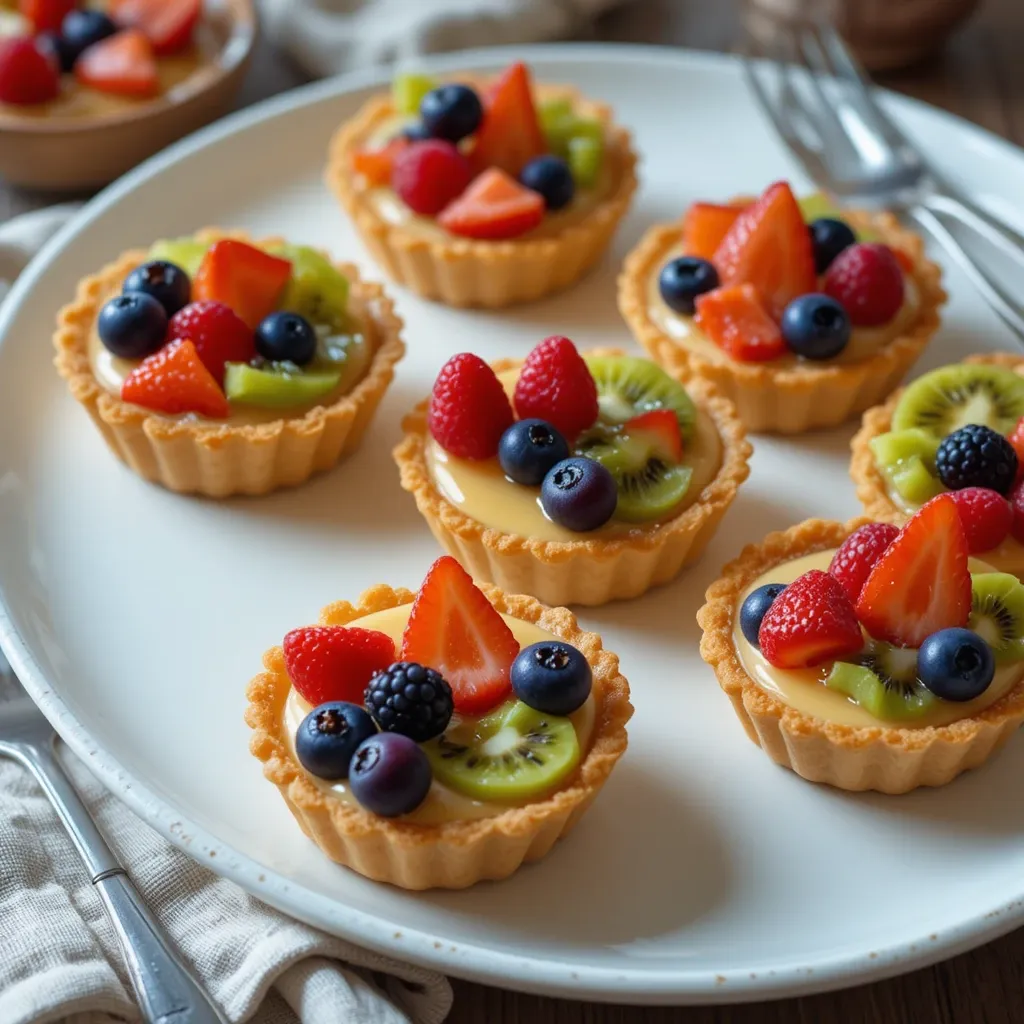
Picture-Perfect Presentation That Tastes Even Better
The moment you arrange these Mini Fruit Tarts Custard on a platter, you’ll feel like a professional pastry chef. Each tart is a tiny canvas where golden-baked shells meet glossy custard and jewel-toned berries. The contrast of textures—crispy crust, smooth custard, and juicy fruit—creates an experience that’s simply divine.
Budget-Friendly Elegance for Any Occasion
Making Mini Fruit Tarts Custard at home saves you a fortune compared to bakery prices. A dozen of these beauties costs less than buying just four from a pastry shop! You control the quality of ingredients, choosing organic fruits and real vanilla for that authentic flavor that can’t be replicated with artificial substitutes.
Endless Customization Possibilities
The beauty of this recipe lies in its versatility. Use strawberries, blueberries, kiwi, mandarin oranges, or even tropical fruits like mango and passion fruit. The custard base welcomes flavor variations too—try adding a hint of lemon zest or almond extract for something different. Much like my popular Berry Parfait recipe, these tarts let you showcase seasonal fruits at their finest. Make a batch this weekend and watch them disappear faster than you can say “encore!”
How to Make Mini Fruit Tarts Custard
Quick Overview
Mini Fruit Tarts Custard combine three simple components into one stunning dessert. The buttery tart shells provide the perfect foundation. The rich vanilla custard offers that classic creamy indulgence. Fresh fruits add natural sweetness and vibrant color.
Total Time Breakdown:
- Prep Time: 30 minutes
- Baking Time: 15 minutes
- Chilling Time: 2 hours
- Assembly Time: 15 minutes
- Total Time: 3 hours
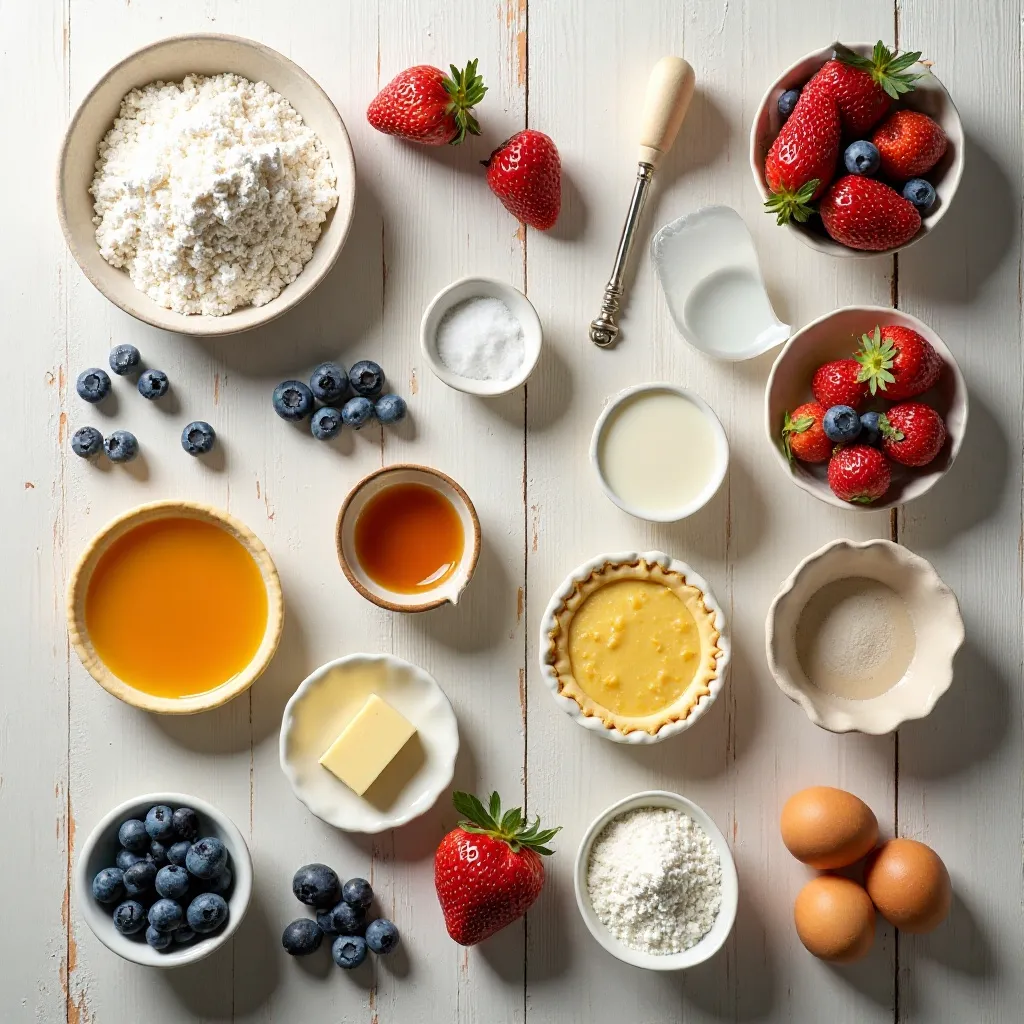
Key Ingredients for Mini Fruit Tarts Custard
For the Tart Shells:
- 1½ cups all-purpose flour
- ½ cup unsalted butter, cold and cubed
- ¼ cup powdered sugar
- 1 large egg yolk
- 2-3 tablespoons ice water
- ¼ teaspoon salt
For the Vanilla Custard:
- 2 cups whole milk
- 4 large egg yolks
- ½ cup granulated sugar
- ⅓ cup cornstarch
- 2 tablespoons unsalted butter
- 2 teaspoons pure vanilla extract
- Pinch of salt
For the Fruit Topping:
- 1 cup fresh strawberries, sliced
- ½ cup fresh blueberries
- 2 kiwis, peeled and sliced
- ½ cup fresh raspberries
- 3 tablespoons apricot jam (for glaze)
- 1 tablespoon water
Step-by-Step Instructions
Making the Tart Shells
Step 1: Prepare the Dough In a large mixing bowl, combine the all-purpose flour, powdered sugar, and salt. Add the cold cubed butter and use a pastry cutter or your fingertips to work it into the flour until the mixture resembles coarse breadcrumbs. This process should take about 3-4 minutes. The butter pieces should be about the size of small peas.
Step 2: Form the Dough Create a well in the center of the flour mixture and add the egg yolk. Mix gently with a fork, then add ice water one tablespoon at a time until the dough just comes together. Be careful not to overwork it. The dough should hold together when pressed but shouldn’t be sticky. If it feels too dry, add another teaspoon of water.
Step 3: Chill the Dough Shape the dough into a flat disc, wrap it tightly in plastic wrap, and refrigerate for at least 30 minutes. This resting period allows the gluten to relax and the butter to firm up, which prevents shrinking during baking.
Step 4: Roll and Cut Preheat your oven to 350°F (175°C). On a lightly floured surface, roll the dough to about ⅛-inch thickness. Using a round cookie cutter or glass that’s slightly larger than your tart pans, cut out circles. Gently press each circle into a mini tart pan, making sure it fits snugly against the bottom and sides.
Step 5: Blind Bake Prick the bottom of each tart shell with a fork to prevent puffing. Line each shell with a small piece of parchment paper and fill with pie weights or dried beans. Bake for 12 minutes, then carefully remove the weights and parchment. Bake for another 3-5 minutes until the shells are light golden brown. Let them cool completely on a wire rack.
Creating the Vanilla Custard
Step 6: Heat the Milk Pour the milk into a medium saucepan and warm it over medium heat until it just begins to steam. Don’t let it boil. Remove from heat and set aside.
Step 7: Mix the Egg Mixture In a separate bowl, whisk together the egg yolks, sugar, cornstarch, and salt until smooth and pale yellow. This should take about 2 minutes of vigorous whisking. The mixture should be thick and creamy.
Step 8: Temper the Eggs Slowly pour about half of the warm milk into the egg mixture while whisking constantly. This process, called tempering, prevents the eggs from scrambling. Once combined, pour this mixture back into the saucepan with the remaining milk.
Step 9: Cook the Custard Place the saucepan over medium heat and cook while stirring constantly with a wooden spoon or whisk. The custard will gradually thicken—this usually takes 5-7 minutes. When it reaches a pudding-like consistency and coats the back of your spoon, it’s ready.
Step 10: Finish the Custard Remove from heat and immediately stir in the butter and vanilla extract until the butter melts completely. Transfer the custard to a clean bowl, press plastic wrap directly onto the surface to prevent a skin from forming, and refrigerate until completely chilled (about 2 hours).
Assembling the Tarts
Step 11: Fill the Shells Once your tart shells and custard are completely cool, spoon or pipe the custard into each shell, filling them about three-quarters full. Use the back of a spoon to smooth the top for an even surface.
Step 12: Arrange the Fruit Get creative with your fruit arrangement! Place strawberry slices in a fan pattern, cluster blueberries together, or create a rainbow effect with different colored fruits. The key is to pack them fairly close together for a lush, abundant look.
Step 13: Apply the Glaze In a small bowl, mix the apricot jam with water and microwave for 15-20 seconds until warm and pourable. Strain out any chunks if needed. Using a pastry brush, gently brush the glaze over the fruits. This adds shine and helps preserve the fruit’s freshness.
Step 14: Chill and Serve Refrigerate the assembled tarts for at least 30 minutes before serving to let everything set properly. These beauties are best enjoyed within 24 hours of assembly.
What to Serve Mini Fruit Tarts Custard With
These elegant Mini Fruit Tarts Custard pair beautifully with a variety of beverages and accompaniments. Serve them alongside freshly brewed Earl Grey tea or a delicate chamomile infusion for an afternoon tea experience.
A glass of cold milk works wonderfully for kids, while adults might enjoy them with a café au lait or cappuccino. For special occasions, consider serving them with sparkling grape juice in champagne flutes.
If you’re creating a dessert spread, these tarts complement other elegant sweets like macarons, shortbread cookies, or cream puffs. A fruit sorbet or vanilla ice cream on the side adds another layer of indulgence.
For brunch gatherings, serve them alongside quiche, fresh croissants, and a colorful fruit salad. The combination of savory and sweet creates a balanced and memorable meal.
Top Tips for Perfecting Mini Fruit Tarts Custard
Keep Everything Cold for Perfect Pastry
Your butter and water should be ice-cold when making the tart dough. Warm butter creates tough, dense pastry instead of flaky, tender shells. I always cube my butter and pop it back in the freezer for 10 minutes before starting.
Don’t Skip the Blind Baking
Blind baking (pre-baking the empty shells) prevents soggy bottoms—a common problem with custard-filled pastries. The pie weights keep the dough from puffing up and losing its shape. If you don’t have pie weights, uncooked rice or dried beans work perfectly and can be reused multiple times.
Temper Your Eggs Properly
Rushing the tempering process can result in scrambled eggs in your custard. Always add the hot milk slowly to the egg mixture while whisking constantly. If you see any lumps forming, strain the custard through a fine-mesh sieve before chilling.
Use Fresh, Dry Fruit
Wash your berries and fruit well in advance and let them dry completely on paper towels before arranging them on the tarts. Excess moisture can make the custard runny and dilute the beautiful glaze.
Assemble Close to Serving Time
While the shells and custard can be made a day ahead, assemble the tarts no more than 6 hours before serving for the crispest shells. The moisture from the custard and fruit will eventually soften the pastry.
Experiment with Flavors
Add a tablespoon of lemon zest to your custard for a citrusy twist. Try orange blossom water or rose water for a Middle Eastern flair. A splash of almond extract creates a delightful marzipan-like flavor that pairs beautifully with stone fruits.
Master the Smooth Custard Technique
Stir your custard continuously and watch it carefully. The moment it thickens and can coat the back of a spoon, remove it from heat. Overcooking creates a grainy texture that’s nearly impossible to fix.
Storing and Reheating Tips
Storing the Components Separately: The best approach is to store each component separately. Keep baked tart shells in an airtight container at room temperature for up to 3 days. Store the custard in a sealed container in the refrigerator for up to 4 days. Prepare fresh fruit just before assembly.
Storing Assembled Tarts: Once assembled, Mini Fruit Tarts Custard should be refrigerated immediately. Cover them loosely with plastic wrap (don’t let it touch the fruit) and store for up to 24 hours. The shells will gradually lose their crispness, so these are best enjoyed fresh.
Freezing Options: You can freeze the unbaked tart shells for up to 3 months. Wrap them individually in plastic wrap, then place in a freezer bag. Bake from frozen, adding 2-3 extra minutes to the baking time. Unfortunately, assembled tarts don’t freeze well—the custard separates and the fruit becomes mushy upon thawing.
Reheating Guidelines: These tarts are meant to be served chilled or at room temperature, so reheating isn’t necessary or recommended. If your custard has been refrigerated and seems too thick, let it sit at room temperature for 10-15 minutes before filling the shells. Give it a gentle stir to restore the smooth texture.
Maximum Freshness Timeline:
- Unfilled tart shells: 3 days at room temperature
- Custard filling: 4 days refrigerated
- Fresh fruit: Use the day of assembly
- Assembled tarts: 24 hours refrigerated
Tips for Avoiding Common Baking Mistakes
Mistake #1: Overworking the Dough Many home bakers mix the tart dough too much, activating the gluten and creating tough shells. Mix just until the dough comes together—it should look slightly shaggy before you press it into a disc. Those few dry crumbs are perfectly fine.
Mistake #2: Skipping the Resting Period I know waiting is hard when you’re excited to bake, but chilling the dough is non-negotiable. Without proper rest time, your shells will shrink dramatically during baking, leaving you with misshapen tarts that can’t hold enough custard.
Mistake #3: Rolling the Dough Too Thin Dough that’s thinner than ⅛ inch will crack easily and create holes. Use rolling pin guides or rubber bands wrapped around both ends of your rolling pin to maintain consistent thickness.
Mistake #4: Not Pricking the Dough Those little fork pricks are crucial! Without them, steam gets trapped under the dough during baking, creating bubbles and uneven shells. Prick the bottom of each shell 8-10 times with a fork.
Mistake #5: Baking at the Wrong Temperature Too hot, and your shells brown before they’re fully cooked inside. Too cool, and they won’t develop that golden color and crisp texture. Use an oven thermometer to verify your actual oven temperature—many run 25 degrees hotter or cooler than the dial suggests.
Mistake #6: Lumpy Custard Lumps form when the eggs cook too quickly or when the cornstarch isn’t fully dissolved. Always whisk your egg mixture thoroughly before adding the milk, and keep stirring the custard constantly while it cooks. A whisk works better than a spoon for preventing lumps.
Mistake #7: Watery Custard If your custard seems thin, you probably removed it from heat too early. It should be thick enough to hold its shape when spooned. Remember, it will thicken slightly more as it cools, but it should already be pudding-like on the stove.
Mistake #8: Fruit That Browns or Weeps Some fruits oxidize quickly after cutting. Toss sliced apples or pears in a little lemon juice to prevent browning. For berries, make sure they’re completely dry—even a little moisture can make your custard watery.
Mistake #9: Too Much Glaze More isn’t better with the apricot glaze. You want a thin, glossy coating—not a thick, goopy layer. Use a light hand with your pastry brush and apply just enough to make the fruit shine.
Mistake #10: Filling Shells While They’re Warm This mistake results in soggy bottoms every single time. Both your shells and custard must be completely cool before assembly. The contrast in temperatures creates condensation that softens the pastry.
Frequently Asked Questions
Can I use store-bought tart shells instead of homemade?
Absolutely! Store-bought shells are a fantastic time-saver for busy days. Look for pre-baked phyllo cups, mini graham cracker crusts, or frozen puff pastry shells. Just follow the package instructions for any additional baking needed, then fill with your homemade custard for a semi-homemade treat that still tastes amazing.
What’s the difference between custard and pastry cream?
Great question! Custard and pastry cream are very similar—both use milk, eggs, and sugar. Pastry cream (crème pâtissière) typically includes cornstarch or flour as a thickener, making it more stable for filling pastries. This recipe uses cornstarch, so it’s technically pastry cream, but many people use the terms interchangeably.
Can I make these tarts dairy-free?
Yes, with some adjustments! Use dairy-free butter for the shells and substitute the milk in the custard with full-fat coconut milk or oat milk. Keep in mind that the flavor will be slightly different, and coconut milk will add a subtle tropical taste. The texture might be slightly less rich, but they’ll still be delicious.
How far in advance can I make these for a party?
Bake your tart shells up to 3 days ahead and store them airtight at room temperature. Make your custard up to 2 days ahead and keep it refrigerated. Assemble the tarts no more than 6 hours before your party for the best texture. If you’re serving them at a buffet, keep them refrigerated until the last possible moment.
Why did my custard turn out lumpy?
Lumps usually happen when the eggs cook too quickly or when ingredients aren’t properly mixed. Make sure you whisk the egg mixture thoroughly before adding the milk. Cook over medium (not high) heat and stir constantly. If you do get lumps, strain the custard through a fine-mesh sieve—it’ll be smooth as silk!
What fruits work best for topping?
Almost any fresh fruit works beautifully! Strawberries, blueberries, raspberries, and kiwi are classics. Try sliced peaches, mandarin oranges, pomegranate seeds, or even edible flowers. Avoid overly juicy fruits like watermelon, and stay away from bananas unless you’re serving immediately, as they brown quickly.
My tart shells shrank during baking—what happened?
Shrinking occurs when the dough hasn’t been chilled properly or has been overworked. Always chill your dough for at least 30 minutes before rolling. After pressing the dough into the pans, chill them again for 15 minutes before baking. This double-chill method prevents shrinkage.
Can I use flavored custard instead of vanilla?
Definitely! Chocolate custard creates a decadent base for berries. Lemon custard pairs wonderfully with summer fruits. Add 2 tablespoons of cocoa powder for chocolate, or use lemon extract instead of vanilla for citrus flavor. You can even add a tablespoon of instant coffee for mocha custard.
How do I prevent soggy tart shells?
The secret is creating a moisture barrier. Brush the inside of each cooled shell with a thin layer of melted white chocolate, then let it set before adding custard. This creates a waterproof layer between the crispy shell and moist filling. Alternatively, dust the inside with a very light coating of powdered sugar.
Can I make larger tarts instead of mini ones?
Of course! This recipe adapts beautifully to a standard 9-inch tart pan or 4-inch individual tart pans. Increase the blind baking time to 15-18 minutes for larger shells, and adjust the custard quantity accordingly. A 9-inch tart will need about 1.5 times the custard recipe.
Nutrition Information (Per Mini Tart)
| Nutrient | Amount |
|---|---|
| Calories | 165 |
| Total Fat | 8g |
| Saturated Fat | 5g |
| Cholesterol | 75mg |
| Sodium | 45mg |
| Total Carbohydrates | 21g |
| Dietary Fiber | 1g |
| Sugars | 12g |
| Protein | 3g |
| Vitamin C | 15% DV |
| Calcium | 4% DV |
| Iron | 4% DV |
Nutrition values are approximate and may vary based on specific ingredients used and tart size.
These Mini Fruit Tarts Custard represent everything I love about homemade desserts—they’re beautiful, delicious, and surprisingly achievable for home bakers. The combination of crispy pastry, silky custard, and fresh fruit creates a symphony of flavors and textures that never fails to impress.
What I appreciate most about this recipe is its flexibility. Make them for a baby shower with pastel-colored fruits, create a patriotic version with strawberries and blueberries, or go tropical with mango and kiwi. Each variation brings something special to the table.
The satisfaction of arranging these little masterpieces on a platter, watching guests’ eyes light up, and hearing “you made these yourself?” makes every minute of preparation worthwhile. They might look like they came from an expensive bakery, but only you need to know how simple they actually were to create.
I’d love to hear how your Mini Fruit Tarts Custard turn out! Share your creations in the comments below, and let me know which fruit combinations you tried. Don’t forget to tag me in your photos—I always get so excited seeing your beautiful baking adventures!