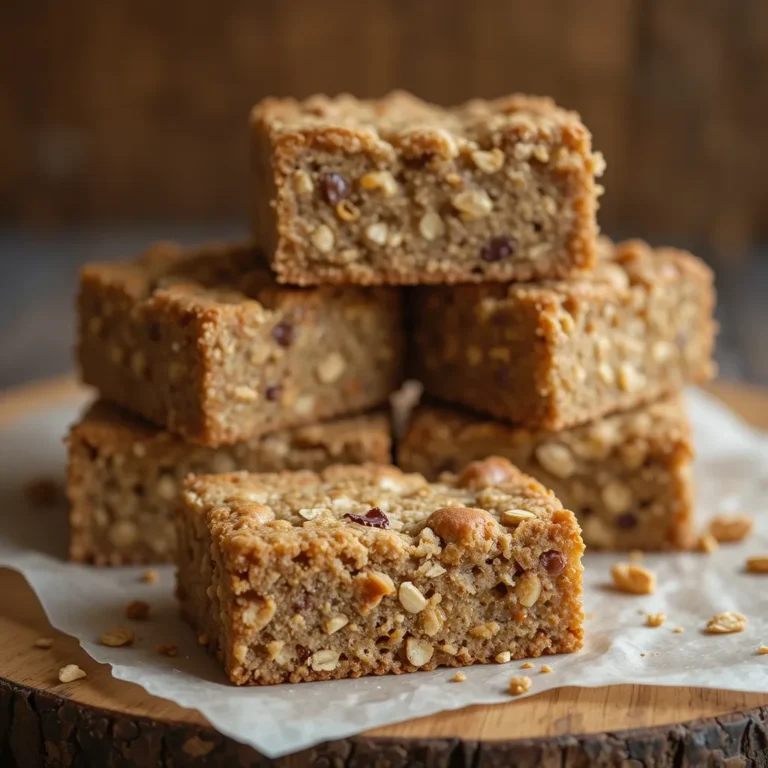
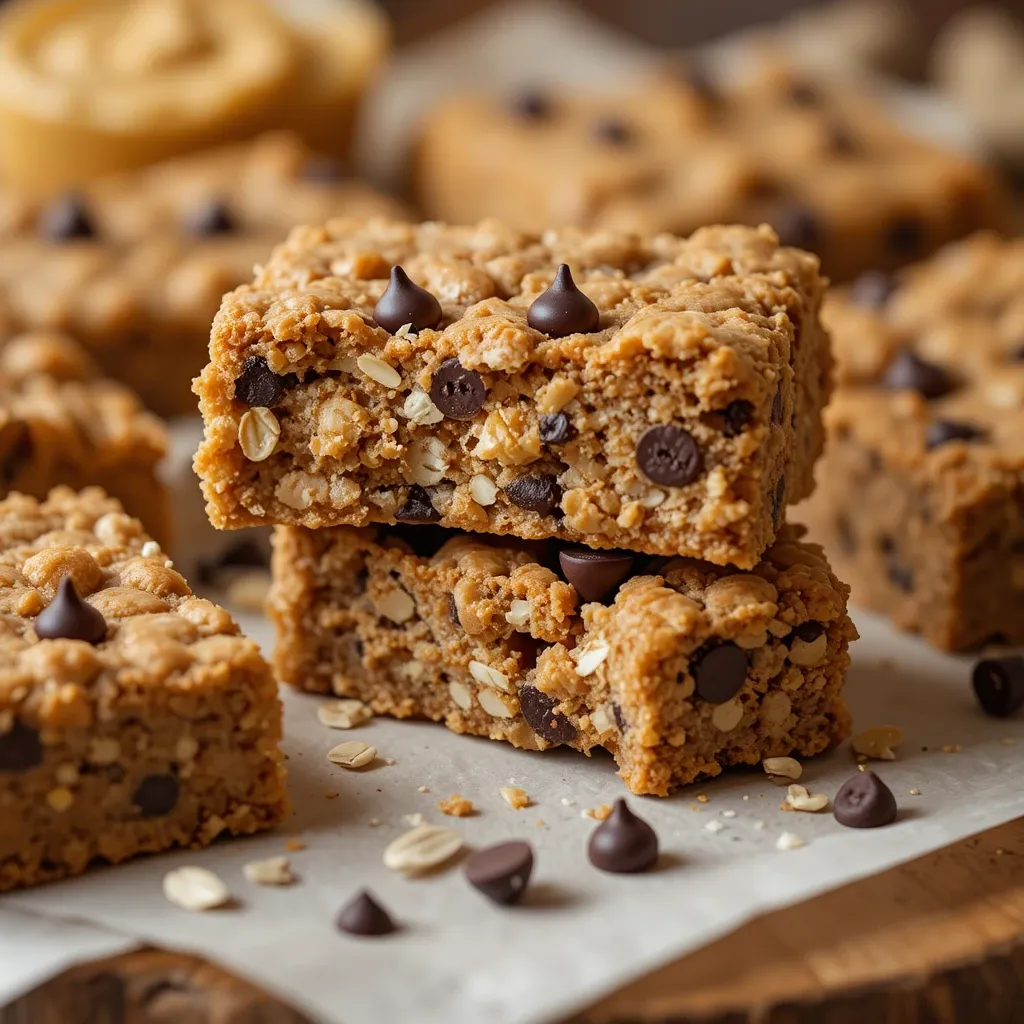
Homemade Peanut Butter Protein Bars Recipe – Ready in 15 Minutes
Imagine biting into a soft, chewy bar that tastes like dessert but fuels your body like a champion. These peanut butter protein bars are creamy, naturally sweet, and packed with wholesome ingredients. I discovered this recipe during my own fitness journey when store-bought bars left me disappointed with their ingredient lists.
This simple no-bake recipe takes just 15 minutes to prepare and uses pantry staples you probably already have. Perfect for busy mornings, post-workout snacks, or lunchbox treats, these bars rival my popular energy bites recipe. Get ready to fall in love with homemade nutrition!
This recipe was fully created by AI and has not been tested in our kitchen. Our goal is to support and inspire home cooks, and many readers report positive results from other recipes here.
What Are Peanut Butter Protein Bars?
Ever wonder why peanut butter and protein became the ultimate power couple? These bars combine creamy peanut butter with protein powder to create a satisfying snack that actually keeps you full.
They say the way to anyone’s heart is through their stomach, and these bars prove it! I call them my “kitchen confidence builders” because they’re practically foolproof. Whether you’re a meal prep newbie or seasoned cook, you’ll feel like a nutrition guru making these. So grab your mixing bowl and let’s create something amazing together!
Why You’ll Love This Peanut Butter Protein Bars Recipe
The Protein-Packed Powerhouse
These bars deliver serious nutrition without compromise. Each bar contains around 10-12 grams of protein, making them perfect for muscle recovery and sustained energy. The natural peanut butter provides healthy fats while dates or honey add just the right amount of sweetness. Unlike store-bought versions loaded with preservatives, you control every ingredient.
Budget-Friendly Nutrition
Making protein bars at home saves you serious money. A batch of 12 bars costs roughly $8-10 compared to $2-3 per store-bought bar. That’s potentially $20-30 in savings per batch! Plus, you can customize flavors and avoid paying premium prices for specialty dietary options.
Customizable & Delicious Toppings
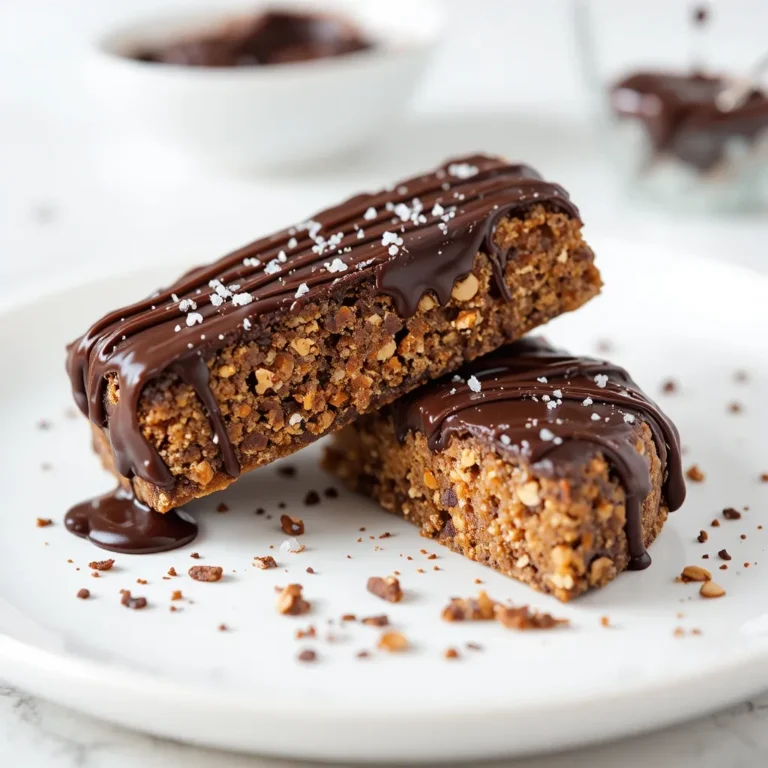
The beauty lies in versatility. Add dark chocolate chips for richness, sprinkle sea salt for balance, mix in chia seeds for omega-3s, or fold in dried cranberries for tartness. These bars remind me of my no-bake granola bars recipe but with extra protein power. Create your signature version and watch them disappear from your fridge. Trust me, once you try homemade, you’ll never go back to store-bought!
How to Make Peanut Butter Protein Bars
Quick Overview
These no-bake peanut butter protein bars are incredibly simple to make. You’ll love how the creamy peanut butter binds everything together while protein powder adds nutritional punch. The bars have a perfectly chewy texture with just enough sweetness. No oven required means no heating up your kitchen!
Preparation Time:
- Prep Time: 10 minutes
- Chill Time: 1-2 hours
- Total Time: 2 hours 10 minutes
- Servings: 12 bars
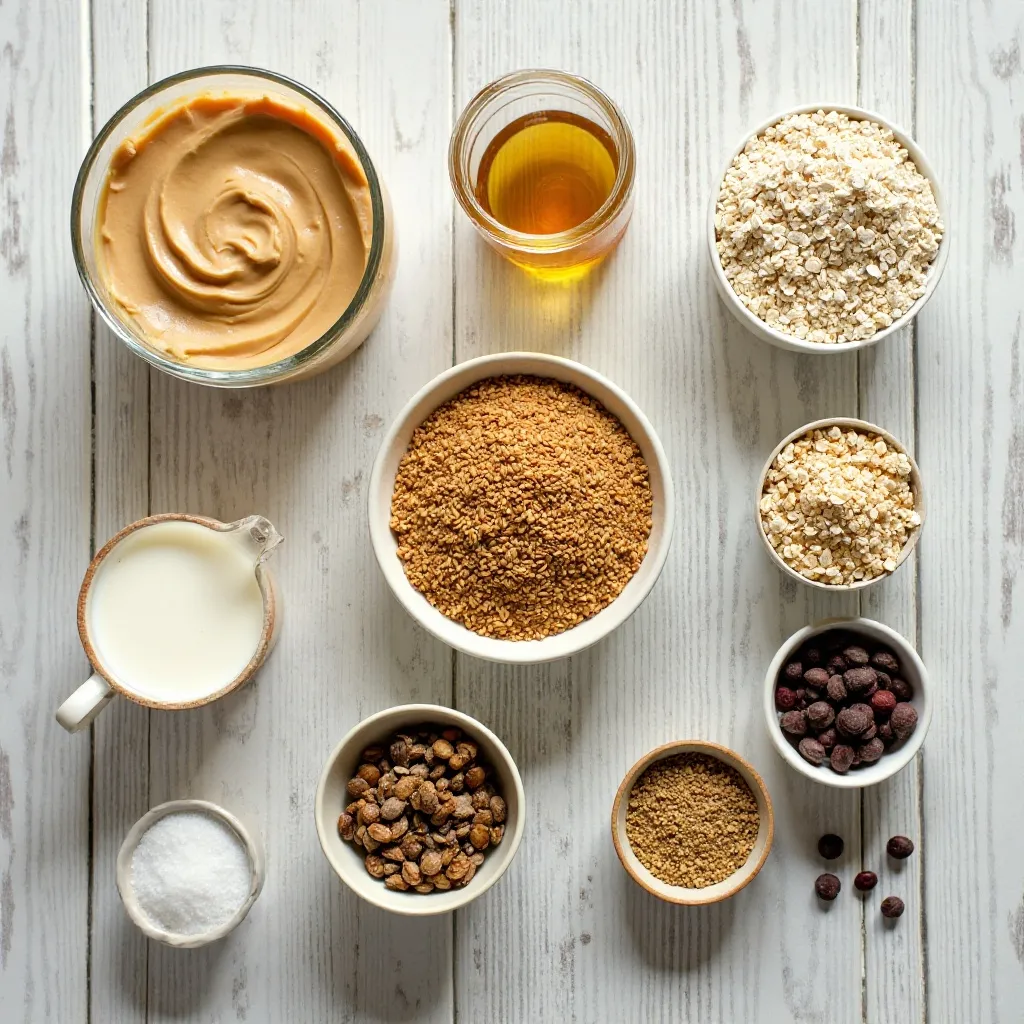
Key Ingredients for Peanut Butter Protein Bars
Base Ingredients:
- 1 cup natural peanut butter (creamy or crunchy)
- 1/3 cup honey or maple syrup
- 1 cup vanilla protein powder (or your favorite flavor)
- 1 cup rolled oats
- 1/4 cup ground flaxseed
- 2 tablespoons chia seeds
- 1/4 teaspoon sea salt
- 2-4 tablespoons milk (dairy or plant-based, as needed)
Optional Add-ins:
- 1/3 cup dark chocolate chips
- 1/4 cup dried fruit (cranberries, raisins)
- 2 tablespoons hemp hearts
- 1 teaspoon vanilla extract
Step-by-Step Instructions
Step 1: Prepare Your Pan
Line an 8×8 inch square baking pan with parchment paper, leaving some overhang on the sides. This makes lifting the bars out super easy later. Set aside while you mix your ingredients.
Step 2: Mix the Wet Ingredients
In a large mixing bowl, combine the peanut butter and honey. If your peanut butter is quite thick, you can microwave it for 20-30 seconds to make stirring easier. Mix until completely smooth and well combined. The mixture should be glossy and flow easily.
Step 3: Add the Dry Ingredients
Add the protein powder, rolled oats, ground flaxseed, chia seeds, and sea salt to the peanut butter mixture. Using a sturdy spoon or your hands, mix everything together. The mixture will be quite thick and may seem dry at first.
Step 4: Adjust the Consistency
If the mixture is too dry and crumbly, add milk one tablespoon at a time until it comes together. You want a consistency that holds together when pressed but isn’t too wet. Think of it like cookie dough that sticks together nicely.
Step 5: Add Optional Mix-ins
If you’re using chocolate chips, dried fruit, or other add-ins, fold them in now. Make sure they’re evenly distributed throughout the mixture for consistent flavor in every bite.
Step 6: Press into Pan
Transfer the mixture to your prepared pan. Using your hands or the back of a measuring cup, press the mixture firmly and evenly into the pan. Really pack it down to ensure the bars hold together well. The surface should be smooth and compact.
Step 7: Chill and Set
Cover the pan with plastic wrap and refrigerate for at least 1-2 hours until firm. This chilling time is crucial for the bars to set properly and slice cleanly.
Step 8: Cut into Bars
Once set, lift the entire block out of the pan using the parchment paper overhang. Place on a cutting board and use a sharp knife to cut into 12 equal bars. Wipe the knife between cuts for clean edges.
Step 9: Store Properly
Wrap individual bars in parchment paper or store them in an airtight container with parchment paper between layers to prevent sticking.
What to Serve Peanut Butter Protein Bars With
These versatile bars work for any time of day! For breakfast, pair them with Greek yogurt and fresh berries for a complete meal.
As a pre-workout snack, enjoy one bar with a banana and water for quick energy. Post-workout, pair with a protein smoothie for optimal recovery.
For kids’ lunchboxes, pack alongside apple slices, baby carrots, and cheese cubes. The bars complement fresh fruit perfectly and provide sustained energy for afternoon activities.
Mid-afternoon, serve with black coffee or herbal tea for a pick-me-up that beats any vending machine option.
On hiking trips, these bars travel beautifully with trail mix and dried fruit for sustained outdoor energy.
Top Tips for Perfecting Peanut Butter Protein Bars
Choose the Right Protein Powder
Not all protein powders work equally well. Whey protein creates a slightly denser texture while plant-based proteins can be a bit grainier. Vanilla and chocolate flavors work best, but unflavored works if you add extra honey or vanilla extract. Avoid protein powders with lots of added fillers.
Get the Consistency Just Right
The biggest mistake is making the mixture too dry or too wet. If it’s crumbly and won’t hold together, add milk gradually. If it’s too sticky, add more oats or protein powder. The mixture should be moldable like playdough.
Press Firmly for Best Results
Don’t be gentle when pressing the mixture into the pan. Use significant pressure to compact everything. This ensures bars that hold together instead of crumbling when you bite into them.
Allow Proper Chilling Time
Resist the urge to cut bars too soon. A full 2 hours of chilling makes cutting much easier and prevents crumbling. If you’re in a rush, place in the freezer for 30-45 minutes instead.
Use Fresh Ingredients
Check your protein powder’s expiration date. Old protein powder can taste chalky or off. Fresh, natural peanut butter without added oils works best. If your peanut butter has separated, stir it well before using.
Customize Thoughtfully
When adding mix-ins, don’t exceed 1/2 cup total or the bars may not hold together. Wet add-ins like nut butter swirls need to be balanced with dry ingredients. Always fold in add-ins gently to distribute evenly.
Storing and Reheating Tips
Refrigerator Storage
Store peanut butter protein bars in an airtight container in the refrigerator for up to 2 weeks. Place parchment paper between layers to prevent sticking. The bars stay fresh and maintain their chewy texture when properly refrigerated.
Freezer Storage
For longer storage, freeze bars individually wrapped in plastic wrap, then place in a freezer-safe bag or container. They’ll keep for up to 3 months. This method is perfect for meal prep warriors who like to batch cook.
Thawing and Serving
Remove bars from the freezer and let them thaw at room temperature for 15-20 minutes, or enjoy them slightly frozen for a firmer, almost ice cream bar-like texture. Some people prefer them straight from the fridge for maximum chewiness.
Room Temperature Caution
While these bars can sit at room temperature for a few hours (perfect for lunchboxes), they may become soft and sticky in warm weather. If temperatures exceed 75°F, keep them chilled until ready to eat.
Tips for Avoiding Common Baking Mistakes
Mistake 1: Using the Wrong Peanut Butter
Avoid peanut butter with added sugar, oils, or stabilizers. Natural peanut butter works best because it has a better binding quality. If you only have conventional peanut butter, reduce the honey slightly as it’s already sweetened.
Mistake 2: Not Measuring Protein Powder Correctly
Always use the scoop-and-level method. Packed protein powder throws off the ratio and creates dry, crumbly bars. Fluff the powder first, then scoop and level with a knife.
Mistake 3: Overmixing or Undermixing
Mix just until ingredients are evenly distributed. Overmixing can make bars tough, while undermixing leaves dry pockets. You should see no streaks of peanut butter or dry patches of protein powder.
Mistake 4: Cutting Too Soon
Warm bars fall apart easily. Always chill completely before cutting. For the cleanest cuts, run your knife under hot water and wipe dry between each slice.
Mistake 5: Storing Improperly
Without proper storage, bars dry out or absorb refrigerator odors. Always use airtight containers and consider individual wrapping for grab-and-go convenience.
Mistake 6: Expecting Bakery-Style Texture
These are no-bake bars with a dense, chewy texture—not light and fluffy. If you want them softer, add an extra tablespoon of honey. For firmer bars, add more oats.
Nutrition Information
| Nutrient | Per Bar (1/12 recipe) |
|---|---|
| Calories | 185-210 |
| Protein | 10-12g |
| Carbohydrates | 18-22g |
| Fat | 9-11g |
| Fiber | 3-4g |
| Sugar | 8-10g |
| Sodium | 75-100mg |
Note: Nutrition values vary based on specific brands and optional add-ins used.
Frequently Asked Questions
Can I make these bars without protein powder?
Yes, but the texture will be different. Replace protein powder with equal parts oat flour or additional rolled oats ground into flour. The bars will be less protein-dense but still nutritious. Consider adding 2-3 tablespoons of extra nut butter to help with binding.
What’s the best protein powder for this recipe?
Whey protein isolate works beautifully for the best texture. For plant-based options, pea protein or brown rice protein work well. Avoid protein powders with lots of added fiber as they can make bars too dry.
Can I use almond butter instead of peanut butter?
Absolutely! Almond butter, cashew butter, or sunflower seed butter all work great. Keep in mind that different nut butters have varying consistencies, so you may need to adjust the liquid slightly.
Why are my bars too crumbly?
Crumbly bars usually mean the mixture was too dry. Add more wet ingredients (peanut butter, honey, or milk) one tablespoon at a time. Also ensure you’re pressing firmly enough when packing the mixture into the pan.
Can I make these bars vegan?
Yes! Use maple syrup instead of honey, plant-based protein powder, and non-dairy milk. The rest of the ingredients are naturally vegan-friendly.
How do I make these bars nut-free?
Use sunflower seed butter or tahini instead of peanut butter. Choose a nut-free protein powder and avoid adding any tree nuts as mix-ins. These modifications make them perfect for school lunchboxes.
Can I add collagen powder instead of protein powder?
Collagen powder doesn’t provide the same structure as protein powder. You can replace 1/4 of the protein powder with collagen, but don’t replace it entirely or the bars won’t set properly.
How do I make these bars softer or firmer?
For softer bars, add more honey or peanut butter. For firmer bars, increase the oats or chill longer in the freezer. You can also add 2-3 tablespoons of coconut flour for extra firmness.
Can I double this recipe?
Yes! Use a 9×13 inch pan and follow the same instructions. The chilling time may need to be extended by 30 minutes to an hour for the thicker layer to set completely.
What if I don’t have chia seeds or flaxseed?
You can use all of one or the other, or substitute with hemp hearts or additional oats. These seeds add nutrition and help with binding, but the recipe works without them.
Final Thoughts
Making your own peanut butter protein bars is truly a game-changer. You’ll save money, control your ingredients, and enjoy better flavor than anything from a store shelf.
These bars have become my go-to solution for busy mornings, post-workout recovery, and mid-afternoon energy slumps. I keep a batch in my freezer at all times because they’re just that good.
The best part? You can make them uniquely yours. Experiment with different nut butters, try various protein powder flavors, or create your own signature mix-in combinations.
My family fights over the chocolate chip version, while I prefer them plain with a sprinkle of sea salt on top.
Whether you’re a fitness enthusiast, busy parent, or just someone who appreciates delicious, nutritious snacks, these bars deliver on every level. They’re proof that healthy eating doesn’t have to be complicated or expensive.
So grab your mixing bowl and make a batch today. Your future self will thank you when you reach for a homemade protein bar instead of raiding the vending machine. Here’s to taking control of your nutrition, one delicious bar at a time!
Did you make this recipe? I’d love to hear about it! Leave a comment below and share your experience. Don’t forget to tag me on social media with your creations!