Red Velvet Cheesecake Brownies – Easy 15-Minute Prep
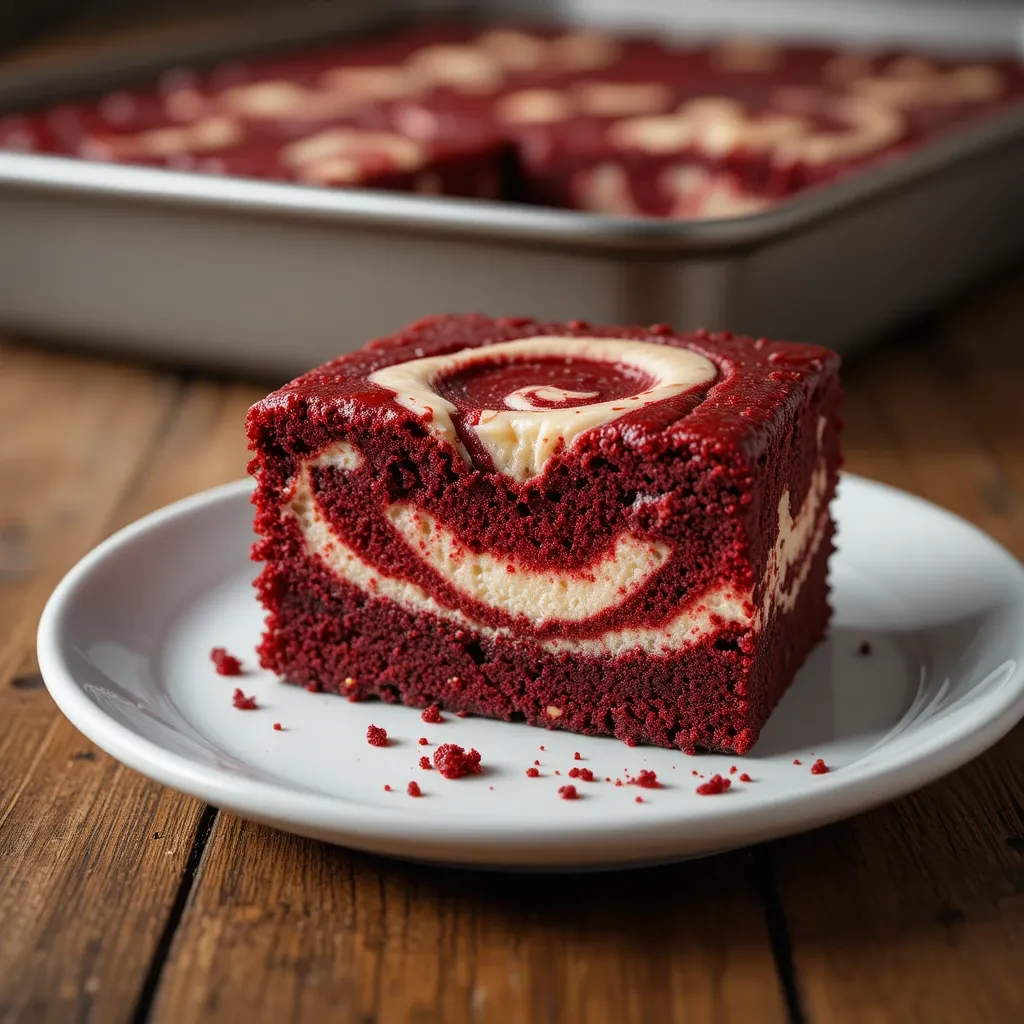
Picture this: velvety red brownies meet tangy cheesecake swirls in one glorious pan. These red velvet cheesecake brownies are everything you’ve been dreaming about. They’re rich without being overwhelming, stunning enough for special occasions, and surprisingly simple to make.
My grandmother always said the best desserts tell a story, and these brownies tell three: chocolate, cream cheese, and that gorgeous red hue that makes everyone curious. What makes this recipe truly special is how it combines two beloved desserts into one unforgettable treat that takes just 15 minutes to prep.
This recipe was generated completely by AI and has not been personally prepared by us. We value our readers deeply, and feedback from those who’ve tried other recipes on our site has been encouraging.
If you loved my classic chocolate chip brownies, you’re going to be absolutely obsessed with this elevated version. The marbled pattern isn’t just beautiful, it’s delicious, and I promise your family will be requesting these on repeat.
What Are Red Velvet Cheesecake Brownies?
Ever wondered why red velvet gets its name? It’s not just about the color. These brownies combine the subtle cocoa flavor of red velvet cake with the tangy richness of cheesecake, all in a fudgy brownie form. Some say red velvet earned its name from the reddish-brown hue cocoa powder naturally creates when mixed with acidic ingredients.
Others believe it’s simply because the texture is as smooth as velvet. Whatever the origin, one thing’s certain: the way to anyone’s heart is through their stomach, and these brownies pave that path beautifully. Ready to become everyone’s favorite baker? Let’s dive in.
Why You’ll Love This Red Velvet Cheesecake Brownies
A Show-Stopping Dessert That’s Easier Than You Think
The marbled cheesecake topping makes these brownies look like they came from a fancy bakery, but the secret? They’re incredibly simple to make at home. You don’t need professional baking skills or fancy equipment. Just two bowls, a whisk, and about 15 minutes of active prep time stand between you and dessert perfection.
Budget-Friendly Indulgence
Skip the $40 bakery box and make a whole pan for under $10. You probably have most ingredients in your pantry already: flour, sugar, eggs, cocoa powder, and cream cheese. The red food coloring is optional but creates that signature wow factor. When you calculate the cost per serving, you’re looking at pennies compared to boutique dessert shops.
Flavor Combination That Can’t Be Beat
The subtle chocolate undertones of red velvet pair perfectly with tangy cream cheese. Each bite delivers fudgy brownie texture with pockets of creamy cheesecake that literally melts in your mouth. The slight tanginess from the cheesecake layer cuts through the sweetness, creating a balanced dessert that doesn’t feel heavy. If you enjoyed my strawberry cheesecake bars, you’ll recognize that same magical cream cheese swirl technique here, but with a completely different flavor profile.
Don’t wait for a special occasion. These brownies turn Tuesday into a celebration.
How to Make Red Velvet Cheesecake Brownies
Quick Overview
These brownies bring together the best of both worlds with minimal effort. The red velvet base is fudgy and moist, while the cheesecake swirl adds a luxurious creaminess that melts into every bite.
Prep Time: 15 minutes
Bake Time: 35-40 minutes
Total Time: 50-55 minutes
Servings: 16 brownies
The straightforward process makes this recipe perfect for beginner bakers and experienced dessert enthusiasts alike.
Key Ingredients for Red Velvet Cheesecake Brownies
For the Red Velvet Brownie Base:
- 1/2 cup (115g) unsalted butter, melted
- 1 cup (200g) granulated sugar
- 2 large eggs, room temperature
- 2 teaspoons vanilla extract
- 1 tablespoon red food coloring (or natural beet powder)
- 1 tablespoon unsweetened cocoa powder
- 1/4 teaspoon salt
- 3/4 cup (95g) all-purpose flour
- 1/2 teaspoon white vinegar
For the Cheesecake Swirl:
- 8 oz (225g) cream cheese, softened
- 1/4 cup (50g) granulated sugar
- 1 large egg
- 1 teaspoon vanilla extract
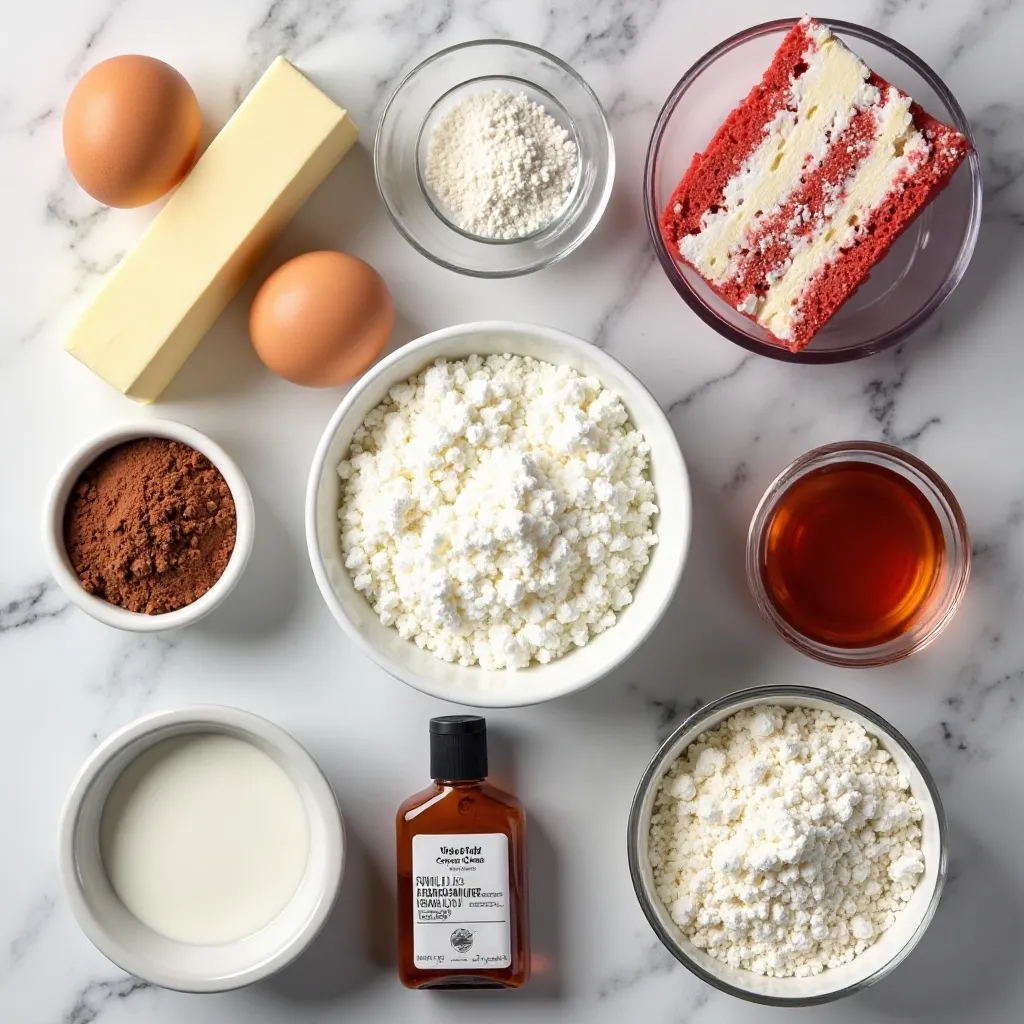
Having your ingredients at room temperature ensures smooth mixing and better texture. This small detail makes a huge difference in the final result.
Step-by-Step Instructions
Step 1: Prepare Your Pan
Preheat your oven to 350°F (175°C). Line a 9×9-inch baking pan with parchment paper, leaving overhang on two sides for easy removal. Lightly grease the parchment with butter or cooking spray. This step prevents sticking and makes cleanup effortless.
Step 2: Make the Cheesecake Layer
In a medium bowl, beat the softened cream cheese with 1/4 cup sugar until smooth and creamy, about 2 minutes. Make sure there are no lumps. Add one egg and vanilla extract, beating until just combined. Set this mixture aside while you prepare the brownie batter.
Step 3: Create the Red Velvet Base
In a large bowl, whisk together melted butter and 1 cup sugar until well combined. Add the two eggs, one at a time, whisking after each addition. Stir in vanilla extract, red food coloring, and white vinegar. The vinegar reacts with the cocoa to enhance the red velvet flavor.
Step 4: Add Dry Ingredients
Sift together the cocoa powder, salt, and flour. Gently fold the dry ingredients into the wet mixture using a spatula. Mix until just combined. Don’t overmix or your brownies will become tough. The batter should be thick and glossy.
Step 5: Layer and Swirl
Pour the red velvet batter into your prepared pan, spreading it evenly. Drop spoonfuls of the cheesecake mixture on top, spacing them evenly across the surface. Use a butter knife or skewer to create swirls by dragging it through both layers in a figure-eight pattern. Don’t over-swirl or the pattern will muddy.
Step 6: Bake to Perfection
Bake for 35-40 minutes, or until a toothpick inserted into the center comes out with a few moist crumbs. The cheesecake portions may look slightly jiggly, but they’ll set as they cool. The edges should look set while the center remains slightly soft.
Step 7: Cool Completely
Let the brownies cool in the pan on a wire rack for at least 30 minutes. Then lift them out using the parchment overhang and let them cool completely before cutting. This patience pays off with clean, beautiful slices.
What to Serve Red Velvet Cheesecake Brownies With
These brownies shine on their own, but pairing them right elevates the experience. Serve them slightly warm with a scoop of vanilla ice cream melting over the top. The cold creaminess contrasts beautifully with the fudgy warmth.
A hot cup of coffee or espresso cuts through the sweetness perfectly. The bitter notes complement the tangy cheesecake swirl. For special occasions, add a dollop of whipped cream and fresh raspberries for a restaurant-worthy presentation.
They’re also incredible alongside a glass of cold milk for a classic combination. Kids especially love this pairing. For adult gatherings, serve them on a dessert board with fresh strawberries, chocolate-covered pretzels, and cream cheese mints.
Top Tips for Perfecting Red Velvet Cheesecake Brownies
Don’t Skip the Room Temperature Ingredients
Room temperature eggs and cream cheese blend more smoothly into your batters. Cold cream cheese creates lumps, while cold eggs can cause the butter to seize. Take ingredients out 30-60 minutes before baking.
Natural Food Coloring Options
If you prefer natural ingredients, substitute beet powder for red food coloring. Use 2-3 tablespoons for vibrant color. The taste remains neutral, and you avoid artificial dyes. Some bakers also use pomegranate juice powder.
Test for Doneness Carefully
Because these brownies have a cheesecake layer, the toothpick test looks different. You want moist crumbs, not wet batter. The cheesecake portions may jiggle slightly, which is normal. Overbaking creates dry, crumbly brownies.
Let Them Cool Completely
I know waiting is hard, but warm brownies are difficult to cut cleanly. Refrigerating them for an hour before cutting creates the sharpest edges. Use a hot, clean knife between each cut for bakery-perfect slices.
Adjust Sweetness to Taste
If you prefer less sweet desserts, reduce the sugar in the brownie base to 3/4 cup. The cheesecake layer still needs its full sugar amount for proper texture and flavor balance.
Common Baking Mistakes to Avoid
Overmixing the Batter: Once you add flour to the brownie batter, mix only until combined. Overmixing develops gluten, resulting in tough, cake-like brownies instead of fudgy ones.
Using Cold Cream Cheese: This is the number one mistake. Cold cream cheese won’t blend smoothly and creates lumps in your cheesecake layer. Microwave it for 10-15 seconds if you forgot to take it out early.
Over-Swirling the Layers: Too much swirling muddles the beautiful marbled pattern. Make 5-7 deliberate swirls, then stop. Less is more here.
Not Lining the Pan: Parchment paper is essential for easy removal. Without it, you’ll struggle to get clean slices, and the corners will stick stubbornly.
Opening the Oven Door Frequently: Each time you open the door, the temperature drops. Check your brownies only after 30 minutes have passed.
Cutting Too Early: Warm brownies fall apart and lose their shape. Patience creates picture-perfect slices that hold together beautifully.
Using Low-Quality Cocoa Powder: Dutch-processed or natural cocoa both work, but cheap cocoa tastes bitter and flat. Invest in good cocoa for better flavor.
Storing and Reheating Tips
Store your red velvet cheesecake brownies in an airtight container in the refrigerator. The cream cheese layer requires refrigeration for food safety. They’ll stay fresh for up to 5 days, though they rarely last that long in my house.
For longer storage, freeze individual brownies wrapped in plastic wrap, then placed in a freezer bag. They keep beautifully for up to 3 months. Thaw overnight in the refrigerator or at room temperature for 2-3 hours.
To reheat, microwave individual brownies for 15-20 seconds. This warms them just enough to soften without melting the cheesecake layer. You can also enjoy them cold straight from the fridge, which intensifies the fudgy texture.
If you’re meal prepping desserts, cut all the brownies after cooling, then layer them between parchment paper sheets before refrigerating. This prevents sticking and makes grabbing one easy.
Nutrition Information
| Nutrient | Per Serving (1 brownie) |
|---|---|
| Calories | 245 |
| Total Fat | 13g |
| Saturated Fat | 8g |
| Cholesterol | 75mg |
| Sodium | 110mg |
| Total Carbohydrates | 29g |
| Dietary Fiber | 0.5g |
| Sugars | 22g |
| Protein | 4g |
Nutritional values are approximate and may vary based on specific ingredients used.
Frequently Asked Questions
Can I make these brownies without food coloring?
Absolutely! The brownies will be brown instead of red, but they’ll taste just as delicious. You’ll essentially have chocolate cheesecake brownies, which is still an amazing dessert. The flavor profile remains identical.
Why did my cheesecake layer sink into the brownie base?
This happens when the brownie batter is too thin or the cheesecake mixture is too heavy. Make sure your brownie batter is thick and spread evenly before adding the cheesecake dollops. Also, don’t overmix the cheesecake layer, which can thin it out.
Can I use low-fat cream cheese?
I don’t recommend it. Full-fat cream cheese creates the best texture and flavor. Low-fat versions contain more water and can make your cheesecake layer watery or cause cracking.
How do I know when the brownies are done?
Look for set edges and a slightly jiggly center. A toothpick inserted into the brownie portion should come out with moist crumbs. The cheesecake areas may look underdone, but they’ll set as they cool.
Can I double this recipe?
Yes! Use a 9×13-inch pan and bake for 40-45 minutes. Watch closely toward the end, as larger pans may need adjusted baking time. All other instructions remain the same
Why are my brownies dry and crumbly?
Overbaking is the most common cause. Remember that brownies continue cooking slightly as they cool. Take them out when they still look slightly underdone in the center.
Can I add chocolate chips?
Definitely! Fold 1/2 cup of chocolate chips into the brownie batter for extra chocolatey goodness. White chocolate chips also pair beautifully with red velvet flavor.
How do I get clean cuts?
Refrigerate the brownies until cold, then use a sharp knife dipped in hot water. Wipe the knife clean between each cut. This creates bakery-perfect edges.
Can I make these gluten-free?
Replace the all-purpose flour with a 1:1 gluten-free baking flour blend. Make sure your cocoa powder is certified gluten-free. The texture may be slightly different but still delicious.
What if I don’t have white vinegar?
Apple cider vinegar or lemon juice work as substitutes. The acidity is what matters, not the specific type. This ingredient helps create the classic red velvet flavor.
Final Thoughts
These red velvet cheesecake brownies represent everything I love about baking: they’re beautiful, delicious, and surprisingly achievable. You don’t need advanced skills or expensive equipment. Just quality ingredients, a little patience, and the willingness to try something new.
The first time I made these, I was shocked by how professional they looked. My family couldn’t believe I’d made them from scratch. That’s the magic of this recipe. It delivers impressive results without the stress.
Whether you’re baking for a special someone, bringing dessert to a gathering, or simply treating yourself, these brownies never disappoint. The combination of fudgy red velvet and tangy cheesecake creates a flavor profile that’s both familiar and exciting.
So grab your mixing bowls and preheat that oven. Your kitchen is about to smell absolutely incredible, and you’re about to become everyone’s favorite person. Trust me, once you make these red velvet cheesecake brownies, you’ll be adding them to your regular rotation. They’re that good.
Happy baking, and don’t forget to save me a corner piece!