Best S’mores Cookies Recipe – Easy Step-by-Step Recipe
There’s something magical about biting into a warm, gooey s’mores cookie that instantly transports you to summer evenings by the campfire. These dreamy treats capture everything we love about classic s’mores—the golden graham crackers, melty chocolate, and toasted marshmallows—all wrapped up in a soft, chewy cookie.
What makes them even better? You can enjoy them year-round without needing a campfire or even leaving your kitchen! If you loved my chocolate chip cookies recipe, wait until you taste this campfire-inspired creation that’s become my family’s new favorite treat.
This recipe was generated using artificial intelligence and has not been tested by our team. We truly care about our site family, and many readers report good results from other recipes they’ve tried.
What Are S’mores Cookies?
Ever wondered how to capture that nostalgic campfire experience in cookie form? S’mores cookies are basically your favorite campfire treat reimagined as a bakery-style cookie that you can enjoy any time the craving hits. They’re called s’mores cookies because they contain all the iconic elements—crushed graham crackers in the dough, chunks of chocolate throughout, and gooey marshmallows that get perfectly toasted on top.
As they say, the way to anyone’s heart is through their stomach, and these cookies definitely prove that saying true! Trust me, once you make these, they’ll become your go-to dessert for every occasion.
Why You’ll Love This S’mores Cookies Recipe
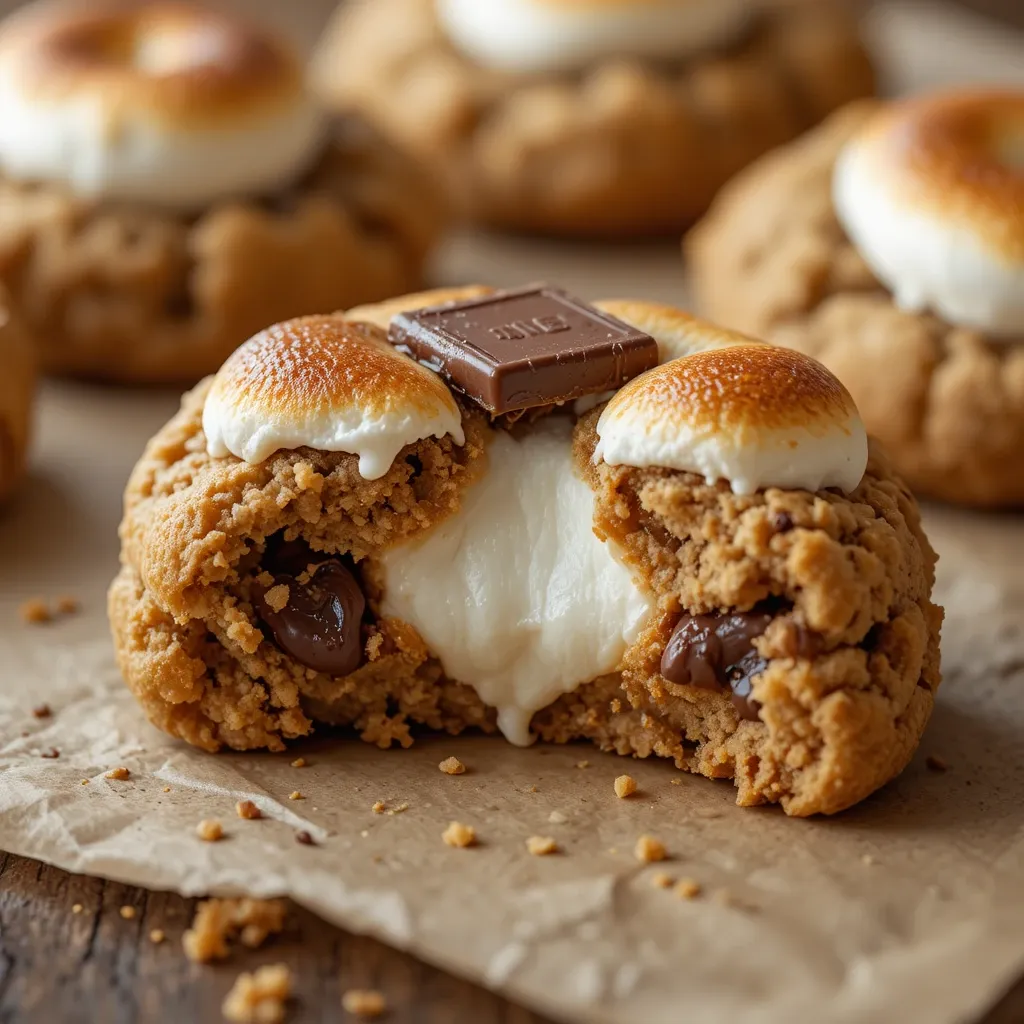
The best part about these s’mores cookies is how they deliver that authentic campfire flavor with a soft, bakery-style texture that melts in your mouth. Each cookie is loaded with three types of chocolate—semi-sweet chips, milk chocolate chunks, and a Hershey’s chocolate square pressed into the center—creating layers of rich, chocolaty goodness in every bite.
Making these at home saves you serious money compared to buying fancy cookies from gourmet bakeries. You can whip up a big batch for the cost of just two or three store-bought cookies, and they taste even better fresh from your own oven.
The graham cracker crumbs mixed into the dough give these cookies that signature s’mores flavor, while the toasted marshmallows on top add both visual appeal and that irresistible gooey texture we all crave. The combination of crunchy, chewy, and melty textures creates a truly special eating experience.
If you enjoyed my peanut butter cookies, you’ll absolutely love how these s’mores cookies take things to the next level with their complex flavors and fun presentation. They’re perfect for parties, bake sales, or simply satisfying your sweet tooth on a cozy evening at home. Give this recipe a try and watch them disappear within minutes!
How to Make S’mores Cookies
Quick Overview
These s’mores cookies are surprisingly easy to make despite their impressive appearance and complex flavors. The graham cracker base gives them structure while keeping them tender, and the combination of melted butter and brown sugar creates that perfect chewy texture.
What makes this recipe special is the toasted marshmallow topping that gets beautifully golden under the broiler, creating a professional bakery look right in your home kitchen.
Total Time Breakdown:
- Prep Time: 20 minutes
- Chill Time: 30 minutes
- Baking Time: 12 minutes per batch
- Broiling Time: 1-2 minutes
- Total Time: Approximately 1 hour 15 minutes
Key Ingredients for S’mores Cookies
For the Cookie Dough:
- 2 cups all-purpose flour
- 1 cup graham cracker crumbs (about 8 full graham crackers, finely crushed)
- 1 teaspoon baking soda
- ½ teaspoon salt
- ¾ cup unsalted butter, melted and slightly cooled
- 1 cup packed light brown sugar
- ½ cup granulated sugar
- 2 large eggs, room temperature
- 2 teaspoons pure vanilla extract
- 1½ cups semi-sweet chocolate chips
- 1 cup milk chocolate chunks
- 12 full-size Hershey’s chocolate bars, broken into squares
For the Topping:
- 24 large marshmallows, cut in half
- Extra graham cracker crumbs for sprinkling (optional)

Step-by-Step Instructions
Step 1: Prepare Your Ingredients
Start by crushing your graham crackers into fine crumbs using a food processor or by placing them in a sealed bag and crushing with a rolling pin. You want them finely ground but not powdery. Set aside. Allow your eggs to come to room temperature by placing them in warm water for about 5 minutes. This helps them incorporate better into the dough.
Step 2: Mix the Dry Ingredients
In a medium bowl, whisk together the all-purpose flour, graham cracker crumbs, baking soda, and salt until well combined. The graham cracker crumbs should be evenly distributed throughout the flour mixture. Set this bowl aside while you prepare the wet ingredients.
Step 3: Cream the Wet Ingredients
In a large mixing bowl, combine the melted butter with both the brown sugar and granulated sugar. Use a wooden spoon or electric mixer to beat them together for about 2 minutes until the mixture is smooth and slightly lighter in color. The sugar should be mostly dissolved into the butter.
Step 4: Add Eggs and Vanilla
Add the eggs one at a time to the butter-sugar mixture, beating well after each addition. The mixture should become lighter and fluffier. Pour in the vanilla extract and mix until everything is fully combined and you have a smooth, glossy mixture.
Step 5: Combine Wet and Dry Ingredients
Gradually add the flour mixture to the wet ingredients, stirring gently with a wooden spoon or using your mixer on low speed. Mix just until no flour streaks remain. Be careful not to overmix, as this can make your cookies tough instead of tender.
Step 6: Fold in the Chocolate
Add the semi-sweet chocolate chips and milk chocolate chunks to your dough. Fold them in gently using a spatula, making sure they’re evenly distributed throughout. The dough will be thick and studded with chocolate pieces.
Step 7: Chill the Dough
Cover your bowl with plastic wrap and refrigerate the dough for at least 30 minutes. This chilling step is crucial because it prevents the cookies from spreading too much during baking and helps develop better flavor. You can chill it for up to 24 hours if you want to prepare ahead.
Step 8: Prepare for Baking
Preheat your oven to 350°F (175°C). Line two large baking sheets with parchment paper or silicone baking mats. This prevents sticking and makes cleanup much easier.
Step 9: Shape the Cookies
Using a large cookie scoop or about 3 tablespoons of dough, roll the dough into balls. Place them on your prepared baking sheets, leaving about 3 inches between each cookie to allow for spreading. You should get about 24 cookies from this recipe.
Step 10: Add Chocolate Squares
Press one Hershey’s chocolate square gently into the top center of each cookie dough ball. Press it down slightly but don’t flatten the cookie completely. The chocolate square will melt beautifully during baking.
Step 11: Bake the Cookies
Bake for 10-12 minutes, or until the edges are golden brown but the centers still look slightly underdone. They will continue cooking on the hot baking sheet after you remove them from the oven. The cookies should be puffed up and just starting to crack on top.
Step 12: Add Marshmallow Topping
Immediately after removing the cookies from the oven, gently press 2 marshmallow halves onto the top of each cookie, cut side down. The heat from the cookies will start melting the marshmallows slightly.
Step 13: Toast the Marshmallows
Turn your oven to broil on high. Return the baking sheet to the oven on the top rack and broil for 1-2 minutes, watching very carefully. The marshmallows should turn golden brown and slightly puffy. They can burn quickly, so don’t walk away during this step!
Step 14: Cool and Serve
Remove the cookies from the oven and let them cool on the baking sheet for 5 minutes. The marshmallows will deflate slightly as they cool. Transfer to a wire rack to cool completely, or enjoy them warm for the ultimate gooey experience.
What to Serve S’mores Cookies With
These cookies are delicious on their own, but they pair beautifully with cold milk—the classic cookie companion that balances out the sweetness perfectly. For a more grown-up treat, serve them alongside a cup of rich hot chocolate or coffee.
You can create a fun dessert board by serving these cookies with fresh strawberries, banana slices, and additional graham crackers for dipping. This makes a great interactive dessert for parties.
For a truly indulgent experience, sandwich a scoop of vanilla ice cream between two cookies to make s’mores cookie ice cream sandwiches. The contrast of cold ice cream with the chewy cookie is absolutely divine.
They also work wonderfully as part of a dessert platter alongside brownies and your favorite fruit tart for variety.
Top Tips for Perfecting S’mores Cookies
Use Room Temperature Eggs Cold eggs don’t incorporate as well into your dough and can result in uneven texture. Let them sit out for 30 minutes or place them in warm water for 5 minutes before using.
Don’t Skip the Chilling Step Chilling the dough prevents excessive spreading and creates thicker, chewier cookies with better texture. If you’re short on time, chill for at least 30 minutes, but overnight is even better for developing deeper flavor.
Watch the Broiler Carefully Marshmallows can go from perfectly golden to burnt in seconds under the broiler. Stay by the oven and remove the cookies the moment they reach your desired level of toastiness. I recommend cracking the oven door slightly and watching constantly.
Use Fresh Baking Soda Old baking soda loses its leavening power, resulting in flat, dense cookies. If your baking soda is older than 6 months, replace it for best results.
Measure Flour Correctly Too much flour makes dry, cakey cookies. Use the spoon-and-level method: spoon flour into your measuring cup and level off with a knife rather than scooping directly from the bag, which compacts the flour.
Customize Your Chocolate Feel free to use all semi-sweet chips, all milk chocolate, or even add some dark chocolate chunks for a more sophisticated flavor. White chocolate chips also work beautifully if you prefer less intense chocolate flavor.
Try Different Marshmallows Regular marshmallows work perfectly, but mini marshmallows create a different look, or you can use flavored marshmallows like vanilla or strawberry for a fun twist.
Common Baking Mistakes to Avoid
Overmixing the Dough Once you add the flour, mix just until combined. Overmixing develops the gluten in flour, creating tough, dense cookies instead of tender ones. Stop mixing as soon as you don’t see any dry flour.
Baking at Wrong Temperature Too hot and your cookies will burn on the outside while staying raw inside. Too cool and they’ll spread too much and turn out flat. Use an oven thermometer to verify your oven temperature is accurate at 350°F.
Not Spacing Cookies Properly These cookies spread during baking. Place only 6 cookies per standard baking sheet, leaving at least 3 inches between each one to prevent them from merging together into one giant cookie blob.
Overbaking The cookies should look slightly underdone when you remove them from the oven. They’ll continue cooking on the hot baking sheet. If they look completely done in the oven, they’ll be overbaked once cooled.
Using Cold Butter This recipe calls for melted butter, not softened. Make sure it’s melted and slightly cooled before adding to prevent cooking the eggs when you mix them in.
Burning the Marshmallows The broiler is extremely hot. Set a timer for 1 minute and check constantly. Some ovens have very powerful broilers that will toast marshmallows in 30-45 seconds.
Not Using Parchment Paper The marshmallow topping gets very sticky. Parchment paper or silicone mats are essential for easy removal without cookies sticking or bottoms burning.
Storing and Reheating Tips
Room Temperature Storage: Store your s’mores cookies in an airtight container at room temperature for up to 4 days. Place parchment paper between layers to prevent the marshmallow tops from sticking together. They’ll stay soft and chewy throughout this time.
Refrigerator Storage: If your kitchen is very warm or humid, you can refrigerate the cookies in an airtight container for up to 1 week. Let them come to room temperature before eating, or warm them briefly for that fresh-baked taste.
Freezing Instructions: These cookies freeze beautifully! Place cooled cookies in a single layer on a baking sheet and freeze until solid (about 2 hours). Then transfer to a freezer-safe container or bag with parchment paper between layers. They’ll keep for up to 3 months. Thaw at room temperature for about 30 minutes before serving.
Freezing Cookie Dough: You can also freeze the unbaked cookie dough balls. Shape the dough, place on a baking sheet, and freeze until solid. Transfer to a freezer bag for up to 3 months. Bake from frozen, adding 2-3 extra minutes to the baking time. Add marshmallows and broil as directed.
Reheating Instructions: To recapture that fresh-baked texture, warm cookies in a 300°F oven for 3-4 minutes. This softens them up and makes the chocolate slightly melty again. You can also microwave individual cookies for 8-10 seconds, though this won’t toast the marshmallows.
Best Practices: For the best texture, store cookies only after they’ve completely cooled. Warm cookies create condensation in containers, making them soggy. Never store cookies in the refrigerator unless absolutely necessary, as this can dry them out.
Frequently Asked Questions
Can I make these cookies without a broiler? Yes! If you don’t have a broiler or prefer not to use it, you can use a kitchen torch to toast the marshmallows instead. This gives you more control and creates beautiful caramelization. Alternatively, skip toasting altogether for a different but still delicious result.
Why are my cookies spreading too much? Cookies spread excessively when the dough isn’t chilled enough, the butter is too warm, or there’s too much sugar. Make sure to chill your dough for the full 30 minutes and check that your oven temperature is accurate. Using melted butter that’s completely cooled also helps.
Can I use homemade graham crackers? Absolutely! Homemade graham crackers will give your cookies an even more special flavor. Just make sure they’re completely crispy before crushing them into crumbs for the best texture.
How do I prevent marshmallows from burning? The key is constant supervision under the broiler. Stay right by the oven and watch through the window. Remove the cookies the moment the marshmallows turn golden. Every broiler is different, so your timing may vary from 30 seconds to 2 minutes.
Can I make these cookies smaller or larger? Yes! For smaller cookies, use 1-2 tablespoons of dough and reduce baking time to 8-10 minutes. For larger cookies, use 4 tablespoons and increase to 14-15 minutes. Adjust the amount of toppings accordingly.
What’s the best way to crush graham crackers? A food processor gives the finest, most even crumbs. Alternatively, place whole graham crackers in a sealed plastic bag and crush with a rolling pin. You want fine crumbs but not powder for the best texture.
Can I substitute the chocolate? Definitely! Try dark chocolate chips, white chocolate, butterscotch chips, or even peanut butter chips. Using Hershey’s chocolate bars gives that authentic s’mores taste, but any chocolate bar works.
Will these cookies stay gooey? Yes! The marshmallow topping stays soft and slightly gooey even after cooling, and the chocolate chips create pockets of melty goodness. The cookie itself has a chewy texture thanks to the brown sugar and proper baking time.
Nutrition Information
| Nutrient | Amount Per Cookie |
|---|---|
| Calories | 285 |
| Total Fat | 12g |
| Saturated Fat | 7g |
| Cholesterol | 35mg |
| Sodium | 145mg |
| Total Carbohydrates | 42g |
| Dietary Fiber | 2g |
| Sugars | 28g |
| Protein | 3g |
Nutritional values are approximate and based on one cookie (recipe makes 24 cookies)
These s’mores cookies have become my absolute favorite way to enjoy that classic campfire treat without needing to plan an outdoor adventure. The combination of graham cracker-infused dough, multiple types of chocolate, and perfectly toasted marshmallows creates something truly special that both kids and adults can’t resist.
What I love most about this recipe is how it brings back memories of summer nights and campfire gatherings, but you can make them any time of year right in your cozy kitchen. They’re perfect for birthday parties, holiday cookie exchanges, bake sales, or simply when you’re craving something sweet and nostalgic.
The recipe might seem like it has several steps, but each one is straightforward and contributes to the final amazing result. Once you’ve made these a couple times, you’ll find they come together quickly and easily.
I encourage you to make these cookies your own by experimenting with different chocolates, adding extra marshmallows, or even sprinkling some sea salt on top before baking. Baking should be fun and creative, and this recipe gives you a perfect foundation to work with.
Happy baking, and I hope these s’mores cookies bring as much joy to your home as they do to mine!