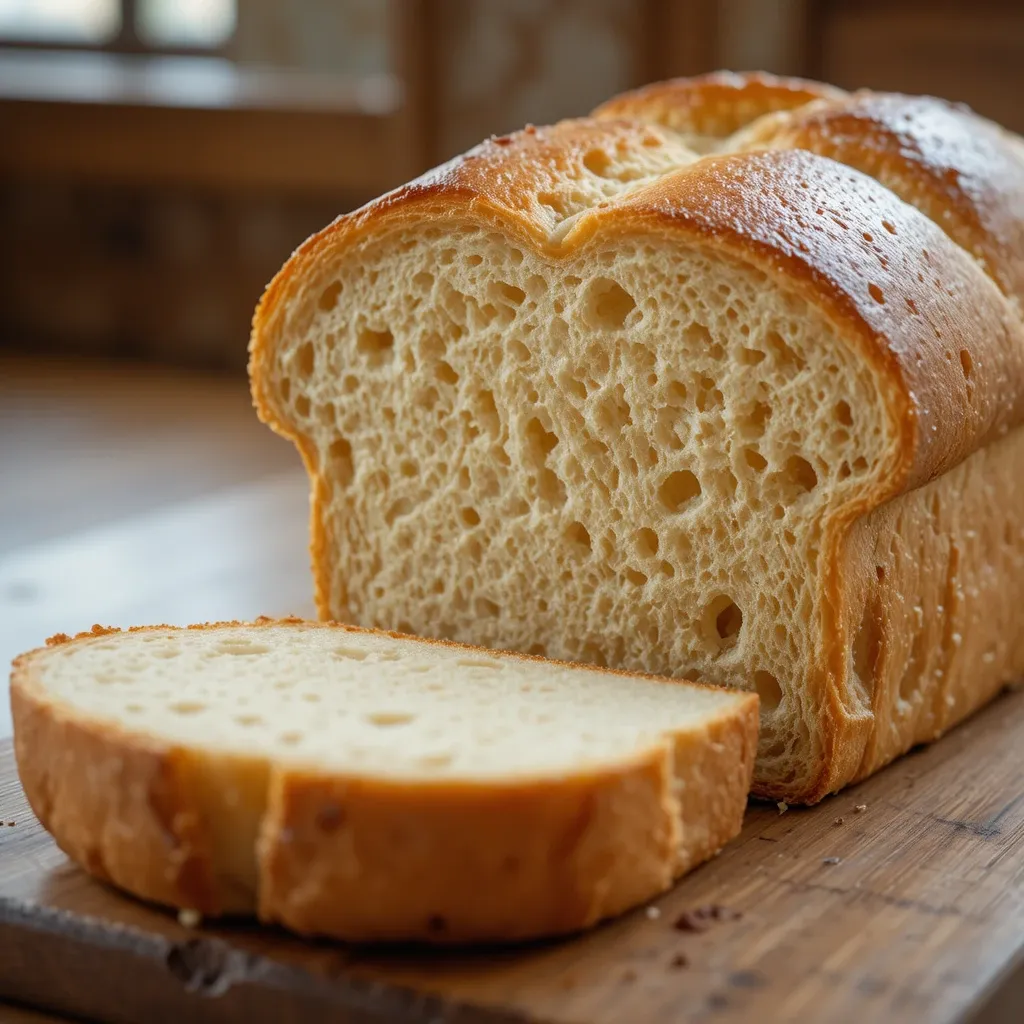
Soft Sourdough Sandwich Bread Recipe – Step-by-Step Guide
There’s something magical about pulling a perfectly golden loaf of soft sourdough sandwich bread from your oven. The aroma fills your kitchen, the crust gives that satisfying crackle, and inside? Pure pillowy perfection.
This isn’t your typical crusty artisan loaf. This soft sourdough sandwich bread combines the tangy depth of traditional sourdough with the tender, slice-able texture your family craves for everything from morning toast to lunchbox sandwiches.
This recipe was fully created by AI and remains untested at home by us. Our readers matter deeply to us, and many have shared kind feedback after trying other site recipes.
What is Soft Sourdough Sandwich Bread?
Ever wondered why we call it “soft” sourdough sandwich bread when most sourdough is crusty and chewy? Here’s the delightful truth: this recipe takes the complex flavors of fermented dough and transforms them into something completely different.
It’s sourdough that traded its hiking boots for house slippers! Instead of that jaw-workout crust, you get a tender crumb that’s perfect for stacking turkey and cheese. They say the way to anyone’s heart is through their stomach, and this bread makes a pretty compelling argument. Ready to transform your sandwich game forever?
Why You’ll Love This Soft Sourdough Sandwich Bread
The Perfect Balance of Flavor and Texture
This soft sourdough sandwich bread delivers that signature tangy sourdough flavor without overwhelming your taste buds. The fermentation process creates incredible depth, but the addition of enriching ingredients like butter and a touch of honey keeps everything beautifully balanced. You get complexity without the sourness that makes some people shy away from traditional sourdough.
Budget-Friendly Baking at Home
Let’s talk savings. A single loaf of quality sourdough sandwich bread at the store costs anywhere from $6 to $10. This recipe makes two gorgeous loaves for less than $3 total. Plus, you control exactly what goes into your bread—no preservatives, no mystery ingredients, just wholesome goodness. If you’ve enjoyed my honey whole wheat bread recipe, you’ll appreciate how this soft sourdough sandwich bread takes homemade baking to the next level.
Versatile and Family-Approved
This bread is incredibly versatile. It toasts beautifully for breakfast, makes restaurant-quality grilled cheese, and holds up perfectly to hearty sandwich fillings without falling apart. Kids love the soft texture, and adults appreciate the sophisticated flavor. It’s mild enough for picky eaters but interesting enough to impress your foodie friends.
The slightly tangy notes pair wonderfully with both sweet and savory toppings. Try it with almond butter and sliced bananas in the morning, or pile on roasted vegetables and hummus for lunch. The possibilities are truly endless, and your family will be requesting this bread weekly.
How to Make Soft Sourdough Sandwich Bread
Quick Overview
This soft sourdough sandwich bread requires patience but minimal hands-on time. The sourdough starter does most of the work, developing those complex flavors while you go about your day. The actual hands-on preparation takes about 20 minutes, spread across two days.
Time Breakdown:
- Prep Time: 20 minutes
- First Rise: 8-12 hours (overnight)
- Shaping & Second Rise: 2-4 hours
- Baking Time: 40 minutes
- Total Time: Approximately 16-18 hours (mostly inactive)
The long fermentation makes the bread easier to digest and develops incredible flavor. Don’t let the timeline intimidate you—most of it is simply waiting while the dough does its thing!
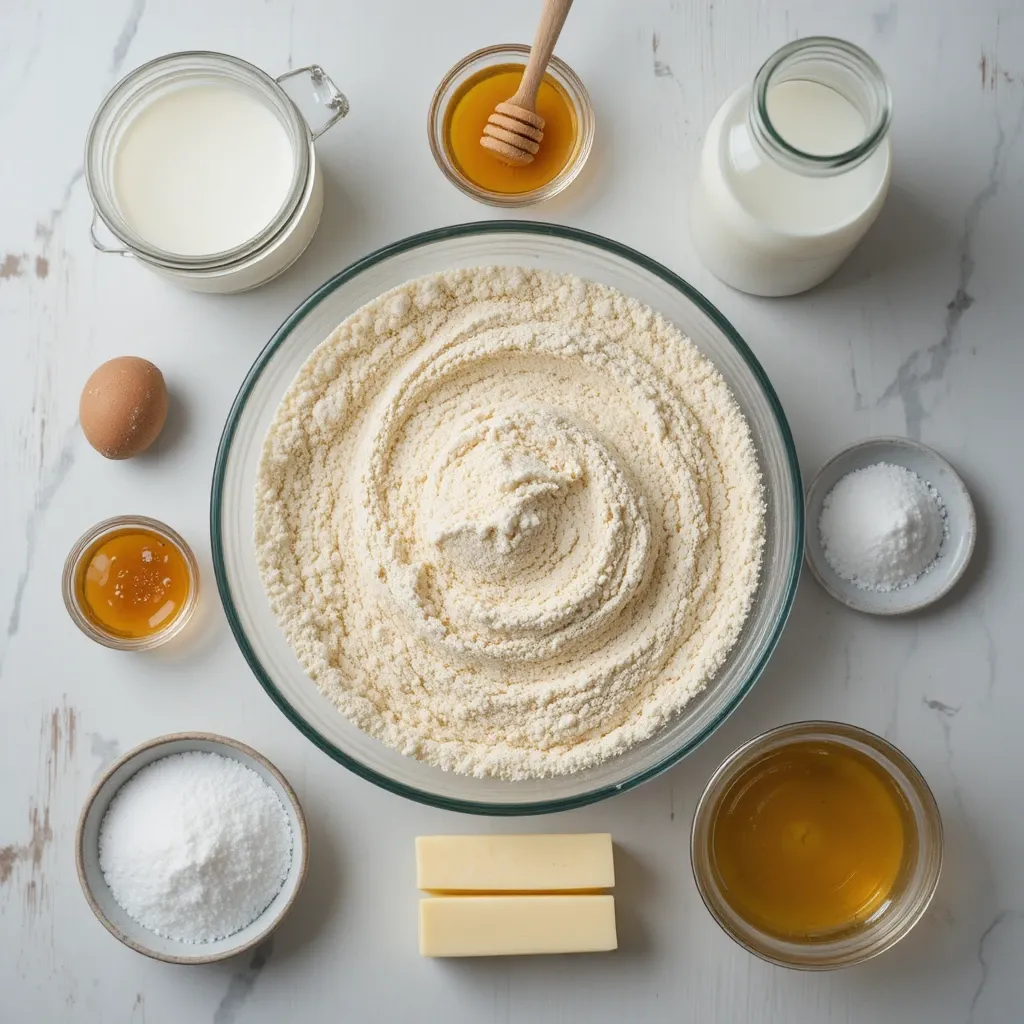
Key Ingredients for Soft Sourdough Sandwich Bread
For the Dough:
- 1 cup (227g) active sourdough starter, fed and bubbly
- 1½ cups (360ml) warm whole milk (around 100°F)
- ¼ cup (60ml) warm water
- ¼ cup (50g) granulated sugar
- 5 cups (625g) bread flour, plus more for kneading
- 2½ teaspoons (7g) salt
- ¼ cup (57g) unsalted butter, softened
- 2 tablespoons (42g) honey
For Brushing:
- 2 tablespoons melted butter (optional, for soft crust)
The combination of milk and butter creates that signature soft texture, while the sourdough starter provides leavening and flavor. The sugar and honey feed the starter and add a subtle sweetness that balances the tang perfectly.
Step-by-Step Instructions
Step 1: Feed Your Starter
Begin by feeding your sourdough starter 4-6 hours before you plan to mix your dough. You want it active, bubbly, and doubled in size. A healthy starter is the foundation of great sourdough bread. If your starter passes the float test (a small spoonful floats in water), you’re ready to proceed.
Step 2: Mix the Dough
In a large mixing bowl, combine the warm milk, water, sugar, and honey. Stir until the sugar dissolves. Add your active sourdough starter and whisk everything together until well combined. The mixture should look slightly frothy.
Add 4 cups of the bread flour and the salt. Stir with a wooden spoon or Danish dough whisk until a shaggy dough forms. The dough will look rough and uneven at this stage—that’s exactly what you want.
Step 3: Incorporate the Butter
Add the softened butter in small pieces, working it into the dough with your hands or a spoon. This takes a few minutes, but the butter will eventually incorporate completely. Once the butter is mixed in, add the remaining cup of flour gradually, mixing as you go.
Step 4: Knead the Dough
Turn the dough out onto a lightly floured surface. Knead for 8-10 minutes until the dough becomes smooth, elastic, and slightly tacky but not sticky. You should be able to stretch a small piece of dough thin enough to see light through it without it tearing immediately (this is called the windowpane test).
If the dough feels too sticky, add flour one tablespoon at a time. If it’s too dry, wet your hands and continue kneading to add moisture gradually.
Step 5: First Rise (Bulk Fermentation)
Place the dough in a large, lightly greased bowl, turning once to coat all sides. Cover with a damp kitchen towel or plastic wrap. Let it rise at room temperature (around 70-75°F) for 8-12 hours, or until doubled in size.
This slow rise develops the sourdough flavor while the enriched dough stays soft. I usually mix my dough in the evening and let it rise overnight on my kitchen counter.
Step 6: Shape the Loaves
Once the dough has doubled, gently deflate it and turn it out onto a lightly floured surface. Divide the dough in half for two loaves. Let the dough rest for 10 minutes—this relaxes the gluten and makes shaping easier.
To shape each loaf, gently pat the dough into a rectangle about 8 inches wide and 12 inches long. Starting from the short end, roll the dough tightly into a log, pinching the seam closed as you go. Tuck the ends under and pinch to seal.
Step 7: Second Rise
Place each shaped loaf seam-side down in a greased 9×5-inch loaf pan. Cover loosely with a kitchen towel and let rise until the dough crowns about 1 inch above the rim of the pan, typically 2-4 hours depending on your room temperature.
Don’t skip this step! Proper proofing ensures your bread has great volume and texture.
Step 8: Prepare for Baking
About 30 minutes before baking, preheat your oven to 375°F (190°C). Position a rack in the lower third of your oven for even baking.
Step 9: Bake the Bread
Once the loaves have finished their second rise, place them in the preheated oven. Bake for 38-42 minutes, until the tops are deep golden brown and the internal temperature reaches 190-200°F.
If the tops are browning too quickly, tent loosely with aluminum foil for the last 10-15 minutes of baking.
Step 10: Cool and Finish
Remove the loaves from the oven and immediately brush the tops with melted butter for an ultra-soft crust. Let the bread cool in the pans for 10 minutes, then turn out onto a wire rack.
Here’s the hardest part: resist slicing for at least 30 minutes! The bread continues to set as it cools, and cutting too early can result in a gummy texture.
What to Serve Soft Sourdough Sandwich Bread With
This versatile bread pairs beautifully with countless meals and toppings. For breakfast, try thick slices toasted and topped with mashed avocado, everything bagel seasoning, and a perfectly fried egg. The bread’s sturdy texture holds up wonderfully to runny yolks.
For lunch, this soft sourdough sandwich bread makes incredible sandwiches. Try a classic combination of roasted turkey, sharp cheddar, crisp lettuce, and tangy mustard. The bread’s subtle tang complements savory fillings perfectly.
It also makes outstanding French toast—the slightly dense crumb soaks up the egg mixture without falling apart. Serve with fresh berries and a drizzle of pure maple syrup for a weekend breakfast treat.
For dinner, serve thick slices alongside hearty soups and stews. This bread is fantastic for mopping up every last drop of tomato basil soup, creamy chicken stew, or vegetable chili.
Don’t overlook simple pleasures either. Sometimes a thick slice with quality butter and a sprinkle of flaky sea salt is all you need.
Top Tips for Perfecting Soft Sourdough Sandwich Bread
Use a Fed, Active Starter
Your sourdough starter should be at its peak—bubbly, doubled in size, and passing the float test. A sluggish starter won’t give you the rise or flavor you want. Feed your starter 4-6 hours before mixing your dough and use it when it’s most active.
Temperature Matters
Dough temperature affects fermentation speed dramatically. In warmer kitchens (above 75°F), your dough will rise faster. In cooler environments, it takes longer. Adjust your timing accordingly. If your kitchen is very cold, place the dough in your turned-off oven with the light on to create a warm environment.
Don’t Rush the Second Rise
Many bakers underbake their second rise, resulting in dense bread. The dough should crown at least 1 inch above the rim of your loaf pan. When you gently press the dough with your finger, it should slowly spring back but leave a slight indentation.
Check Internal Temperature
The most reliable way to know when your bread is done is checking internal temperature. It should reach 190-200°F in the center. An instant-read thermometer is worth every penny for consistent results.
Substitutions and Variations
You can replace up to 1 cup of bread flour with whole wheat flour for added nutrition and a nuttier flavor. Replace the milk with non-dairy alternatives like oat or almond milk—just choose unsweetened varieties. If you don’t have honey, you can use all sugar instead, or try maple syrup for a different flavor profile.
For a dairy-free version, use plant-based milk and replace the butter with softened coconut oil or vegan butter.
Troubleshooting Common Issues
If your bread is dense, your starter may not have been active enough, or you may have under-proofed the dough. If it’s dry, you might have added too much flour during kneading—remember, the dough should be slightly tacky.
If the crust is too hard, brush with butter immediately after baking and store in a plastic bag once completely cooled.
Storing and Reheating Tips
Store your soft sourdough sandwich bread at room temperature in a plastic bag or airtight container for up to 4 days. The enriched dough stays softer longer than lean sourdough breads.
For longer storage, slice the bread and freeze individual slices in a freezer bag with parchment paper between slices. Frozen slices can go straight into the toaster—no thawing needed! Properly stored, frozen bread stays fresh for up to 3 months.
To freeze whole loaves, wrap tightly in plastic wrap, then in aluminum foil. Thaw at room temperature for several hours before slicing.
To refresh day-old bread, wrap the loaf in aluminum foil and warm in a 300°F oven for 10-15 minutes. The bread will taste freshly baked again!
Avoid refrigerating bread, as this actually causes it to go stale faster. The cold temperature accelerates starch retrogradation, making the bread dry and crumbly.
Tips for Avoiding Common Baking Mistakes
Mistake 1: Using Cold Ingredients
Cold milk and butter don’t incorporate well and can slow down fermentation. Always use room temperature or slightly warm ingredients. This helps the dough come together smoothly and encourages proper starter activity.
Mistake 2: Over-Kneading or Under-Kneading
Over-kneaded dough becomes tough and tight, while under-kneaded dough won’t develop enough gluten for proper structure. Knead until the dough is smooth and elastic, passing the windowpane test. This typically takes 8-10 minutes by hand.
Mistake 3: Skipping the Rest Period
When you divide and shape your dough, let it rest for 10 minutes first. This brief rest relaxes the gluten and makes shaping much easier. Trying to shape tight dough results in tears and an uneven loaf.
Mistake 4: Uneven Shaping
Take your time shaping the loaves. Roll tightly and evenly, ensuring there are no air pockets. Uneven shaping leads to tunnels in the finished bread and an irregular crumb structure.
Mistake 5: Opening the Oven Door Too Often
Every time you open the oven door, you lose precious heat. This can cause the bread to collapse or bake unevenly. Check your bread through the oven window and only open the door if you need to tent with foil.
Mistake 6: Cutting Too Soon
I know it’s tempting, but cutting into hot bread releases too much steam, leaving you with a gummy interior. Let your bread cool for at least 30 minutes. For the cleanest slices, wait until it’s completely cool.
Mistake 7: Storing Improperly
Never store bread in the refrigerator unless it contains perishable fillings. The fridge accelerates staling. Keep bread at room temperature in a plastic bag or bread box for the best texture.
Frequently Asked Questions
Can I make this recipe without a stand mixer?
Absolutely! This soft sourdough sandwich bread is easily made by hand. The kneading takes about 10 minutes, but it’s great exercise and gives you a better feel for the dough. The dough should be smooth, elastic, and slightly tacky when properly kneaded.
Why is my sourdough sandwich bread dense?
Dense bread usually results from inactive starter, under-proofing, or insufficient kneading. Make sure your starter is bubbly and active before using it. Allow full time for both rises—the dough should double in size during bulk fermentation and crown above the pan during the second rise.
Can I use all-purpose flour instead of bread flour?
Yes, but your bread will be slightly less chewy. Bread flour has higher protein content, which develops more gluten for better structure. If using all-purpose flour, your bread will still be delicious but may have a slightly more tender crumb.
How do I know when my bread is done baking?
The most reliable method is checking internal temperature—it should reach 190-200°F. The bread should also be deep golden brown on top and sound hollow when tapped on the bottom.
Can I add mix-ins to this recipe?
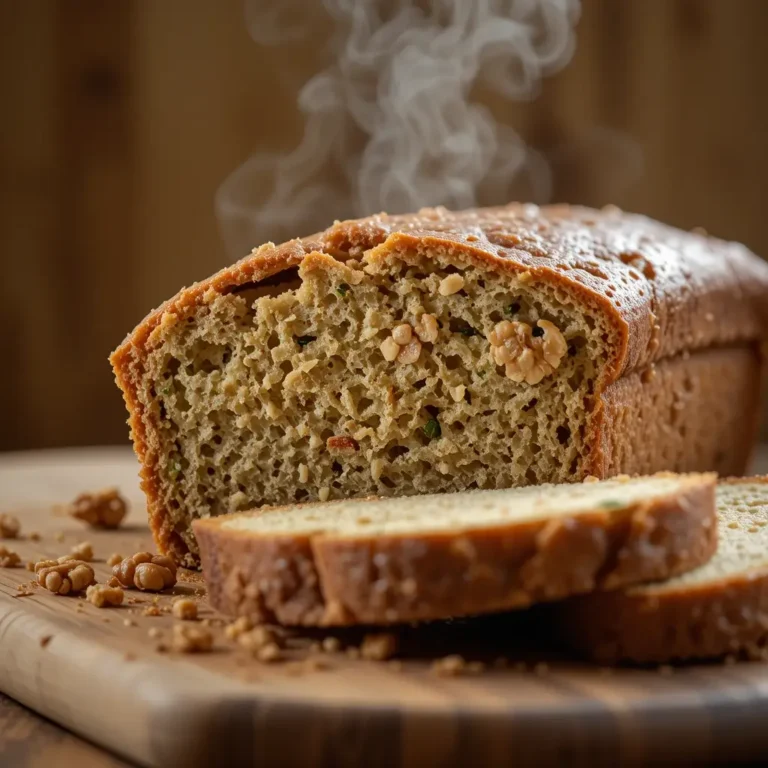
Definitely! Fold in additions like dried herbs, cheese, seeds, or dried cranberries during the last few minutes of kneading. Don’t add more than 1 cup total of mix-ins, or they’ll interfere with gluten development.
Why does my bread have a gummy texture?
This usually happens when bread is sliced too soon while still warm. The interior needs time to set properly. Always let your bread cool for at least 30 minutes before slicing.
Can I make this recipe in a bread machine?
Yes, though you’ll miss out on some of the hands-on experience. Add ingredients to your bread machine in the order recommended by your manufacturer, use the basic white bread setting, and select your preferred crust color.
How long does homemade sourdough sandwich bread last?
At room temperature in proper storage, this bread stays fresh for 4-5 days. Because of the enriched dough with butter and milk, it stays softer longer than lean sourdough breads. For longer storage, freeze slices for up to 3 months.
Nutrition Information
| Nutrient | Per Slice (1/16 of loaf) |
|---|---|
| Calories | 165 |
| Total Fat | 3.5g |
| Saturated Fat | 2g |
| Cholesterol | 10mg |
| Sodium | 245mg |
| Total Carbohydrates | 28g |
| Dietary Fiber | 1g |
| Sugars | 4g |
| Protein | 5g |
Nutritional values are approximate and may vary based on specific ingredients used.
Making soft sourdough sandwich bread at home transforms your daily meals from ordinary to extraordinary. The process might seem intimidating at first, but once you’ve made it a few times, it becomes second nature.
The beauty of this recipe lies in its flexibility. You can mix the dough in the evening and wake up to perfectly fermented dough ready for shaping. The slow fermentation not only develops incredible flavor but also makes the bread easier to digest.
There’s something deeply satisfying about slicing into a loaf you’ve made from scratch. The tender crumb, the subtle tang, the way it toasts to perfection—this soft sourdough sandwich bread will quickly become a kitchen staple.
Your family will notice the difference immediately. Sandwiches taste better. Toast is more satisfying. Even simple bread and butter becomes a treat worth savoring.
Don’t be discouraged if your first loaf isn’t perfect. Sourdough baking is as much art as science, and every baker’s kitchen is different. Pay attention to your dough, learn how it feels at each stage, and adjust accordingly.
Soon you’ll be confidently producing beautiful loaves every single week. Your friends will ask for your secret. Your family will request this bread specifically. And you’ll have the satisfaction of knowing exactly what goes into every slice.
So gather your ingredients, feed your starter, and let’s bake some incredible soft sourdough sandwich bread together. Your kitchen—and your sandwiches—will never be the same!
Ready to start baking? Pin this recipe for later and share your results in the comments below!