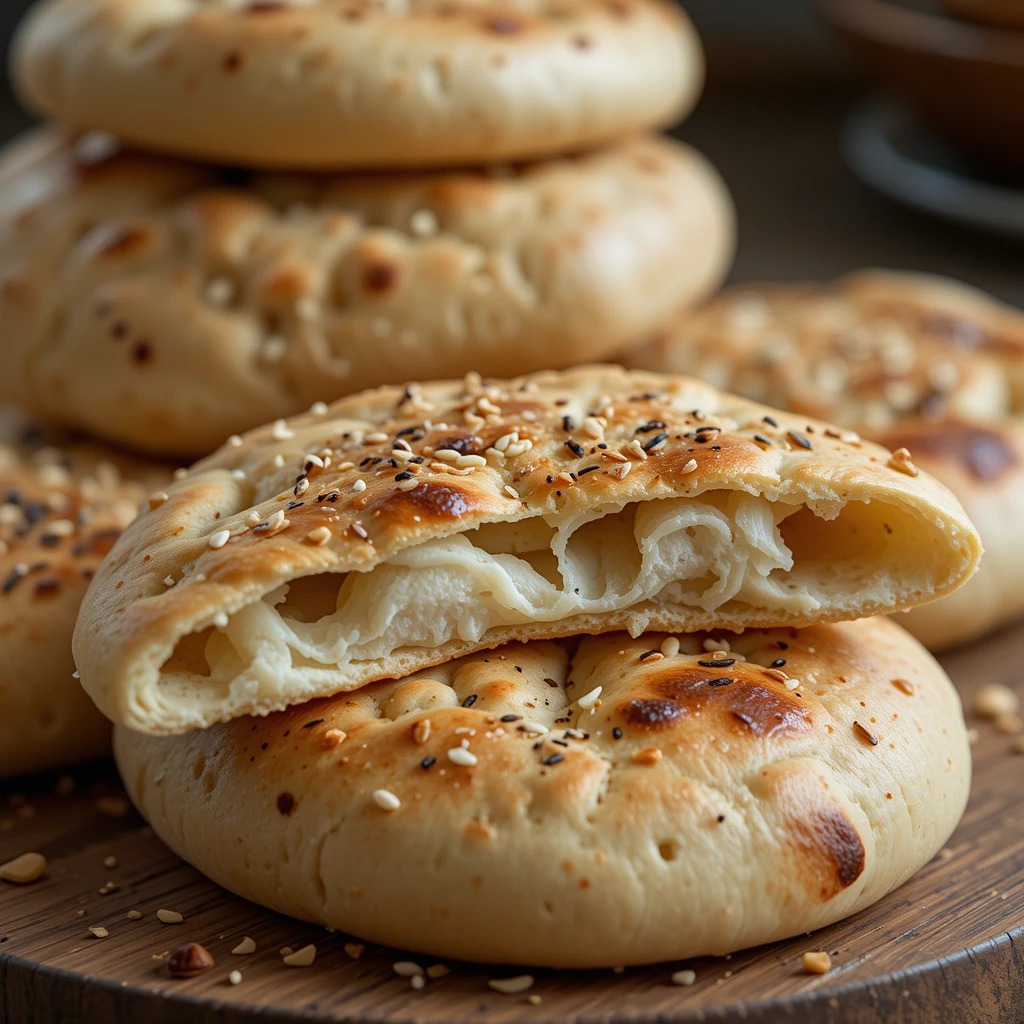
Fluffy Sourdough Pita Bread Recipe – Perfect Pockets Every Time
Imagine biting into warm, pillowy sourdough pita bread with that signature pocket just waiting to be filled with your favorite ingredients. There’s something magical about watching these flatbreads puff up in the oven like little edible balloons!
Here’s a fun fact: pita bread dates back over 4,000 years, making it one of humanity’s oldest breads. This sourdough version takes that ancient tradition and adds gut-friendly fermentation benefits. It’s surprisingly simple to make, ready in about 24 hours (mostly hands-off time), and perfect for family dinners or meal prep.
If you loved my sourdough focaccia recipe, you’ll adore how this bread transforms simple ingredients into something extraordinary. Let’s dive into making the best sourdough pita bread together!
This recipe was generated using artificial intelligence and has not been made in our kitchen. We care about every reader, and feedback from people who tried other recipes here has been positive.
What is Sourdough Pita Bread?
Ever wondered why pita bread has that convenient pocket? It’s pure kitchen science magic! Sourdough pita bread combines the tangy depth of wild yeast fermentation with the ancient Middle Eastern flatbread tradition. Unlike regular pita made with commercial yeast, this version develops complex flavors through slow fermentation, creating a slightly sour, incredibly aromatic bread.
The saying goes, “the way to a man’s heart is through his stomach,” and honestly, nothing proves this better than fresh, warm pita straight from the oven. Ready to become the pita bread hero in your household?
Why You’ll Love This Sourdough Pita Bread
The Flavor is Unmatched
The sourdough starter brings an incredible depth of flavor that store-bought pita simply cannot match. Each bite offers subtle tanginess, nutty undertones, and that distinctive sourdough aroma that fills your entire kitchen. The crust gets beautifully golden and slightly crispy while the interior stays soft and tender.
Budget-Friendly Home Cooking
Making sourdough pita bread at home costs a fraction of what you’d pay for artisan bakery versions. With just flour, water, salt, and your sourdough starter, you can produce a dozen pitas for less than the price of two store-bought packages. Plus, you control every ingredient—no preservatives, no mystery additives, just pure, wholesome bread.
Endless Versatility
These pitas are your blank canvas for countless meals. Fill them with falafel and tahini, stuff them with grilled vegetables and hummus, or use them as pizza bases. Brush them with olive oil and za’atar for a simple snack, or tear them up for the best bread salad you’ve ever tasted. If you enjoyed my sourdough naan recipe, you’ll appreciate how these pitas offer similar versatility with their own unique character.
The Nutritional Benefits
Sourdough fermentation breaks down phytic acid, making minerals more bioavailable and easier to digest. Many people who struggle with regular bread find sourdough much gentler on their digestive system. The wild yeast and beneficial bacteria create prebiotics that support gut health.
Why settle for boring store-bought pita when you can create restaurant-quality bread right in your own kitchen? Let’s get baking!
How to Make Sourdough Pita Bread
Quick Overview
This sourdough pita bread recipe is easier than you might think. The dough comes together quickly, requiring just a few simple ingredients and basic mixing. The bulk fermentation happens overnight, so the dough does most of the work while you sleep. Each pita takes only 2-3 minutes to bake, puffing up dramatically in a hot oven. The result is soft, flavorful bread with that perfect pocket.
Time Breakdown:
- Active prep time: 20 minutes
- Bulk fermentation: 8-12 hours (overnight)
- Shaping and resting: 30 minutes
- Baking: 15-20 minutes (for all pitas)
- Total time: Approximately 24 hours (mostly hands-off)
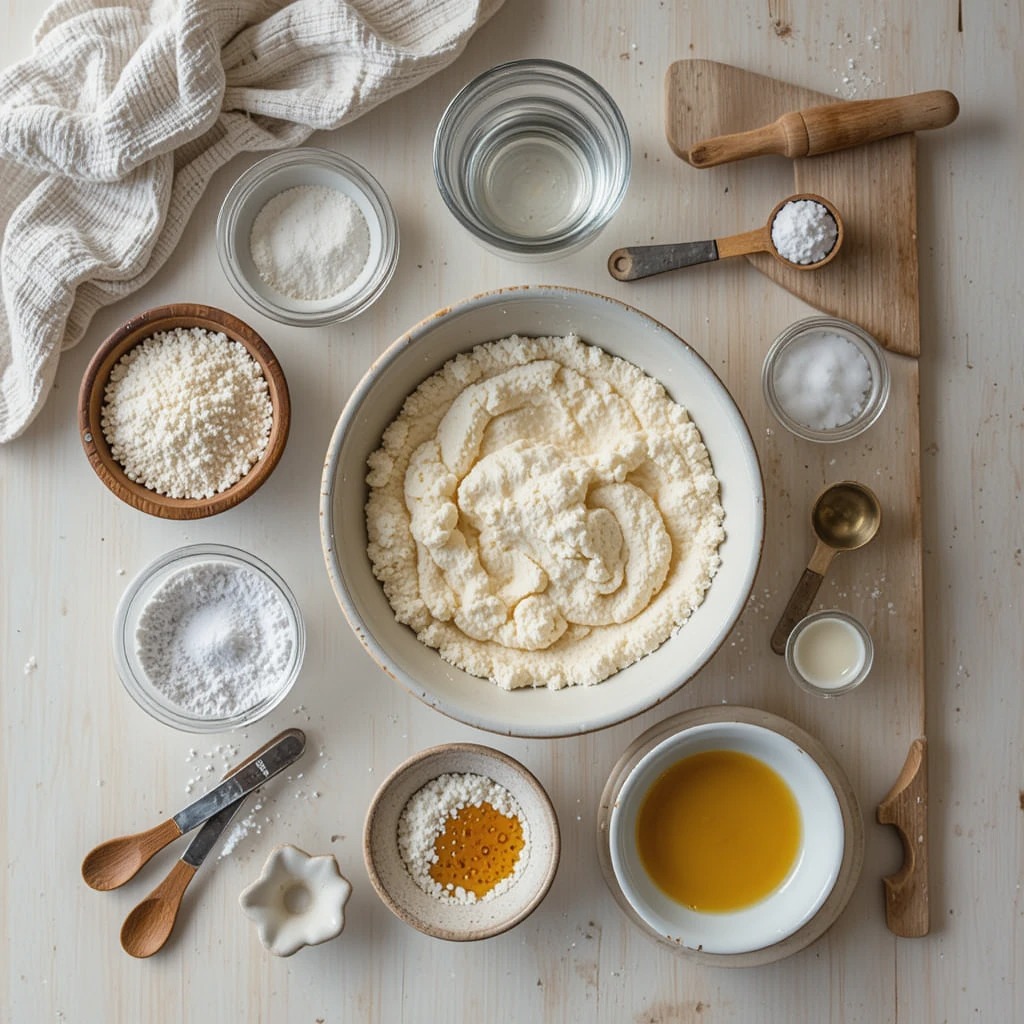
Key Ingredients for Sourdough Pita Bread
For the Dough:
- 200g active sourdough starter (100% hydration, fed and bubbly)
- 500g bread flour or all-purpose flour
- 280g lukewarm water
- 10g salt
- 15g olive oil (optional, for softer texture)
- 5g honey or sugar (optional, helps with browning)
For Finishing:
- Extra flour for dusting
- Olive oil for brushing (optional)
- Za’atar, sesame seeds, or herbs (optional)
Pro tip: Use a kitchen scale for the most accurate results. Weight measurements ensure consistent success every time.
Step-by-Step Instructions
How do I prepare the sourdough starter?
About 4-6 hours before you plan to mix your dough, feed your sourdough starter. Use equal parts flour and water (by weight) to refresh it. For this recipe, you’ll need 200g of active starter, so feed at least 250g total. Your starter should be bubbly, doubled in size, and pass the float test—drop a small spoonful in water, and it should float when ready.
How do I mix the dough?
In a large mixing bowl, combine the water and active sourdough starter. Stir until the starter dissolves into the water—it’s okay if it’s slightly cloudy. Add the flour and mix with your hands or a wooden spoon until no dry flour remains. The dough will look shaggy and rough. Cover the bowl with a damp towel and let it rest for 30-60 minutes. This autolyse period allows the flour to fully hydrate and makes the dough easier to work with.
How do I add salt and develop the dough?
After the rest period, sprinkle the salt over the dough. If using olive oil and honey, add them now. Wet your hands slightly and use a pinching motion to incorporate the salt throughout the dough. Then perform a series of stretch and folds: grab one side of the dough, stretch it up, and fold it over itself. Rotate the bowl 90 degrees and repeat. Do this for about 5 minutes until the dough becomes smoother and more cohesive. The dough should feel slightly elastic and less sticky.
How long should I ferment the dough?
Cover the bowl tightly with plastic wrap or a damp towel. Leave it at room temperature (68-72°F is ideal) for 8-12 hours, typically overnight. The dough should roughly double in size and show bubbles on the surface and sides. In warmer kitchens, this might take 6-8 hours. In cooler environments, it could take up to 14 hours. Don’t rush this step—proper fermentation is key to flavor development.
How do I shape the pitas?
Turn the fermented dough onto a lightly floured work surface. Gently deflate it and divide it into 10-12 equal pieces (about 90-100g each). Shape each piece into a smooth ball by pulling the edges underneath and rolling it against the counter with a cupped hand. Place the balls on a floured surface, cover with a towel, and let them rest for 20-30 minutes. This bench rest relaxes the gluten and makes rolling easier.
How do I roll out the pita bread?
Working with one dough ball at a time (keep others covered), flatten it slightly with your palm. Using a rolling pin, roll it into a circle about 6-7 inches in diameter and roughly ¼ inch thick. Try to maintain even thickness throughout—this helps with uniform puffing. Don’t worry if they’re not perfect circles; rustic is beautiful! Dust off any excess flour. Place rolled pitas on parchment paper and cover them while you roll the rest.
What’s the best way to bake sourdough pita bread?
Preheat your oven to 500°F (260°C) with a baking stone or inverted baking sheet on the middle rack for at least 30 minutes. The high heat is crucial for that dramatic puff. Working in batches of 2-3, carefully transfer the rolled pitas onto the hot baking stone.
Don’t open the oven door for the first 2 minutes—this is when the magic happens! The pitas should puff up like balloons within 1-2 minutes. Bake for 3-4 minutes total until they show light golden spots but haven’t browned too much. You want them soft, not crispy.
How do I keep pitas soft after baking?
As soon as you remove the pitas from the oven, wrap them in a clean kitchen towel. This traps steam and keeps them soft and pliable. Stack them as you go, keeping them covered. The residual heat and moisture will soften any slightly crispy spots. Let them cool completely in the towel before storing. If you prefer a slightly crispy exterior, let them cool unwrapped on a wire rack instead.
What to Serve Sourdough Pita Bread With
These versatile pitas pair beautifully with countless dishes:
Classic Mediterranean Spreads: Serve with creamy hummus, smoky baba ganoush, or tangy tzatziki. The sourdough tang complements these dips perfectly.
Protein-Filled Pockets: Stuff with falafel, grilled chicken shawarma, lamb kofta, or roasted vegetables. The sturdy pocket holds generous fillings without falling apart.
Fresh Salads: Pair with fattoush, tabbouleh, or Greek salad. Tear the pita into pieces and toss it right into the salad for added texture.
Hearty Stews: Use as an edible utensil for scooping up Moroccan tagines, Indian curries, or Turkish beef stew. The bread soaks up flavorful sauces beautifully.
Breakfast Options: Split and fill with scrambled eggs, feta cheese, olives, and fresh tomatoes for a Mediterranean breakfast that’ll start your day right.
Simple Snacks: Brush with garlic butter and herbs, cut into wedges, and bake until crispy for homemade pita chips.
Top Tips for Perfecting Sourdough Pita Bread
Should I use bread flour or all-purpose flour?
Bread flour creates chewier, more structured pitas with better puff due to higher protein content. All-purpose flour works perfectly fine and produces slightly softer, more tender pitas. You can even use a 50/50 blend. Whole wheat flour can replace up to 30% of the white flour for nuttier flavor and added nutrition, though it may produce slightly denser pitas.
What if my starter isn’t very active?
The strength of your starter directly impacts the rise and flavor. If your starter is sluggish, give it 2-3 feedings over 24 hours before using it. It should double within 4-6 hours of feeding and smell pleasantly tangy, not sour or alcoholic. Using weak starter will result in dense, flat pitas that won’t puff properly.
Why isn’t my pita puffing up?
Several factors affect puffing: oven temperature (must be at least 475°F), even rolling thickness (thin spots prevent puffing), proper dough hydration (too dry won’t steam), and adequate fermentation (underfermented dough won’t have enough structure). Make sure your baking surface is properly preheated for at least 30 minutes. Don’t open the oven door during the first 2 minutes of baking.
Can I make the dough ahead of time?
Absolutely! After bulk fermentation, you can refrigerate the dough for up to 3 days. The extended cold fermentation actually improves flavor. Let the dough come to room temperature (about 1 hour) before shaping. You can also shape the pitas and refrigerate them stacked between parchment paper for up to 24 hours before baking.
How thick should I roll the pitas?
Aim for about ¼ inch thickness. Too thin and they’ll become crispy crackers. Too thick and they’ll be doughy in the middle and may not puff properly. Use light, even pressure with your rolling pin and roll from the center outward. Check thickness by gently pressing the dough—it should feel uniform throughout.
What if I don’t have a baking stone?
An inverted baking sheet works great! Preheat it thoroughly in the oven. You can also use a cast-iron skillet or griddle. Some bakers even successfully bake pitas directly on oven racks, though this requires practice. The key is having a very hot surface that transfers heat quickly to create steam inside the dough.
Storing and Reheating Tips
Room Temperature Storage: Keep sourdough pita bread in an airtight container or resealable plastic bag at room temperature for up to 3 days. The sourdough fermentation naturally preserves the bread better than commercial yeast versions. Don’t refrigerate—this dries them out quickly.
Freezing for Long-Term Storage: These pitas freeze exceptionally well for up to 3 months. Let them cool completely, then stack them with parchment paper between each pita. Place the stack in a freezer-safe bag, pressing out excess air. Freeze flat to save space. Thaw at room temperature for 30 minutes or microwave for 20-30 seconds wrapped in a damp paper towel.
Reheating Methods: For the best texture, wrap pitas in foil and warm in a 350°F oven for 5-7 minutes. For quick reheating, microwave for 15-20 seconds wrapped in a damp paper towel—this adds moisture back. You can also warm them in a dry skillet over medium heat for 30 seconds per side. The pocket should remain soft and pliable.
Reviving Stale Pitas: If your pitas have dried out, lightly spritz them with water and wrap in foil. Heat in a 300°F oven for 10 minutes. They’ll soften up beautifully. Alternatively, cut them into triangles, brush with olive oil, and bake into pita chips—waste not, want not!
Common Baking Mistakes to Avoid
Rolling Unevenly: Thin spots won’t puff and may burn while thick areas stay doughy. Rotate the dough as you roll and check thickness frequently by gently pressing the surface.
Using Cold Dough: Cold dough from the fridge won’t puff properly and bakes unevenly. Always let shaped pitas sit at room temperature for 20-30 minutes before baking.
Overcrowding the Oven: Baking too many pitas at once drops the oven temperature and prevents proper puffing. Stick to 2-3 pitas per batch maximum. The oven needs to recover heat between batches.
Opening the Oven Door Too Soon: Resist the urge to peek! Opening the door in the first 2 minutes releases crucial heat and steam. The pitas need consistent high heat to puff dramatically.
Underproofing the Dough: Rushing fermentation produces dense, sour-tasting pitas that won’t rise well. Be patient—proper fermentation cannot be rushed. Look for visual cues like doubled size and bubbles, not just time.
Using Too Much Flour When Rolling: Excess flour creates a barrier that prevents proper browning and can make pitas tough. Use just enough to prevent sticking, and brush off excess before baking.
Baking at Too Low Temperature: Anything below 475°F won’t create the rapid steam expansion needed for puffing. Your oven must be screaming hot. Use an oven thermometer to verify actual temperature.
Not Preheating Long Enough: The baking stone or sheet needs 30-45 minutes to fully heat through. A lukewarm surface won’t create the instant heat transfer needed for that iconic pocket.
Frequently Asked Questions
Can I make sourdough pita bread without a starter?
While this recipe specifically uses sourdough starter for its unique flavor and digestibility benefits, you can adapt it by substituting 100g of commercial yeast-based dough. However, you’ll lose the characteristic tangy flavor and health benefits of sourdough fermentation. For authentic sourdough pita bread, maintaining an active starter is essential.
Why did my pitas turn out more like flatbread?
If your pitas didn’t develop the signature pocket, the most common causes are insufficient oven temperature, uneven rolling thickness, or underdeveloped dough structure. Ensure your oven reaches at least 475-500°F and preheat your baking surface thoroughly. The dough should be properly fermented with good gluten development from stretch and folds.
How can I make whole wheat sourdough pita bread?
Replace up to 50% of the bread flour with whole wheat flour. You’ll need to add an extra 20-30g of water as whole wheat absorbs more liquid. The pitas will be slightly denser and more nutritious with a nuttier flavor. Expect a slightly longer fermentation time as whole wheat can slow down yeast activity.
Can I cook sourdough pita bread on the stovetop?
Yes! Heat a cast-iron skillet or heavy-bottomed pan over high heat. Cook each pita for 1-2 minutes per side until puffed and spotted with brown. Cover the pan with a lid during cooking to trap heat and encourage puffing. Stovetop pitas tend to be softer and more flexible than oven-baked ones.
What’s the difference between sourdough pita and regular pita?
Sourdough pita uses wild yeast fermentation over 8-12 hours, developing complex flavors, improved digestibility, and better nutritional value. Regular pita uses commercial yeast and rises in 1-2 hours, producing a milder flavor. Sourdough pitas also stay fresh longer due to the natural preservatives created during fermentation.
My dough seems too sticky—what should I do?
Some stickiness is normal and desirable for hydrated dough. Resist adding too much extra flour, which makes pitas tough. Instead, wet your hands when handling the dough, use a bench scraper for shaping, and trust the fermentation process to develop structure. If the dough is genuinely soupy, you may need to reduce water by 20-30g next time.
How do I know when my sourdough starter is ready to use?
Your starter should have doubled in size, show plenty of bubbles throughout, and pass the float test (a small spoonful floats in water). It should smell pleasantly tangy and yeasty, not sour or alcoholic. The timing varies by temperature but typically takes 4-6 hours after feeding at room temperature.
Can I add flavors to my sourdough pita bread?
Absolutely! Mix in herbs like rosemary, thyme, or oregano during the final stretch and fold. Add garlic powder, onion powder, or za’atar to the dough. Brush the rolled pitas with olive oil and sprinkle with sesame seeds or nigella seeds before baking. Just avoid adding wet ingredients that would alter hydration.
Nutrition Information
| Nutrient | Per Pita (makes 10) |
|---|---|
| Calories | 185 kcal |
| Protein | 6g |
| Carbohydrates | 37g |
| Fiber | 2g |
| Fat | 2g |
| Sodium | 235mg |
| Iron | 10% DV |
| Calcium | 2% DV |
Note: Nutritional values are approximate and may vary based on specific ingredients and portion sizes.
Final Thoughts
There’s something deeply satisfying about pulling hot, puffed sourdough pita bread from your oven. The aroma, the texture, the knowledge that you created something both ancient and nourishing—it’s kitchen magic at its finest.
The beauty of this recipe lies in its simplicity and flexibility. Once you master the basic technique, you’ll find yourself making these pitas weekly. They’re perfect for meal prep, freeze beautifully, and transform ordinary meals into something special.
Don’t be discouraged if your first batch isn’t perfect. Like any bread baking, sourdough pita bread improves with practice. You’ll develop a feel for the dough, understand your oven’s quirks, and soon be producing bakery-quality pitas with confidence.
Remember, the best sourdough pita bread is the one you make yourself, filled with whatever makes you happy, and shared with people you love.
Now grab your sourdough starter and let’s get baking! Your taste buds will thank you.
Happy baking!
Have you tried this sourdough pita bread recipe? I’d love to hear about your experience! Share your photos and tips in the comments below. If you enjoyed this recipe, please share it with your fellow bread-loving friends!