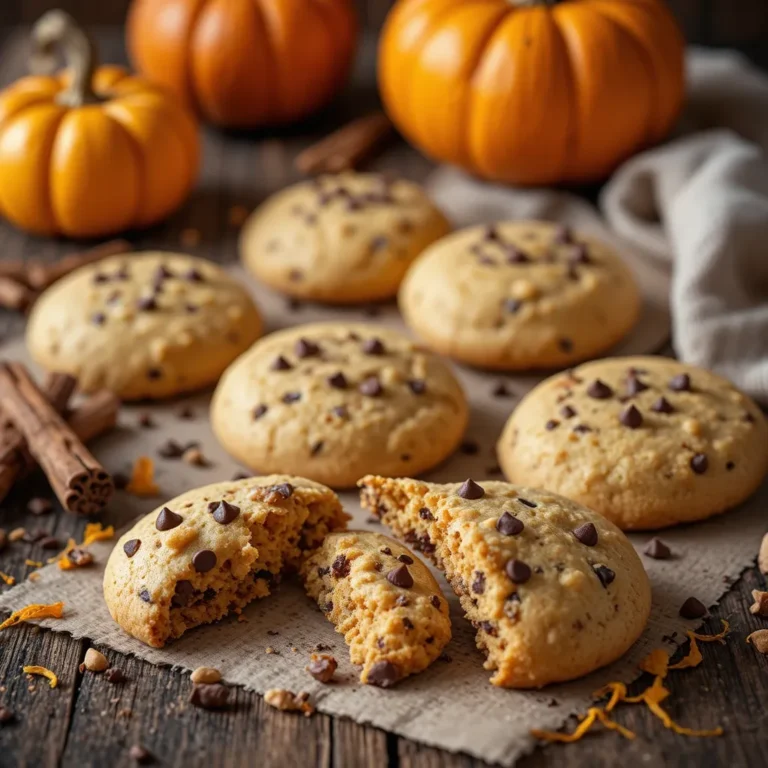
Easy Thanksgiving Cookies Chocolate Chip – Ready in 25 Minutes
Picture this: warm, gooey thanksgiving cookies chocolate chip fresh from the oven, filling your home with the most incredible aroma just as your family arrives for the holidays. These aren’t just any cookies – they’re soft, buttery, and loaded with melty chocolate chips that make every bite absolutely heavenly.
Did you know that chocolate chip cookies were invented by accident in 1938? Just like that happy mistake, these thanksgiving cookies chocolate chip will become your new holiday tradition. What makes these cookies special is their foolproof recipe that takes just 25 minutes from start to finish, making them perfect for busy holiday schedules.
Similar to our popular Pumpkin Spice Cookies, these treats are guaranteed crowd-pleasers that both kids and adults will devour. Get ready to become the star of Thanksgiving dinner!
This recipe was fully created by AI and has not been made or tested in our kitchen. Our readers mean a lot to us, and many have shared good experiences with other recipes on the site.
What Are Thanksgiving Cookies Chocolate Chip?
Ever wonder why we call them thanksgiving cookies chocolate chip instead of just regular chocolate chip cookies? Well, here’s the delicious truth: these beauties are elevated with warm fall spices and a hint of cinnamon that makes them perfect for the holiday season.
They’re the cookie equivalent of a warm hug on a crisp autumn day! As the saying goes, “the way to a man’s heart is through his stomach,” and these cookies prove it every single time. Trust me, once you bake a batch, you’ll understand why they deserve their special thanksgiving title. Ready to make magic happen in your kitchen?
Why You’ll Love This Thanksgiving Cookies Chocolate Chip Recipe
The Perfect Holiday Cookie
These thanksgiving cookies chocolate chip are everything you dream about in a holiday dessert. Imagine biting into a cookie with crispy golden edges that give way to a soft, chewy center studded with pools of melted chocolate. The subtle warmth of cinnamon and nutmeg adds that cozy autumn feeling without overpowering the rich chocolate flavor.
Budget-Friendly Baking
Making thanksgiving cookies chocolate chip at home saves you serious money compared to buying fancy bakery cookies. A single batch costs under $5 to make and yields 24 generous cookies – that’s less than 25 cents per cookie! You probably have most ingredients in your pantry already: flour, sugar, butter, eggs, and chocolate chips. Plus, you control the quality of ingredients, meaning you can use real butter and premium chocolate for bakery-quality results at a fraction of the cost.
Customizable and Crowd-Pleasing
The beauty of these cookies lies in their versatility. Love extra chocolate? Double the chips. Want a nutty crunch? Add pecans or walnuts. Prefer white chocolate? Swap it in! The base recipe is incredibly forgiving and adapts beautifully to your preferences. Much like our beloved Oatmeal Cranberry Cookies, these thanksgiving cookies chocolate chip can be customized to suit any taste while maintaining that perfect texture everyone craves.
Ready to fill your cookie jar with homemade goodness? Let’s get baking!
How to Make Thanksgiving Cookies Chocolate Chip
Quick Overview
These thanksgiving cookies chocolate chip are incredibly easy to make, even for beginner bakers. The dough comes together in one bowl with simple mixing – no fancy equipment needed.
You’ll love how the cookies bake up with perfectly crispy edges while staying soft and chewy in the middle. The addition of warm spices gives them that special holiday twist without being overwhelming.
Time Breakdown:
- Prep Time: 15 minutes
- Chill Time: 30 minutes (optional but recommended)
- Baking Time: 10-12 minutes per batch
- Total Time: 25-30 minutes (active time)
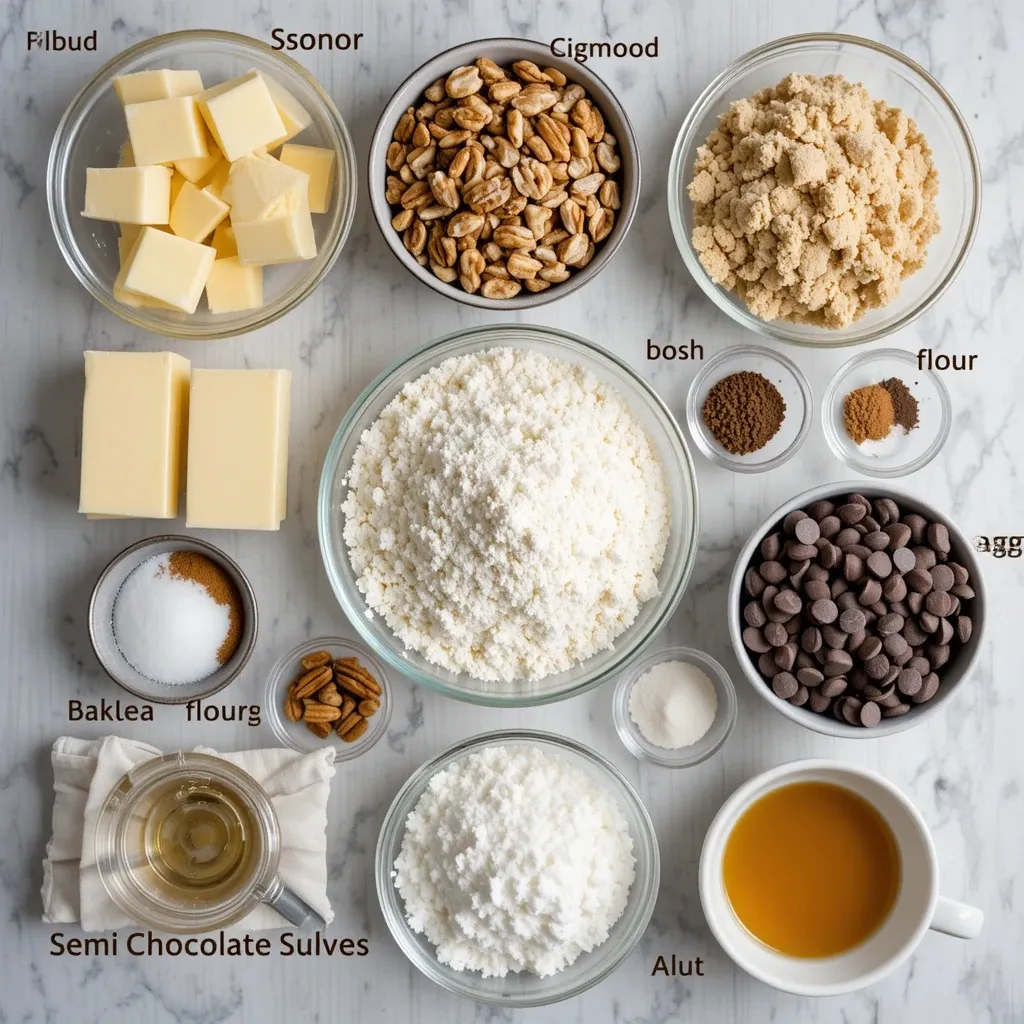
Key Ingredients for Thanksgiving Cookies Chocolate Chip
Dry Ingredients:
- 2¼ cups all-purpose flour
- 1 teaspoon baking soda
- 1 teaspoon salt
- 1 teaspoon ground cinnamon
- ½ teaspoon ground nutmeg
- ¼ teaspoon ground cloves (optional)
Wet Ingredients:
- 1 cup (2 sticks) unsalted butter, softened to room temperature
- ¾ cup granulated sugar
- ¾ cup packed light brown sugar
- 2 large eggs, room temperature
- 2 teaspoons pure vanilla extract
Mix-Ins:
- 2 cups semi-sweet chocolate chips
- 1 cup milk chocolate chips (optional, for extra richness)
- ½ cup chopped pecans or walnuts (optional)
Step-by-Step Instructions
Prepare Your Workspace
Start by preheating your oven to 375°F (190°C). Line two large baking sheets with parchment paper or silicone baking mats. This prevents sticking and ensures even browning. Set them aside while you prepare the dough.
Mix the Dry Ingredients
In a medium bowl, whisk together the flour, baking soda, salt, cinnamon, nutmeg, and cloves (if using). Whisking aerates the flour and evenly distributes the leavening agents and spices throughout. This ensures every cookie has consistent flavor and texture. Set this bowl aside.
Cream Butter and Sugars
In a large mixing bowl, beat the softened butter with both sugars using an electric mixer on medium speed. Continue beating for 3-4 minutes until the mixture becomes light, fluffy, and pale in color. This creaming process incorporates air into the dough, which helps create a tender, cakey texture. The mixture should look almost doubled in volume and feel smooth when rubbed between your fingers.
Add Eggs and Vanilla
Beat in the eggs one at a time, mixing well after each addition. This ensures proper emulsification. Add the vanilla extract and beat for another 30 seconds until everything is fully combined. The mixture may look slightly curdled – this is completely normal and will come together once you add the flour.
Combine Wet and Dry Ingredients
Reduce your mixer speed to low. Gradually add the flour mixture to the butter mixture, about ½ cup at a time. Mix just until no flour streaks remain. Be careful not to overmix, as this can lead to tough, dense cookies. The dough should look thick and slightly sticky.
Fold in Chocolate Chips
Using a wooden spoon or rubber spatula, gently fold in the chocolate chips (and nuts if using) until they’re evenly distributed throughout the dough. Make sure to scrape the bottom and sides of the bowl to incorporate any butter or flour that may have settled there.
Chill the Dough (Optional but Recommended)
Cover the bowl with plastic wrap and refrigerate for 30 minutes to 2 hours. Chilling the dough serves multiple purposes: it makes the dough easier to handle, prevents excessive spreading during baking, and allows the flour to fully hydrate, resulting in chewier cookies with deeper flavor. If you’re short on time, you can skip this step, but your cookies may spread more.
Shape the Cookies
Using a cookie scoop or tablespoon, portion out dough balls about 2 tablespoons each. Roll them gently between your palms to create uniform rounds. Place them on the prepared baking sheets, spacing them about 2 inches apart to allow for spreading. For extra-thick cookies, make the dough balls taller rather than wider.
Bake to Perfection
Bake one sheet at a time on the center rack for 10-12 minutes. The cookies are done when the edges are golden brown but the centers still look slightly underdone and puffy. They may seem too soft, but they’ll continue cooking on the hot pan after you remove them from the oven. For softer cookies, bake for 10 minutes; for crispier edges, go for 12 minutes.
Cool Properly
Let the cookies cool on the baking sheet for 5 minutes. This cooling time is crucial – it allows them to set up properly. If you try to move them too soon, they’ll fall apart. After 5 minutes, transfer the cookies to a wire cooling rack to cool completely. The cookies will firm up as they cool while maintaining that perfect chewy center.
What to Serve Thanksgiving Cookies Chocolate Chip With
Beverages:
- Hot apple cider with cinnamon sticks
- Pumpkin spice lattes or regular coffee
- Cold milk (classic pairing!)
- Hot chocolate with marshmallows
- Spiced chai tea
Dessert Pairings:
- Vanilla ice cream for cookie sandwiches
- Whipped cream and fresh berries
- Caramel sauce for drizzling
- Pumpkin pie (double dessert is always a good idea!)
Cheese Board Addition: These cookies pair surprisingly well with a cheese board featuring sharp cheddar, brie, and honey.
Top Tips for Perfecting Thanksgiving Cookies Chocolate Chip
Use Room Temperature Ingredients
Take your butter and eggs out of the refrigerator 30-60 minutes before baking. Room temperature ingredients mix more easily and create a smoother, more evenly textured dough. Cold butter won’t cream properly with the sugar, leading to dense cookies.
Don’t Skip the Chill Time
While optional, chilling your dough makes a noticeable difference. It prevents cookies from spreading too thin and creates a thicker, chewier texture. If you’re in a hurry, chill for at least 15 minutes.
Measure Flour Correctly
Too much flour is the number one cause of dry, cakey cookies. Use the spoon-and-level method: spoon flour into your measuring cup, then level off the top with a knife. Don’t scoop directly from the bag or pack it down.
Slightly Underbake for Chewy Cookies
Cookies continue baking on the hot pan after you remove them from the oven. Take them out when the centers still look slightly underdone for the chewiest results.
Use Quality Chocolate
The chocolate is the star here, so use good-quality chocolate chips. Ghirardelli, Guittard, or even chopped chocolate bars create richer, more decadent cookies than generic brands.
Rotate Baking Sheets
If your oven has hot spots (most do), rotate the baking sheet halfway through baking for even browning.
Add a Sprinkle of Sea Salt
Before baking, sprinkle a tiny pinch of flaky sea salt on top of each cookie. This enhances the chocolate flavor and adds a gourmet touch.
Don’t Overcrowd the Pan
Space cookies at least 2 inches apart. Overcrowding causes uneven baking and cookies that merge into one giant cookie blob.
Storing and Reheating Tips
Room Temperature Storage:
Store thanksgiving cookies chocolate chip in an airtight container at room temperature for up to 5 days. Place a piece of bread in the container to keep cookies soft – the cookies will absorb moisture from the bread. Replace the bread slice every couple of days.
Refrigeration:
These cookies don’t need refrigeration unless your kitchen is very warm. If you do refrigerate them, they’ll last up to 10 days. Bring them to room temperature before serving, or warm them slightly for the best texture.
Freezing Baked Cookies:
Freeze baked cookies for up to 3 months. Let them cool completely, then place them in a single layer on a baking sheet and freeze until solid (about 1 hour). Transfer to a freezer-safe bag or container, separating layers with parchment paper. Thaw at room temperature for 30 minutes.
Freezing Cookie Dough:
Cookie dough freezes beautifully! Shape dough into balls and freeze on a baking sheet until solid. Transfer to a freezer bag for up to 3 months. Bake from frozen, adding 2-3 extra minutes to the baking time.
Reheating Instructions:
To recreate that fresh-from-the-oven experience, warm cookies in a 300°F oven for 3-5 minutes. Alternatively, microwave individual cookies for 8-10 seconds. They’ll taste like you just baked them!
Tips for Avoiding Common Baking Mistakes
Flat, Spread-Out Cookies
Problem: Cookies spread too thin and lose their shape.
Solutions:
- Make sure your butter is softened, not melted
- Chill the dough before baking
- Check that your baking soda is fresh (it loses potency after 6 months)
- Don’t place dough on warm baking sheets – always use cool pans
Dry, Cakey Cookies
Problem: Cookies are dense and cake-like instead of chewy.
Solutions:
- Don’t add too much flour (measure properly!)
- Don’t overbake – remove cookies when centers still look slightly underdone
- Make sure you’re using enough fat (butter)
- Add an extra egg yolk for richness
Burnt Bottoms
Problem: Cookie bottoms burn before tops are done.
Solutions:
- Use light-colored baking sheets (dark pans absorb more heat)
- Line pans with parchment paper or silicone mats
- Place baking sheet on middle oven rack
- Reduce oven temperature by 25°F if problem persists
Tough, Hard Cookies
Problem: Cookies turn out hard instead of soft and chewy.
Solutions:
- Don’t overmix the dough after adding flour
- Bake for less time
- Store properly in an airtight container with a bread slice
- Use more brown sugar than white sugar (brown sugar adds moisture)
Uneven Baking
Problem: Some cookies are done while others are raw.
Solutions:
- Make all dough balls the same size using a cookie scoop
- Rotate the baking sheet halfway through baking
- Don’t overcrowd the pan
- Bake one sheet at a time for best results
Cookies Stick to Pan
Problem: Cookies stick and break when you try to remove them.
Solutions:
- Always use parchment paper or silicone baking mats
- Let cookies cool on the pan for 5 minutes before transferring
- Don’t grease the pan – it makes cookies spread too much
Frequently Asked Questions
Can I make thanksgiving cookies chocolate chip without eggs?
Yes! Replace each egg with one of these options: 3 tablespoons of applesauce, ¼ cup mashed banana, or 1 tablespoon ground flaxseed mixed with 3 tablespoons water (let sit 5 minutes). The texture will be slightly different but still delicious.
Why are my cookies spreading too much?
Cookie spreading usually happens because the butter was too warm, the dough wasn’t chilled, or there’s not enough flour. Make sure your butter is just softened (not melted), chill the dough for 30 minutes, and measure flour accurately using the spoon-and-level method.
Can I use margarine instead of butter?
While you can substitute margarine, butter creates much better flavor and texture. If you must use margarine, choose stick margarine (not spread) with at least 80% fat content.
How do I make my cookies extra thick?
For thick cookies, chill the dough for at least 2 hours, use more brown sugar than white sugar, shape dough balls taller rather than wider, and slightly underbake them.
Can I add other mix-ins besides chocolate chips?
Absolutely! Try butterscotch chips, white chocolate chips, dried cranberries, chopped pecans, walnuts, toffee bits, or even peanut butter chips. Get creative!
Why did my cookies turn out cakey?
Cakey cookies result from too much flour, too much leavening (baking soda), or overbaking. Measure flour properly, don’t add extra baking soda, and remove cookies when centers still look slightly soft.
How do I know when the cookies are done?
The cookies are done when the edges are golden brown but the centers still look slightly puffy and underdone. They’ll continue cooking on the hot pan and will firm up as they cool.
Can I make the dough ahead of time?
Yes! Refrigerate unbaked dough for up to 3 days or freeze it for up to 3 months. If refrigerated, let it sit at room temperature for 10 minutes before scooping and baking.
Do I need to use both white and brown sugar?
Using both creates the best texture. Brown sugar adds moisture and chewiness, while white sugar helps cookies spread and creates crispy edges. You can use all brown sugar for chewier cookies or all white sugar for crispier cookies.
My cookies are too hard after cooling. What happened?
Overbaking is the most common cause. Remember that cookies continue baking on the hot pan after removal from the oven. Take them out when they look slightly underdone. Also, make sure you’re storing them in an airtight container.
Nutrition Information
| Nutrient | Per Cookie (1 cookie) |
|---|---|
| Calories | 180 |
| Total Fat | 9g |
| Saturated Fat | 5g |
| Cholesterol | 30mg |
| Sodium | 125mg |
| Total Carbohydrates | 24g |
| Dietary Fiber | 1g |
| Sugars | 15g |
| Protein | 2g |
Nutrition facts are approximate and based on one cookie from a batch of 24 cookies.
Final Thoughts
These thanksgiving cookies chocolate chip are more than just a dessert – they’re a holiday tradition waiting to happen in your home. The combination of classic chocolate chip cookie goodness with warm autumn spices creates something truly special that captures the essence of the season.
Whether you’re baking for Thanksgiving dinner, a friendsgiving gathering, a cookie exchange, or just because it’s Tuesday and you want something delicious, this recipe delivers every single time. The best part? They’re foolproof enough for beginners yet impressive enough to satisfy experienced bakers.
So preheat that oven, gather your ingredients, and get ready to fill your home with the most incredible aroma. Your family and friends will be asking for this recipe all season long!
Pin this recipe for later, share it with your friends, and don’t forget to leave a comment below letting me know how your thanksgiving cookies chocolate chip turned out! Happy baking!