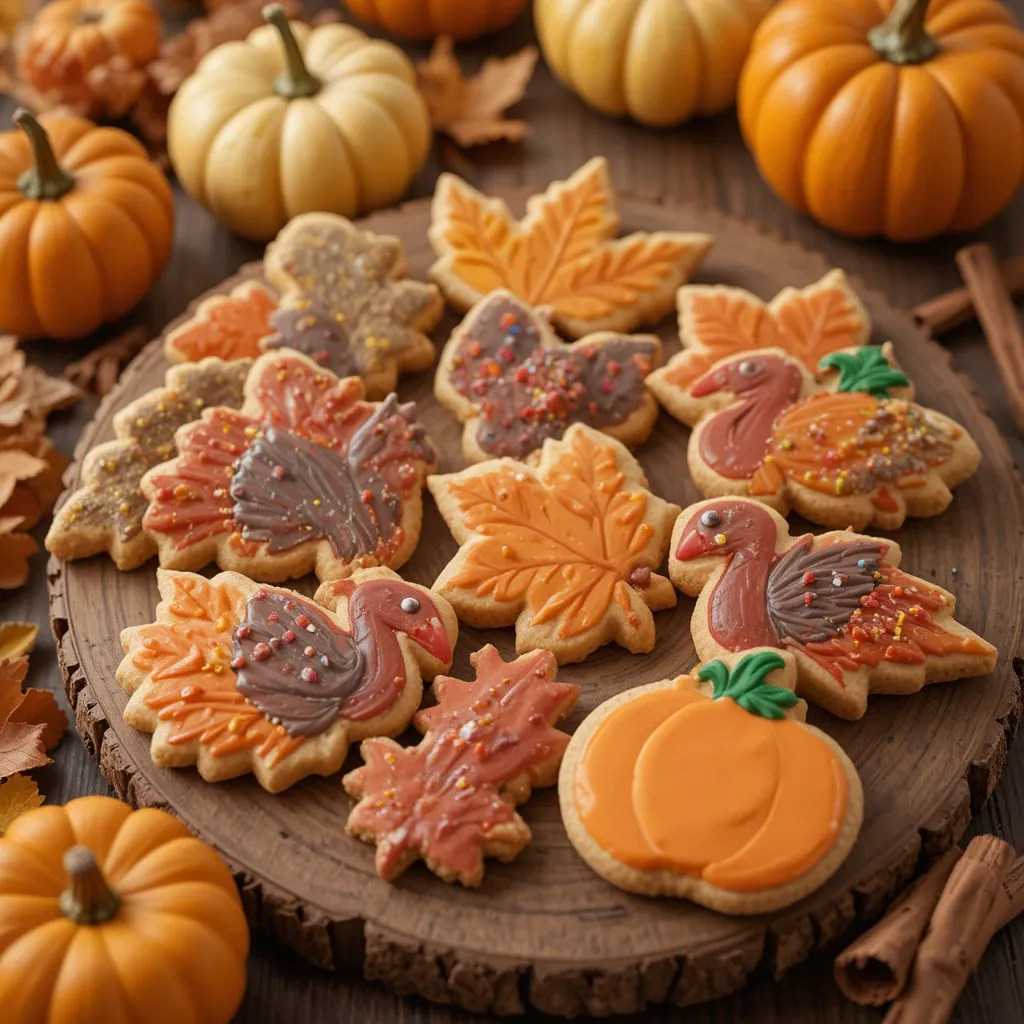
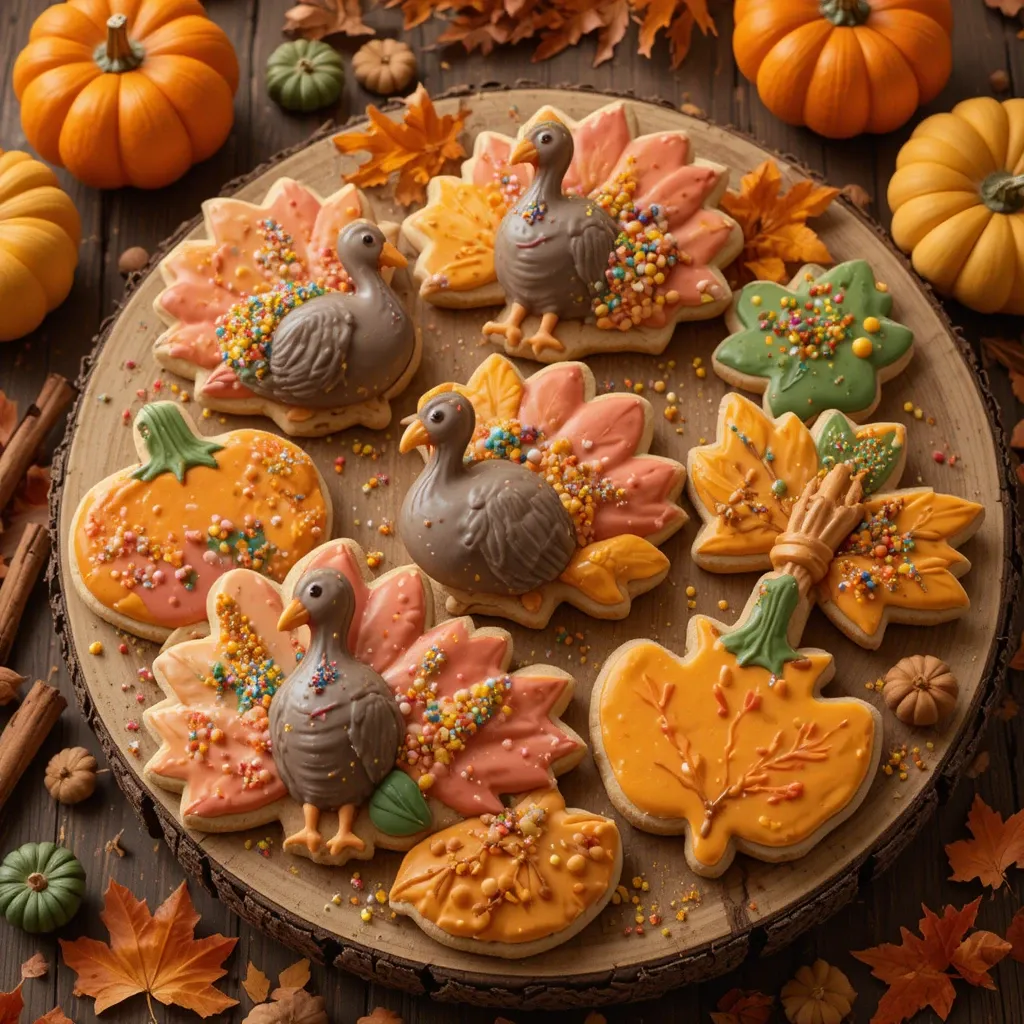
Thanksgiving Cookies Cutout: My Family Favorite Fall Tradition
Picture this: it’s the Sunday before Thanksgiving, and my kitchen counter is covered in flour. Cookie cutters shaped like turkeys, pumpkins, and fall leaves are scattered everywhere. My daughter’s got frosting in her hair, and we’re both laughing because the “turkey” she just decorated looks more like a brown blob with googly eyes. This is what making Thanksgiving cookies cutout is all about in our house—messy, chaotic, and absolutely perfect.
I’ve been making these cookies for eight years now, ever since my daughter was old enough to hold a cookie cutter without dropping it. What started as a simple baking project has turned into our pre-Thanksgiving tradition. Honestly, I think she looks forward to decorating these cookies even more than the actual turkey dinner.
Here’s the thing about Thanksgiving cookies cutout: they’re not just dessert. They’re conversation starters at potlucks, they’re edible place cards at your dinner table, and they’re the perfect activity for keeping kids (and let’s be real, adults too) entertained while the turkey roasts. Plus, they smell absolutely amazing and make your whole house feel like fall.
What Makes These Thanksgiving Cookies Special
Let me tell you why I’m so obsessed with this particular recipe. I’ve tried at least a dozen different sugar cookie recipes over the years—some spread too much, some turned out hard as rocks, and some just tasted… meh. This recipe? It’s been perfected through trial and error, kitchen disasters, and that one time I accidentally used salt instead of sugar (we don’t talk about that).
These Thanksgiving cookies cutout hold their shape beautifully. You know that frustrating moment when you cut out a perfect turkey shape, and then it bakes into something that looks like a melted blob? Yeah, that won’t happen here. The edges stay crisp, the centers stay slightly soft, and the shape you cut is the shape you get.
The flavor is buttery and vanilla-forward with just a hint of almond extract—that’s my secret weapon. Most recipes don’t include it, but I find it adds this subtle depth that makes people say, “What IS that amazing flavor?” And the texture? After testing this recipe probably thirty times (I’m not exaggerating), I’ve landed on the perfect balance of tender and sturdy.
Why You’ll Love This Recipe
It Actually Tastes Good
Real talk: so many decorated sugar cookies look gorgeous but taste like cardboard. Not these. I’ve watched picky eaters at Thanksgiving dinner bypass the pumpkin pie to grab another one of these cookies. The secret is using real butter (no shortcuts!), quality vanilla extract, and not overbaking them.
They’re Ridiculously Fun to Make
Even if you’re not a “baker,” you can nail these. My sister, who once burned boiling water (don’t ask), successfully made these last year. If you can roll out dough and press a cookie cutter, you’re golden. Plus, the decorating part is where things get really fun. Put out bowls of colored frosting and some fall-themed sprinkles, and watch what happens.
Perfect for Make-Ahead Magic
Life gets crazy the week of Thanksgiving. I always make the dough two days ahead and keep it in the fridge. You can even freeze these cookies (unfrosted) for up to three months. I’ve done this multiple times when I’m feeling ambitious in October, and it’s a total game-changer when November hits.
They’re Instagram-Worthy
Look, we all know presentation matters. These Thanksgiving cookies cutout look like they came from a fancy bakery, but they’re made in your regular home kitchen. Arrange them on a rustic wooden board, add some mini pumpkins around them, snap a photo, and watch the likes roll in.
Recipe Details for Thanksgiving Cookies Cutout
| Recipe Details | |
|---|---|
| Prep Time | 25 minutes (plus 2 hours chilling) |
| Cook Time | 10 minutes per batch |
| Total Time | 3 hours |
| Servings | 36 cookies (depending on cutter size) |
| Difficulty | Easy |
| Calories | 145 per cookie |
| Protein | 2g |
| Carbs | 19g |
| Fat | 7g |
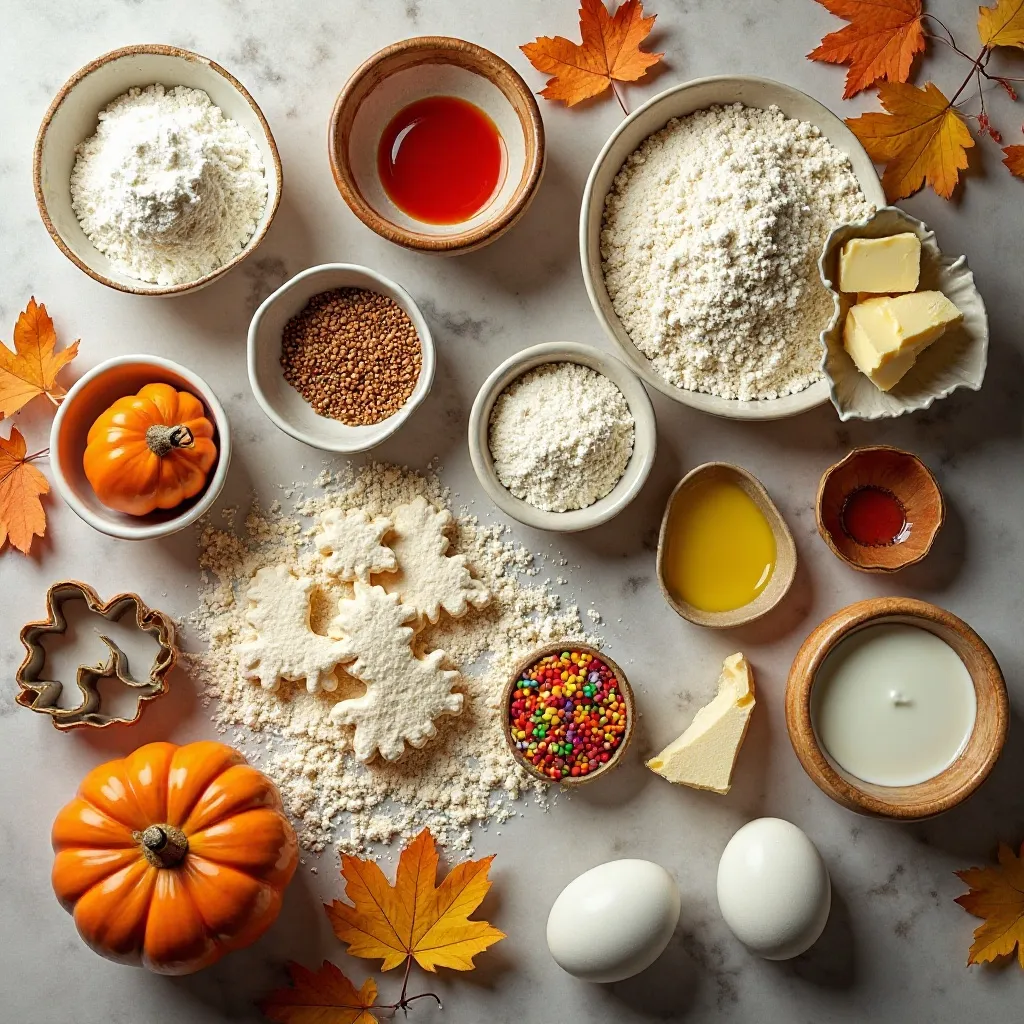
Ingredients for Thanksgiving Cookies Cutout
Before we dive into the ingredient list, let me mention a few things. Don’t even think about using margarine—trust me, I tried it once when I ran out of butter, and the cookies just weren’t the same. And that almond extract? It’s optional, but it’s the secret ingredient that makes people ask for the recipe.
I always keep these ingredients stocked in my pantry starting in late October because I know I’ll be making batch after batch once November rolls around.
For the Cookies:
- 3 cups all-purpose flour (I use King Arthur, but any brand works)
- 1½ teaspoons baking powder
- ½ teaspoon salt
- 1 cup (2 sticks) unsalted butter, softened to room temperature
- 1 cup granulated sugar
- 1 large egg
- 2 teaspoons pure vanilla extract
- ½ teaspoon almond extract (my secret weapon!)
- 1 tablespoon whole milk
For the Royal Icing:
- 4 cups powdered sugar
- 3 tablespoons meringue powder
- 5-6 tablespoons warm water
- Gel food coloring (orange, brown, red, yellow, green)
Optional Decorations:
- Fall-themed sprinkles
- Edible gold dust
- Sanding sugar in autumn colors
My Ingredient Notes
The butter needs to be truly soft—like, you should be able to press your finger into it easily, but it shouldn’t be melted or greasy. I usually leave mine on the counter for about an hour before baking. If you’re in a rush, cut it into small cubes to speed up the softening process.
For food coloring, gel colors are way better than liquid. They don’t water down your frosting, and the colors are more vibrant. I’ve been using Americolor brand for years, and a little goes a long way.
How to Make Thanksgiving Cookies Cutout
Here’s the quick version before we dive in: you’ll mix your dough, chill it (don’t skip this!), roll it out, cut your shapes, bake them, let them cool completely, and then decorate. The whole process takes about three hours, but most of that is hands-off chilling and cooling time. I usually make the dough the night before and bake the next day.
Step-by-Step Instructions
Step 1: Mix the Dry Ingredients
Whisk together your flour, baking powder, and salt in a medium bowl. Set it aside. I know this seems basic, but properly mixing your dry ingredients ensures you won’t get pockets of baking powder in your dough. I learned this the hard way when I bit into a cookie that tasted like pure baking powder—not fun.
Step 2: Cream the Butter and Sugar
In your stand mixer (or with a hand mixer), beat the softened butter and sugar together for about 3 minutes until it’s light and fluffy. It should look almost white and have increased in volume. This step is crucial for getting that perfect tender texture. Don’t rush it—I set a timer because I used to undermix, and the cookies turned out dense.
Step 3: Add the Wet Ingredients
Beat in the egg, vanilla extract, almond extract, and milk until everything’s well combined. The mixture might look slightly curdled—that’s totally normal. It’ll come together once you add the flour.
Step 4: Incorporate the Flour
With your mixer on low speed, gradually add the flour mixture. Mix until just combined. Here’s where a lot of people mess up—overmixing at this stage makes tough cookies. As soon as you don’t see any more white streaks of flour, stop mixing. The dough should pull away from the sides of the bowl and be slightly sticky to the touch.
Step 5: Chill the Dough (Don’t Skip This!)
Divide your dough in half, shape each half into a flat disk, and wrap tightly in plastic wrap. Refrigerate for at least 2 hours, or up to 3 days. I usually chill mine overnight. This step firms up the butter, making the dough way easier to roll out. The first time I made these, I was impatient and tried to skip the chilling. The dough stuck to everything, and I wanted to cry. Learn from my mistakes.
Step 6: Roll and Cut
Preheat your oven to 350°F. Take one disk of dough out of the fridge (leave the other one chilled until you’re ready for it). On a lightly floured surface, roll the dough to about ¼-inch thickness. Use your Thanksgiving cookie cutters to cut out shapes—turkeys, pumpkins, leaves, acorns, whatever speaks to you.
Here’s my pro tip: dip your cookie cutter in flour between cuts to prevent sticking. Place the cutouts on a parchment-lined baking sheet, leaving about 1 inch between cookies. They don’t spread much, but you want a little breathing room.
Step 7: Bake to Golden Perfection
Bake for 9-11 minutes, until the edges are just barely starting to turn golden. The centers might look slightly underdone—that’s what you want. They’ll firm up as they cool. I usually bake mine for exactly 10 minutes, and they come out perfect every time. If you overbake them, they’ll be hard instead of that nice tender texture we’re going for.
Let the cookies cool on the baking sheet for 5 minutes (they’re too fragile to move right away), then transfer to a wire rack to cool completely. And I mean completely—at least 45 minutes. Trying to frost warm cookies is a disaster waiting to happen.
Step 8: Make the Royal Icing
While your cookies cool, make your icing. Whisk together powdered sugar and meringue powder. Add 5 tablespoons of warm water and beat with a mixer for about 7 minutes until stiff peaks form. If it’s too thick, add more water a teaspoon at a time. If it’s too thin, add more powdered sugar.
Divide the icing into separate bowls and tint with gel food coloring. For Thanksgiving cookies cutout, I usually make orange, brown, red, yellow, and green. Cover each bowl with a damp paper towel so the icing doesn’t dry out.
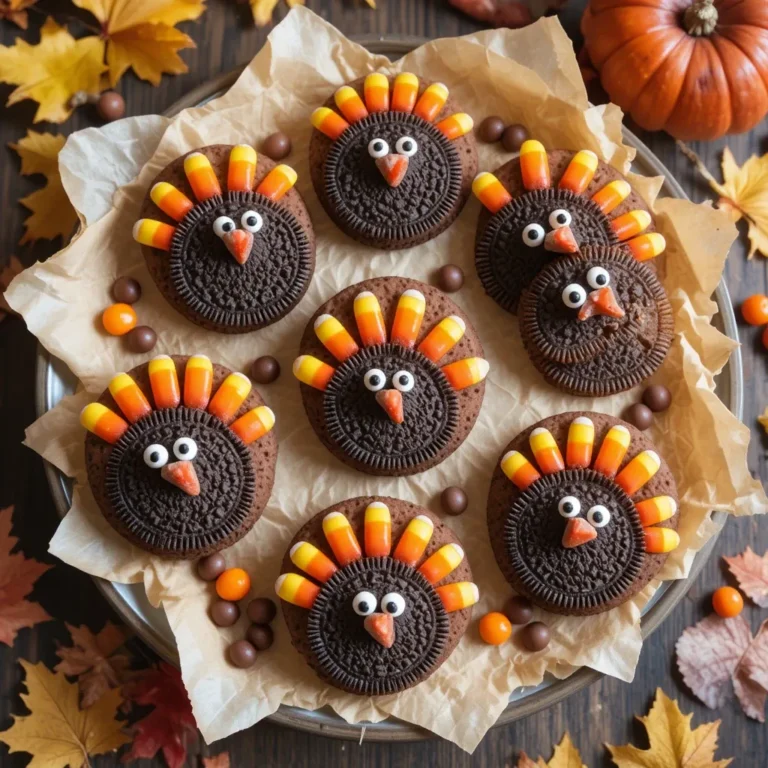
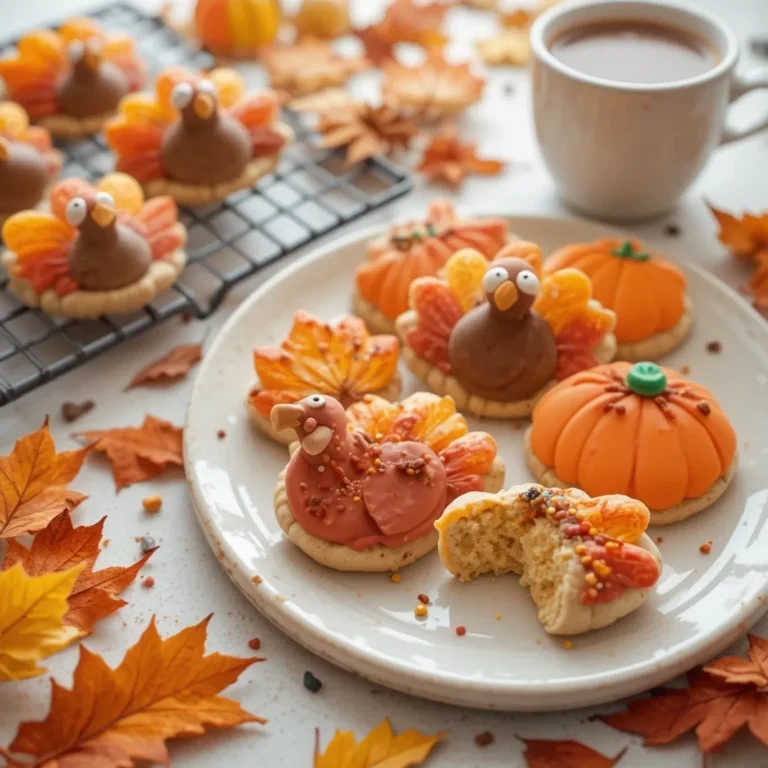
Step 9: Decorate and Let Your Creativity Shine
This is the fun part! Use piping bags, squeeze bottles, or even zip-top bags with the corner snipped off to decorate your cookies. Outline first, then flood the center. Add details with different colors. Let the base layer dry for about 20 minutes before adding additional details on top.
My daughter loves giving the turkeys silly faces and adding way too many sprinkles. I’ve learned to just let go and embrace the chaos. The “imperfect” cookies always end up being everyone’s favorites anyway.
My Favorite Ways to Serve These
Honestly, these Thanksgiving cookies cutout are versatile. I’ve served them so many different ways over the years. At our Thanksgiving dinner, I like to arrange them on a tiered stand as a centerpiece. They’re pretty enough to be decoration, but everyone knows they’re also dessert.
For a more casual gathering, I pile them on a large platter lined with parchment paper. Sometimes I’ll add name tags written in frosting and use them as place cards—it’s a fun surprise for guests, and kids especially love finding their names on a cookie.
If you’re bringing these to a potluck, invest in a good cookie carrier with layers. Stack them between parchment paper, and they’ll arrive looking perfect. I learned this after my first attempt resulted in a box of cookie crumbs.
For a Special Occasion
When I want to go all out (like for my daughter’s school Thanksgiving party), I package individual cookies in clear cellophane bags tied with raffia ribbon. Add a little tag that says “Happy Thanksgiving,” and you’ve got an instant party favor that people actually want.
Quick Weeknight Pairing
These cookies aren’t just for Thanksgiving Day. I make them throughout November and serve them with afternoon coffee or as an after-school snack. They pair beautifully with hot apple cider or a chai latte.
Pro Tips from My Kitchen
After making these cookies dozens of times, I’ve picked up some tricks that make a huge difference.
Can I make the dough ahead of time?
Absolutely! The dough keeps in the fridge for up to 5 days, or you can freeze it for up to 3 months. I’ve done both multiple times. If you freeze it, let it thaw in the fridge overnight before rolling. When I’m feeling ambitious, I make a triple batch in October and freeze it in portions. Then when Thanksgiving week hits and I’m swamped, I just pull out dough and bake.
Use room temperature ingredients
This is huge. Cold butter won’t cream properly, and cold eggs can cause the dough to seize up. I take everything out of the fridge about an hour before I start baking. If you forget (like I do sometimes), you can quick-temper the egg by placing it in warm water for 5 minutes.
Don’t overwork the dough
When you’re rolling out the dough, work quickly and avoid re-rolling scraps more than twice. The more you work the dough, the tougher it gets because you’re developing the gluten. My first batch of these cookies was tough because I kept re-rolling scraps five or six times. Now I know better—after two re-rolls, I’ll bake the scraps as rustic “chef’s snack” cookies.
The toothpick trick for perfect flooding
When you’re flooding the icing on your cookies, use a toothpick to spread it into corners and pop any air bubbles. This gives you that smooth, professional bakery look. I spent years wondering why my cookies never looked quite right, and then a friend showed me this trick. Game-changer.
My foolproof timing method
I set three timers when I’m baking these: one for when the dough finishes chilling, one for the baking time, and one reminder to check if my icing is the right consistency. It sounds excessive, but it keeps me organized when I’m making multiple batches. Plus, I once forgot cookies in the oven while I was decorating another batch. Those burned ones haunted me.
Freeze decorated cookies for easy entertaining
You can freeze these cookies even after they’re decorated! Layer them between parchment paper in an airtight container, and they’ll keep for up to 2 months. Thaw them at room temperature for about an hour before serving. I do this when I’m hosting and want to spread out my prep work. It takes so much pressure off.
Storing and Reheating Tips
Let’s talk storage because nothing’s worse than putting all this work into beautiful cookies only to have them go stale.
How Long Do They Last?
Undecorated cookies stay fresh in an airtight container at room temperature for up to 1 week. Decorated cookies (once the icing is fully dry) last about 5 days at room temperature. The royal icing actually helps preserve them a bit because it seals the cookie.
Refrigerator Storage
You don’t really need to refrigerate these unless you’re somewhere really hot and humid. If you do refrigerate them, let them come to room temperature before serving—they taste way better that way.
Freezer Instructions
For longer storage, freeze cookies in a single layer on a baking sheet until solid (about 2 hours), then transfer to a freezer-safe container with parchment paper between layers. They’ll keep for up to 3 months. I’ve frozen these countless times, especially when I get into a baking frenzy and end up with way too many cookies.
Best Way to Keep Them Fresh
The biggest enemy of sugar cookies is air. Store them in an airtight container with a piece of bread. I know this sounds weird, but the cookies will absorb moisture from the bread and stay soft. Replace the bread every couple of days. This trick works like magic.
Recipe FAQs
Can I use cookie cutters with a lot of detail?
Yes, but simpler shapes work better for beginners. The first time I tried making these, I used an intricate turkey cutter with tons of detail. It was frustrating because the tiny parts broke off easily. Now I prefer cutters that are 3-4 inches with moderately detailed designs. Save the super intricate ones for when you’ve made these a few times.
Why did my cookies spread?
This usually means your butter was too soft or melted, or you didn’t chill the dough long enough. Make sure your butter is softened but still holds its shape, and don’t skip that 2-hour chill time. I’ve noticed that if my kitchen is really warm, the cookies are more likely to spread. Sometimes I’ll even pop the cut-out shapes in the fridge for 10 minutes before baking on hot days.
Can I make these without almond extract?
Definitely. Just use an extra ½ teaspoon of vanilla extract instead. The almond extract adds a subtle depth, but plenty of people have allergies or just don’t like the flavor. The cookies will still taste amazing.
How do I get smooth, professional-looking icing?
The consistency is everything. For outlining, your icing should be thick—like toothpaste. For flooding, thin it down until it’s like honey and slowly flows back into itself when you lift a spoon. This took me probably ten batches to figure out. If you’re not sure, test it on a plate first.
What if I don’t have meringue powder for the icing?
You can make a simpler icing with just powdered sugar and milk, but it won’t dry as hard as royal icing. Mix 2 cups powdered sugar with 2-3 tablespoons milk and ½ teaspoon vanilla. It works in a pinch, but royal icing is better for decorating because it dries hard and stacks well.
Can I use whole wheat flour?
I wouldn’t recommend it for these Thanksgiving cookies cutout. Whole wheat flour makes the cookies denser and changes the flavor. If you really want to add some whole grains, you could replace up to ½ cup of the all-purpose flour with whole wheat pastry flour, but I’ve never tried it.
Why do my cookies taste bland?
Make sure you’re using quality vanilla extract (not imitation) and that your baking powder is fresh. Old baking powder can affect the taste. Also, don’t reduce the sugar—it’s needed for both flavor and texture.
How far ahead can I make these?
I usually make the dough up to 3 days ahead and bake 1-2 days before serving. If you’re decorating them, I’d do that no more than 2 days ahead so they stay fresh. For the absolute best texture and flavor, bake them the day before your event.
Final Thoughts
Making Thanksgiving cookies cutout has become one of my favorite November traditions. Sure, there’s always flour everywhere, and yes, my kitchen looks like a frosting bomb exploded by the time we’re done. But watching my daughter carefully pipe icing onto a pumpkin-shaped cookie, tongue sticking out in concentration, makes every bit of mess worth it.
These cookies bring people together. Whether you’re making them with kids, friends, or just by yourself with some good music playing, there’s something special about the process. And when you put them out at Thanksgiving dinner and watch people’s faces light up? That’s the best part.
So grab your cookie cutters, clear off your counter, and don’t stress about perfection. The wonky turkeys and slightly crooked leaves are what make homemade cookies special. That’s where the love shows through.
Now I want to know—what’s your favorite Thanksgiving cookie shape? Turkey, pumpkin, or leaves? Drop a comment and let me know! And if you make these, please tag me in your photos. I love seeing everyone’s creative decorating styles.