Thanksgiving Cookies for School – Kids Will Love it
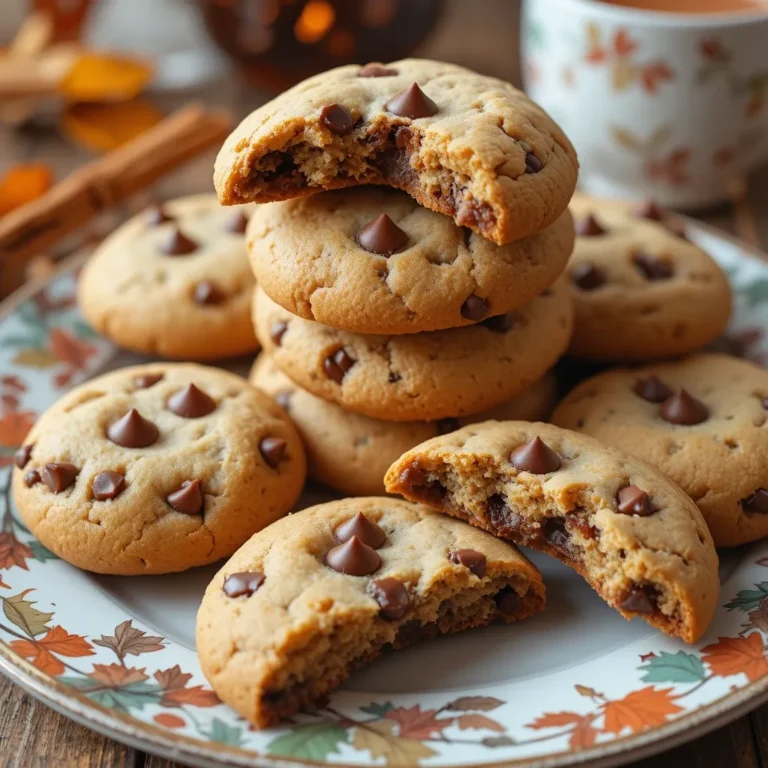
Imagine the joy on your child’s face when they bring beautifully decorated Thanksgiving cookies for school! These delightful, buttery treats are perfect for classroom parties, bake sales, or lunchbox surprises. With simple ingredients you already have and decorating options that let kids get creative, these cookies combine nostalgia with festive fun.
They’re easier than our popular Pumpkin Spice Cupcakes but just as crowd-pleasing! Get ready to become the hero parent with these adorable autumn-themed goodies.
This recipe was created entirely by AI and has not been tested in our kitchen. Our readers are our top priority, and many who’ve tried other recipes on our site have shared good results.
What Are Thanksgiving Cookies for School?
Ever wonder why these simple sugar cookies become magical when cut into turkey and leaf shapes? Thanksgiving cookies for school are classic butter cookies transformed into festive treats that celebrate gratitude and autumn harvest.
They’re basically your grandmother’s sugar cookie recipe dressed up for the holiday season! As the saying goes, “the way to a child’s heart is through homemade cookies at lunch time.” These cookies are allergen-friendly when made right, travel-safe for backpacks, and guaranteed to make your kid the most popular at the lunch table. Ready to start baking memories?
Why You’ll Love This Thanksgiving Cookies for School Recipe
Perfect for Busy Parents
These cookies are a lifesaver for busy parents juggling work and school events. The dough comes together in under 15 minutes and doesn’t require chilling for hours. Unlike complicated recipes, you can make these with your kids without creating a kitchen disaster.
Budget-Friendly Baking
Skip the expensive bakery cookies that cost $3-4 each! Making thanksgiving cookies for school at home costs less than $10 for 2-3 dozen cookies. You’ll use basic pantry staples like flour, sugar, and butter—no fancy ingredients required.
Customizable and Allergy-Conscious
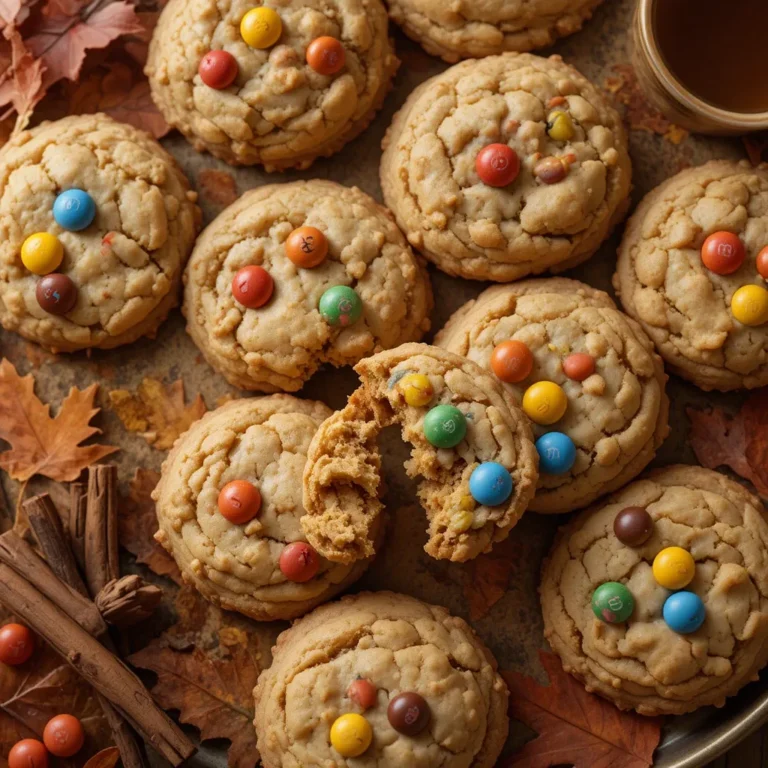
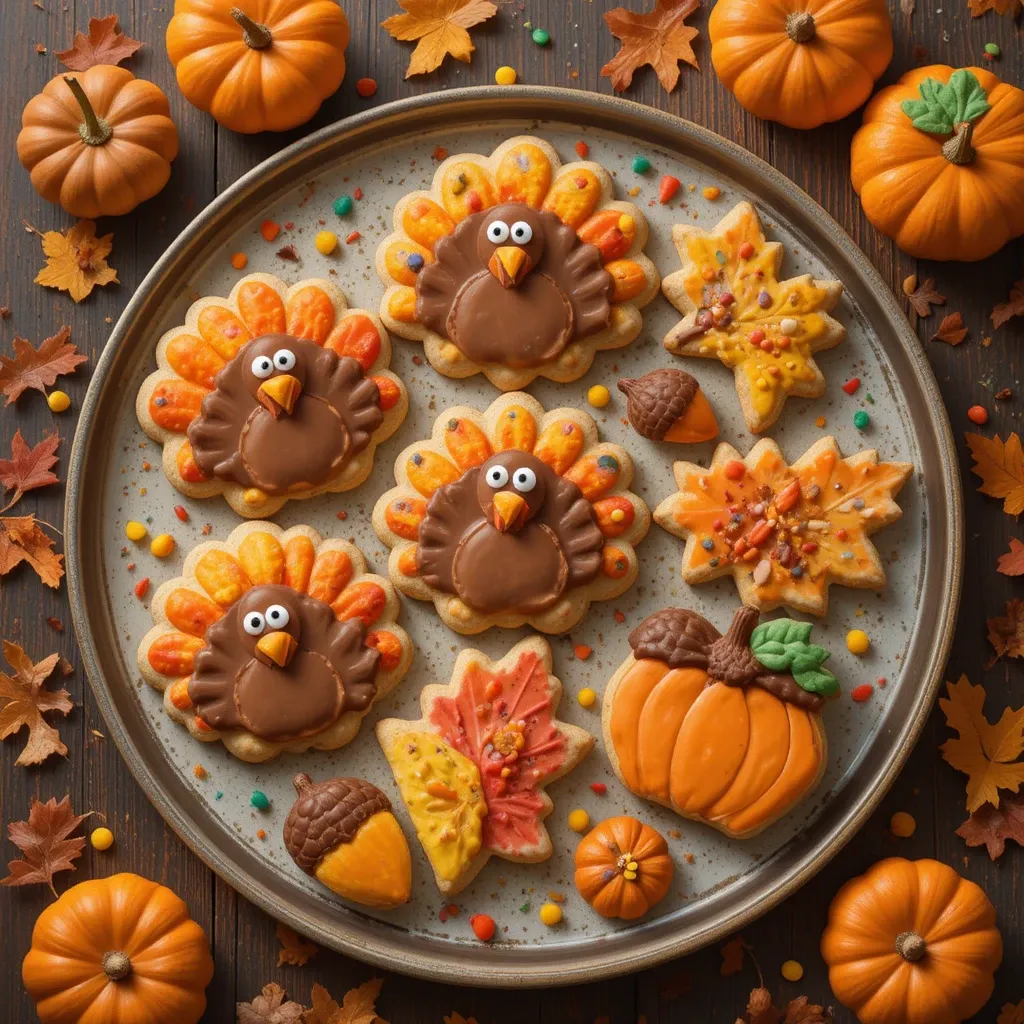
The real magic is in the decorating possibilities. Use royal icing, colored frosting, sprinkles, or candy corn to create turkeys, pumpkins, leaves, and cornucopias. You can easily adapt this recipe to be nut-free for school requirements. If your child loves festive treats, check out our Halloween Sugar Cookies recipe for similar decorating fun!
Making thanksgiving cookies for school at home means fresher ingredients, less sugar than store-bought versions, and the priceless experience of baking together. Your kitchen will smell amazing, and you’ll create memories that last far longer than the cookies!
How to Make Thanksgiving Cookies for School
Quick Overview
These thanksgiving cookies for school are wonderfully simple to create! You’ll make a classic vanilla sugar cookie dough that bakes into perfectly crisp edges with soft centers. The cookies hold their shape beautifully, making them ideal for cookie cutters.
Preparation Details:
- Prep Time: 20 minutes
- Baking Time: 10-12 minutes per batch
- Decorating Time: 30-45 minutes
- Total Time: 1 hour 15 minutes
- Yield: 24-30 cookies (depending on cutter size)
- Difficulty Level: Easy
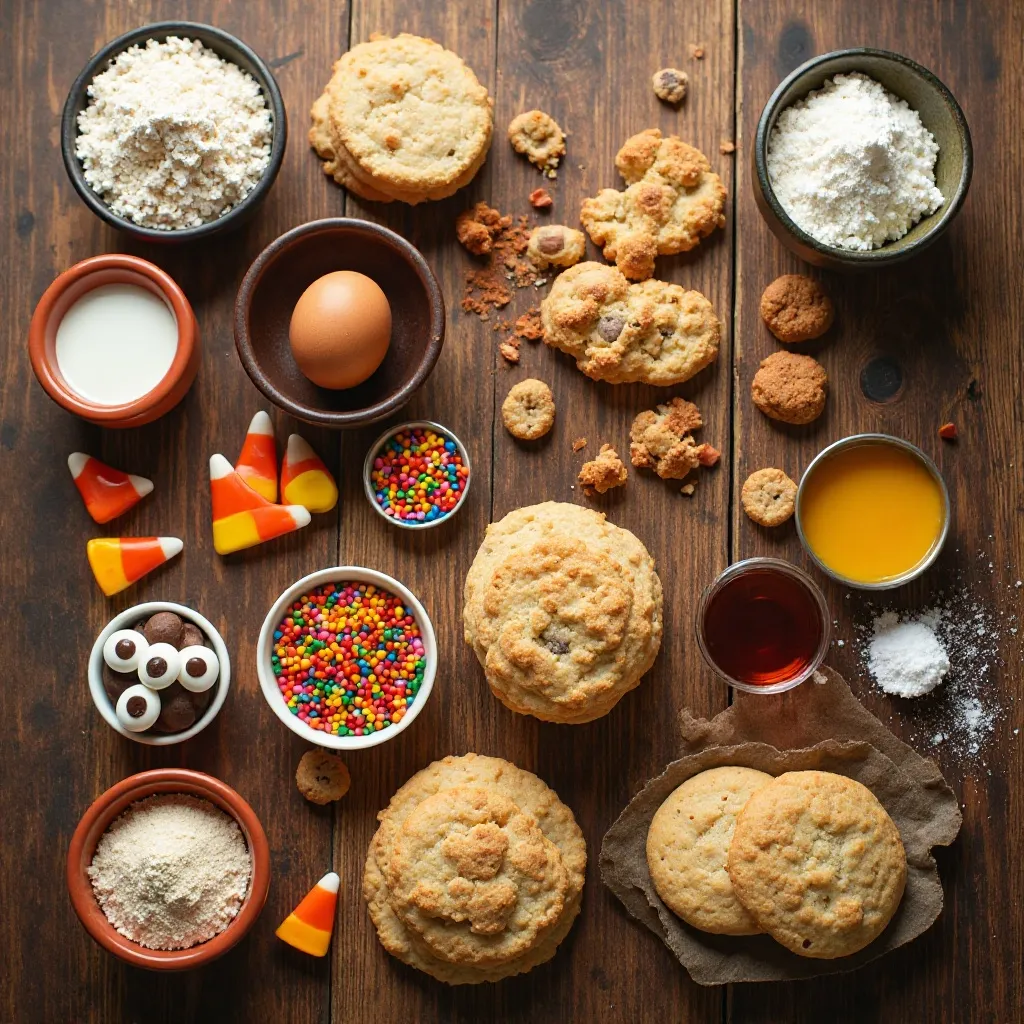
Key Ingredients for Thanksgiving Cookies for School
For the Cookie Dough:
- 3 cups all-purpose flour
- 1½ teaspoons baking powder
- ½ teaspoon salt
- 1 cup (2 sticks) unsalted butter, softened
- 1 cup granulated sugar
- 1 large egg
- 2 teaspoons vanilla extract
- 1 tablespoon milk
For the Frosting and Decorations:
- 2 cups powdered sugar
- 3-4 tablespoons milk
- ½ teaspoon vanilla extract
- Food coloring (orange, brown, yellow, red for autumn colors)
- Sprinkles, candy eyes, candy corn (optional)
Special Equipment:
- Thanksgiving-themed cookie cutters (turkey, pumpkin, leaf, acorn shapes)
- Rolling pin
- Parchment paper
- Piping bags or zip-top bags
Step-by-Step Instructions
Step 1: Prepare Your Workspace
Start by preheating your oven to 350°F (175°C). Line two large baking sheets with parchment paper to prevent sticking and ensure easy cleanup. Gather all your ingredients and have your Thanksgiving cookie cutters ready. This preparation makes the process smoother, especially if you’re baking with kids.
Step 2: Mix the Dry Ingredients
In a medium bowl, whisk together 3 cups of all-purpose flour, 1½ teaspoons of baking powder, and ½ teaspoon of salt. Whisking aerates the flour and ensures the baking powder distributes evenly, which helps your cookies rise uniformly. Set this bowl aside while you prepare the wet ingredients.
Step 3: Cream Butter and Sugar
In a large mixing bowl, use an electric mixer to beat 1 cup of softened butter and 1 cup of granulated sugar together for 3-4 minutes. The mixture should become light, fluffy, and pale in color. This creaming process incorporates air into the dough, creating a tender cookie texture. Make sure your butter is at room temperature—it should leave a slight indent when pressed.
Step 4: Add Egg and Flavorings
Beat in 1 large egg, 2 teaspoons of vanilla extract, and 1 tablespoon of milk. Mix until everything is fully combined and the mixture looks smooth. The egg binds the ingredients while the vanilla adds that classic sugar cookie flavor kids love.
Step 5: Combine Wet and Dry Ingredients
Gradually add the flour mixture to the butter mixture in three parts, mixing on low speed after each addition. Stop mixing as soon as you no longer see flour streaks. Overmixing develops gluten and can make your cookies tough instead of tender.
Step 6: Roll Out the Dough
Divide your dough into two equal portions. On a lightly floured surface, roll out one portion to about ¼-inch thickness. Keep the second portion covered to prevent drying. If the dough is too sticky, refrigerate it for 15-20 minutes. For perfectly even cookies, use rolling pin guide rings.
Step 7: Cut Out Shapes
Use your Thanksgiving cookie cutters to cut out shapes, pressing firmly and cutting as many cookies as possible from each rolling. Gather scraps, re-roll once (not more, or cookies become tough), and cut more shapes. Transfer cut cookies to your prepared baking sheets, spacing them about 1 inch apart.
Step 8: Bake the Cookies
Bake for 10-12 minutes, or until the edges are just barely golden. The centers may look slightly underdone—that’s perfect! They’ll continue cooking on the hot pan after you remove them from the oven. Avoid overbaking, which creates hard, crunchy cookies instead of the tender texture we want.
Step 9: Cool Completely
Let cookies cool on the baking sheet for 5 minutes, then transfer them to a wire cooling rack. This is crucial—cookies must be completely cool before decorating, or your frosting will melt and slide off. Use this time to prepare your frosting and organize decorating supplies.
Step 10: Prepare the Frosting
In a bowl, whisk together 2 cups of powdered sugar, 3 tablespoons of milk, and ½ teaspoon of vanilla extract until smooth. The consistency should be thick but spreadable. Add more milk (a few drops at a time) if it’s too thick, or more powdered sugar if it’s too thin. Divide the frosting into small bowls and add food coloring to create autumn colors—orange, brown, yellow, and red.
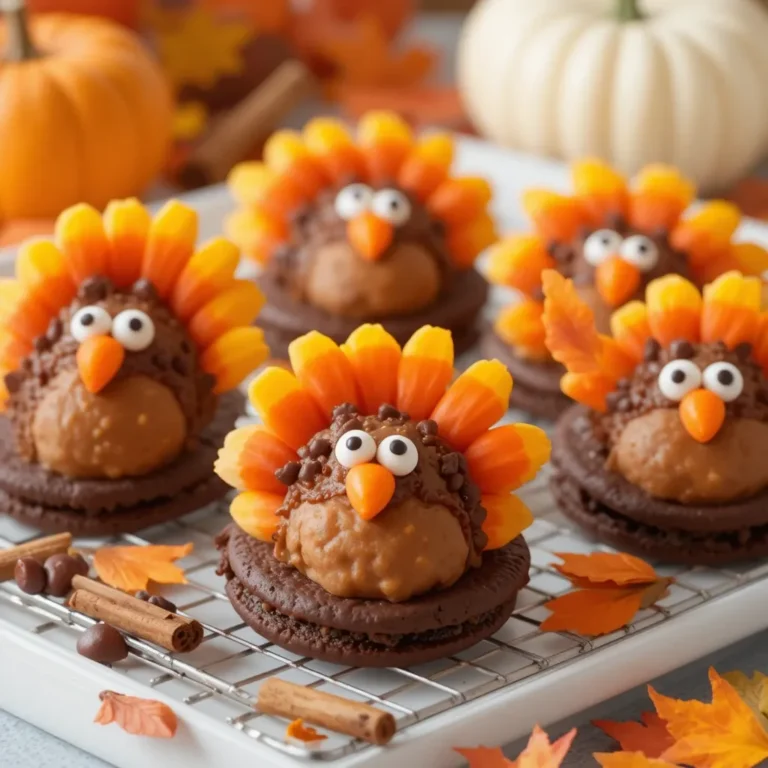
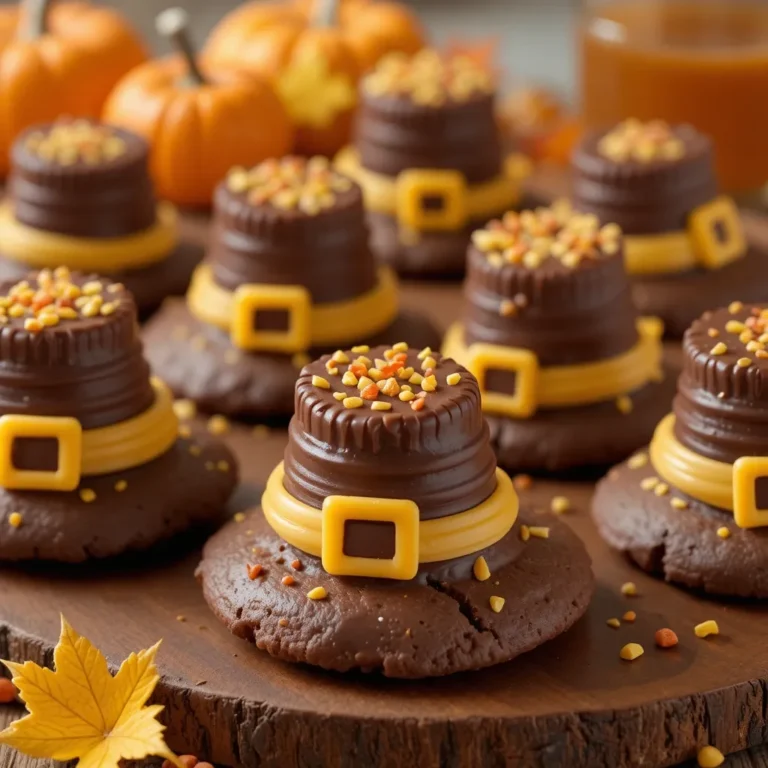
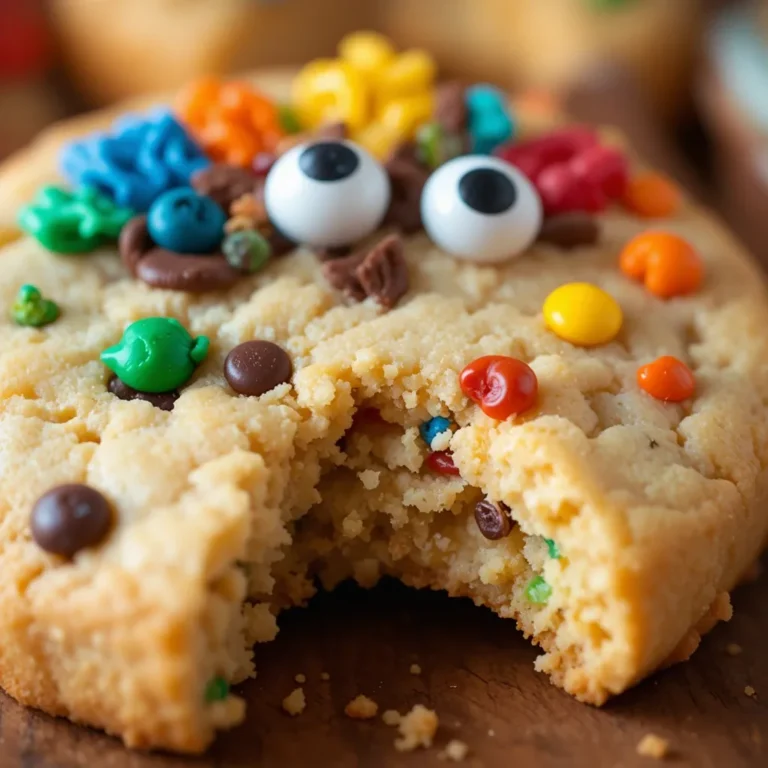
Step 11: Decorate Your Cookies
Now for the fun part! Use piping bags, zip-top bags with corners snipped off, or small offset spatulas to decorate your thanksgiving cookies for school. Let kids get creative with designs. Create turkey feathers with different colors, add candy corn for texture, use candy eyes for turkey faces, and sprinkle with autumn-themed decorations. Let frosting dry completely (about 2 hours) before stacking or packaging.
What to Serve Thanksgiving Cookies for School With
These thanksgiving cookies for school are versatile treats that pair beautifully with various beverages and snacks!
For Classroom Parties: Serve alongside apple cider, cold milk, or hot chocolate for a cozy autumn treat. Include fresh apple slices, cheese cubes, and mini pretzels for a balanced snack table.
For Lunchboxes: Pack cookies with a cheese stick, grapes, and a small sandwich for a complete lunch. The cookies provide a special dessert that makes lunchtime exciting.
For Thanksgiving Gatherings: Create a cookie platter with these alongside our Pumpkin Spice Cupcakes and Cinnamon Roll Apple Pie Bites. Serve with spiced chai tea, pumpkin spice lattes, or warm apple cider.
For After-School Snacks: Pair with a glass of cold milk, hot apple cider, or homemade hot chocolate. Add orange slices or apple nachos for extra fruit servings.
Top Tips for Perfecting Thanksgiving Cookies for School
Don’t Skip the Butter Softening
Room temperature butter (about 65-68°F) is crucial for proper creaming. Cold butter won’t incorporate properly, and melted butter will create flat, greasy cookies. Leave butter out for 30-60 minutes before starting.
Chill Dough If Needed
If your kitchen is warm or the dough feels too soft, refrigerate it for 20-30 minutes before rolling. This prevents cookies from spreading too much during baking and helps them hold detailed shapes.
Use Parchment Paper Always
Parchment paper prevents sticking better than greasing pans and promotes even browning. It also makes cleanup incredibly easy—essential when baking multiple batches!
Roll to Even Thickness
Uneven thickness means some parts overbake while others underbake. Use rolling pin rings or stack rulers on both sides of your dough to ensure consistent ¼-inch thickness throughout.
Watch Your Oven Temperature
Oven thermometers are inexpensive and invaluable. Many ovens run hot or cold by 25 degrees, which significantly affects baking time. Check your actual temperature for consistent results.
Avoid Overmixing
Once you add flour to wet ingredients, mix only until combined. Overmixing develops gluten, creating tough cookies instead of tender, buttery ones.
Cool Cookies Completely Before Decorating
Warm cookies will melt frosting instantly. Wait at least 30 minutes after cookies have cooled to room temperature. This patience prevents frustrating decorating mishaps.
Make Frosting the Right Consistency
Too thick and it won’t spread smoothly; too thin and it’ll run off the cookies. The perfect consistency should be like thick glue—it should slowly drop from a spoon but still hold peaks.
Allergy-Friendly Substitutions
For egg-free cookies, use 1 tablespoon ground flaxseed mixed with 3 tablespoons water (let sit 5 minutes). For dairy-free, substitute butter with vegan butter and use non-dairy milk. The texture will be slightly different but still delicious!
Prevent Color Bleeding
When using multiple frosting colors, let each color dry for 15-20 minutes before adding the next color. This prevents colors from bleeding into each other and keeps designs crisp.
Storing and Reheating Tips
Room Temperature Storage:
Store unfrosted thanksgiving cookies for school in an airtight container at room temperature for up to 1 week. Place parchment paper between layers to prevent sticking. Keep in a cool, dry place away from direct sunlight.
Storing Decorated Cookies:
Once frosting has completely dried (2-4 hours), layer decorated cookies in an airtight container with parchment paper between layers. They’ll stay fresh for 5-7 days at room temperature. Avoid refrigerating decorated cookies, as condensation can make frosting sticky and colors may bleed.
Freezing Cookie Dough:
Roll cookie dough into a disk, wrap tightly in plastic wrap, then aluminum foil. Freeze for up to 3 months. Thaw in the refrigerator overnight before rolling and cutting. You can also freeze cut, unbaked cookies on a baking sheet, then transfer to freezer bags. Bake directly from frozen, adding 1-2 minutes to baking time.
Freezing Baked Cookies:
Freeze unfrosted cookies in freezer-safe containers or bags for up to 3 months. Thaw at room temperature for 30 minutes before decorating or serving. Decorated cookies can be frozen but may have slight color changes or texture issues when thawed.
Packaging for School:
Package cookies individually in small cellophane bags tied with festive ribbon to keep them fresh and make distribution easy. For lunchboxes, use rigid containers to prevent crushing. Include a small ice pack if your child’s lunch isn’t refrigerated and it’s a warm day.
Reheating (If Desired):
While these cookies are best served at room temperature, you can warm unfrosted cookies in a 300°F oven for 3-4 minutes for a fresh-baked taste. Don’t reheat frosted cookies—the decorations will melt.
Frequently Asked Questions
Can I make thanksgiving cookies for school ahead of time?
Absolutely! Bake cookies up to 1 week ahead and store unfrosted in an airtight container. Decorate 1-2 days before needed. For even more advance prep, freeze cookie dough up to 3 months ahead, or freeze baked unfrosted cookies for up to 3 months.
How do I make these cookies nut-free for school?
This recipe is naturally nut-free! Just ensure all your ingredients (especially decorations and sprinkles) are labeled nut-free and produced in nut-free facilities. Always check labels, as manufacturing processes can change.
What’s the best frosting for decorating cookies?
Royal icing (made with meringue powder or egg whites) dries hard and is perfect for intricate designs and stacking. The simple powdered sugar frosting in this recipe is easier for kids to use and dries semi-firm. Both work beautifully for thanksgiving cookies for school.
Why did my cookies spread during baking?
Cookie spreading usually happens because: butter was too soft or melted, dough was too warm, or your oven temperature was too low. Make sure butter is just softened (not melted), chill dough if it’s too soft, and verify oven temperature with a thermometer.
Can I use cookie stamps instead of cutters?
Yes! Cookie stamps create beautiful embossed designs. Roll dough slightly thicker (about ⅜ inch), press stamp firmly, and bake as directed. These look elegant with just a light dusting of powdered sugar—no frosting needed.
How thick should I roll the cookie dough?
Roll dough to ¼-inch thickness for best results. Thinner cookies (⅛ inch) become too crispy and break easily. Thicker cookies (½ inch) may have raw centers when edges are done. Use rolling pin guides for consistency.
What if I don’t have Thanksgiving cookie cutters?
Get creative! Use a knife to cut simple shapes like squares and rectangles, then decorate to look like turkeys or hay bales. Round cutters can become pumpkins. Star cutters work for autumn leaves when decorated in fall colors.
How do I prevent frosting colors from bleeding?
Allow each color to dry 15-20 minutes before adding adjacent colors. Use thicker frosting consistency for outlines to create “barriers” between colors. Gel food coloring works better than liquid, as it won’t thin your frosting as much.
Can I make these cookies vegan?
Yes! Substitute butter with vegan butter (stick form, not tub), use a flax egg (1 tablespoon ground flaxseed + 3 tablespoons water), and use non-dairy milk. The texture will be slightly different but still delicious for thanksgiving cookies for school.
How long do decorated cookies stay fresh?
Decorated cookies stay fresh for 5-7 days when stored properly in an airtight container at room temperature. The frosting creates a seal that actually helps keep cookies fresh. Just ensure frosting is completely dry before storing to prevent sticking.
Nutrition Information
| Nutrient | Per Cookie (1 cookie) |
|---|---|
| Calories | 145 |
| Total Fat | 6g |
| Saturated Fat | 3.5g |
| Cholesterol | 25mg |
| Sodium | 65mg |
| Total Carbohydrates | 21g |
| Dietary Fiber | 0g |
| Sugars | 12g |
| Protein | 2g |
Nutrition information is approximate and based on using standard ingredients and plain frosting. Values may vary based on decorations used.
Additional Tips for Success
Color Mixing Guide:
Create perfect autumn colors by mixing food coloring: Orange (red + yellow), Brown (red + green + blue), Rust (orange + tiny drop of brown), Golden Yellow (yellow + tiny drop of orange). Start with small amounts—you can always add more but can’t remove color!
Transporting Cookies to School:
Use rigid, shallow containers with tight lids. Place parchment paper between layers. For extra security, pack the container in a larger bag with bubble wrap or kitchen towels around it. If giving cookies to the teacher or sharing with a class, attach a note listing all ingredients for allergy awareness.
Making It a Learning Experience:
Turn cookie baking into an educational activity! Discuss the history of Thanksgiving, practice fraction measurements, talk about how ingredients change with heat, and encourage creativity in decorating. Kids learn better when they’re having fun and creating something tangible.
Troubleshooting Common Issues:
If cookies are too crumbly, you may have added too much flour or overbaked them. If they’re too soft, they need more time in the oven. If shapes lose definition, dough was too warm—refrigerate before cutting. If cookies stick to cutters, dip cutters in flour between each cut.
These thanksgiving cookies for school are more than just treats—they’re edible expressions of creativity and love that make school celebrations extra special. The simple ingredients, straightforward process, and endless decorating possibilities make this recipe perfect for both experienced bakers and kitchen novices.
Whether you’re sending cookies in your child’s lunchbox, contributing to a classroom party, or preparing for a school bake sale, these festive treats will be the hit of the celebration. The best part? You’ll create wonderful memories in the kitchen while teaching kids valuable skills and the joy of sharing homemade goodies.
So preheat that oven, gather your cookie cutters, and get ready to bake some thanksgiving cookies for school that will have everyone asking for the recipe. Happy baking, and may your cookies be as sweet as the smiles they create!
Don’t forget to pin this recipe for later and share your decorated cookies with us on social media using #ThanksgivingCookiesForSchool!