Easy Thanksgiving Cookies Royal Icing Step-by-Step Guide
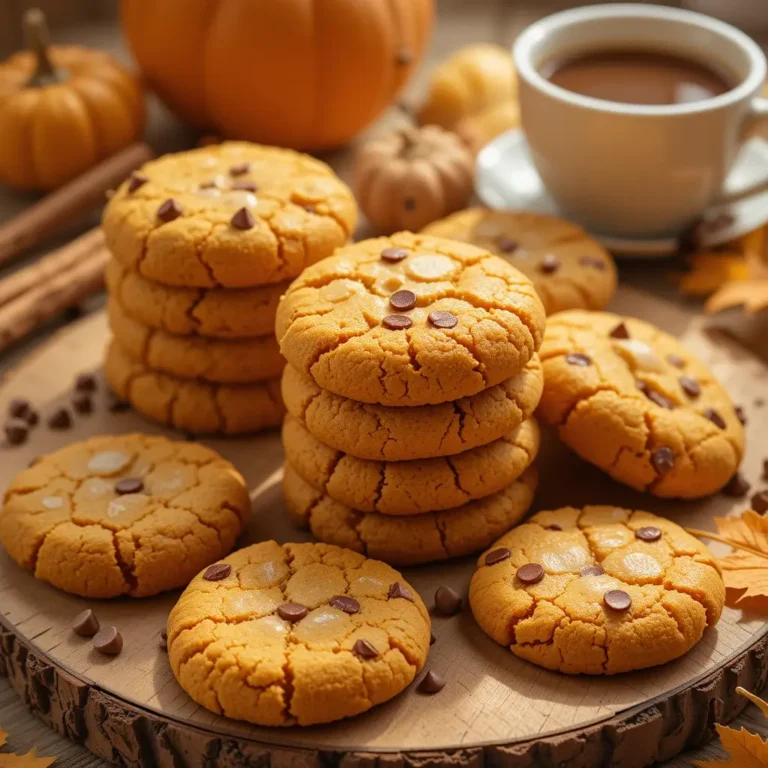
Picture this: buttery, perfectly golden cookies adorned with smooth, glossy royal icing in festive fall colors. These Thanksgiving cookies royal icing creations are not just desserts—they’re edible art that brings joy to your holiday celebration.
Whether you’re hosting a grand feast or contributing to a potluck, these beautifully decorated cookies impress every time. Plus, they’re surprisingly simple to make! If you loved our classic sugar cookies, you’ll absolutely adore this festive twist that combines tradition with creative flair. Ready to create some holiday magic?
What Are Thanksgiving Cookies Royal Icing?
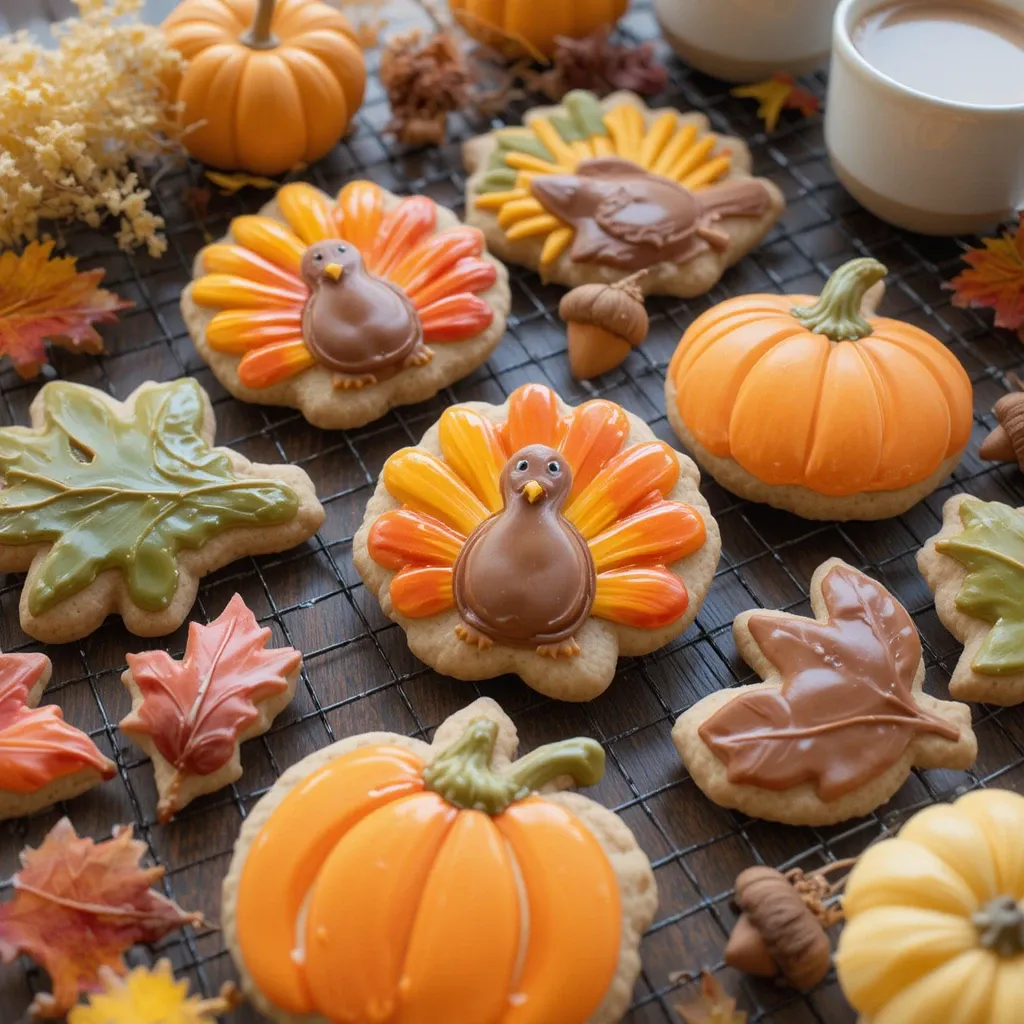
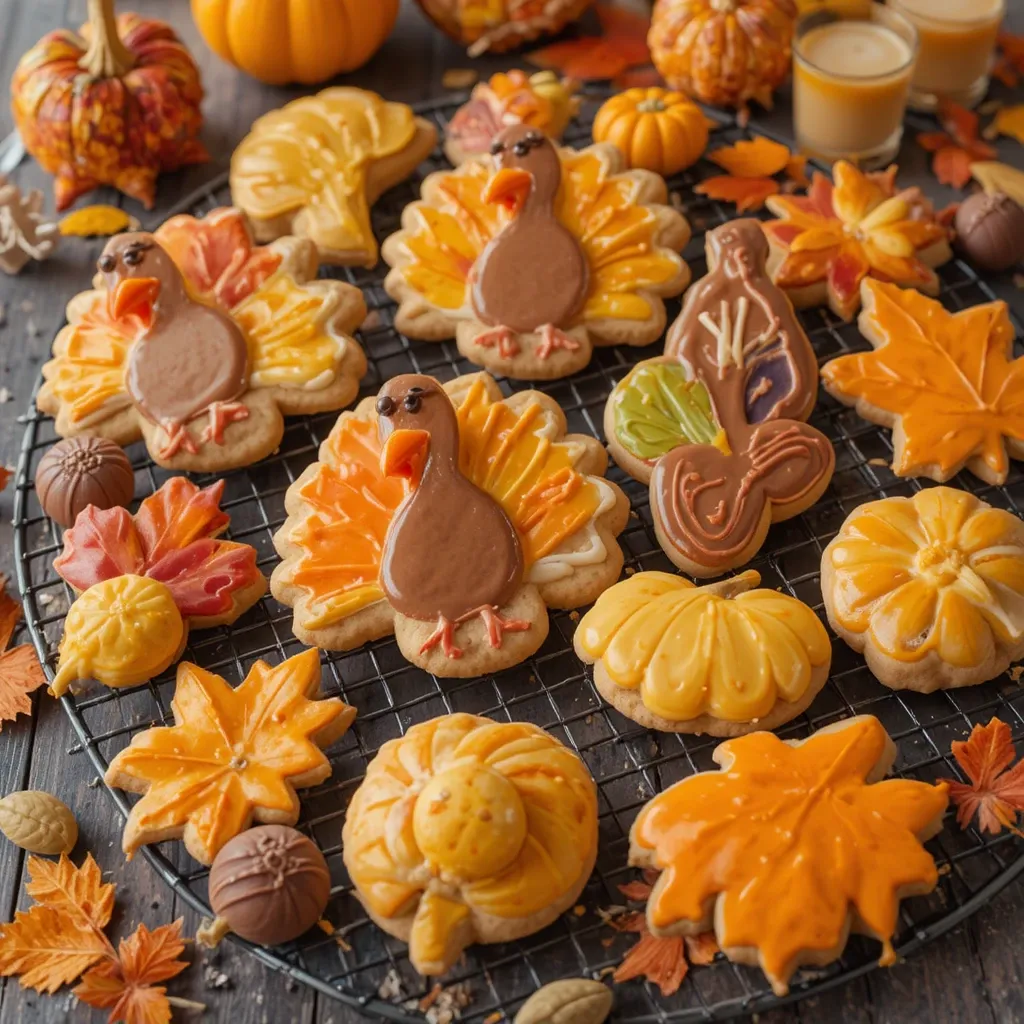
Ever wonder why these cookies have become the crown jewel of holiday baking? Thanksgiving cookies royal icing are sugar cookies cut into festive shapes—think turkeys, pumpkins, and autumn leaves—then decorated with royal icing that hardens to a beautiful, smooth finish. It’s like painting, but delicious!
The saying goes, “the way to a man’s heart is through his stomach,” and these cookies prove it true for everyone at your table. They’re part cookie, part canvas, and entirely irresistible. Don’t wait another holiday season—grab your cookie cutters and let’s create some memories!
Why You’ll Love This Thanksgiving Cookies Royal Icing Recipe
Showstopping Presentation That Tastes Amazing
These cookies aren’t just pretty to look at—they deliver on flavor too. The buttery, vanilla-kissed cookie base provides the perfect foundation for the sweet, crisp royal icing. Each bite offers a satisfying crunch followed by tender cookie goodness. The combination of textures makes every cookie an experience, not just a snack.
Budget-Friendly Holiday Baking
Forget spending $30-40 on fancy bakery cookies! Making Thanksgiving cookies royal icing at home costs a fraction of the price. With basic pantry staples like flour, butter, and powdered sugar, you can create dozens of cookies for under $15. That’s professional-quality treats without the professional price tag. Your wallet will thank you, and your guests will never know you didn’t splurge.
Endless Customization Options
Here’s where the magic happens: you control everything! Choose traditional fall colors like orange, gold, and burgundy, or go modern with pastels. Cut turkeys, pumpkins, leaves, acorns, or cornucopias. Add edible gold dust for elegance or colorful sprinkles for whimsy. Similar to our popular Christmas sugar cookies, these adapt to any style. The best part? Kids love helping decorate, making this a perfect family activity. Roll up your sleeves and let your creativity shine—these cookies are your blank canvas!
How to Make Thanksgiving Cookies Royal Icing
Quick Overview
This recipe delivers bakery-quality decorated cookies right from your kitchen. The process is straightforward: mix a classic sugar cookie dough, cut festive shapes, bake until golden, then decorate with royal icing that dries to perfection.
Time Breakdown:
- Prep Time: 30 minutes
- Chill Time: 1 hour
- Baking Time: 10-12 minutes per batch
- Decorating Time: 45-60 minutes
- Total Time: Approximately 3 hours
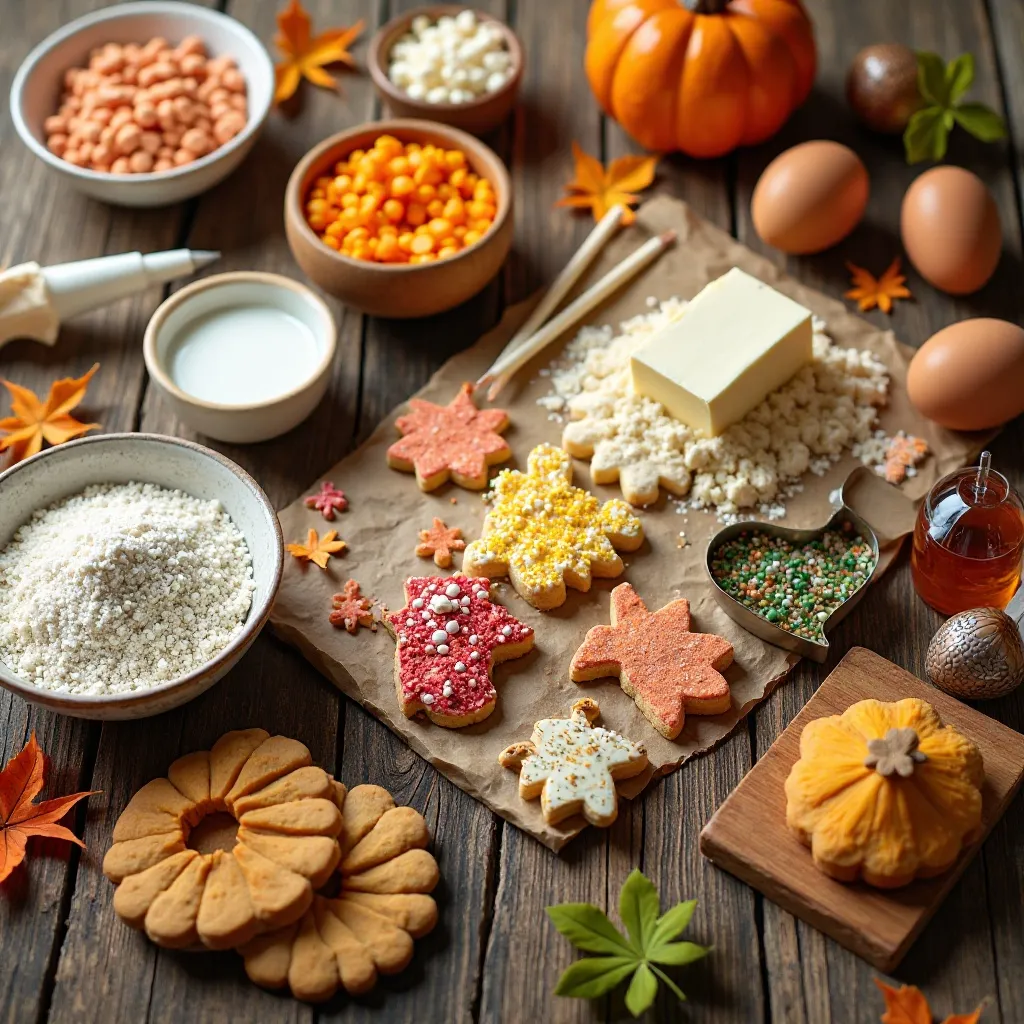
Key Ingredients for Thanksgiving Cookies Royal Icing
For the Cookies:
- 3 cups all-purpose flour
- 1 teaspoon baking powder
- ½ teaspoon salt
- 1 cup (2 sticks) unsalted butter, softened
- 1 cup granulated sugar
- 1 large egg
- 2 teaspoons vanilla extract
- 1 tablespoon milk
For the Royal Icing:
- 4 cups powdered sugar, sifted
- 3 tablespoons meringue powder
- 6-7 tablespoons water (adjust for consistency)
- Gel food coloring (orange, brown, yellow, red, green)
- ½ teaspoon vanilla extract (optional)
Special Tools:
- Thanksgiving-themed cookie cutters
- Piping bags or squeeze bottles
- Piping tips (small round tips work best)
- Toothpicks for detail work
Step-by-Step Instructions
Making the Cookie Dough
Step 1: Combine Dry Ingredients
Whisk together 3 cups flour, 1 teaspoon baking powder, and ½ teaspoon salt in a medium bowl. Set this mixture aside. This step ensures even distribution of the leavening agent for perfectly uniform cookies.
Step 2: Cream Butter and Sugar
In a large mixing bowl, beat 1 cup softened butter and 1 cup sugar using an electric mixer on medium-high speed for 3-4 minutes. The mixture should become light, fluffy, and pale yellow. This incorporates air for tender cookies.
Step 3: Add Wet Ingredients
Beat in 1 egg, 2 teaspoons vanilla extract, and 1 tablespoon milk until completely combined. Scrape down the sides of the bowl to ensure everything mixes evenly.
Step 4: Incorporate Flour Mixture
Reduce mixer speed to low. Gradually add the flour mixture in three additions, mixing just until combined after each addition. Don’t overmix—this can make cookies tough.
Step 5: Chill the Dough
Divide dough in half, shape into flat disks, and wrap tightly in plastic wrap. Refrigerate for at least 1 hour or up to 3 days. Cold dough is essential for maintaining cookie shapes during baking.
Baking the Cookies
Step 6: Prepare for Baking
Preheat your oven to 350°F (175°C). Line two baking sheets with parchment paper or silicone baking mats.
Step 7: Roll and Cut
On a lightly floured surface, roll one dough disk to ¼-inch thickness. Use Thanksgiving cookie cutters to cut shapes, placing them 1 inch apart on prepared baking sheets. Gather scraps, re-roll, and cut more shapes.
Step 8: Bake to Perfection
Bake for 10-12 minutes until edges are barely golden. Centers may look slightly underdone—that’s perfect! They’ll firm up as they cool. Let cookies cool on baking sheets for 5 minutes, then transfer to wire racks to cool completely.
Making the Royal Icing
Step 9: Mix Royal Icing Base
In a large bowl, combine 4 cups sifted powdered sugar and 3 tablespoons meringue powder. Add 6 tablespoons water and beat on low speed for 30 seconds, then increase to medium-high for 7-10 minutes until stiff peaks form. The icing should be bright white and glossy.
Step 10: Adjust Consistency
For outlining, keep icing thick (stiff peak consistency). For flooding, thin icing with water, adding ½ teaspoon at a time, until it flows smoothly but holds its shape. When you drizzle it from a spoon, it should settle back into itself within 10-15 seconds.
Step 11: Create Colors
Divide icing into separate bowls for each color you want. Add gel food coloring one drop at a time, mixing thoroughly. Gel colors work best because they don’t thin the icing. Cover bowls with damp paper towels to prevent crusting.
Decorating the Cookies
Step 12: Outline First
Fill piping bags or squeeze bottles with thick icing. Carefully pipe outlines around the edges of each cookie shape. Let outlines dry for 15-20 minutes until they form a crust.
Step 13: Flood the Centers
Using thinned icing, fill the centers within your outlines. Use a toothpick to spread icing evenly and pop any air bubbles. Work quickly before the icing begins to set.
Step 14: Add Details
While the base layer is still wet, pipe details like feathers on turkeys, veins on leaves, or facial features. Use contrasting colors for visual interest. For dimensional details, let the base dry completely (2-3 hours) before adding layers.
Step 15: Final Drying
Let decorated cookies dry uncovered at room temperature for 6-8 hours or overnight. The icing should be completely hard to the touch and not sticky.
What to Serve Thanksgiving Cookies Royal Icing With
These versatile cookies shine in multiple settings!
Hot Beverages: Pair with spiced apple cider, pumpkin spice lattes, hot chocolate, or chai tea. The warm drinks complement the sweet, crisp cookies perfectly.
Coffee Bar: Set up a dessert station with various coffee options. These cookies are ideal for dunking!
Holiday Dessert Platter: Arrange alongside pumpkin pie, pecan tarts, and apple crisp for a stunning dessert spread.
Kids’ Thanksgiving Table: Serve with milk or juice boxes for the children’s table—they’ll love the festive shapes.
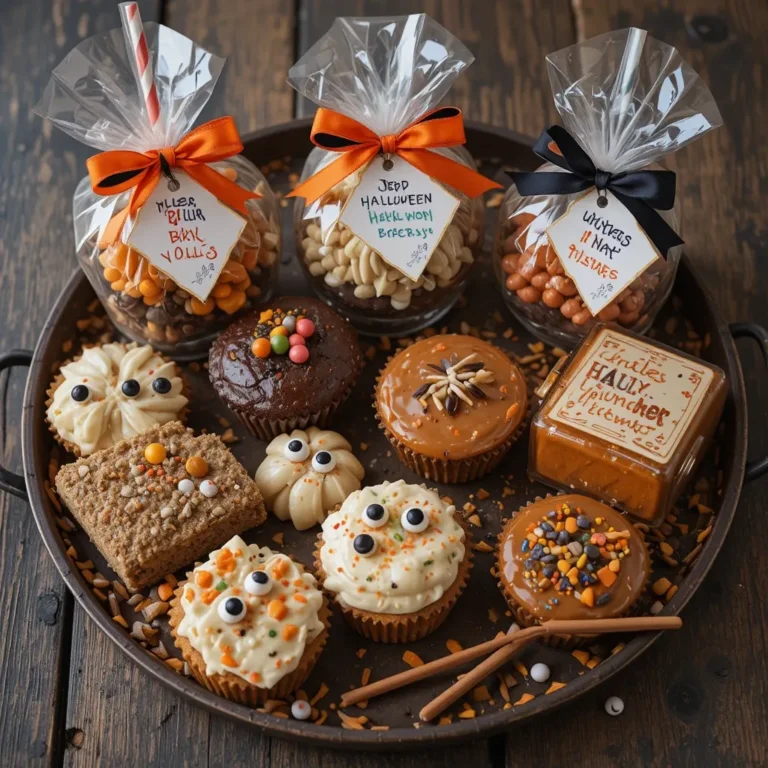
Gift Packaging: Wrap in cellophane bags with ribbon for hostess gifts or party favors.
Top Tips for Perfecting Thanksgiving Cookies Royal Icing
Don’t Skip the Chill Time
Cold dough is non-negotiable. It prevents spreading during baking, ensuring your turkeys don’t turn into blobs. If dough softens while rolling, pop it back in the fridge for 15 minutes.
Sift Your Powdered Sugar
Lumpy royal icing is a decorator’s nightmare. Always sift powdered sugar before mixing to achieve that perfectly smooth, professional finish.
Master Icing Consistency
This is the key to success! Outlining icing should hold a peak. Flooding icing should flow smoothly but not be watery. Test consistency on a plate before committing to your cookies.
Use Gel Food Coloring
Liquid food coloring thins royal icing and produces dull colors. Gel or paste food coloring provides vibrant hues without affecting consistency.
Work in Stages
Don’t rush! Dry each layer before adding details. Patience prevents colors from bleeding together and creates cleaner designs.
Keep Icing Covered
Royal icing crusts quickly when exposed to air. Cover bowls with damp paper towels and keep piping bag tips covered between uses.
Practice Piping
New to decorating? Practice piping techniques on parchment paper before moving to cookies. You’ll gain confidence and control.
Use Quality Vanilla
Since these cookies are fairly simple, ingredient quality matters. Pure vanilla extract creates noticeably better flavor than imitation.
Don’t Overbake
Golden edges are perfect; brown edges are overdone. Remember, cookies continue cooking slightly on the hot pan after leaving the oven.
Plan Your Designs
Sketch cookie designs beforehand or use reference images. This speeds up decorating and ensures consistency across batches.
Storing and Reheating Tips
Room Temperature Storage:
Store completely dried decorated cookies in an airtight container at room temperature for up to 2 weeks. Layer cookies between sheets of parchment or wax paper to prevent sticking. Keep away from humidity, which can soften the icing.
Freezing Undecorated Cookies:
Freeze baked, undecorated cookies for up to 3 months. Stack with parchment between layers in freezer-safe containers. Thaw at room temperature before decorating.
Freezing Decorated Cookies:
Once royal icing is completely dry (24 hours), you can freeze decorated cookies for up to 2 months. Freeze in single layers on baking sheets first, then transfer to containers with parchment layers. This prevents icing from chipping.
Dough Storage:
Refrigerate unbaked dough for up to 1 week or freeze for 3 months. Thaw frozen dough overnight in the refrigerator before rolling.
No Reheating Needed:
These cookies are enjoyed at room temperature. Reheating isn’t recommended as it would melt the royal icing decoration.
Frequently Asked Questions
Can I make royal icing without meringue powder?
Yes! Substitute with 2 large pasteurized egg whites instead of meringue powder and water. Beat with powdered sugar until stiff peaks form. Meringue powder is preferred for stability and food safety.
Why is my royal icing too runny?
You’ve added too much water. Gradually mix in more sifted powdered sugar, 1 tablespoon at a time, until you reach the desired consistency. Always add liquid sparingly.
How do I fix lumpy royal icing?
Strain the icing through a fine-mesh sieve to remove lumps. This happens when powdered sugar isn’t sifted first. Prevention is easier than fixing!
Can I use cookie cutters other than Thanksgiving shapes?
Absolutely! Use any shapes you like. The recipe works perfectly for any occasion—just adjust your decorating colors and themes accordingly.
Why did my cookies spread during baking?
Common causes include: dough too warm, butter too soft, or not enough flour. Always chill dough properly and measure flour accurately by spooning into measuring cups.
How long does royal icing take to dry completely?
Surface drying takes 6-8 hours, but complete hardening requires 24 hours. Don’t stack or package cookies until fully hardened to prevent damage.
Can I add flavors to royal icing?
Yes! Add ½ teaspoon of extract (almond, lemon, or peppermint) to the royal icing. Avoid oil-based flavorings as they can break down the icing.
What’s the best way to thin royal icing?
Add water one drop at a time, mixing thoroughly between additions. Test consistency frequently. It’s easier to thin than to thicken!
Why is my royal icing dull instead of shiny?
Undermixing is usually the culprit. Beat royal icing for the full 7-10 minutes to incorporate air and achieve that glossy finish.
Can kids help make these cookies?
Definitely! Kids love cutting shapes and decorating. Give them squeeze bottles with thicker icing for easier control and less mess.
Nutrition Information
| Nutrient | Per Cookie (unfrosted) | With Royal Icing |
|---|---|---|
| Calories | 95 | 135 |
| Total Fat | 4g | 4g |
| Saturated Fat | 2.5g | 2.5g |
| Cholesterol | 15mg | 15mg |
| Sodium | 45mg | 50mg |
| Total Carbohydrates | 14g | 24g |
| Sugars | 6g | 16g |
| Protein | 1g | 1g |
Based on 24 cookies. Values are approximate and may vary based on specific ingredients and decorating.
Creative Decorating Ideas
Color Palettes to Try:
- Traditional: Orange, brown, yellow, deep red
- Rustic: Cream, tan, burnt orange, sage green
- Modern: Gold, copper, burgundy, navy
- Whimsical: Pink, turquoise, purple with gold accents
Design Themes:
- Grateful Messages: Pipe “Thankful,” “Blessed,” or “Gather” on leaf cookies
- Place Card Cookies: Write guest names for edible seating cards
- Harvest Scene: Create coordinating designs that form a scene when arranged together
- Ombré Effect: Gradient colors on leaf cookies from light to dark
Advanced Techniques:
- Wet-on-Wet: Drop contrasting colors into wet icing and swirl with toothpicks
- Brush Embroidery: Use a damp brush to pull icing for texture
- Stenciling: Use cookie stencils with royal icing for intricate patterns
- Marbling: Swirl multiple colors together for marble effect
Making It a Family Activity
Get everyone involved in the cookie-making fun! Assign age-appropriate tasks: young children can help mix dough and use cookie cutters, older kids can outline cookies, and adults can handle detailed work. Set up stations for maximum efficiency—one for rolling, one for baking, and one for decorating.
Play festive music, wear aprons, and make it a memorable tradition. Take photos of everyone’s creations before the cookies get devoured. These moments become cherished holiday memories that last far longer than the cookies themselves.
Troubleshooting Common Issues
Icing Won’t Flow Smoothly: Too thick. Add water ½ teaspoon at a time.
Colors Bleeding Together: Outline not dry enough. Wait longer before flooding.
Cookies Too Hard: Overbaked. Reduce time by 1-2 minutes next batch.
Icing Cracking When Dry: Applied too thick. Use thinner layers.
Cookies Breaking: Too thin when rolled. Aim for ¼-inch thickness consistently.
Your Thanksgiving cookies royal icing creations are going to be the talk of your holiday gathering! These beautiful, delicious treats combine artistry with flavor in the most delightful way. Whether you’re an experienced baker or trying cookie decorating for the first time, this recipe sets you up for success.
Remember, perfection isn’t the goal—creating joy is. Some cookies will be masterpieces, others charmingly imperfect, and all will be delicious. Share your creations with us on social media, and don’t forget to save this recipe for next year.
Happy baking, and may your Thanksgiving be filled with sweetness, gratitude, and plenty of beautiful cookies!
Pin this recipe for later and share with friends who love holiday baking!