Quick Thanksgiving Marshmallow Treats Ready in 20 Minutes
Thanksgiving marshmallow treats bring the perfect combination of gooey, sweet, and festive to your holiday table! These colorful, no-bake delights take just 20 minutes to create and instantly transform ordinary marshmallows into show-stopping autumn desserts. Did you know that marshmallows were once made from the root of the marshmallow plant and considered a delicacy for pharaohs?
Today’s version is much easier to work with! This recipe is incredibly special because it requires minimal ingredients, zero oven time, and delivers maximum joy to both kids and adults alike.
If you loved our Pumpkin Rice Krispie Treats, you’ll absolutely adore this festive twist that adds Thanksgiving colors and flavors to the classic marshmallow treat formula. Get ready to create memories and satisfy sweet tooths with this foolproof family favorite!
What is Thanksgiving Marshmallow Treats?
Ever wonder why we call them “treats” instead of just “marshmallow snacks”? Well, these Thanksgiving marshmallow treats earn their name by being an absolute treat to make, share, and devour! They’re essentially fluffy marshmallows combined with butter and crispy rice cereal, then dressed up in gorgeous fall colors and Thanksgiving-themed decorations.
As the classic saying goes, “the way to a man’s heart is through his stomach,” and these treats prove it’s also the way to a child’s heart, a grandmother’s smile, and everyone else at your Thanksgiving gathering!
The playful name captures the celebratory spirit and reminds us that sometimes the best holiday recipes are the ones that bring pure, simple joy. Don’t wait another minute—grab your marshmallows and let’s create some Thanksgiving magic together!
Why You’ll Love This Thanksgiving Marshmallow Treats
The Ultimate Crowd-Pleaser
These Thanksgiving marshmallow treats are the ultimate crowd-pleaser that never fails to bring smiles. The combination of crispy, crunchy cereal with gooey, melted marshmallow creates an irresistible texture that literally melts in your mouth. Each bite delivers that nostalgic sweetness we all crave during the holidays, wrapped up in beautiful autumn colors that make your dessert table look professionally decorated.
Budget-Friendly Holiday Magic
Making these treats at home saves you serious money compared to buying fancy bakery desserts. With just a handful of affordable ingredients—marshmallows, butter, cereal, and food coloring—you can create dozens of treats for less than $10. Compare that to store-bought specialty desserts that cost $20-30 for a small batch! Plus, you control the quality of ingredients and can make them fresher and more delicious than anything mass-produced.
Customizable and Fun
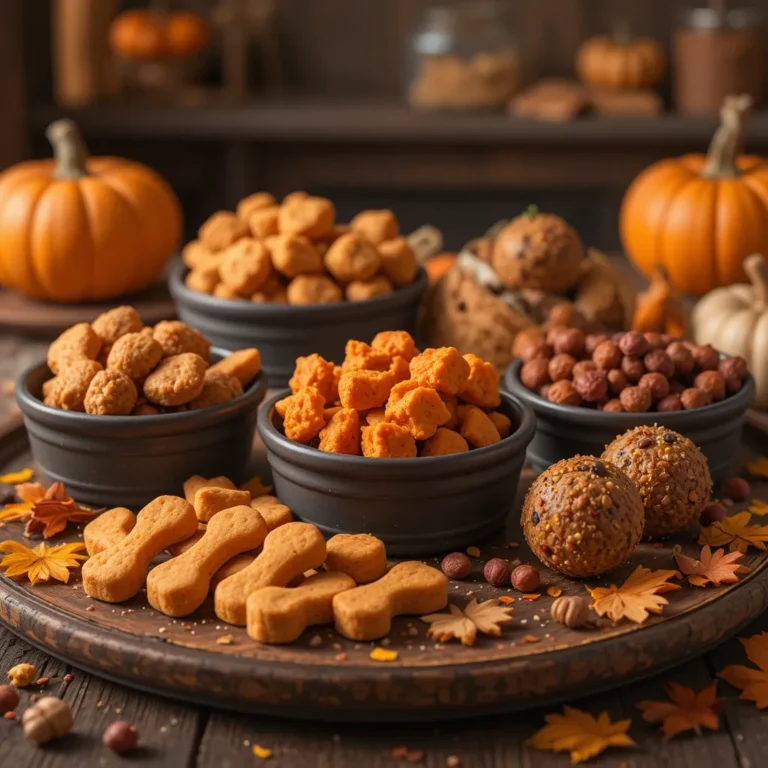
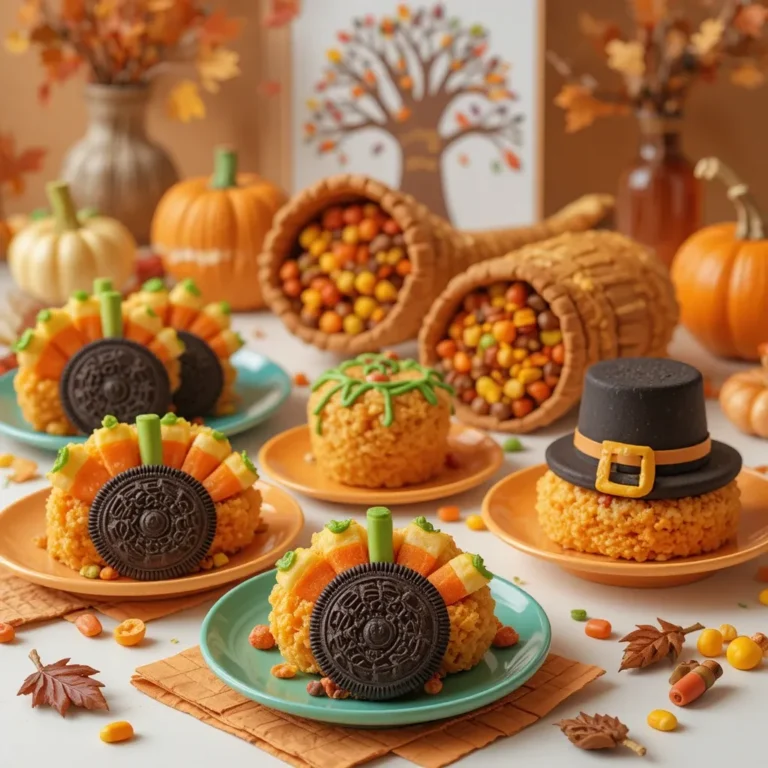
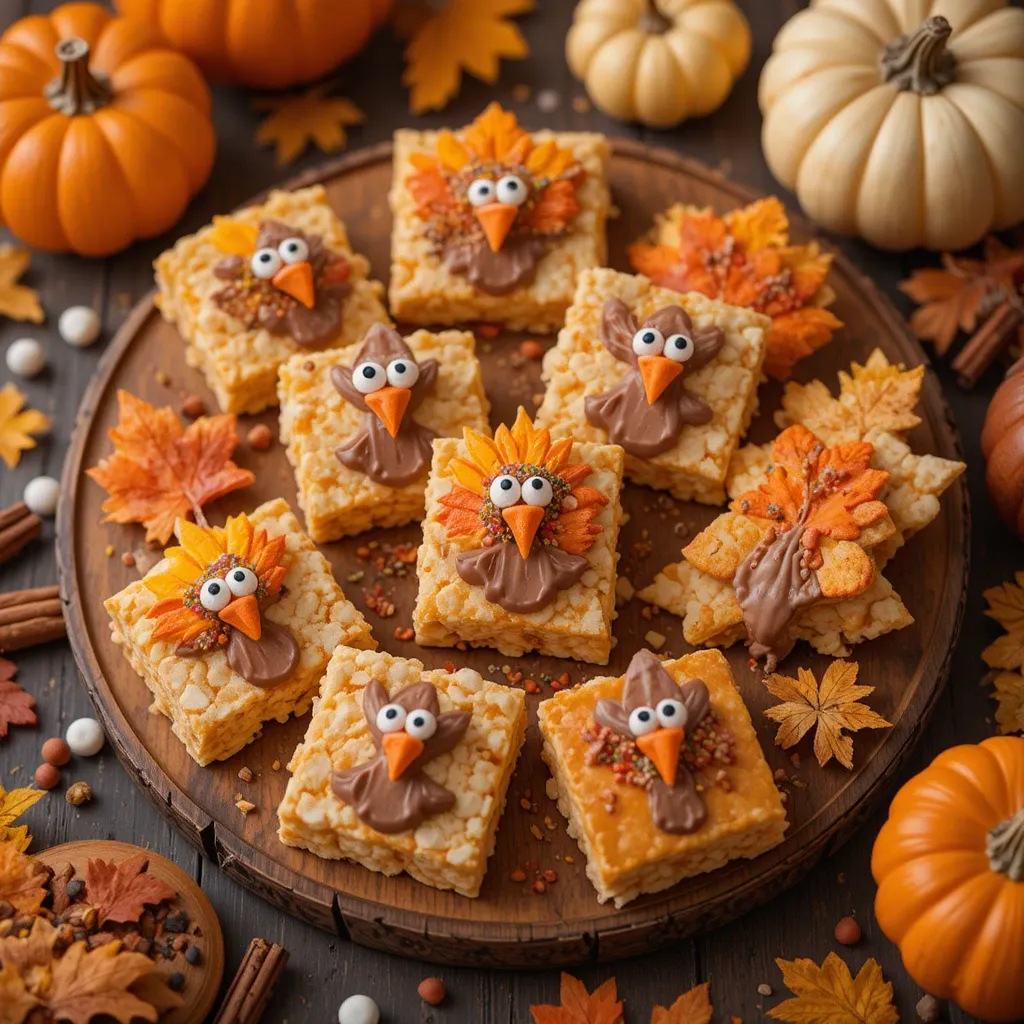
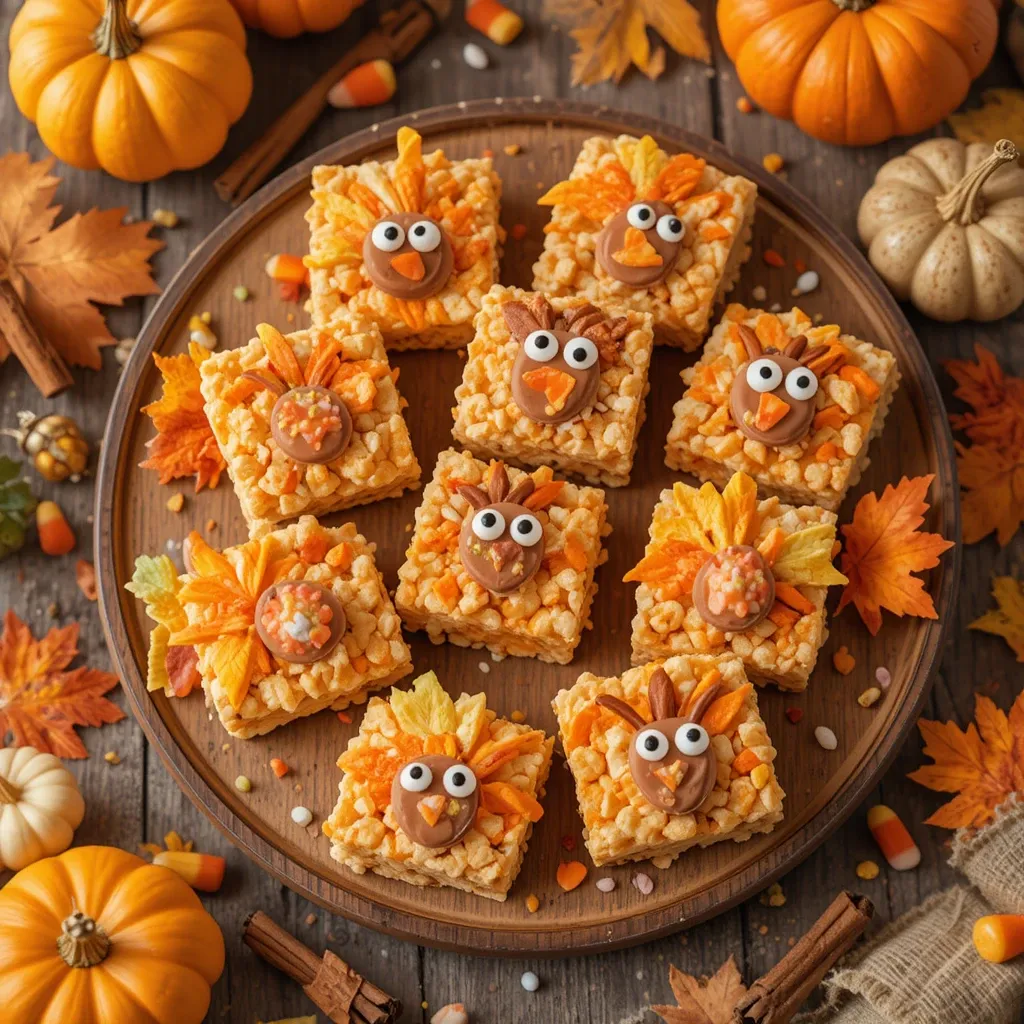
The best part? These treats are endlessly customizable with festive toppings like candy corn, chocolate chips, sprinkles, or even edible glitter. You can shape them into turkeys, leaves, or pumpkins to match your Thanksgiving theme. The vibrant orange, yellow, and red colors make them visually stunning, while additions like white chocolate drizzle or caramel swirls take them from simple to spectacular. If you enjoyed our Fall Sugar Cookies, you’ll love how these treats offer similar decorating fun without the lengthy baking process. Why not whip up a batch this weekend and discover your new favorite Thanksgiving tradition?
How to Make Thanksgiving Marshmallow Treats
Quick Overview
This Thanksgiving marshmallow treats recipe is wonderfully simple to make and perfect for busy holiday prep!
You’ll love how quickly it comes together with minimal mess and maximum flavor. The key to success is working with perfectly melted marshmallows that create that signature gooey-crispy texture everyone adores.
Time Breakdown:
- Prep Time: 10 minutes
- Cook Time: 5 minutes
- Cooling Time: 30 minutes
- Total Time: 45 minutes
- Yield: 24 large treats
Key Ingredients for Thanksgiving Marshmallow Treats
Base Ingredients:
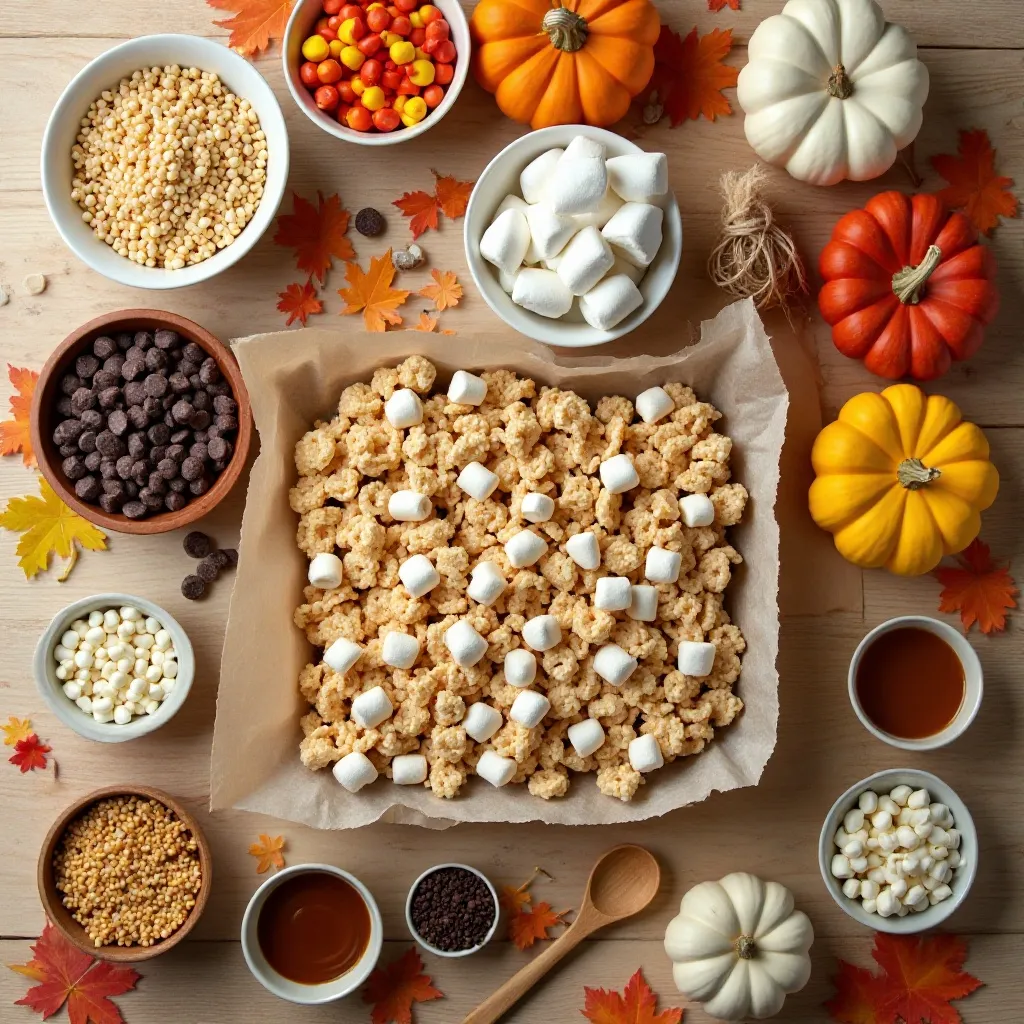
- 6 cups crispy rice cereal (like Rice Krispies)
- 4 tablespoons unsalted butter
- 10 oz bag mini marshmallows (about 40 large marshmallows)
- 1/2 teaspoon vanilla extract
- Pinch of salt
For Thanksgiving Colors:
- Orange gel food coloring
- Yellow gel food coloring
- Red gel food coloring
Optional Toppings:
- Candy corn
- Chocolate chips
- Fall-colored sprinkles
- Candy eyeballs (for turkey designs)
- White chocolate chips for drizzling
- Caramel sauce
Tools Needed:
- Large pot or saucepan
- 9×13 inch baking pan
- Parchment paper or cooking spray
- Wooden spoon or silicone spatula
- Mixing bowls (if making multiple colors)
Step-by-Step Instructions
Step 1: Prepare Your Workspace
Start by preparing your 9×13 inch baking pan with either parchment paper or a generous coating of cooking spray. This crucial step prevents sticking and makes removing the treats much easier later. Line up all your ingredients and tools within arm’s reach because once the marshmallow mixture is ready, you’ll need to work quickly before it sets.
Step 2: Melt the Butter
In a large pot over medium-low heat, melt the 4 tablespoons of butter completely. Watch carefully to ensure it doesn’t brown—you want it just melted and glistening. The butter creates richness and helps prevent the marshmallows from sticking to your pot. Swirl the pot occasionally to coat the bottom evenly.
Step 3: Add Marshmallows
Pour all the mini marshmallows into the melted butter and stir continuously with a wooden spoon or silicone spatula. Keep the heat at medium-low to prevent scorching. The marshmallows will begin to puff up and gradually melt into a smooth, glossy mixture. This process takes about 3-4 minutes. Stir constantly to ensure even melting and to prevent any burning on the bottom.
Step 4: Add Vanilla and Salt
Once the marshmallows are completely melted and smooth, remove the pot from heat immediately. Stir in the vanilla extract and pinch of salt. These small additions enhance the overall flavor and prevent the treats from tasting too one-dimensional. Mix thoroughly for about 15 seconds until everything is well combined.
Step 5: Divide and Color (Optional)
If you want to create multiple Thanksgiving colors, quickly divide the marshmallow mixture into 2-3 separate bowls. Working fast, add 3-4 drops of gel food coloring to each bowl—orange in one, yellow in another, and red in the third. Stir each bowl vigorously until the color is evenly distributed throughout. Gel food coloring works best as it won’t make the mixture too watery.
Step 6: Add the Cereal
Add 2 cups of crispy rice cereal to each colored bowl (or all 6 cups to a single batch if making one color). Fold the cereal into the marshmallow mixture gently but thoroughly using your spatula. Make sure every piece of cereal gets coated with the sticky marshmallow. The mixture will be very thick and sticky—this is perfect!
Step 7: Press Into Pan
Immediately transfer the mixture to your prepared pan. Using a piece of parchment paper or wax paper sprayed with cooking spray, press the mixture firmly and evenly into the pan. Don’t use your bare hands as the mixture is extremely sticky! Apply even pressure across the entire surface to create a uniform thickness. If making multiple colors, you can create layers or swirls for a beautiful marbled effect.
Step 8: Add Toppings
While the treats are still warm and sticky, press your chosen toppings gently into the surface. Candy corn, chocolate chips, or sprinkles should be added now so they adhere properly. Get creative with your designs—create turkey faces, autumn leaves, or simply scatter fall colors across the top. Press toppings in firmly enough to stick but not so hard that you crush the treats.
Step 9: Cool Completely
Allow the treats to cool at room temperature for at least 30 minutes until completely set. Don’t rush this step by refrigerating, as it can make the treats too hard. The cooling process lets the marshmallow firm up to that perfect chewy-crispy texture. You’ll know they’re ready when the surface feels firm to a light touch.
Step 10: Cut and Serve
Once cooled, lift the entire treat sheet out using the parchment paper. Place on a cutting board and use a sharp knife sprayed with cooking spray to cut into 24 squares or rectangles. For cleaner cuts, wipe the knife between each slice. You can also use cookie cutters to create fun Thanksgiving shapes like turkeys, pumpkins, or leaves—just be sure to spray the cutters well!
What to Serve Thanksgiving Marshmallow Treats With
These delightful treats pair wonderfully with various Thanksgiving beverages and desserts to create a complete holiday experience.
Hot Beverages: Serve alongside hot apple cider, pumpkin spice lattes, or hot chocolate with whipped cream. The warm drinks complement the sweet, crispy texture beautifully.
Ice Cream: Create a fun dessert bar by pairing these treats with vanilla bean ice cream or butter pecan. The temperature contrast and creamy texture make an incredible combination.
Fall Fruits: Arrange on a platter with fresh apple slices, pear wedges, and grapes. The fresh fruit helps balance the sweetness and adds a refreshing element.
Coffee Station: Set up a coffee station with various roasts and let guests enjoy these treats as the perfect sweet accompaniment to their afternoon coffee.
Thanksgiving Dessert Spread: Display alongside pumpkin pie, pecan pie, and apple crisp for a diverse dessert table that offers something for everyone, especially those who prefer simpler sweets.
Kids’ Table: These are perfect for the children’s table with cold milk or fruit punch, keeping the little ones happy and energized.
Top Tips for Perfecting Thanksgiving Marshmallow Treats
Use Fresh Marshmallows
Always use fresh, soft marshmallows for the best texture. Stale marshmallows won’t melt as smoothly and can create a tough, hard final product. Check the expiration date and give the bag a gentle squeeze—it should feel soft and pillowy.
Control Your Heat
Low and slow wins the race with marshmallows. Too high heat causes them to scorch on the bottom while remaining lumpy on top. Medium-low heat gives you perfect control and ensures even melting every time.
Work Quickly
The marshmallow mixture begins setting as soon as it starts cooling. Have everything prepped and ready before you start cooking. Once you add the cereal, work fast to get it into the pan and pressed down within 2-3 minutes.
Don’t Overmix
While you want the cereal evenly coated, overmixing can break down the cereal and create a dense, mushy texture. Fold gently but efficiently—about 20-30 strokes should do it.
Grease Everything
Spray or butter your spatula, your hands (if using), the parchment paper, and anything else that touches the mixture. This prevents frustrating sticking and makes cleanup infinitely easier.
Try Brown Butter
For a deeper, nuttier flavor, brown your butter before adding the marshmallows. Cook the butter until it turns golden and smells toasty. This elevates the treats from good to absolutely incredible.
Add Mix-Ins
Fold in 1/2 cup of chocolate chips, butterscotch chips, or chopped nuts after adding the cereal for extra flavor and texture. Dried cranberries or chopped pecans add a sophisticated Thanksgiving touch.
Create Clean Cuts
For professional-looking squares, use a pizza cutter or large sharp knife sprayed generously with cooking spray. Wipe between cuts for the cleanest edges.
Size Matters
Smaller treats are perfect for parties where guests want variety, while larger squares work great for lunch boxes or substantial snacks. Adjust your cutting accordingly.
Storage Success
Don’t stack the treats directly on top of each other without parchment paper between layers, or they’ll stick together in an inseparable mass.
Storing and Reheating Tips
Room Temperature Storage
Store your Thanksgiving marshmallow treats in an airtight container at room temperature for up to 3 days. Layer them between sheets of parchment paper to prevent sticking. Keep them away from direct sunlight or heat sources, which can make them melt or become too soft.
Refrigerator Storage
While not typically necessary, you can refrigerate the treats in hot, humid weather. Place them in an airtight container with parchment between layers and they’ll keep for up to 1 week. Be aware that refrigeration makes them firmer and slightly less chewy. Let them come to room temperature for 15-20 minutes before serving for the best texture.
Freezer Storage
These treats freeze beautifully for up to 6 weeks! Wrap individual treats tightly in plastic wrap, then place them all in a freezer-safe zip-top bag or airtight container. Label with the date so you know when you made them. This is perfect for making them ahead during busy holiday prep time.
Thawing Instructions
Remove frozen treats from the freezer and let them thaw at room temperature for about 30 minutes. Don’t microwave them to speed up the process, as this will make them tough and chewy in an unpleasant way. They’ll taste just as fresh as the day you made them!
Reheating (If Desired)
Generally, these treats are best enjoyed at room temperature or slightly chilled. However, if you want to refresh slightly stale treats, place them in the microwave for just 5-7 seconds. This will soften them slightly and restore some of the original texture. Don’t overdo it or they’ll turn into a melted mess!
Keeping Them Fresh for Parties
If making these for a party or gathering, prepare them the night before and store properly. On serving day, arrange them on a platter about 1 hour before guests arrive so they’re at perfect room temperature and ready to enjoy.
Frequently Asked Questions
<h4>Can I use regular marshmallows instead of mini marshmallows?</h4>
Absolutely! Use 40 large marshmallows in place of the 10 oz bag of mini marshmallows. They’ll take slightly longer to melt (about 5-6 minutes instead of 3-4), but the results are identical. Some people actually prefer large marshmallows because they melt more evenly. <h4>Why are my marshmallow treats hard and tough?</h4>
This usually happens from overcooking the marshmallows, using old/stale marshmallows, or pressing the mixture too firmly into the pan. The marshmallows should be melted just until smooth, not cooked for extended periods. Also, avoid packing the mixture too tightly—a gentle but even press is all you need. <h4>Can I make these treats gluten-free?</h4>
Yes! Simply use certified gluten-free crispy rice cereal instead of regular. Check that your marshmallow brand is also gluten-free (most are, but always verify). The recipe works exactly the same way with no other modifications needed. <h4>How do I prevent the treats from sticking to everything?</h4>
The secret is generous greasing! Spray your pan, spatula, and even the parchment paper you use to press down the mixture with cooking spray. You can also butter your hands if working with the mixture directly. Working quickly also helps since the mixture gets stickier as it cools. <h4>Can I add protein powder to make these healthier?</h4>
You can add 1/4 cup of vanilla protein powder to the mixture, but be aware it will change the texture slightly, making them a bit denser. Add it right after melting the marshmallows and before adding the cereal. This isn’t a health food, but this modification can add some nutritional value. <h4>What’s the best food coloring to use?</h4>
Gel food coloring is best because it provides vibrant colors without adding excess liquid that can make the treats sticky or soggy. Avoid liquid food coloring as it requires too much to achieve deep colors and will negatively affect the texture. <h4>Can I make these dairy-free?</h4>
Yes! Substitute the butter with vegan butter or coconut oil. Use dairy-free marshmallows (check labels, as many marshmallows are actually dairy-free already). The texture and taste remain virtually identical with these simple swaps. <h4>Why did my treats turn out sticky?</h4>
Sticky treats usually result from too much butter, not enough cereal, or humid weather. Make sure you’re measuring ingredients accurately. In humid conditions, you might need to add an extra 1/2 cup of cereal to compensate for moisture in the air. <h4>Can kids help make these?</h4>
Definitely! Kids love making marshmallow treats. They can help measure ingredients, stir the cereal into the marshmallow mixture, add food coloring, and decorate the tops. Just keep them away from the hot stove and melting marshmallow process. Pressing the mixture into the pan and adding toppings are perfect kid-friendly tasks. <h4>How far in advance can I make these for Thanksgiving?</h4>
Make them up to 2 days before Thanksgiving for optimal freshness when storing at room temperature. For earlier preparation, make them up to 1 week ahead and refrigerate, or up to 6 weeks ahead and freeze. They’ll taste just as delicious as freshly made!
Nutrition Information
| Nutrient | Per Serving (1 treat) |
|---|---|
| Calories | 110 |
| Total Fat | 2g |
| Saturated Fat | 1g |
| Cholesterol | 5mg |
| Sodium | 95mg |
| Total Carbohydrates | 23g |
| Dietary Fiber | 0g |
| Sugars | 12g |
| Protein | 1g |
| Vitamin D | 0% |
| Calcium | 2% |
| Iron | 8% |
| Potassium | 1% |
Note: Nutrition information is approximate and based on 24 servings. Values may vary depending on specific brands used and optional toppings added.
Additional Helpful Tips and Variations
Creative Shape Ideas
Transform these treats into adorable Thanksgiving characters! Use a turkey-shaped cookie cutter and decorate with candy corn feathers, candy eyeballs, and an orange M&M for the beak. Create pumpkin shapes and add green fruit leather stems. Leaf-shaped cutters in various sizes make elegant autumn treats when decorated with edible gold dust.
Flavor Variations
Elevate the basic recipe with exciting flavor additions. Stir in 1 teaspoon of pumpkin pie spice with the vanilla for authentic fall flavor. Add 2 tablespoons of peanut butter for a protein boost and nutty taste. Mix in 1/4 cup of Nutella for chocolate-hazelnut treats. Swap vanilla extract for maple extract for a quintessentially autumn flavor profile.
Chocolate Drizzle Technique
Melt 1/2 cup of chocolate chips with 1 teaspoon of coconut oil in the microwave at 50% power in 30-second intervals. Transfer to a zip-top bag, snip a tiny corner, and drizzle over cooled treats in zigzag patterns. White chocolate, dark chocolate, and caramel drizzles all work beautifully and add visual appeal.
Making Them Extra Special
Press a layer of chocolate chips onto the bottom before adding the marshmallow mixture for a hidden chocolate surprise. Create a “candy corn” layered version by dividing the batch into thirds and coloring them orange, yellow, and white, then layering in the pan. Add 1/4 cup of crushed pretzels to the cereal for a sweet-salty combination that’s absolutely addictive.
Party Presentation Ideas
Arrange treats on a tiered serving stand with fall leaves and mini pumpkins for an impressive display. Wrap individual treats in clear cellophane bags tied with raffia ribbon for party favors guests can take home. Create a “build your own” treat bar with plain treats and bowls of various toppings so guests can customize their own.
Common Mistakes to Avoid
Never compress the mixture too firmly or you’ll end up with dense, hard treats. Don’t let the marshmallow mixture cook too long or at too high a temperature. Avoid making these on extremely humid days if possible, as moisture in the air can make them sticky. Don’t use margarine instead of butter—it contains more water and will negatively affect the texture.
Allergy-Friendly Modifications
For nut allergies, ensure all ingredients are processed in nut-free facilities and avoid any nut-based toppings. Make them corn-free by skipping candy corn and using alternative decorations. For egg allergies, check your marshmallow brand as most are egg-free, but some specialty brands may contain egg proteins.
These Thanksgiving marshmallow treats are guaranteed to become your go-to holiday recipe! They’re simple enough for beginner cooks yet impressive enough to wow guests at your Thanksgiving celebration. The combination of nostalgic flavor, festive colors, and easy preparation makes them perfect for busy holiday schedules.
Whether you’re creating them for a potluck, school party, or family gathering, these treats deliver smiles every single time. Don’t forget to share your beautiful creations on social media and tag us—we love seeing your festive variations! Happy Thanksgiving and happy treat-making!