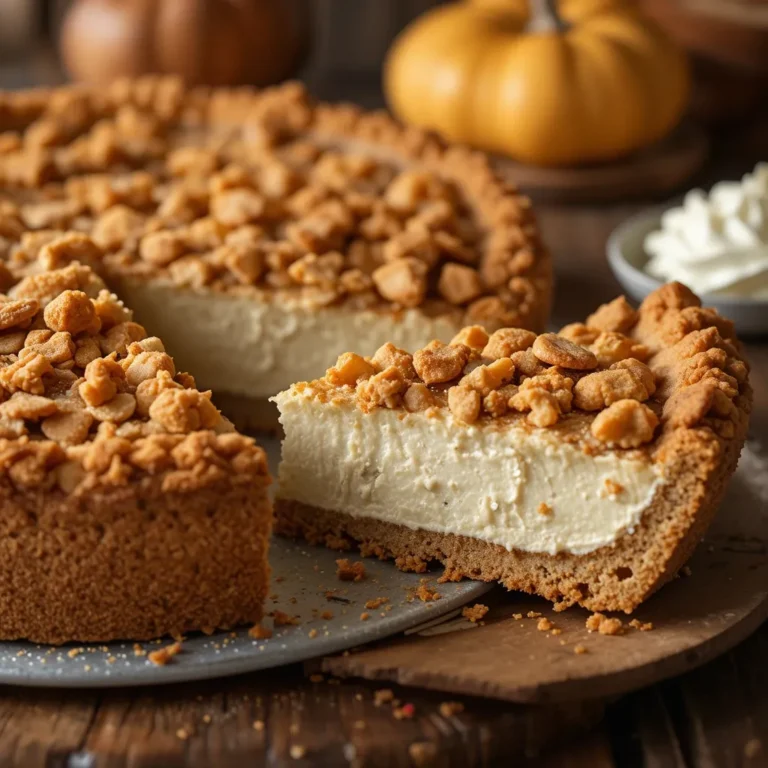
Thanksgiving Place Card Cookies Easy Cookie Tutorial
Imagine combining the warmth of homemade cookies with the charm of personalized place settings. These Thanksgiving place card cookies are the perfect blend of function and flavor, turning your dinner table into an edible work of art. Buttery, sweet, and beautifully decorated, they’re easier to make than you’d think and create an unforgettable impression on your holiday guests.
Just like our popular pumpkin spice sugar cookies, these festive treats require simple ingredients and minimal decorating skills. Whether you’re hosting your first Thanksgiving or you’re a seasoned pro, these adorable cookies will have everyone talking before they even take their first bite.
What Are Thanksgiving Place Card Cookies?
Ever wonder why we put so much effort into place cards when half the time they just get tossed aside? Well, what if your guests could actually eat their name tags?
That’s the genius behind thanksgiving place card cookies! These clever little treats serve double duty as both table decorations and dessert. They’re essentially decorated sugar cookies with your guests’ names piped on top in royal icing.
As the saying goes, “the way to a man’s heart is through his stomach,” and these cookies prove that the way to a memorable Thanksgiving is through creative, delicious details. Ready to impress your family with this sweet seating solution?

Why You’ll Love This Thanksgiving Place Card Cookies Recipe
Personal Touch Meets Delicious Treat
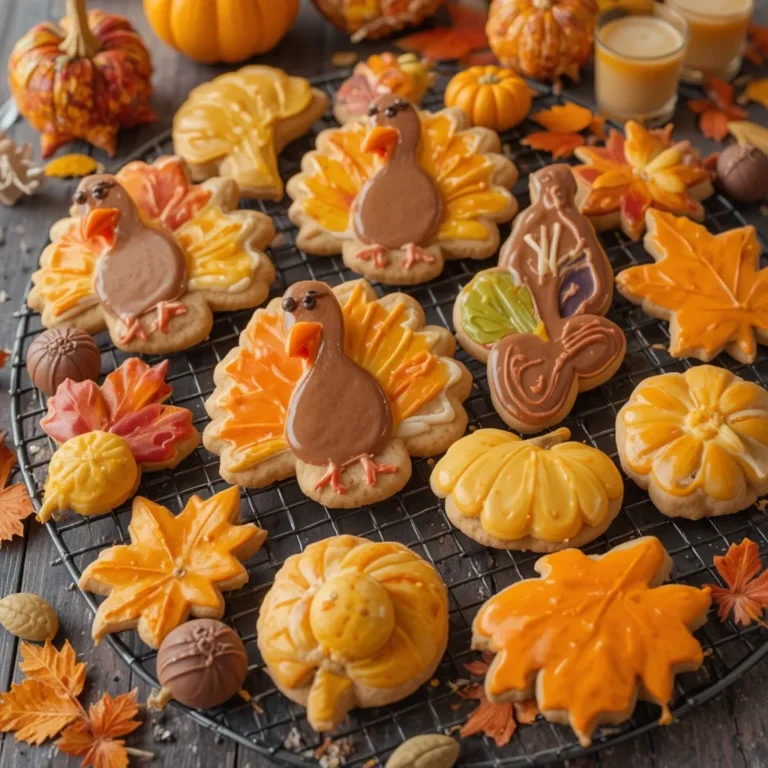
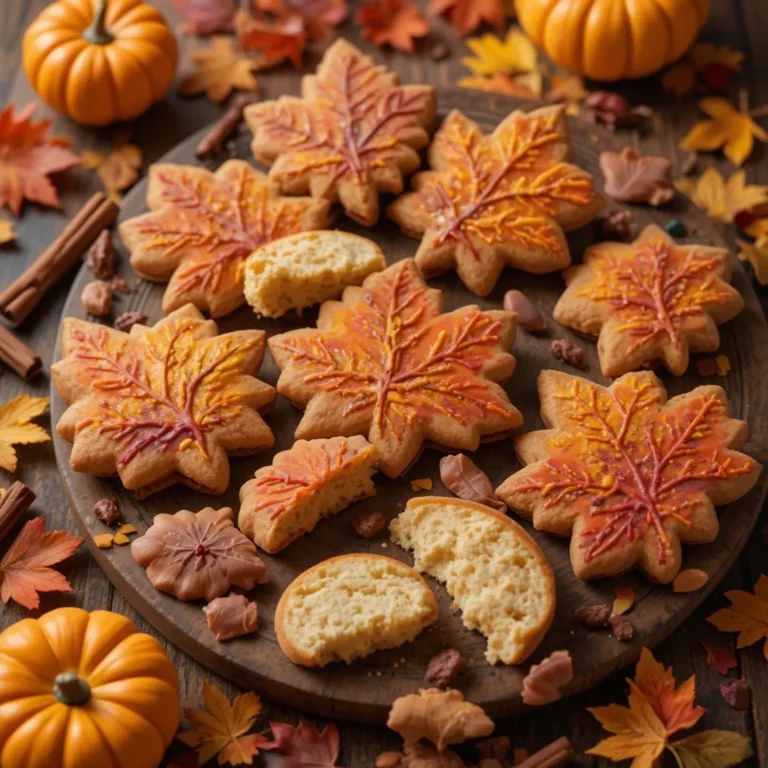
These cookies aren’t just beautiful—they’re incredibly meaningful. Each guest gets their own personalized cookie, making them feel special before dinner even begins. The buttery vanilla flavor pairs perfectly with royal icing that hardens to a smooth, professional finish. Kids and adults alike will be delighted to find their names written in icing, surrounded by festive autumn designs like leaves, pumpkins, or turkeys.
Budget-Friendly Table Decor
Forget spending money on fancy paper place cards or expensive table decorations. Making thanksgiving place card cookies at home costs a fraction of what you’d pay for professional place settings, and they taste infinitely better! With basic pantry staples like flour, butter, sugar, and eggs, plus some food coloring for the icing, you’re creating both decoration and dessert. Compare this to our maple pecan cookies, and you’ll see why homemade holiday treats always win.
Customizable and Fun to Make
The best part? You can customize these cookies to match your Thanksgiving theme perfectly. Choose autumn colors like orange, red, yellow, and brown for your royal icing. Add decorative elements like gold luster dust for elegance or sprinkles for a playful touch. You can even make them ahead of time—royal icing dries completely, making these cookies stackable and easy to store. Get the kids involved in decorating for a fun family activity that doubles as party prep.
Make This Recipe Your New Thanksgiving Tradition
Once you try these thanksgiving place card cookies, they’ll become a requested staple at every holiday gathering. The combination of practicality and sweetness is unbeatable, and your guests will leave with both full stomachs and warm memories.
How to Make Thanksgiving Place Card Cookies
Quick Overview
These thanksgiving place card cookies are surprisingly simple to create, even if you’ve never worked with royal icing before.
The process involves three main steps:
- Baking perfectly shaped sugar cookies
- Preparing smooth royal icing
- Decorating with names and designs
Total Time Breakdown:
- Prep Time: 30 minutes
- Chilling Time: 1 hour
- Baking Time: 10-12 minutes per batch
- Decorating Time: 45-60 minutes
- Total Time: Approximately 3 hours
The cookies themselves are tender and buttery with a slight vanilla sweetness that doesn’t overpower the decorative icing. Royal icing dries to a beautiful matte finish that’s firm enough to handle but still pleasant to eat.
Key Ingredients for Thanksgiving Place Card Cookies
For the Sugar Cookies:
- 3 cups all-purpose flour
- 1½ teaspoons baking powder
- ½ teaspoon salt
- 1 cup (2 sticks) unsalted butter, softened
- 1 cup granulated sugar
- 1 large egg
- 2 teaspoons vanilla extract
- 1 tablespoon milk
For the Royal Icing:
- 4 cups powdered sugar, sifted
- 3 tablespoons meringue powder
- 6-7 tablespoons warm water
- Gel food coloring (autumn colors: orange, red, yellow, brown)
- ½ teaspoon vanilla extract (optional)
Equipment Needed:
- Rectangle or oval cookie cutters (3-4 inches)
- Rolling pin
- Parchment paper
- Piping bags and tips (size 2 or 3 for writing)
- Toothpicks for detail work
Step-by-Step Instructions
Make the Cookie Dough
Start by whisking together your dry ingredients. In a medium bowl, combine the flour, baking powder, and salt. Set this aside while you prepare the wet ingredients.
In a large mixing bowl, cream the softened butter and sugar together using an electric mixer on medium speed. Beat for about 3-4 minutes until the mixture becomes light and fluffy. This step is crucial for creating tender cookies.
Add the egg and vanilla extract to the butter mixture and beat until fully combined. Scrape down the sides of the bowl to ensure everything is incorporated evenly.
Gradually add the dry ingredients to the wet ingredients, mixing on low speed. Add about one-third of the flour mixture at a time. When the dough starts to come together but still looks slightly crumbly, add the tablespoon of milk. Mix until the dough forms a cohesive ball.
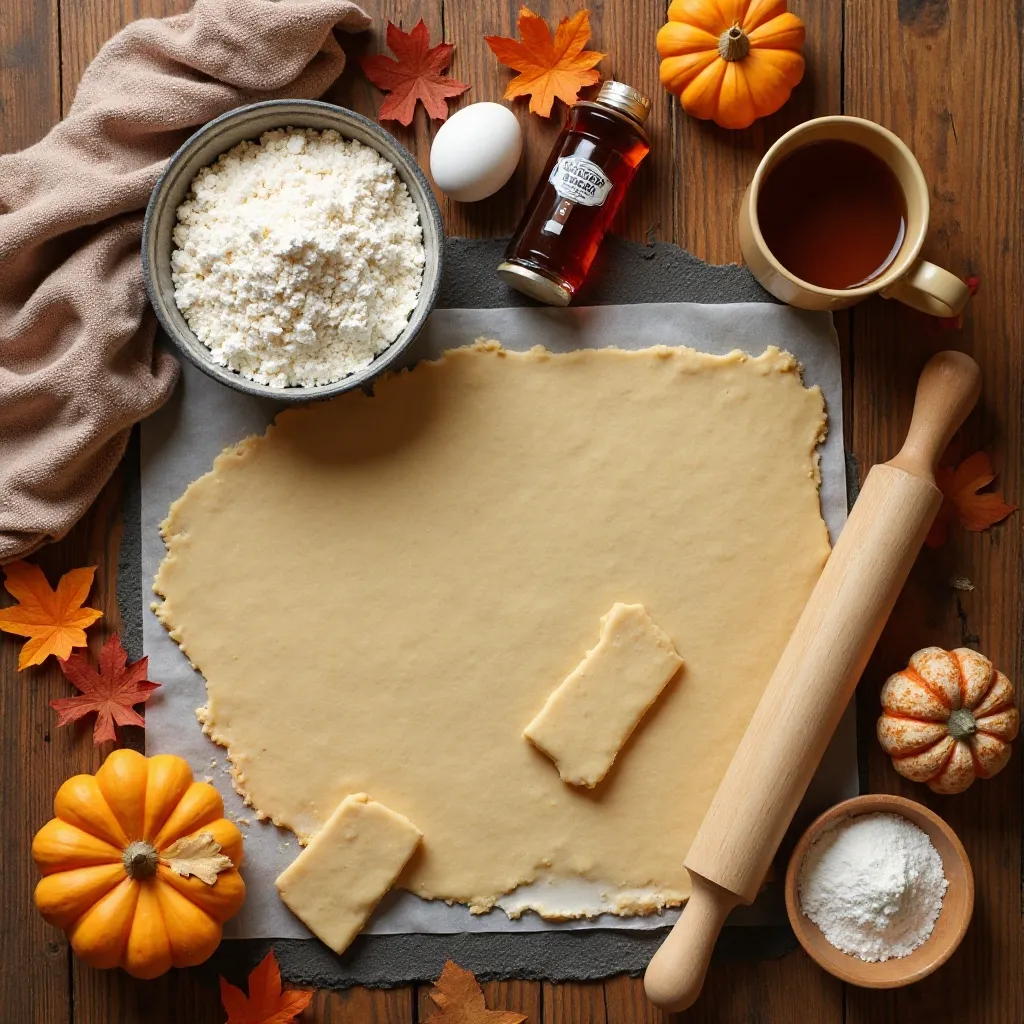
Chill the Dough
Divide the dough into two equal portions and flatten each into a disk shape. Wrap each disk tightly in plastic wrap and refrigerate for at least 1 hour or up to 2 days. Chilling is essential—it prevents the cookies from spreading too much during baking and makes the dough easier to roll out.
Roll and Cut the Cookies
Preheat your oven to 350°F (175°C) and line baking sheets with parchment paper.
Remove one dough disk from the refrigerator. On a lightly floured surface, roll the dough to about ¼-inch thickness. Use a rectangle or oval cookie cutter to cut out your place card shapes. Aim for cookies that are 3-4 inches long to give yourself enough space to write names clearly.
Carefully transfer the cut cookies to your prepared baking sheets, spacing them about 2 inches apart. Gather the scraps, re-roll, and cut more cookies until all the dough is used.
Bake the Cookies
Bake for 10-12 minutes, or until the edges just barely start to turn golden. The centers should still look slightly underdone—they’ll continue to firm up as they cool. Don’t overbake, or your cookies will be dry and hard.
Let the cookies cool on the baking sheet for 5 minutes before transferring them to a wire rack to cool completely. The cookies must be completely cool before decorating, or the icing will melt.
Prepare the Royal Icing
In a large bowl, combine the sifted powdered sugar and meringue powder. Add 6 tablespoons of warm water and beat with an electric mixer on low speed for about 30 seconds. Increase to medium-high speed and beat for 5-7 minutes until the icing forms stiff peaks. The icing should be bright white and hold its shape.
Check the consistency. For outlining and writing names, you want “stiff consistency” icing that holds its shape. For flooding (filling in larger areas), you’ll need to thin it slightly. To thin, add water one teaspoon at a time until the icing slowly flows and smooths out within 10-15 seconds.
Divide your icing into separate bowls for each color you want to use. Add gel food coloring one drop at a time, mixing thoroughly until you achieve your desired shade. Cover the bowls with damp paper towels to prevent the icing from drying out.
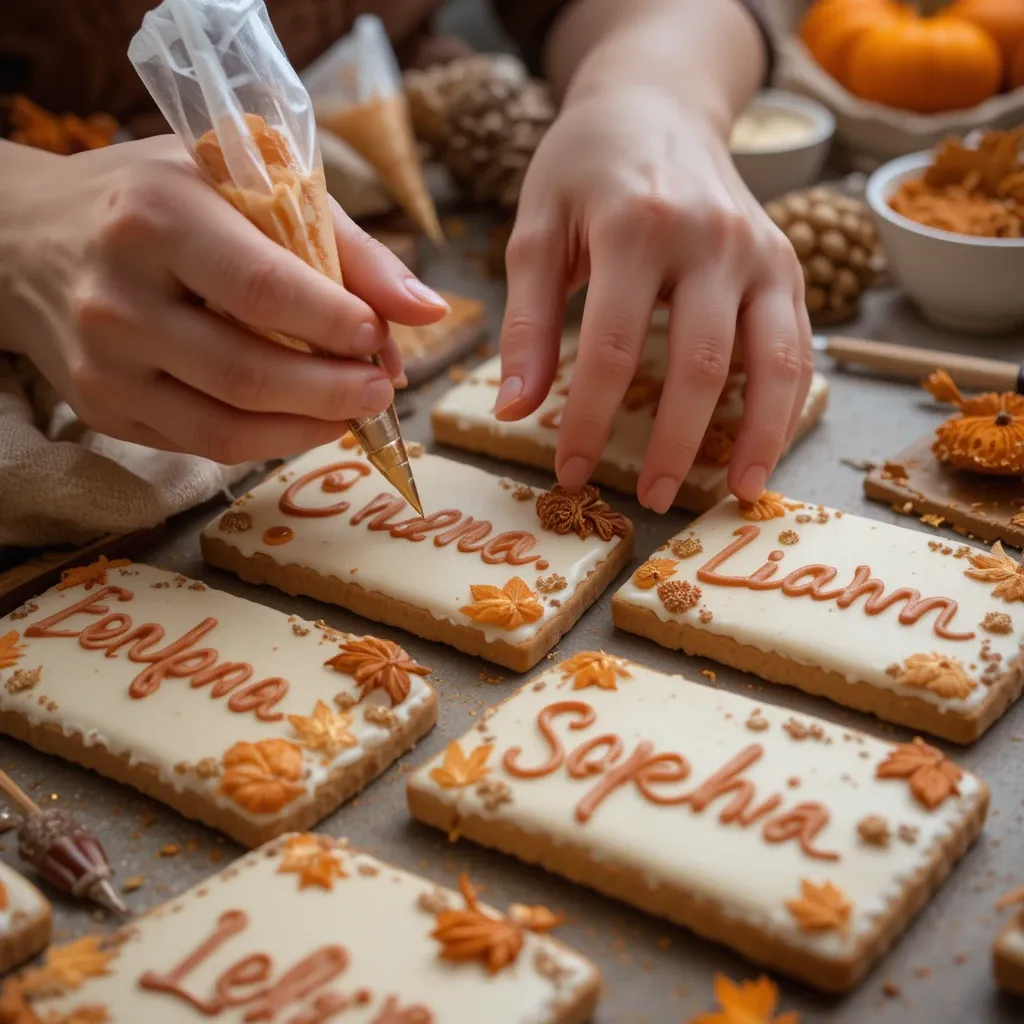
Decorate the Cookies
Start by outlining each cookie with stiff-consistency icing in your chosen base color. Use a piping bag fitted with a size 2 or 3 round tip. Pipe a border around the entire edge of the cookie, staying about 2-3mm from the edge. This creates a barrier for the flood icing.
Let the outline dry for about 10 minutes, then fill in the center with thinned flood icing. Use a toothpick to spread the icing evenly and pop any air bubbles. The icing should flow smoothly and self-level.
Allow the base layer to dry completely before adding names and details. This can take 2-4 hours, depending on humidity. For faster drying, place cookies under a fan.
Once the base is dry, use stiff-consistency icing in a contrasting color to pipe your guests’ names. Practice writing on parchment paper first if you’re nervous. Use steady, even pressure and move slowly for clean lettering.
Let the decorated cookies dry completely overnight before handling or stacking them. The icing should be completely hard and no longer feel tacky to the touch.
What to Serve Thanksgiving Place Card Cookies With
During Dinner Service
Place these cookies directly on each guest’s plate or position them at the top of their place setting. They can stay on the table throughout dinner and be enjoyed with coffee and tea after the meal.
Dessert Pairings
Serve these cookies as part of a dessert spread alongside pumpkin pie, pecan pie, and apple crisp. The vanilla flavor complements rich, spiced desserts beautifully without overwhelming them.
Beverage Pairings
These buttery cookies pair wonderfully with:
- Spiced chai tea
- Pumpkin spice lattes
- Coffee with cream
Leftover Gift Ideas
Package any extra thanksgiving place card cookies in clear cellophane bags tied with autumn-colored ribbons. They make perfect take-home favors for your guests or lovely hostess gifts if you’re attending someone else’s celebration.
Top Tips for Perfecting Thanksgiving Place Card Cookies
Use Room Temperature Ingredients
Make sure your butter is truly softened—not melted, not cold, but soft enough to leave an indent when you press it. Room temperature ingredients mix more evenly, creating a smoother dough and better texture in your final cookies.
Don’t Skip the Chilling Step
It’s tempting to rush, but chilling the dough is non-negotiable. Cold dough holds its shape during baking, giving you clean, crisp edges on your place card cookies. If your kitchen is warm, you can even freeze the cut-out cookies for 10 minutes before baking.
Roll to Even Thickness
Use rolling pin guides or rubber bands around the ends of your rolling pin to ensure consistent ¼-inch thickness. Uneven cookies will bake unevenly, with thin parts burning while thick parts stay underdone.
Master Icing Consistency
Royal icing consistency is everything. For writing names, you need icing that holds its shape (like toothpaste). For flooding backgrounds, it should flow like honey and settle smooth within 10-15 seconds. Test on parchment paper before committing to your cookies.
Practice Your Lettering
Before piping on actual cookies, practice writing names on parchment paper or a plate. This helps you judge spacing and letter size. For longer names, use smaller letters or abbreviate to nicknames.
Control Humidity
Royal icing hates humidity. If possible, decorate on a dry day. If you live in a humid climate, use a dehumidifier in your workspace or add a fan to help the icing dry faster and prevent bleeding colors.
Use Quality Food Coloring
Gel food coloring is superior to liquid for royal icing. It doesn’t thin out your icing consistency and provides more vibrant, true-to-tone colors. A little goes a long way, so add it drop by drop.
Plan Your Color Scheme
Stick to 2-3 main colors for a cohesive, professional look. Too many colors can look busy and chaotic. Classic autumn combinations include burnt orange with cream, burgundy with gold, or sage green with brown.
Make Ahead for Stress-Free Hosting
Bake and decorate these cookies up to one week before Thanksgiving. Store them in an airtight container at room temperature with parchment paper between layers. The royal icing actually preserves the cookies and keeps them fresh.
Storing and Reheating Tips
Room Temperature Storage
Store your finished thanksgiving place card cookies in an airtight container at room temperature for up to 2 weeks. Layer them with parchment paper or wax paper to prevent the icing from sticking together. Keep them away from direct sunlight and heat sources, which can cause colors to fade.
Freezing Instructions
These cookies freeze beautifully! Once the royal icing is completely dry (wait at least 24 hours after decorating), you can freeze them for up to 3 months. Wrap each cookie individually in plastic wrap, then place them in a freezer-safe container or zip-top bag. To thaw, remove them from the freezer and let them come to room temperature in their wrapping—this prevents condensation from forming on the icing.
Make-Ahead Timeline
For the least stressful Thanksgiving prep, follow this timeline:
- 1-2 weeks before: Bake and decorate cookies, store in airtight containers
- 3 days before: Double-check your guest list and make any last-minute replacement cookies if needed
- Day of: Simply place cookies at each setting—no reheating needed
Not Recommended for Refrigeration
Don’t refrigerate these cookies! The moisture in the refrigerator can make the cookies soft and cause the icing colors to bleed or become sticky. Room temperature storage is always best for decorated sugar cookies.
Frequently Asked Questions
Can I make these cookies without meringue powder?
Yes, you can substitute meringue powder with pasteurized egg whites. Use 2 tablespoons of pasteurized egg whites in place of the 3 tablespoons meringue powder and water combination. However, meringue powder is more stable, stores longer, and eliminates any food safety concerns with raw eggs.
How far in advance can I make thanksgiving place card cookies?
You can make these cookies up to 2 weeks in advance if stored properly in an airtight container. The cookies actually taste better after a day or two as the flavors meld together. The royal icing acts as a preservative, keeping the cookies fresh longer than unfrosted cookies.
What if I don’t have cookie cutters in the right shape?
You can use any rectangular cookie cutter you have, or even cut rectangles by hand using a knife and a ruler. Oval shapes also work beautifully. You can even use large square cutters—the shape is less important than having enough flat surface area to write names clearly.
Why is my royal icing too runny or too thick?
Royal icing consistency depends entirely on the water-to-sugar ratio. If it’s too thick, add water one teaspoon at a time. If it’s too thin, add more sifted powdered sugar, ¼ cup at a time. The “10-second rule” helps with flood icing: when you drizzle icing back into the bowl, it should sink back into the surface and smooth out within 10 seconds.
Can I use regular food coloring instead of gel?
You can, but liquid food coloring will thin your icing and make colors less vibrant. If you only have liquid coloring, you’ll need to compensate by adding extra powdered sugar to maintain the proper consistency, and the colors won’t be as bold or saturated.
Do I need special piping bags and tips?
While disposable piping bags with metal tips give the cleanest results, you can make do with DIY solutions. Small zip-top bags with a tiny corner snipped off work in a pinch. Just cut the smallest opening possible—you can always make it bigger if needed.
My icing colors bled together—what went wrong?
Color bleeding happens when you add wet icing to a layer that hasn’t fully dried, or when there’s too much humidity in the air. Always wait until each layer is completely dry before adding the next. Run your finger gently over the icing—if it feels wet, tacky, or cool to the touch, it’s not ready yet.
Can I make these cookies gluten-free?
Yes! Substitute the all-purpose flour with a 1:1 gluten-free baking flour blend that contains xanthan gum. The texture will be slightly different—possibly a bit more crumbly—but they’ll still work perfectly as place cards and taste delicious.
What’s the best way to write names neatly?
Practice makes perfect! Start with steady, even pressure on your piping bag. Write in print rather than cursive for clearest legibility. If you make a mistake, let it dry completely, then gently scrape it off with a knife and try again. You can also use an edible marker as an alternative to piping.
Can I add flavors besides vanilla to the cookies or icing?
Absolutely! For the cookies, try almond extract, maple extract, or cinnamon. For the icing, add ½ teaspoon of any extract you like—almond, peppermint, or lemon all work wonderfully. Just be careful not to add too much, as it can thin the icing.
Nutrition Information
| Nutrient | Per Cookie (1 cookie) |
|---|---|
| Calories | 180 |
| Total Fat | 7g |
| Saturated Fat | 4g |
| Cholesterol | 25mg |
| Sodium | 75mg |
| Total Carbohydrates | 28g |
| Dietary Fiber | 0g |
| Sugars | 19g |
| Protein | 2g |
Note: Nutrition information is approximate and based on one decorated cookie using the recipe as written. Values may vary depending on size and amount of icing used.
Extra Tips for Success
Create a Template
Before decorating, sketch out your design on paper. Plan where names will go and what decorative elements you’ll add. This prevents the “blank canvas panic” when you’re staring at a bare cookie with a piping bag in hand.
Invest in Quality Tools
If you plan to make decorated cookies regularly, invest in a good set of piping tips, reusable piping bags, and gel colors. Quality tools make the process exponentially easier and more enjoyable.
Embrace Imperfection
Remember, these are homemade treats, not professional bakery items. Small imperfections add charm and show your guests you put time and love into creating something special just for them. Even wobbly lettering is endearing when it’s personalized.
Get Creative with Themes
Adapt this recipe to any holiday or celebration: Christmas name cookies, birthday place cards, wedding shower tags, or Easter place settings. The technique stays the same—just change your colors and designs.
These thanksgiving place card cookies are more than just a recipe—they’re a memory in the making. Your guests will be touched by the personal detail, and you’ll love how they elevate your Thanksgiving tablescape while satisfying everyone’s sweet tooth. Happy baking, and may your Thanksgiving be filled with gratitude, great food, and even greater company!