Thanksgiving Treats with Oreos Ready in 20 Minutes
Crispy, creamy, and impossibly festive—these Thanksgiving treats with Oreos transform the classic sandwich cookie into showstopping holiday desserts that’ll have your guests asking for seconds. Here’s something fascinating: Oreos have been America’s favorite cookie for over 110 years, and they’re absolutely perfect for Thanksgiving entertaining because they require minimal effort but deliver maximum wow factor.
These treats are special because they combine nostalgia with holiday flair, taking just 20 minutes of active prep time while looking like you spent hours in the kitchen.
If you loved my Pumpkin Spice Cookies last fall, you’ll adore how these Oreo creations bring that same cozy autumn vibe with even less work. Get ready to impress your family with the easiest, most delightful Thanksgiving dessert you’ve ever made!
This recipe is 100% AI-generated and has not been personally cooked by us. We value our community, and readers who’ve tried other recipes from our site often report positive outcomes.
What Are Thanksgiving Treats with Oreos?
Ever wondered how to turn a simple Oreo into Thanksgiving magic? These festive treats are basically Oreos dressed up for the holiday—think chocolate-covered cookies decorated with autumn leaves, candy corn turkeys, and gorgeous fall colors that scream “Happy Thanksgiving!”
The beauty is in their versatility; you can dip them, stuff them, crumble them, or stack them into adorable turkey faces. And you know what they say—the way to a family’s heart is through creative desserts that look professional but don’t require culinary school.
Trust me, once you see how ridiculously easy these are, you’ll wonder why you’ve been stressing over complicated pies all these years. So grab those Oreos and let’s create some holiday magic together!
Why You’ll Love This Thanksgiving Treats with Oreos
The Ultimate Crowd-Pleaser That Everyone Adores
Picture this: a dessert table where both kids and adults are equally excited. That’s the power of Oreos at Thanksgiving! These treats combine the familiar comfort of chocolate sandwich cookies with festive decorations that make them feel special and holiday-appropriate. The crunchy cookie exterior paired with sweet chocolate coating and colorful toppings creates texture and flavor combinations that satisfy every sweet tooth at your gathering.
Budget-Friendly Without Sacrificing Wow Factor
Let’s talk dollars and sense—making Thanksgiving treats with Oreos costs a fraction of what you’d spend on bakery desserts or elaborate pies. A package of Oreos runs about $4, add some chocolate melts for $3, and decorative candies for $5, and you’ve got desserts for 20+ people for under $15. Compare that to store-bought decorated cookies at $2-3 each, and you’re saving serious money while creating something more personal and memorable.
Endless Flavor Combinations and Decoration Possibilities
The flavor adventure doesn’t stop at regular Oreos! You can use Pumpkin Spice Oreos for extra autumn vibes, Golden Oreos for vanilla lovers, or even Caramel Apple Oreos for a fall-inspired twist. Top them with orange and brown sprinkles, create adorable turkey faces with candy corn and candy eyes, or drizzle them with white chocolate for an elegant marble effect.
The decorating possibilities are truly endless, making each batch uniquely yours. If you enjoyed customizing my Sugar Cookie Bars, you’ll love how these Oreo treats give you the same creative freedom with half the effort. Roll up your sleeves and let’s make Thanksgiving desserts that are as fun to create as they are to devour!
How to Make Thanksgiving Treats with Oreos
Quick Overview
These Thanksgiving treats with Oreos are incredibly simple to prepare, requiring just basic dipping and decorating skills—no baking needed! The rich chocolate coating combined with the classic Oreo crunch creates an irresistible texture that melts in your mouth. What makes these treats extra appealing is their versatility; you can make them as simple or elaborate as you like, from basic chocolate-dipped cookies to intricate turkey designs.
Time Breakdown:
- Prep Time: 20 minutes
- Decorating Time: 30 minutes
- Chilling Time: 15 minutes
- Total Time: About 1 hour
- Yield: 24-30 treats
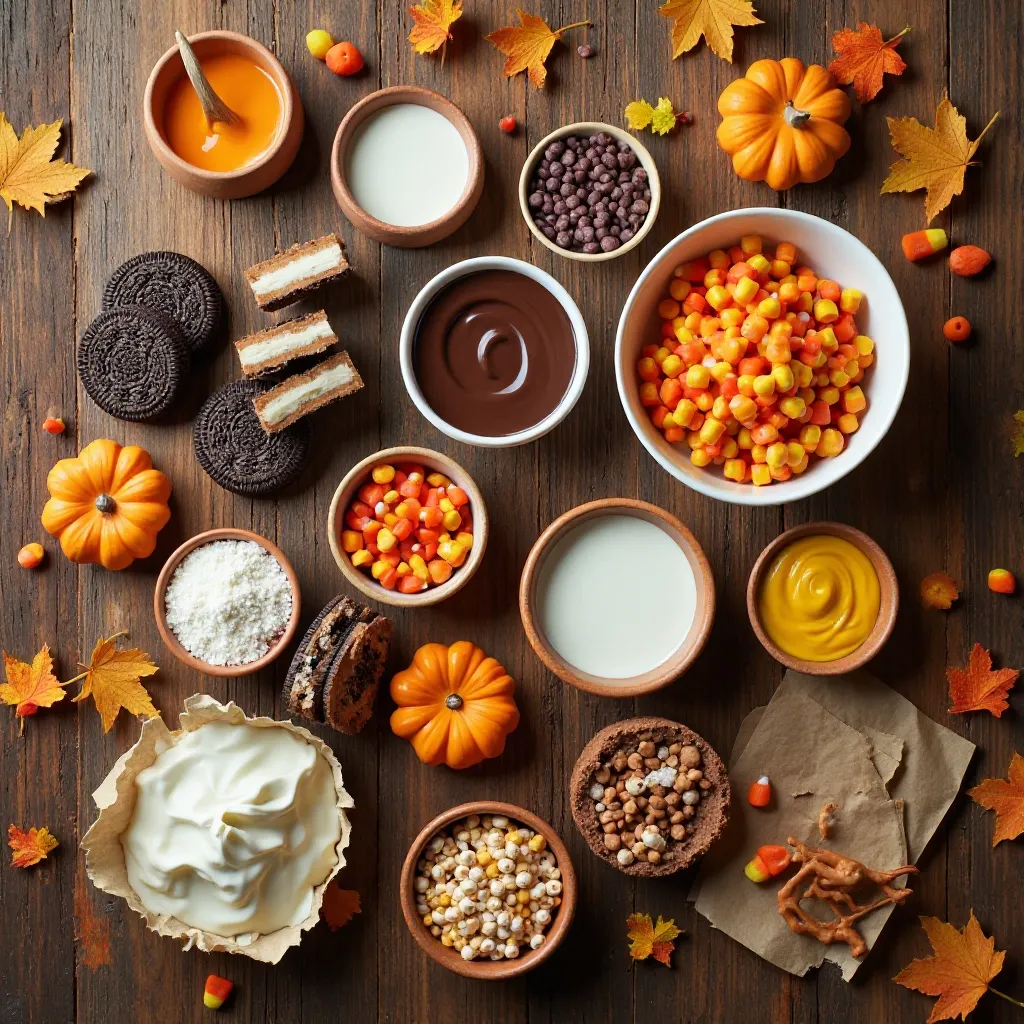
Key Ingredients for Thanksgiving Treats with Oreos
For Basic Chocolate-Dipped Oreos:
- 1 package (14.3 oz) Oreos (about 36 cookies) – regular, Golden, or seasonal flavors
- 2 cups chocolate melting wafers (milk, dark, or white chocolate)
- 1 cup orange candy melts
- 1 cup yellow candy melts
- 2 tablespoons coconut oil (optional, for smoother coating)
For Decorations:
- Fall-colored sprinkles (orange, yellow, brown, red)
- Candy corn
- Candy eyes (various sizes)
- Mini chocolate chips
- Pretzel sticks
- Orange frosting or decorating gel
- Crushed graham crackers
- Chopped pecans or walnuts
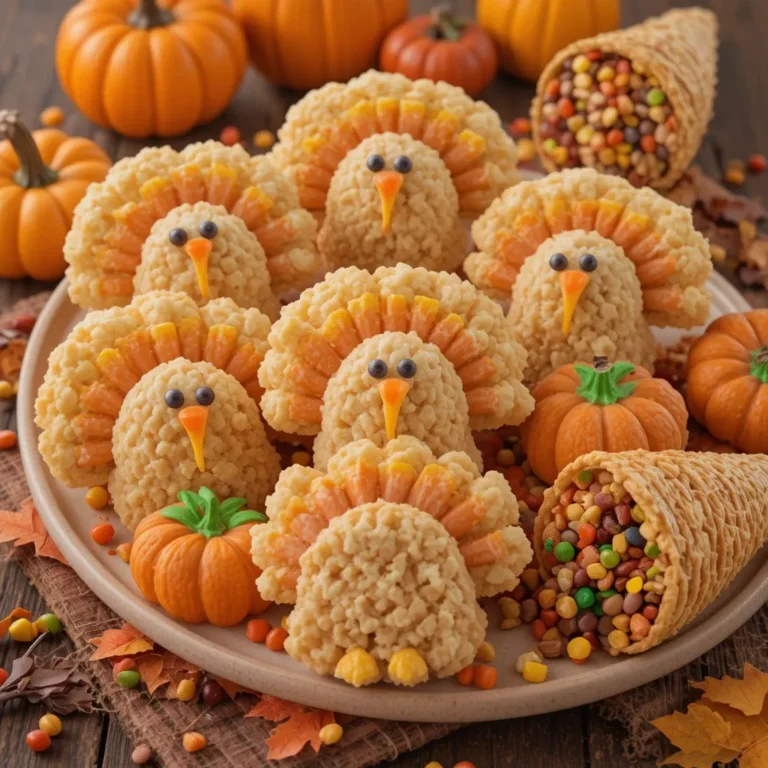
For Oreo Turkey Treats:
- Candy corn (for feathers and beak)
- Candy eyes
- Small red candy pieces or frosting (for wattle)
- Mini Reese’s Pieces or M&Ms
Step-by-Step Instructions
Step 1: Prepare Your Workspace
Start by lining two large baking sheets with parchment paper or silicone baking mats. This prevents sticking and makes cleanup incredibly easy. Set up your decorating station with all sprinkles, candies, and toppings within arm’s reach—trust me, once you start dipping, you’ll want everything accessible. Fill a small cup with warm water to clean your fingers between decorating if needed. Ensure your Oreos are at room temperature; cold cookies can cause the chocolate to seize or crack.
Step 2: Melt the Chocolate
Place your chocolate melting wafers in a microwave-safe bowl. Microwave in 30-second intervals, stirring thoroughly between each interval, until completely smooth and melted. This typically takes 1.5 to 2 minutes total. If you want a thinner coating that’s easier to work with, stir in 1 tablespoon of coconut oil per cup of chocolate. The oil creates a silkier texture that coats the cookies more evenly. Alternatively, you can use a double boiler method by placing the chocolate bowl over simmering water, stirring constantly until melted.
Step 3: Dip the Oreos
Using a fork or dipping tool, place one Oreo into the melted chocolate. Gently submerge it completely, then lift it out, allowing excess chocolate to drip back into the bowl. Tap the fork gently on the bowl’s edge to remove even more excess—this prevents thick chocolate puddles around the base. Carefully slide the chocolate-covered Oreo onto your prepared baking sheet using a toothpick or second fork to push it off. Leave about 1 inch of space between each cookie for decorating room.
Step 4: Add Decorations Immediately
Here’s the crucial part: you must decorate while the chocolate is still wet! Sprinkle on your fall-colored sprinkles, press in candy pieces, or create designs quickly. For turkey treats, place 5-6 candy corn pieces in a fan shape at the top of the Oreo for feathers, add two candy eyes in the center, a candy corn beak pointing down, and use a tiny dot of red frosting for the wattle. Work with 3-4 cookies at a time so the chocolate doesn’t harden before you finish decorating.
Step 5: Create Advanced Designs (Optional)
For elegant drizzled designs, melt a contrasting chocolate color and transfer it to a piping bag or zip-top bag with a tiny corner snipped off. Once your base chocolate layer has hardened (about 10 minutes in the fridge), drizzle thin lines back and forth across the Oreos in a zigzag pattern. You can also create leaf shapes by piping green-tinted white chocolate into leaf outlines and using a toothpick to draw veins through the center.
Step 6: Chill and Set
Place your decorated baking sheets in the refrigerator for 15-20 minutes to fully set the chocolate. This quick chill creates a shiny, firm finish that won’t smudge when you package or stack them. If you’re making these ahead, let them come to room temperature before serving for the best flavor and texture. The chocolate should be completely hard and not tacky to the touch before you move them.
Step 7: Package or Present
Once set, carefully peel the Oreos off the parchment paper. Arrange them on a festive platter, stack them in clear cellophane bags tied with autumn ribbon for party favors, or display them in a tiered serving stand for maximum visual impact. These treats look absolutely stunning when arranged by color or design type.
What to Serve Thanksgiving Treats with Oreos With
These delightful Oreo treats pair beautifully with hot apple cider or spiced chai tea, as the warm beverages complement the sweet chocolate perfectly. For a complete dessert spread, serve them alongside a classic pumpkin pie or pecan pie—the cookies offer a lighter, less filling option for guests who want something sweet but not too heavy.
Create a gorgeous dessert charcuterie board by arranging these Oreo treats with fresh apple slices, caramel dip, mini pumpkin muffins, and candied pecans. The variety of textures and flavors gives everyone options and makes for an Instagram-worthy presentation.
For the beverage side, consider offering a hot chocolate bar where guests can enjoy their Oreo treats as stirrers or dunkers. Coffee lovers will appreciate these treats with a robust French roast or a creamy pumpkin spice latte. And don’t forget the kids—cold milk in festive cups makes these treats even more enjoyable for younger guests.

Top Tips for Perfecting Thanksgiving Treats with Oreos
Use Quality Chocolate for Best Results
Not all chocolate melts are created equal! Ghirardelli, Guittard, or Wilton candy melts provide the smoothest coating and best taste. Avoid using chocolate chips, as they contain stabilizers that prevent them from melting smoothly. If you’re in a pinch, add a tablespoon of shortening to chocolate chips to improve the consistency.
Temperature Control Is Everything
Keep your melted chocolate between 88-90°F for ideal dipping consistency. If the chocolate gets too hot (above 95°F), it can cause the Oreo filling to melt and create a messy situation. If your chocolate starts to thicken as you work, reheat it in 10-second microwave bursts, stirring well between each interval.
Don’t Oversaturate with Toppings
While it’s tempting to load up on decorations, less is often more. Too many heavy candies can cause the chocolate coating to crack or the decorations to slide off. Aim for 3-5 decorative elements per cookie for a balanced, professional look.
Plan Your Color Scheme
Before starting, decide on your color palette. Traditional Thanksgiving colors include orange, yellow, brown, red, and gold. Having a cohesive color scheme makes your dessert table look more polished and intentional. You can even match your Oreo treats to your Thanksgiving table décor!
Work in Batches
Melt chocolate in smaller batches rather than all at once. This prevents the chocolate from sitting too long and developing a thick skin or becoming grainy. Work with 1-2 cups of melted chocolate at a time, and you’ll have much better control over the process.
Use a Cooling Rack Hack
Place a cooling rack over your baking sheet and rest the dipping fork on the rack bars to let excess chocolate drip through. This creates a cleaner bottom on your Oreos without chocolate puddles, giving them a more professional bakery look.
Storing and Reheating Tips
Room Temperature Storage:
Store your finished Thanksgiving treats with Oreos in an airtight container at room temperature for up to 2 weeks. Layer them between sheets of parchment or wax paper to prevent sticking. Keep them away from heat sources and direct sunlight, which can cause the chocolate to melt or develop a white bloom.
Refrigerator Storage:
In warmer climates or humid environments, refrigerate your Oreo treats in an airtight container for up to 3 weeks. Separate layers with parchment paper and allow them to come to room temperature for 10-15 minutes before serving for the best flavor and texture. Cold chocolate can taste dull and lack the rich, smooth mouthfeel.
Freezing for Long-Term Storage:
These treats freeze beautifully for up to 3 months! Arrange them in a single layer on a baking sheet and freeze until solid (about 1 hour), then transfer to freezer-safe containers or bags with parchment between layers. To thaw, leave them at room temperature for 20-30 minutes. Never microwave frozen chocolate-covered Oreos, as this will cause the chocolate to separate and become grainy.
No Reheating Needed:
One of the best parts about these treats is that they’re meant to be enjoyed at room temperature—no reheating required! This makes them perfect for make-ahead entertaining and party planning.
Tips for Avoiding Common Baking Mistakes
Mistake #1: Chocolate Seizing or Becoming Grainy
This happens when even a tiny drop of water gets into your melted chocolate. Make sure all bowls and utensils are completely dry before starting. If your chocolate does seize, try whisking in 1 teaspoon of warm water or vegetable oil per ounce of chocolate—sometimes this can save it.
Mistake #2: Chocolate That’s Too Thick to Coat Evenly
If your chocolate seems thick or gloppy, it’s likely too cool. Rewarm it briefly in the microwave (10 seconds at a time) or add a teaspoon of coconut oil to thin it out. The chocolate should flow smoothly off your dipping fork in a thin stream.
Mistake #3: Decorations Sliding Off or Not Sticking
This happens when you wait too long to decorate after dipping. The chocolate begins to set within 30-60 seconds, so you need to work quickly. Have all your decorations laid out and ready before you start dipping each cookie.
Mistake #4: Chocolate Pooling Around the Base
Too much excess chocolate on the cookie creates those thick, unattractive puddles. After dipping, tap the fork firmly on the bowl’s edge several times and let excess chocolate drip for 5-10 seconds before placing the cookie on the pan.
Mistake #5: White Streaks or Bloom on the Chocolate
This occurs when chocolate is exposed to temperature fluctuations or moisture. Always store finished treats in a cool, dry place with consistent temperature. If bloom does occur, the treats are still safe to eat—they just won’t look as pretty.
Mistake #6: Candy Eyes or Heavy Decorations Falling Off
Heavy decorations need extra support. For candy eyes, press them gently but firmly into the wet chocolate and let them set for 2-3 minutes before moving the cookie. You can also use a tiny dot of frosting as “glue” to secure decorations after the chocolate has set.
Frequently Asked Questions
Can I use regular chocolate chips instead of candy melts?
While you can use chocolate chips, they don’t melt as smoothly as candy melts because they’re formulated to hold their shape during baking. If using chocolate chips, add 1-2 tablespoons of coconut oil or shortening per cup of chips to help them melt into a smoother, more workable consistency. Candy melts, however, are specifically designed for dipping and coating, making them the easier and more reliable choice for beginners.
How far in advance can I make these Thanksgiving treats?
You can make these Oreo treats up to 2 weeks in advance if stored properly in an airtight container at room temperature, or up to 3 weeks if refrigerated. For best results, add them to your prep schedule about 3-5 days before Thanksgiving. This gives you time to perfect your decorating technique without the stress of last-minute preparation, and the treats will still taste fresh and look beautiful.
What’s the best way to melt chocolate without burning it?
The microwave method is easiest: use 30-second intervals at 50% power, stirring thoroughly between each interval. Never try to melt chocolate at full power, as this can burn it quickly. Alternatively, use a double boiler by placing a heat-safe bowl over a pot of barely simmering water (not boiling), ensuring the bowl doesn’t touch the water. Stir constantly until melted and smooth.
Can I make these treats nut-free for people with allergies?
Absolutely! Simply avoid using nut toppings like pecans or walnuts, and check that your Oreos and chocolate melts are labeled “nut-free” or “processed in a nut-free facility.” Most regular Oreos and basic candy melts are nut-free, but always verify the labels, especially with seasonal varieties. Use safe alternatives like sprinkles, candy corn, and candy eyes for decorating.
Why did my chocolate turn white after it dried?
This white coating is called “chocolate bloom” and occurs when chocolate experiences temperature changes or is exposed to moisture. There are two types: fat bloom (cocoa butter rising to the surface) and sugar bloom (from moisture). While it doesn’t look appealing, the chocolate is still perfectly safe to eat. Prevent bloom by storing treats at consistent temperatures between 65-70°F and in airtight containers.
What if I don’t have candy melts in fall colors?
No problem! You can tint white chocolate or white candy melts with oil-based food coloring (NOT water-based, which will cause the chocolate to seize). Use gel food coloring sparingly—just a tiny drop or two—and mix thoroughly until you achieve your desired shade. You can create any color this way, giving you complete control over your color palette.
Can I make these dairy-free or vegan?
Yes! Use dairy-free chocolate melts (brands like Enjoy Life make excellent ones) and check for vegan Oreo varieties. Regular Oreos are actually vegan in most countries, surprisingly enough, but always check the label. The decorating candies should also be checked for dairy, though many basic sprinkles and hard candies are naturally dairy-free.
How do I prevent air bubbles in my chocolate coating?
Air bubbles typically come from stirring too vigorously when melting. Stir gently and smoothly, and let the chocolate sit for 30 seconds after melting before you start dipping. You can also tap the dipped Oreo gently on the bowl’s edge, which helps bubbles rise to the surface and pop before the chocolate sets.
Nutrition Information (Per Chocolate-Dipped Oreo)
| Nutrient | Amount |
|---|---|
| Calories | 120-150 |
| Total Fat | 6g |
| Saturated Fat | 3g |
| Cholesterol | 0mg |
| Sodium | 90mg |
| Total Carbohydrates | 18g |
| Dietary Fiber | 0.5g |
| Sugars | 12g |
| Protein | 1g |
Note: Nutrition values are approximate and vary based on chocolate type and decorations used.
Final Thoughts
These Thanksgiving treats with Oreos prove that impressive holiday desserts don’t require hours in the kitchen or advanced baking skills. With just a few simple ingredients and some creativity, you can create beautiful, delicious treats that capture the warm, festive spirit of Thanksgiving.
What I love most about this recipe is its flexibility—make them as simple or elaborate as your schedule allows, customize them to match your table décor, and get the kids involved in decorating for quality family time. Whether you’re contributing to a potluck, setting up a dessert table, or packaging them as sweet gifts for guests to take home, these Oreo treats deliver big on both taste and presentation.
So this Thanksgiving, skip the stress of complicated desserts and embrace the joy of chocolate-covered Oreos dressed up for the holidays. Your guests will be impressed, you’ll actually enjoy the process, and you might just start a new family tradition. Happy Thanksgiving, and happy decorating!
Pin this recipe for later and share it with friends who need easy Thanksgiving dessert ideas!