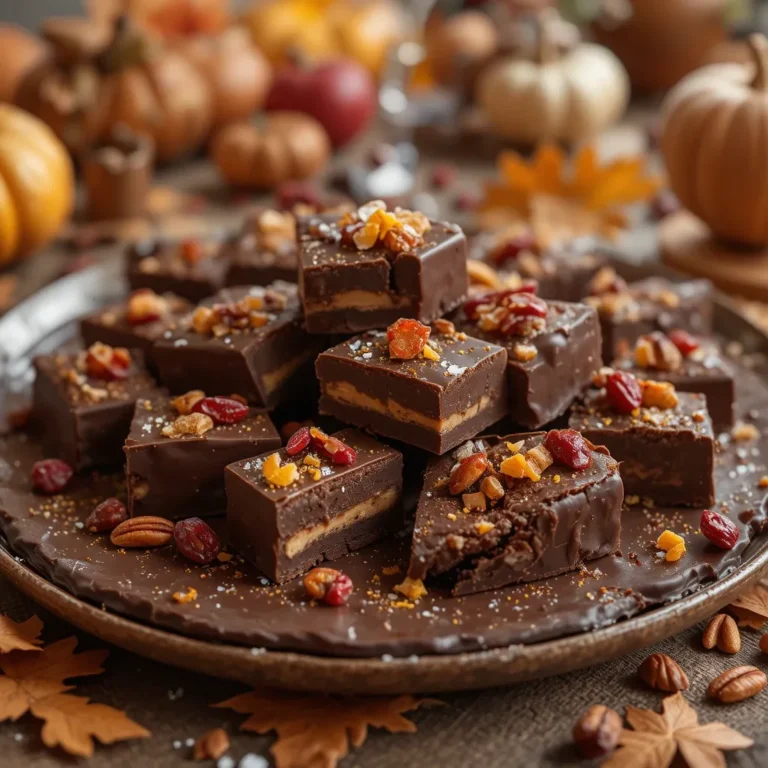
Easy Thanksgiving Treats with Rice Krispies Ready in 20 Minutes
Get ready to fall in love with these delightful Thanksgiving treats with Rice Krispies! These crispy, gooey, and perfectly sweet treats are about to become your new holiday tradition. Did you know that Rice Krispies treats were invented by accident in 1939 when two Kellogg’s home economists were looking for a fundraiser treat?
Now, we’re giving them a festive Thanksgiving makeover! These treats are incredibly simple to make, taking just 20 minutes from start to finish, and kids absolutely adore helping shape them into turkeys, pumpkins, and autumn leaves.
Much like our popular Pumpkin Spice Cookies, these treats capture the essence of fall in every bite. You’ll love how these thanksgiving treats with rice krispies bring smiles to everyone’s faces while keeping your kitchen stress-free during the busy holiday season!
This recipe was created entirely by AI and has not been tested in our kitchen. We care about our readers, and many who’ve tried other recipes from our site report good results.
What Are Thanksgiving Treats with Rice Krispies?
Ever wondered why we can’t resist these crispy, marshmallowy delights dressed up for the holidays? Thanksgiving treats with Rice Krispies are the classic treats we all know and love, transformed into festive shapes and colors that celebrate the harvest season.
They’re called “treats” because they’re exactly that—a sweet reward that brings joy without the fuss of complicated baking. As the saying goes, “the way to a man’s heart is through his stomach,” and these colorful creations win hearts at every Thanksgiving gathering! Ready to make some magic in your kitchen?
Why You’ll Love This Thanksgiving Treats with Rice Krispies
Incredibly Versatile and Fun to Customize
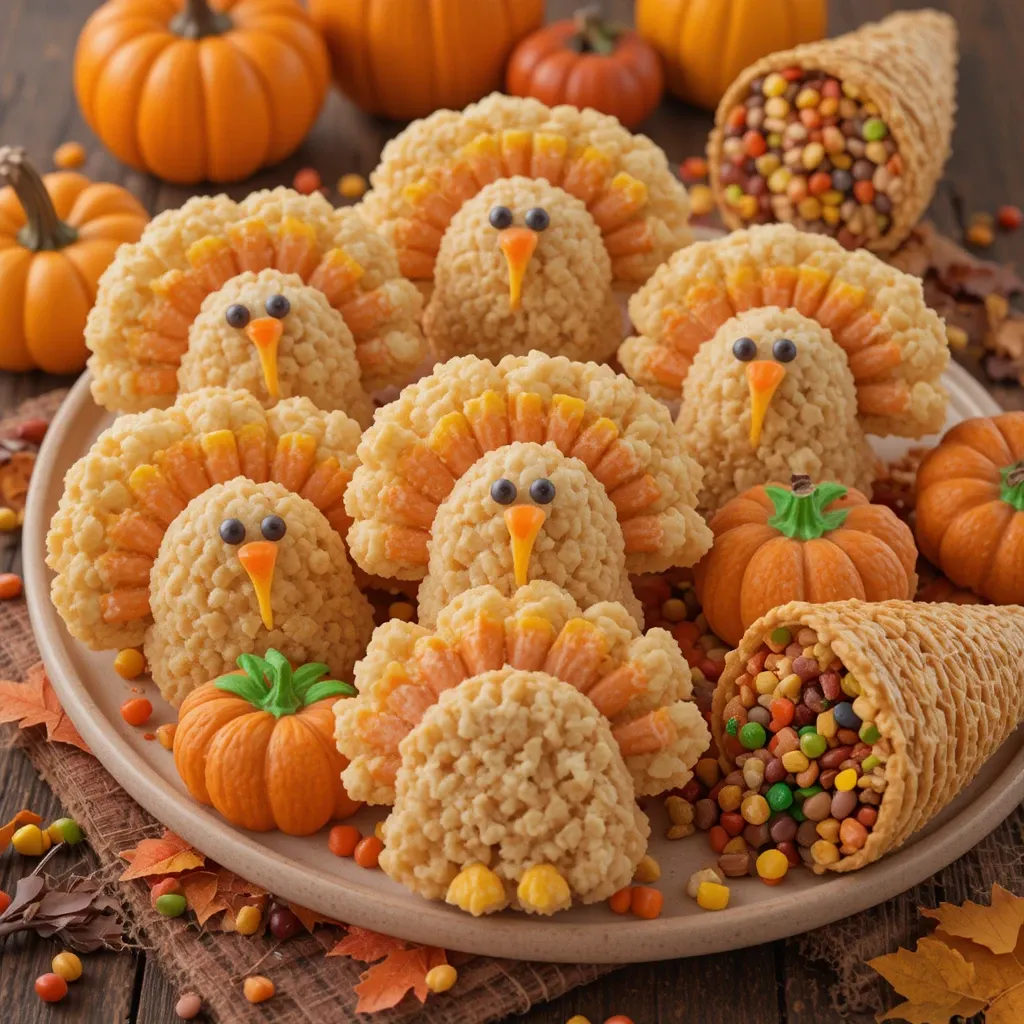
The best part about these thanksgiving treats with rice krispies is their endless creativity potential. You can shape them into adorable turkeys with candy corn feathers, orange pumpkins with green stems, or golden cornucopias overflowing with autumn colors.
The buttery marshmallow base provides the perfect canvas for food coloring, sprinkles, and edible decorations. Your kids will have a blast helping you mold and decorate these treats, making them perfect for family bonding time.
Budget-Friendly Holiday Dessert
Forget spending a fortune on fancy bakery desserts! Making thanksgiving treats with rice krispies at home costs just a fraction of store-bought holiday treats.
With basic pantry staples like Rice Krispies cereal, marshmallows, and butter, you can create dozens of impressive desserts for under $10. Compare that to paying $3-5 per fancy dessert at the bakery, and you’ll see why home cooks love this recipe.
Plus, you probably already have most ingredients in your pantry right now!
Delicious Toppings and Flavor Variations
While the classic recipe is divine on its own, the flavor possibilities are endless. Drizzle them with melted chocolate, add a pinch of cinnamon for warmth, or mix in dried cranberries for a tart burst.
Some people love adding pumpkin spice seasoning to capture those cozy autumn flavors. You can also dip them in white chocolate and sprinkle with orange and yellow sanding sugar for a gorgeous presentation.
If you enjoyed our Apple Cider Donuts recipe, you’ll appreciate how these treats capture similar fall flavors in a no-bake format. Why not whip up a batch this weekend and see how quickly they disappear?
How to Make Thanksgiving Treats with Rice Krispies
Quick Overview
These thanksgiving treats with rice krispies are surprisingly simple to make, even for beginner cooks. The recipe requires no baking, just melting and mixing, which means less cleanup and more fun.
You’ll love the satisfying snap and chew of each bite, combined with that nostalgic marshmallow sweetness. The treats come together quickly with a gooey marshmallow binding that holds everything together perfectly.
Total Time Breakdown:
- Prep Time: 10 minutes
- Cook Time: 5 minutes
- Decorating Time: 15 minutes
- Total Time: 30 minutes
- Cooling Time: 20 minutes
- Yields: 12-16 treats (depending on size)
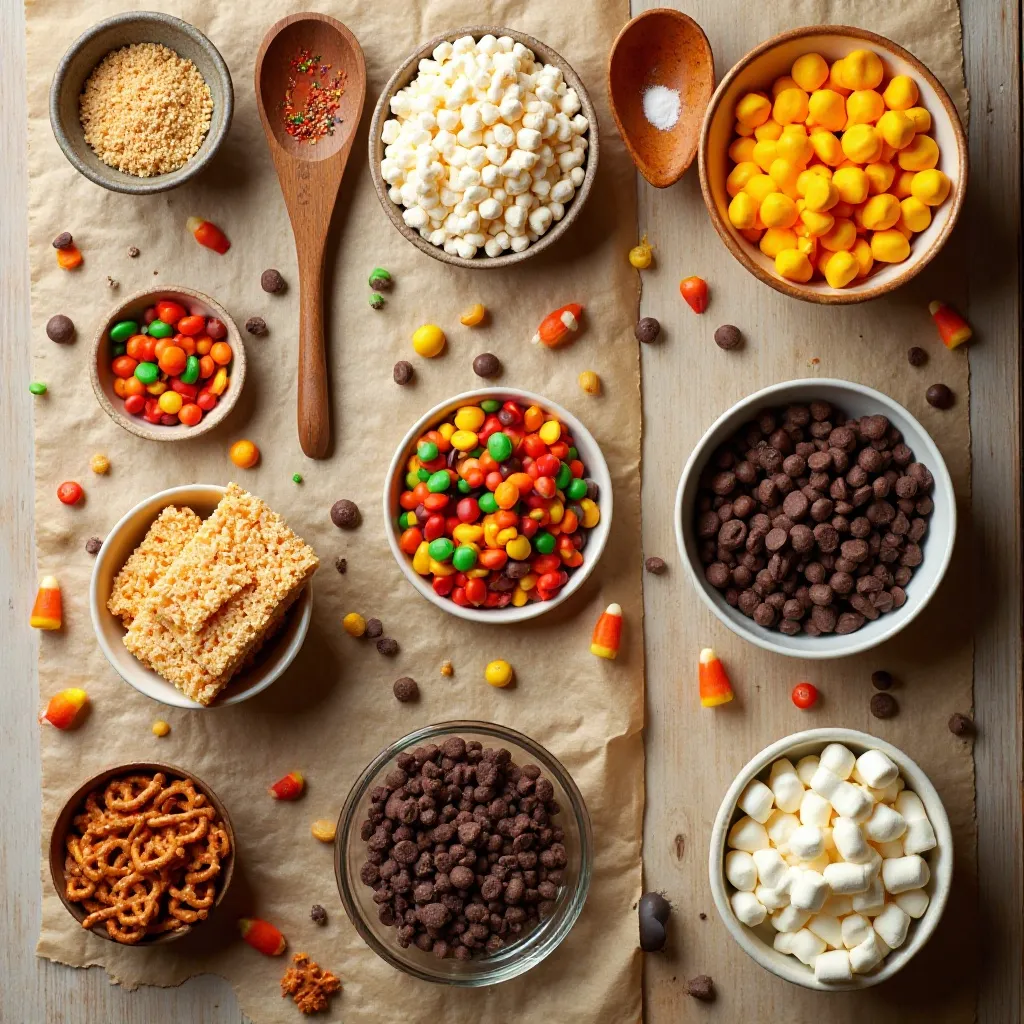
Key Ingredients for Thanksgiving Treats with Rice Krispies
For the Base Treats:
- 3 tablespoons butter (unsalted preferred)
- 4 cups mini marshmallows (or one 10-oz bag)
- 6 cups Rice Krispies cereal
- 1/4 teaspoon vanilla extract
- Pinch of salt
For Thanksgiving Decorations:
- Orange food coloring (gel works best)
- Yellow food coloring
- Brown food coloring
- Candy corn (for turkey feathers)
- Candy eyes (edible googly eyes)
- Chocolate chips (for details)
- Pretzel sticks (for turkey legs or pumpkin stems)
- Melted chocolate (dark, milk, or white)
- Fall-colored sprinkles
- M&Ms in autumn colors
Optional Add-ins:
- 1/2 teaspoon pumpkin pie spice
- 1/2 cup white chocolate chips
- 1/4 cup dried cranberries
Step-by-Step Instructions
Step 1: Prepare Your Workspace
Before you begin, line a 9×13-inch baking pan with parchment paper or aluminum foil, leaving some overhang on the sides for easy removal later. Lightly spray the paper with cooking spray to prevent sticking.
Set out all your decorating supplies within arm’s reach because once you start working with the marshmallow mixture, you’ll need to move quickly. Measure out your Rice Krispies cereal into a large bowl and set aside. Have your spatula and wooden spoon ready to go.
Step 2: Melt the Butter and Marshmallows
In a large heavy-bottomed pot or Dutch oven, melt the 3 tablespoons of butter over low heat. Keep the heat low to prevent the butter from browning or burning.
Once the butter is completely melted, add all 4 cups of mini marshmallows. Stir constantly with a wooden spoon or heat-resistant spatula, ensuring the marshmallows melt evenly. This should take about 3-4 minutes.
You’ll know they’re ready when the mixture becomes smooth and creamy with no lumps remaining. Remove from heat immediately and stir in the vanilla extract and pinch of salt.
Step 3: Add Food Coloring (Optional)
If you want to create colored treats for specific shapes (like orange for pumpkins or brown for turkeys), now’s the time to add food coloring. Work quickly because the mixture will start to set as it cools.
Add 3-4 drops of gel food coloring to the melted marshmallow mixture and stir vigorously until the color is evenly distributed. Gel food coloring works better than liquid because it doesn’t thin out the mixture.
For multiple colors, divide the marshmallow mixture into separate bowls before adding different colors.
Step 4: Mix in the Rice Krispies Cereal
Pour the melted marshmallow mixture over the Rice Krispies cereal in your large bowl. Using a rubber spatula sprayed with cooking spray, fold the cereal into the marshmallow mixture, stirring until every piece is evenly coated.
Work quickly but gently to avoid crushing the cereal. The mixture should look glossy and stick together when pressed. If you’re adding pumpkin spice or dried cranberries, fold them in during this step.
Step 5: Press into Pan or Shape Individual Treats
For traditional squares: Pour the mixture into your prepared pan and press down firmly with a spatula or your hands (spray them with cooking spray or butter them first). Press evenly to create a uniform thickness of about 1 inch. Let cool completely for 20 minutes.
For shaped treats: Spray your hands generously with cooking spray or butter them well. While the mixture is still warm and pliable, grab a handful (about 1/2 cup) and shape it into balls, turkeys, or pumpkins. Work quickly before the mixture cools and hardens.
Step 6: Create Thanksgiving Shapes and Decorations
For Turkey Treats: Form orange-colored Rice Krispie mixture into round balls. Insert 5-6 candy corns into the back to create tail feathers. Use melted chocolate to attach candy eyes and an orange M&M for the beak. Add a small red piece of candy corn for the wattle.
For Pumpkin Treats: Shape orange-colored mixture into slightly flattened balls. Use a toothpick to create vertical ridges from top to bottom. Insert a small piece of green pretzel stick or a Tootsie Roll piece for the stem.
For Cornucopia Treats: Shape mixture into cone shapes with one open end. Fill the open end with small candies in fall colors, allowing them to “spill out” for a festive look.
Let all decorated treats sit at room temperature for at least 30 minutes to set completely before serving.
Step 7: Cut and Serve
If you made a pan of treats, lift the entire block out using the parchment paper overhang. Place on a cutting board and use a sharp knife sprayed with cooking spray to cut into squares or rectangles.
For extra flair, dip the edges in melted chocolate and then in fall-colored sprinkles. Arrange your thanksgiving treats with rice krispies on a festive platter and watch them disappear!
What to Serve Thanksgiving Treats with Rice Krispies With
These delightful treats pair wonderfully with so many Thanksgiving favorites! Serve them alongside a hot cup of apple cider or pumpkin spice latte for the ultimate fall experience.
They make an excellent addition to your dessert table, complementing richer desserts like pumpkin pie and pecan pie. The light, crispy texture provides a nice contrast to heavier, creamier desserts.
Consider setting them out during appetizer time with a cheese and cracker board—the sweet treats balance savory snacks perfectly. They’re also fantastic packed in cellophane bags with ribbon as take-home favors for your dinner guests.
Kids especially love enjoying them with a cold glass of milk after the big Thanksgiving meal. For an adults-only twist, pair them with coffee cocktails.
Top Tips for Perfecting Thanksgiving Treats with Rice Krispies
Use Fresh Marshmallows for Best Results
Always check the expiration date on your marshmallows before starting. Stale or old marshmallows won’t melt as smoothly and will create a tough, hard texture. Fresh marshmallows create that perfect gooey consistency we all love. If your marshmallows have been sitting in the pantry for months, buy a fresh bag—it makes a huge difference!
Don’t Overcook the Marshmallow Mixture
One of the biggest mistakes is cooking the marshmallows over too-high heat or for too long. This causes them to become tough and difficult to work with. Keep your heat on low and remove the pot from the burner as soon as the marshmallows are completely melted. Overcooked marshmallows will result in rock-hard treats that are difficult to chew.
Work Quickly When Shaping
The marshmallow mixture begins to set as it cools, so speed is essential when shaping treats. If the mixture becomes too stiff to work with, you can microwave it for 10-15 seconds to soften it slightly. Keep a bowl of water nearby to dip your hands in (then dry them) if the mixture becomes too sticky.
Prevent Sticking with Proper Greasing
Generously spray your spatula, hands, and pan with cooking spray. Alternatively, butter works wonderfully and adds a subtle flavor. Don’t skip this step—it’s the difference between easy shaping and a frustrating, sticky mess. Reapply spray or butter as needed while working.
Customize with Seasonal Flavors
While vanilla extract is classic, try almond extract for a nutty note or maple extract for extra autumn flavor. A tablespoon of brown butter instead of regular butter adds incredible depth. For chocolate lovers, stir in 1/2 cup of cocoa powder with the cereal for chocolate Rice Krispie treats.
Make Them Extra Special with Mix-Ins
Fold in chopped pecans, mini chocolate chips, or butterscotch chips for added texture and flavor. Dried cranberries add a tart pop that balances the sweetness beautifully. Just don’t add more than 1 cup of mix-ins total, or the treats won’t hold together properly.
Storing and Reheating Tips
Store your thanksgiving treats with rice krispies in an airtight container at room temperature for up to 3 days. Layer them between sheets of parchment paper to prevent sticking. Avoid refrigerating them, as this makes them hard and less enjoyable.
For longer storage, these treats freeze beautifully! Wrap individual treats tightly in plastic wrap, then place them in a freezer-safe container or bag. They’ll keep for up to 6 weeks in the freezer.
To thaw, simply leave them at room temperature for about 30 minutes. They’ll taste just as fresh as the day you made them.
If your treats become too hard, you can soften them slightly by microwaving for 5-10 seconds, but be careful not to overdo it or they’ll melt. The best practice is to keep them well-sealed to maintain their perfect texture.
Nutritional Information
| Nutrient | Per Serving (1 treat) |
|---|---|
| Calories | 140 |
| Total Fat | 3g |
| Saturated Fat | 2g |
| Cholesterol | 8mg |
| Sodium | 95mg |
| Total Carbohydrates | 28g |
| Dietary Fiber | 0g |
| Sugars | 14g |
| Protein | 1g |
Nutritional values are approximate and based on standard ingredients without additional decorations or mix-ins.
Frequently Asked Questions
Can I use regular marshmallows instead of mini marshmallows?
Yes, you can! Four cups of mini marshmallows equals about 40 regular-sized marshmallows. Regular marshmallows just take a bit longer to melt, so be patient and stir continuously. Cut them in half before melting to speed up the process.
Why are my Rice Krispie treats hard and not gooey?
This usually happens when the marshmallow mixture is overcooked or there’s too much cereal for the amount of marshmallow. Always use low heat and measure your ingredients carefully. Also, make sure you’re not pressing too hard when shaping—gentle pressure keeps them tender.
Can I make these treats ahead of time?
Absolutely! These thanksgiving treats with rice krispies actually taste great made 1-2 days in advance. Just store them properly in an airtight container at room temperature. If you’re decorating them, add the decorations on the day of serving for the freshest look.
How do I prevent my Rice Krispie treats from sticking to my hands?
Generously coat your hands with butter or cooking spray before handling the mixture. You can also wet your hands slightly with water (then shake off the excess) to prevent sticking. Reapply butter or spray as needed while working.
Can I make these gluten-free?
Traditional Rice Krispies contain malt flavoring, which has gluten. However, you can use gluten-free crispy rice cereal available at most grocery stores. Make sure your marshmallows are also certified gluten-free, as some brands use modified food starch that contains gluten.
What’s the best way to cut Rice Krispie treats cleanly?
Use a sharp knife sprayed with cooking spray or dipped in hot water (then dried). Make confident, straight cuts rather than sawing back and forth. Clean the knife between cuts for the neatest squares.
Can I add food coloring after mixing in the cereal?
It’s much harder to distribute color evenly once the cereal is added. Always add food coloring to the melted marshmallow mixture before adding the cereal. If you forgot, you can try kneading the color in with greased hands, but it won’t be as uniform.
How do I make my treats more festive without much effort?
The easiest way is to use fall-colored sprinkles on top before the treats set. You can also drizzle melted chocolate in a zigzag pattern or press a few candy corns on top. Simple touches make a big visual impact!
Can I double this recipe?
Yes! Double all ingredients and use a larger pot to accommodate the bigger batch. You may need to work in sections when shaping individual treats since the mixture will start to set. A 13×18-inch half-sheet pan works perfectly for doubled recipes.
Why do my treats fall apart?
This happens when there’s not enough marshmallow mixture coating the cereal. Make sure you’re using the correct measurements and that every piece of cereal is well-coated. Press firmly when shaping to help everything stick together. Old marshmallows can also cause this problem.
Pro Tips from a Seasoned Baker
Color Mixing Magic: To achieve the perfect pumpkin orange, mix red and yellow food coloring in a 1:3 ratio. For realistic turkey brown, combine red, yellow, and a tiny drop of blue. Always start with less coloring than you think you need—you can always add more!
Temperature Matters: If you’re working in a warm kitchen, pop your finished treats in the refrigerator for 10 minutes to help them set faster. Just don’t leave them in too long, or they’ll become too hard.
Presentation Ideas: Arrange your thanksgiving treats with rice krispies on a wooden cutting board with fresh fall leaves (washed and dried) for a stunning rustic display. Use small chalkboard signs to label each shape—”Tom Turkey,” “Precious Pumpkins,” “Candy Cornucopia.”
Make It Educational: Let kids help with this recipe to teach measuring, following directions, and creativity. It’s a wonderful way to create holiday memories while learning valuable kitchen skills.
Conclusion
These thanksgiving treats with rice krispies are the perfect addition to your holiday celebration—easy, affordable, and absolutely delightful! Whether you’re making them with your children, bringing them to a potluck, or serving them at your Thanksgiving feast, they’re guaranteed to bring smiles and spark conversations.
The beauty of this recipe lies in its versatility and foolproof nature. Even if you’ve never made Rice Krispie treats before, you’ll succeed with these simple instructions. And once you master the basic recipe, the creative possibilities are endless!
So grab those marshmallows, heat up your pot, and get ready to create some thanksgiving treats with rice krispies that will become a cherished tradition in your home. Your family will be asking for them year after year—I promise! Happy cooking, and may your Thanksgiving table be filled with love, laughter, and lots of these scrumptious treats!