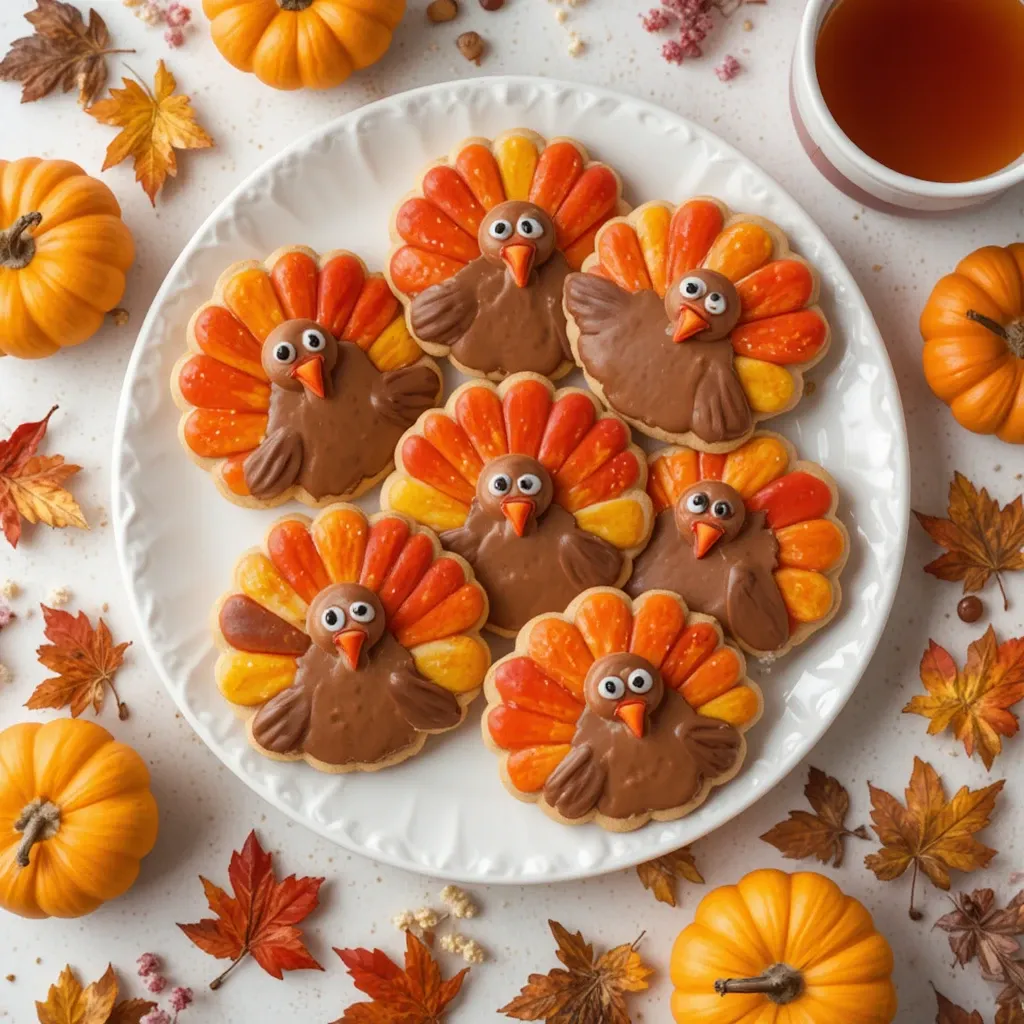
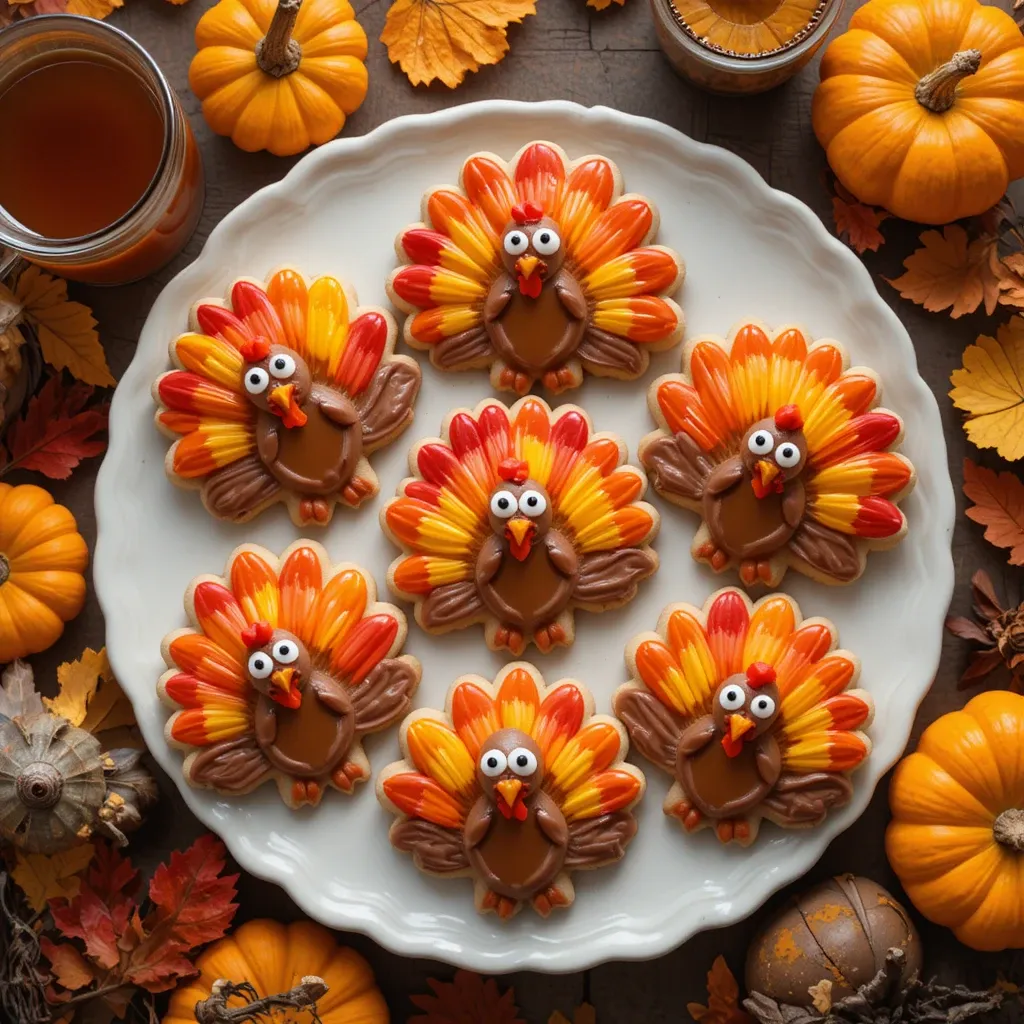
Thanksgiving Turkey Sugar Cookies Royal Icing Recipe
The first time I made Thanksgiving turkey sugar cookies royal icing designs, I was honestly terrified. It was 2019, and I’d promised to bring “something festive” to our family gathering. I stayed up until 1 AM the night before, armed with piping bags and shaky hands, convinced every turkey looked more like a blob than a bird.
But here’s the thing – everyone went absolutely nuts over them. My niece collected three cookies and refused to eat them because they were “too pretty.” That’s when I realized these cookies aren’t just dessert; they’re edible art that brings genuine joy to the table.
Since then, I’ve made these turkey cookies at least fifteen times (yes, I’m counting), and I’ve learned all the tricks to make them turn out beautifully without the stress. Trust me, if I can do this after working a full day and wrangling two kids, you absolutely can too.
What Makes These Turkey Cookies So Special
Let me be real with you – there are approximately a million Thanksgiving desserts you could make. Pumpkin pie, apple crisp, pecan bars… the list goes on. But Thanksgiving turkey sugar cookies royal icing decorations have something those classics don’t: they make people smile before they even take a bite.
I’ve watched kids light up when they see a platter of these. I’ve seen adults pull out their phones to take pictures. There’s something about a perfectly decorated turkey cookie that just screams “celebration” in a way that regular desserts don’t. Plus, and this is important, you can make them days ahead. While everyone else is frantically mashing potatoes on Thanksgiving morning, your cookies are already sitting pretty in an airtight container.
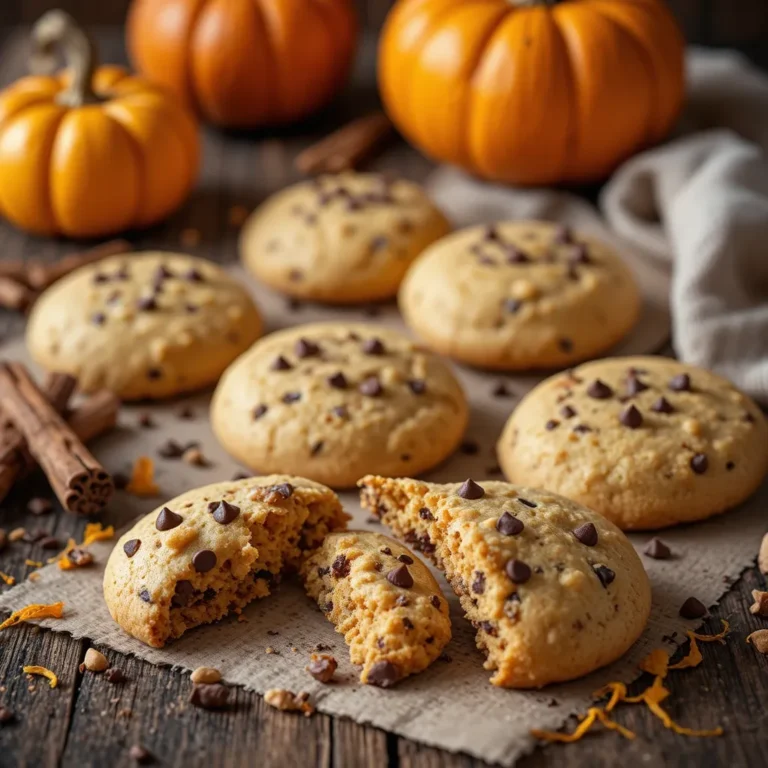
These aren’t fussy or complicated once you know the method. The sugar cookie base is sturdy enough to handle decorating but still tastes buttery and delicious. The royal icing dries hard, which means you can stack these cookies, transport them, or even mail them to family without everything turning into a sticky mess.
Here’s Why This Recipe Works Every Time
The Cookie Base Is Foolproof
After testing this recipe twelve times (yeah, my family was sick of turkey cookies by December), I can confidently say this dough is nearly impossible to mess up. It doesn’t spread in the oven, which means your turkey shapes stay exactly how you cut them. The texture hits that perfect balance – crisp around the edges but with a slight chew in the middle.
I use a higher ratio of butter to sugar than most recipes, and that’s my secret weapon. It gives these cookies an almost shortbread-like richness that elevates them from “cute” to “actually delicious.”
Royal Icing Is More Forgiving Than You Think
I know royal icing sounds intimidating. Before I learned the trick, mine was either too runny (and slid right off the cookies) or too thick (and looked like cement). But here’s what took me three years to figure out: it’s all about consistency, and you can always adjust it. Too thick? Add water literally a half-teaspoon at a time. Too thin? Add more powdered sugar.
The icing also dries completely hard within a few hours, which means you can layer colors without them bleeding together. That’s how you get those gorgeous feather details.
You Can Customize Them Endlessly
My favorite thing about this recipe? No two batches have to look the same. Last year, I made traditional brown turkeys. The year before, I went wild with rainbow feathers because my daughter was going through a unicorn phase and insisted our turkeys needed “more colors.” Both versions were hits.
You can pipe simple designs or go full-on detailed with every feather outlined. You can add edible glitter, sprinkles, or keep them classic. The recipe works for whatever vibe you’re going for.
Perfect for Involving Kids
My six-year-old can’t be trusted with a knife or the oven, but she absolutely can flood a cookie with icing and add sprinkles. These turkey cookies have become our unofficial Thanksgiving bonding activity. I handle the baking and outlining, she does the “color filling” (her words), and we both feel like we’ve contributed something special to the holiday.
Recipe Card
| Recipe Details | |
|---|---|
| Prep Time | 45 minutes (plus 2 hours chilling) |
| Bake Time | 10 minutes per batch |
| Decorating Time | 1-2 hours (depending on detail) |
| Total Time | 4-5 hours (includes drying) |
| Yield | 24 medium cookies |
| Difficulty | Medium |
| Calories | 165 per cookie |
| Protein | 2g |
| Carbs | 24g |
| Fat | 7g |
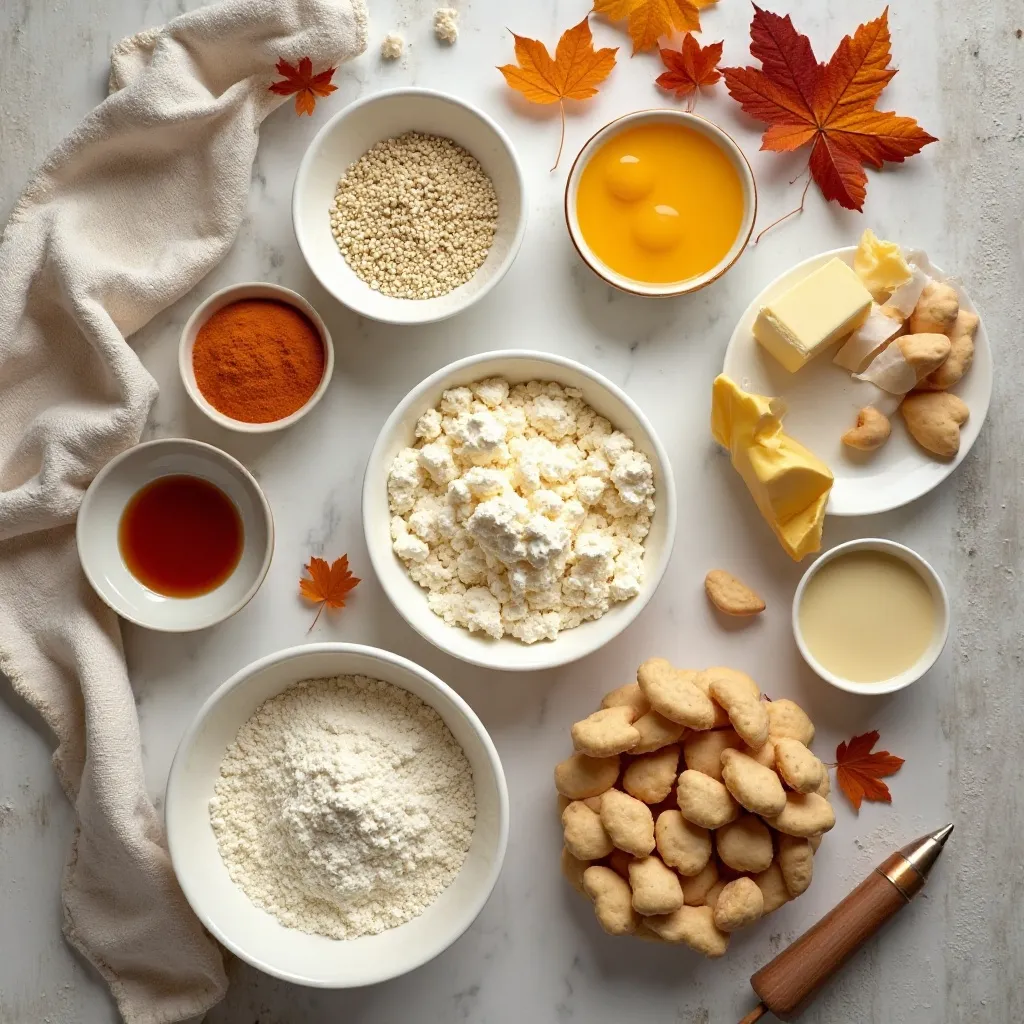
Ingredients for Thanksgiving Turkey Sugar Cookies Royal Icing
Before we dive into the ingredient list, let me say this: don’t skip the almond extract. I know some recipes make it optional, but honestly, it’s what takes these from “good” to “where did you get these?” territory. It adds this subtle, sophisticated flavor that makes people think you’re a way better baker than you actually are (speaking from experience here).
For the Sugar Cookies:
- 3 cups all-purpose flour (plus extra for rolling)
- 1½ teaspoons baking powder
- ½ teaspoon salt
- 1 cup unsalted butter, softened (that’s 2 sticks)
- 1 cup granulated sugar
- 1 large egg
- 2 teaspoons vanilla extract
- ½ teaspoon almond extract (seriously, don’t skip this)
For the Royal Icing:
- 4 cups powdered sugar, sifted
- 3 tablespoons meringue powder
- 5-6 tablespoons warm water
- Gel food coloring (brown, orange, red, yellow – whatever colors you want for your turkeys)
For Decoration:
- Candy eyes (optional but adorable)
- Orange sprinkles for beaks (or you can pipe them)
My Substitution Notes
If you can’t find meringue powder, you can use pasteurized egg whites (about 3 tablespoons), but I prefer meringue powder because it’s shelf-stable and you don’t have to worry about raw eggs. I always have a container in my pantry.
For the gel food coloring – and this is important – use GEL, not liquid. Liquid food coloring will thin out your icing too much and you’ll be adding powdered sugar forever trying to fix it. Ask me how I know. (Hint: my kitchen counter looked like a snow globe exploded.)
How to Make Perfect Turkey Sugar Cookies
Quick Overview
Here’s the honest timeline: The dough takes about 20 minutes to mix and then needs at least 2 hours in the fridge (I usually do this the night before). Baking takes about 10 minutes per sheet. The decorating is where you’ll spend most of your time – budget 1-2 hours depending on how detailed you go. But the actual hands-on work is totally manageable, especially if you spread it over two days like I do.
Step-by-Step Instructions
Step 1: Make the Cookie Dough
In a medium bowl, whisk together your flour, baking powder, and salt. Set this aside – you’ll need it in a minute. In your stand mixer (or a large bowl with a hand mixer), cream the softened butter and sugar together for about 3 minutes. You want it light and fluffy, not just mixed. This is where a lot of people don’t beat it long enough. When I first started baking, I’d rush this step, and my cookies always turned out denser than they should be.
Add your egg, vanilla, and almond extract to the butter mixture. Beat until everything’s completely combined – another 30 seconds or so. Now, gradually add your flour mixture, mixing on low speed. Stop as soon as you don’t see any more dry flour streaks. Overmixing at this stage = tough cookies, and nobody wants that.
Step 2: Chill the Dough
Divide your dough in half and flatten each half into a disc about 1 inch thick. Wrap them tightly in plastic wrap and refrigerate for at least 2 hours. I know waiting is annoying, but cold dough is exponentially easier to work with. Room temperature dough will stick to everything and make you want to throw the rolling pin across the kitchen. (Trust me on this.)
Step 3: Roll and Cut
Preheat your oven to 350°F. Line two baking sheets with parchment paper – this is non-negotiable unless you enjoy scraping stuck cookies off your pans.
Take one disc of dough out of the fridge (leave the other one cold until you need it). On a lightly floured surface, roll it out to about ¼ inch thickness. Use a turkey-shaped cookie cutter (mine is about 4 inches tall) to cut out your shapes. Place them on your prepared baking sheets about 2 inches apart. They don’t spread much, but give them a little breathing room.
Pro tip I learned the hard way: If your dough gets too soft while you’re working with it, stick the whole cutting board in the freezer for 10 minutes. Soft dough is the enemy of clean shapes.
Step 4: Bake
Bake for 9-11 minutes. Here’s the visual cue I use: the edges should just barely start to turn golden. The centers might look slightly underdone, but they’ll firm up as they cool. I usually bake mine for exactly 10 minutes, but every oven is different. The first time you make these, check them at 9 minutes.
Let the cookies cool on the baking sheet for 5 minutes (if you try to move them sooner, they might break – learned that one the messy way). Then transfer them to a wire rack to cool completely. And I mean completely. Warm cookies plus icing equals a melted disaster.
Step 5: Make the Royal Icing
In a large bowl (or your stand mixer), combine the sifted powdered sugar and meringue powder. Add 5 tablespoons of warm water and beat on low speed for about 30 seconds, then increase to medium-high and beat for 5-7 minutes. It should be thick, glossy, and form stiff peaks when you lift the beater.
This is “stiff consistency” icing – perfect for outlining. You’ll need to thin it out for flooding (filling in the colors). To test if it’s the right consistency for flooding, drizzle a bit back into the bowl. If the line disappears within 10-15 seconds, you’re golden. If it just sits there, add water half a teaspoon at a time until it’s right.
Step 6: Divide and Color
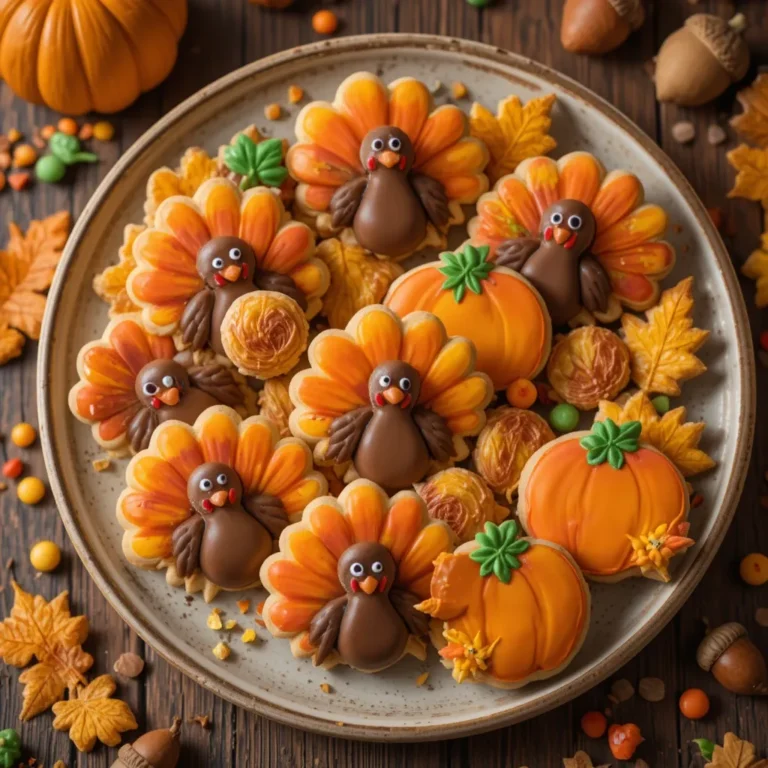
Split your icing into separate bowls – one for each color you’re using. I typically do: brown (for the turkey body), orange (for beak and feet), red (for the wattle), and yellow/orange/red for the feathers. Add gel food coloring bit by bit until you get the shade you want. Remember, the color will dry slightly darker.
Step 7: Decorate!
Here’s my method: Put the stiff consistency icing into piping bags fitted with #2 or #3 tips. Outline each section of your turkey – the body, each feather, the beak, the wattle. Let these outlines dry for about 15 minutes.
Now thin the remaining icing to flooding consistency and put it in squeeze bottles (way easier than piping bags for this step). Fill in each outlined section, using a toothpick to spread the icing into corners and pop any air bubbles. Let each color dry for at least 30 minutes before adding the next color on top.
For the feather details, I go back with my piping bags of stiff icing and add little lines or dots once the base color is dry. Add candy eyes and you’re done!
My Favorite Ways to Serve These
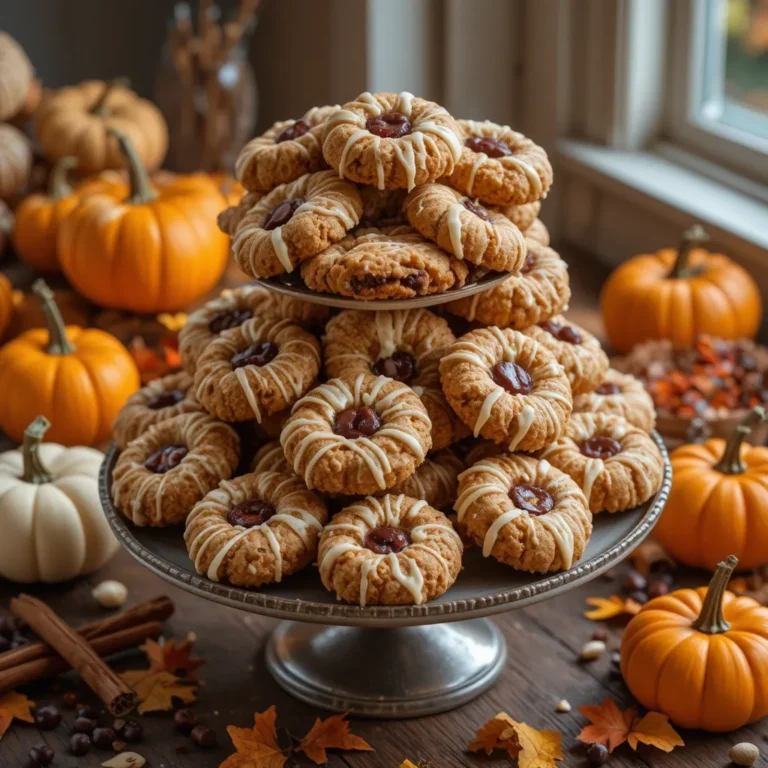
I’m not going to lie – these Thanksgiving turkey sugar cookies royal icing creations are so pretty that they kind of serve themselves. I like arranging them on a simple white platter so the colors really pop. Last year, I stuck them upright in a foam block covered with autumn leaves for a centerpiece that doubled as dessert, and people lost their minds.
If you’re bringing these to a gathering, transport them in a single layer in a rigid container. I learned this after showing up to a potluck with a box of cookie shards. Not cute.
For a full Thanksgiving dessert table, I’ll pair these with:
- Mini pumpkin cheesecakes
- Apple cider donuts
- Pecan pie bars
- A cheese board with dried cranberries and candied nuts
The cookies add that fun, whimsical element while the other desserts bring the traditional autumn flavors. It’s a good balance.
If you’re doing a kids’ table (game changer, by the way), set out these cookies along with some hot chocolate and let them feel fancy.
Pro Tips from My Kitchen
Can I Make These Ahead?
Yes! This is honestly the best part. Bake the cookies up to a week ahead and store them in an airtight container at room temperature. They’ll stay fresh and perfect for decorating. Once decorated, the cookies keep for up to two weeks in a covered container. Just layer them with parchment paper between each layer so the icing doesn’t stick.
I always make my cookies on a Sunday, decorate on Monday, and then I’m completely stress-free come Thursday.
The Secret to Smooth Icing
After making approximately 300 turkey cookies over the years (yes, really), here’s my foolproof trick: Always, ALWAYS sift your powdered sugar. I know it’s an extra step and another dish to wash, but lumpy icing is impossible to pipe smoothly. I used to skip this and then spend 20 minutes fishing lumps out of my piping bag. Not worth it.
Also, use fresh meringue powder. Old meringue powder doesn’t whip up properly, and your icing will never get that glossy, stiff peak consistency you need.
Don’t Rush the Drying Time
I know you’re excited to add the next color (me too!), but patience is everything with royal icing. If you add a new color before the previous one is dry, they’ll bleed together and you’ll lose all your beautiful details. I typically wait 30 minutes between colors, longer if it’s humid in my kitchen.
If you’re in a hurry, you can use a fan to speed up drying. Just don’t use a hair dryer – ask me how I know that’s a terrible idea. (Spoiler: it blows the icing everywhere.)
Use Quality Food Coloring
This might sound bougie, but good gel food coloring makes a huge difference. Cheap food coloring can give your icing a weird, slightly bitter taste, and the colors aren’t as vibrant. I use Americolor or Wilton gels, and a little goes a long way. One set of colors has lasted me three years.
Practice Pressure Control
When you’re piping, the consistency of your lines depends on steady pressure. Practice on a piece of parchment paper before you commit to your cookies. I still do this every single time because my first few lines are always a bit wonky as I get a feel for the icing consistency that day.
Keep Your Icing Covered
Royal icing dries out crazy fast when exposed to air. Keep a damp towel over your bowls and put caps on your piping tips when you’re not actively using them. Otherwise, you’ll end up with crusty icing and clogged tips. So annoying.
Storing and Reheating Tips
Room Temperature Storage
Once your thanksgiving turkey sugar cookies royal icing decorations are completely dry (give them at least 4-6 hours, or overnight to be safe), store them in an airtight container at room temperature. Layer them with parchment or wax paper between each layer. They’ll keep perfectly for 2 weeks this way.
Don’t refrigerate them! I made that mistake once and the cookies got soft and the colors started to bleed. Royal icing hates humidity.
Freezing the Undecorated Cookies
Here’s a trick I use when I’m planning ahead: bake the cookies and freeze them (undecorated) for up to 3 months. Wrap them tightly in plastic wrap, then put them in a freezer bag. Thaw them at room temperature for about an hour before decorating. This is perfect if you want to spread the work out or if you’re baking for multiple events.
Can You Freeze Decorated Cookies?
Technically yes, but I don’t recommend it. The royal icing can sometimes get condensation when thawing, which makes the colors run or creates water spots. If you must freeze them, make absolutely sure they’re in an airtight container and thaw them slowly in the fridge, then bring to room temperature before opening the container.
Common Questions About Turkey Sugar Cookies
Why did my cookies spread in the oven?
This usually means your dough wasn’t cold enough when it went into the oven. Make sure you’re chilling the dough fully, and if your kitchen is warm, pop the cut-out cookies in the freezer for 10 minutes before baking. Also, check that your butter was actually softened, not melted – melted butter causes spreading.
My royal icing is too runny. Help!
Add more sifted powdered sugar, a tablespoon at a time, and beat well after each addition. It might take 2-3 tablespoons to get back to the right consistency. On the flip side, if it’s too thick, add water just a few drops at a time.
How do I get vibrant colors without using tons of food coloring?
Start with less water in your icing – a thicker base takes color better. Also, gel colors are way more concentrated than liquid, so you need less. For really vibrant colors like red, let the icing sit for about 30 minutes after coloring – the color develops and deepens.
Can I use regular icing instead of royal icing?
You can use buttercream if you want, but it won’t dry hard like royal icing does. That means your cookies will be sticky and you can’t stack them. Royal icing is really the best choice for decorated cookies you want to transport or give as gifts.
My icing cracked while drying. What happened?
This usually means the icing was too thick when you flooded the cookie. It needs to be thin enough to self-level but not so thin it runs off. Also, if you added the icing in a really thick layer, the top can dry before the bottom and cause cracking.
Variations to Try
Make Them Mini
Use a smaller cookie cutter (about 2 inches) for bite-sized versions. These are perfect for cookie platters or as place cards – you can write names on them with edible markers. Baking time for mini cookies is only about 6-7 minutes.
Try Different Flavors
While I love the almond extract version, you can swap it out for:
- Lemon extract (gives a bright, citrusy note)
- Maple extract (very fall-appropriate)
- Orange extract (pairs beautifully with the Thanksgiving theme)
Add Sparkle
Before the royal icing dries completely, dust the cookies with edible glitter or luster dust. My daughter insists on this for every batch we make. It catches the light and makes them look extra fancy.
Go 3D
If you’re feeling ambitious, make two turkey cookies and use royal icing to “glue” them together at a 90-degree angle so they stand up. These make incredible place card holders for your Thanksgiving table.
Final Thoughts
Here’s the truth about Thanksgiving turkey sugar cookies royal icing projects: they take time, but they’re absolutely worth it. Every single year, these cookies are the first thing to disappear from my dessert table. I’ve had relatives ask me in July when I’m making “those turkey cookies again.”
The first time you make them, give yourself grace. Your turkeys might look a little wonky (mine definitely did), but I promise they’ll still taste delicious and bring smiles to everyone who sees them. By your third batch, you’ll be piping feathers like a pro.
My biggest piece of advice? Put on a good playlist or your favorite show, pour yourself something to drink, and settle in for a couple hours of creative, meditative decorating time. I’ve started treating it as my pre-Thanksgiving self-care ritual. There’s something genuinely relaxing about watching a plain cookie transform into a colorful turkey under your piping bag.
And when your niece refuses to eat her cookie because it’s too beautiful? That’s when you know you’ve nailed it.