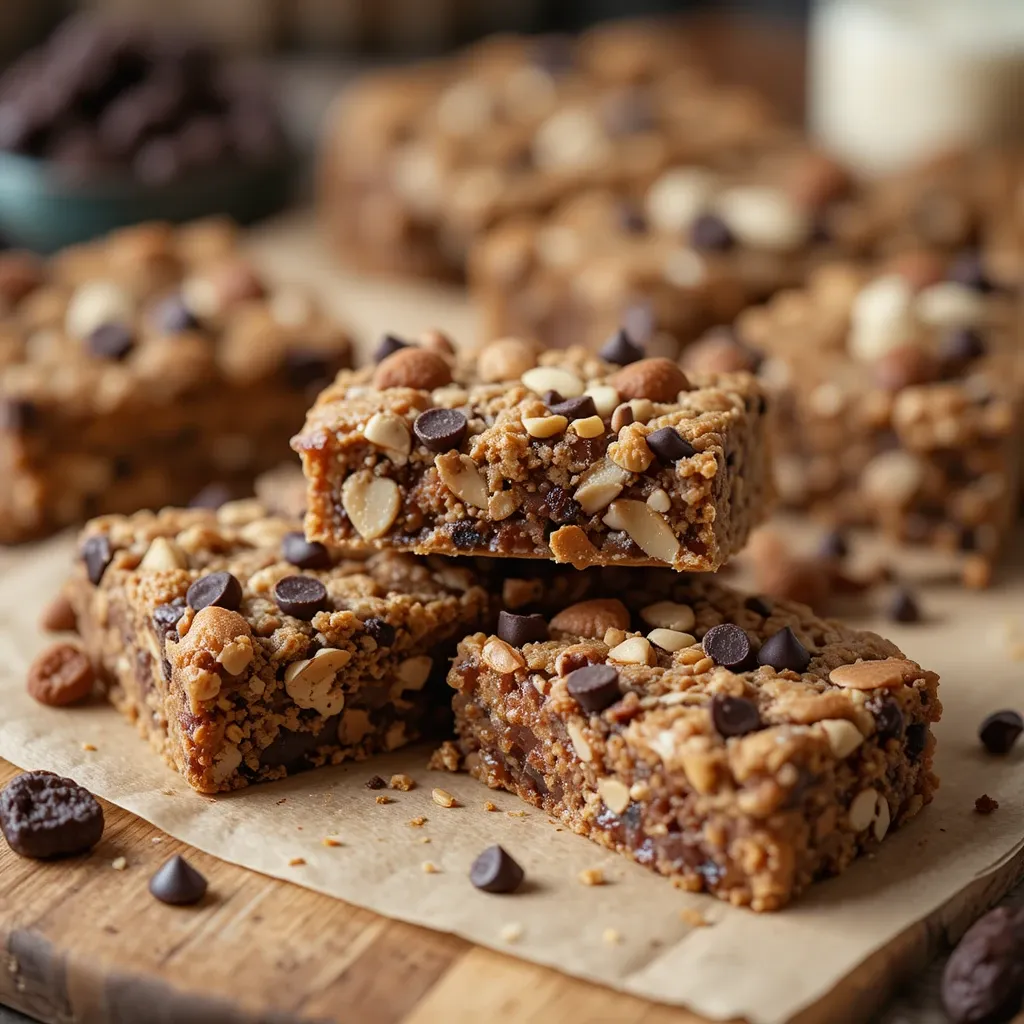
Best Vegan Protein Bars – Just 5 Minutes Prep
There’s something absolutely magical about biting into a homemade vegan protein bar that’s chewy, satisfying, and packed with wholesome ingredients. These vegan protein bars are my go-to snack when I need an energy boost without the guilt. They’re ridiculously simple to make, require no baking, and taste like a treat rather than health food.
I remember the first time I made these—I was skeptical that something so easy could be so good. Now I keep a batch in my fridge at all times! If you loved my energy balls recipe, you’re going to be absolutely obsessed with these protein-packed beauties.
This recipe was generated using artificial intelligence and has not been made in our kitchen. We share it with care, and readers who tried other site recipes have reported positive outcomes.
What Are Vegan Protein Bars?
Ever wonder why these delightful snacks are called “protein bars” when they taste more like candy? Well, they’re basically nature’s answer to those expensive store-bought bars that cost a fortune! These homemade vegan protein bars combine nuts, seeds, dates, and plant-based protein powder into portable energy bombs.
They say the way to anyone’s heart is through their stomach, and these bars prove it every single time. Trust me, once you make your first batch, you’ll never go back to buying them!
Why You’ll Love This Vegan Protein Bars Recipe
The Ultimate Post-Workout Snack
These bars are everything you could want in a healthy snack. They’re chewy, naturally sweet, and loaded with plant-based protein that keeps you satisfied for hours. The combination of dates and nut butter creates this incredible caramel-like flavor that makes you forget you’re eating something healthy. I love grabbing one after my morning workout or when that 3 PM energy slump hits.
Save Money While Eating Better
Let’s talk about money for a second. Store-bought vegan protein bars can cost anywhere from $2 to $4 each. When you make them at home, you’re spending about 50 cents per bar! Plus, you know exactly what’s going into them—no weird preservatives, artificial sweeteners, or ingredients you can’t pronounce. Making a batch takes less time than driving to the store.
Customize to Your Heart’s Content
The beauty of these bars is their versatility. Want chocolate chips? Throw them in! Prefer almond butter over peanut butter? Go for it! Add dried cherries, coconut flakes, or even a swirl of tahini. You can also try my chocolate chip cookies recipe if you’re craving something sweet and baked. The possibilities are endless, and you can adjust everything to match your taste preferences perfectly.
How to Make Vegan Protein Bars
Quick Overview
These no-bake vegan protein bars come together in about 15 minutes of active time. You’ll love how simple the process is—just mix, press, and chill. The result is a perfectly chewy bar with amazing texture and flavor that rivals any store-bought version.
Total Time Breakdown:
- Prep Time: 15 minutes
- Chilling Time: 2 hours
- Total Time: 2 hours 15 minutes
- Yield: 12 bars
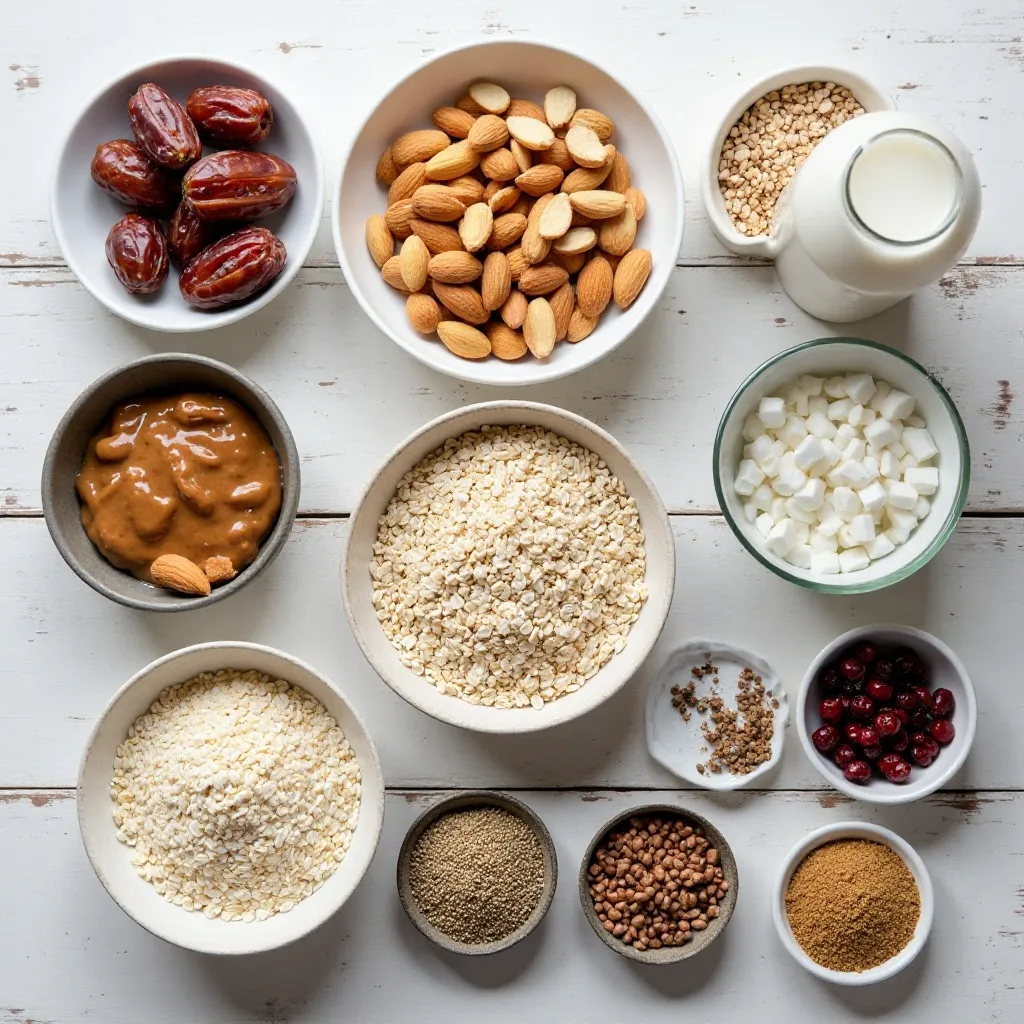
Key Ingredients for Vegan Protein Bars
Here’s what you’ll need to create these amazing bars:
Base Ingredients:
- 1½ cups pitted Medjool dates (about 15-18 dates)
- 1 cup raw almonds (or cashews)
- ½ cup rolled oats
- ½ cup vegan protein powder (vanilla or chocolate)
- ⅓ cup natural peanut butter or almond butter
- 2 tablespoons maple syrup
- 2 tablespoons ground flaxseed
- 1 teaspoon vanilla extract
- ¼ teaspoon sea salt
- 2-3 tablespoons plant-based milk (as needed)
Optional Add-ins:
- ⅓ cup vegan chocolate chips
- 2 tablespoons chia seeds
- ¼ cup dried cranberries or goji berries
- 2 tablespoons hemp hearts
- ¼ cup shredded coconut
Step-by-Step Instructions
How do I prepare the dates for the bars?
Start by soaking your dates in warm water for about 10 minutes if they’re not super soft and sticky. This step is crucial because hard dates won’t blend smoothly. Drain them well and pat dry with a paper towel. If your dates are already soft and fresh (like good Medjool dates), you can skip the soaking entirely.
How do I process the dry ingredients?
Add the almonds and oats to your food processor. Pulse them together for about 20-30 seconds until they’re broken down into a coarse meal. You don’t want powder—think of it like coarse sand with some small chunks remaining. This texture is what gives your bars that perfect chewy consistency instead of being too dense or too crumbly.
How do I combine everything into a dough?
Add the soaked dates, protein powder, nut butter, maple syrup, flaxseed, vanilla extract, and sea salt to the food processor with the nut-oat mixture. Process for 1-2 minutes, stopping to scrape down the sides as needed. The mixture should start clumping together and feel sticky when you pinch it. If it’s too dry and crumbly, add plant-based milk one tablespoon at a time while processing. The dough should stick together when pressed but not be overly wet.
How do I add the mix-ins?
If you’re using chocolate chips, dried fruit, or other add-ins, pulse them in briefly (just 3-4 pulses) or mix them in by hand with a spoon. You want these ingredients distributed throughout but still chunky, not pulverized into the base.
How do I shape and press the bars?
Line an 8×8 inch baking pan with parchment paper, leaving some overhang on the sides for easy removal. Transfer your mixture to the pan and press it down firmly and evenly. I like to use the bottom of a measuring cup or glass to really pack it in. The firmer you press, the better your bars will hold together. Make sure the surface is as smooth and even as possible.
How long do the bars need to chill?
Place the pan in the refrigerator for at least 2 hours, or in the freezer for 1 hour if you’re in a hurry. This chilling time is essential—it allows everything to firm up and makes cutting the bars so much easier. Don’t rush this step or you’ll end up with crumbly bars that fall apart.
How do I cut the bars cleanly?
Use the parchment paper overhang to lift the entire block out of the pan. Place it on a cutting board and use a sharp knife to cut into 12 bars (3 rows of 4). Wipe your knife clean between cuts for the neatest edges. If the bars are sticking to the knife, run it under hot water, dry it, and then cut.
What to Serve Vegan Protein Bars With
These bars are perfect on their own, but here are some delicious pairing ideas:
For Breakfast: Pair a protein bar with a smoothie bowl or fresh fruit salad. Add a cup of herbal tea or black coffee for a complete morning meal.
Post-Workout: Enjoy with a protein shake or coconut water to replenish after exercise. A handful of fresh berries on the side adds extra antioxidants.
Afternoon Snack: Serve alongside apple slices with almond butter or a small handful of trail mix. A cup of matcha or green tea makes this a perfect pick-me-up.
Travel Companion: Pack with dried fruit, nuts, and some veggie sticks for a complete portable meal. They’re perfect for hiking, road trips, or busy days.
Top Tips for Perfecting Vegan Protein Bars
Can I use a different sweetener instead of dates?
Dates are ideal because they provide natural sweetness and act as a binder. However, if you can’t use dates, you can try a combination of maple syrup (¼ cup) and a bit more nut butter, plus an extra tablespoon of ground flaxseed to help bind everything. The texture will be slightly different but still delicious.
What type of protein powder works best?
I’ve tested these with various vegan protein powders. Pea protein, brown rice protein, and blends all work beautifully. Avoid using too much protein powder as it can make the bars dry and chalky. Stick to the ½ cup measurement for the best texture. Flavored protein powders (vanilla, chocolate) add extra taste, while unflavored keeps them neutral for more customization.
Why are my bars falling apart?
This usually happens for two reasons: not pressing firmly enough or the mixture being too dry. Make sure you really pack down the mixture in the pan. If your dough seems crumbly before pressing, add a tablespoon or two of plant-based milk or extra nut butter until it holds together when squeezed.
Can I make these nut-free?
Absolutely! Replace the almonds with sunflower seeds or pumpkin seeds (pepitas). Use sunflower seed butter or tahini instead of peanut or almond butter. The flavor will be different but equally delicious, and they’ll be perfect for nut-free environments like schools.
How can I make these chocolate-flavored?
Use chocolate protein powder instead of vanilla. Add 2 tablespoons of cocoa powder to the mixture. Fold in ⅓ cup of vegan chocolate chips. You can even drizzle melted dark chocolate on top after they’ve chilled for an extra decadent touch.
Storing and Reheating Tips
Refrigerator Storage: Store your vegan protein bars in an airtight container in the refrigerator for up to 2 weeks. Place parchment paper between layers if you’re stacking them to prevent sticking. They actually taste better after a day or two as the flavors meld together.
Freezer Storage: These bars freeze beautifully for up to 3 months. Wrap each bar individually in parchment paper, then place them all in a freezer-safe bag or container. This makes it easy to grab one whenever you need it. They thaw in about 20 minutes at room temperature, or you can eat them partially frozen for a firmer texture.
Room Temperature: If you prefer softer, chewier bars, you can leave them at room temperature for 30 minutes before eating. However, don’t store them at room temperature for more than a few hours, especially in warm weather, as they can become too soft and sticky.
Travel Tips: These bars travel exceptionally well. Wrap individually and pack in a lunch box with an ice pack if it’s warm outside. They’re perfect for hiking, camping, or long days when you need portable nutrition.
Common Baking Mistakes to Avoid
Even though these are no-bake bars, there are still some pitfalls to watch out for:
Using Old, Dry Dates: Fresh, soft Medjool dates are essential. Old, hard dates won’t blend properly and will create a grainy texture. If your dates are dry, soak them longer—up to 30 minutes.
Over-Processing: While you want everything mixed well, over-processing can turn your mixture into a paste that’s too dense. Process just until it comes together and holds when squeezed.
Not Pressing Firmly Enough: This is the biggest mistake! Really use some muscle to press that mixture down. The firmer you press, the better your bars will hold together when cut.
Cutting Too Soon: Patience is key. Wait the full 2 hours before cutting. If you cut too early, the bars will be soft and crumbly. This resting time is crucial for proper texture.
Using Low-Quality Protein Powder: Cheap protein powder can have a chalky, unpleasant taste that ruins your bars. Invest in a good-quality vegan protein powder—it makes all the difference.
Not Tasting as You Go: Before pressing into the pan, taste your mixture. Is it sweet enough? Does it need more salt? A pinch more vanilla? Adjust seasonings now, because you can’t change it later.
Skipping the Parchment Paper: Always line your pan. Trying to cut bars directly in the pan is a nightmare, and you’ll likely end up with a crumbly mess.
Frequently Asked Questions
Can I make these bars without a food processor?
While a food processor makes this recipe much easier, you can make them without one. Finely chop the dates and nuts by hand, use quick oats instead of rolled oats, and mash everything together in a large bowl using a potato masher or your hands. It requires more effort but definitely works. The texture might be slightly different with more visible chunks.
Are these bars suitable for kids?
Yes! Kids love these vegan protein bars. They taste like a treat but provide sustained energy without the sugar crash from conventional snacks. You can even get kids involved in making them—pressing the mixture into the pan is a fun job for little hands. Just be aware of any nut allergies if sharing with other children.
How much protein is in each bar?
Each bar contains approximately 8-10 grams of protein, depending on the protein powder you use and the exact size of your bars. This comes from the combination of nuts, protein powder, nut butter, and seeds. It’s a substantial amount that helps keep you full between meals.
Can I add more protein powder for extra protein?
I don’t recommend adding more than the ½ cup called for. Too much protein powder makes the bars dry, chalky, and difficult to bind together. If you want more protein, add hemp hearts, extra nuts, or a bit more nut butter instead.
What’s the texture supposed to be like?
These bars should be chewy, slightly dense, and hold together well when you bite into them. They shouldn’t be hard and crunchy (like a granola bar) or soft and mushy. The texture is somewhere between a Lärabar and a cookie dough—firm enough to hold its shape but still tender.
Can I make these bars oil-free?
These bars are naturally oil-free if you use natural nut butter without added oils. The healthy fats come from whole food sources like nuts and seeds. This makes them a great option for those following a whole-food, plant-based diet.
Why do my bars taste too “protein powder-y”?
This usually means you’re tasting the protein powder too much. Make sure you’re using a high-quality protein powder with good flavor. Adding extra vanilla extract, a bit more maple syrup, or mix-ins like chocolate chips can help mask any protein powder taste. Also ensure you’re not using more than ½ cup of protein powder.
Can I make these bars gluten-free?
Yes! Simply use certified gluten-free oats. All other ingredients in the recipe are naturally gluten-free. Always check your protein powder label to ensure it’s certified gluten-free if you have celiac disease.
Nutritional Benefits of Vegan Protein Bars
Let me share why these bars are such a nutritional powerhouse:
Complete Protein Source: The combination of nuts, seeds, and plant-based protein powder provides all essential amino acids your body needs. This makes them perfect for muscle recovery and sustained energy throughout the day.
Fiber-Rich: With dates, oats, nuts, and flaxseed, each bar delivers about 4-5 grams of fiber. This supports digestive health and helps you feel satisfied longer. The fiber also helps stabilize blood sugar levels, preventing energy crashes.
Healthy Fats: These bars contain omega-3 fatty acids from flaxseed and monounsaturated fats from nuts and nut butter. These healthy fats support heart health, brain function, and help with nutrient absorption.
Natural Sugars: Unlike store-bought bars loaded with refined sugars, these use dates for natural sweetness. Dates also provide minerals like potassium, magnesium, and iron. The natural sugars are bound with fiber, which means they’re absorbed more slowly.
Antioxidants: Nuts, seeds, and any add-ins like chocolate or berries provide powerful antioxidants that fight inflammation and support overall health. These compounds help protect your cells from damage.
Nutrition Information (Per Bar)
| Nutrient | Amount |
|---|---|
| Calories | 185 |
| Protein | 9g |
| Carbohydrates | 22g |
| Fiber | 4g |
| Sugar | 12g |
| Fat | 8g |
| Saturated Fat | 1g |
| Sodium | 65mg |
| Potassium | 285mg |
| Calcium | 45mg |
| Iron | 2mg |
Nutritional values are approximate and will vary based on specific ingredients and brands used.
Final Thoughts
Making homemade vegan protein bars has become one of my favorite weekly meal prep activities. There’s something incredibly satisfying about creating wholesome snacks that fuel your body and taste amazing. These bars prove that healthy eating doesn’t have to be complicated or expensive.
I love experimenting with different flavor combinations—last week I made a batch with tahini, dark chocolate chunks, and orange zest that was absolutely incredible. The week before, I added dried cherries and coconut for a tropical twist.
The best part? My non-vegan friends and family can’t believe these are plant-based and homemade. They always ask for the recipe, and now you have it too!
Whether you’re vegan, plant-curious, or just looking for healthier snack options, these bars deserve a spot in your regular rotation. Give them a try, and don’t forget to let me know which flavor variation becomes your favorite. Happy snacking!
Have you tried this recipe? I’d love to hear about it! Leave a comment below sharing your experience and any creative variations you’ve made. Don’t forget to rate the recipe and share photos—I feature reader creations on my social media!