10 Wildflower Cake ideas You Can Actually Make at Home
There’s something magical about wildflower cakes that makes my heart skip a beat every time I create one. These stunning botanical beauties combine nature’s delicate artistry with delicious homemade cake, creating desserts that taste as incredible as they look.
Whether you’re celebrating a garden party, wedding, or simply want to bring spring vibes to your kitchen, these wildflower cake ideas will transform your baking from ordinary to absolutely enchanting.
This recipe is AI-created and has not been personally cooked by us. We care deeply about our website family, and readers who’ve tried other recipes here often share positive feedback.
What Are Wildflower Cakes?
Ever wondered why we’re all obsessed with wildflower cakes right now? These gorgeous creations feature edible flowers, buttercream botanicals, or fresh blooms that capture nature’s untamed beauty. I remember the first time I topped a simple vanilla cake with fresh chamomile and lavender from my garden—my family couldn’t stop taking photos before we even cut into it!
As they say, the way to anyone’s heart is through their stomach, but add some flowers and you’ve won them over completely. Trust me, once you create your first wildflower cake, you’ll never look at plain frosted cakes the same way again.
Why You’ll Love These Wildflower Cake Ideas
A Natural Showstopper
Wildflower cakes instantly elevate any occasion without requiring advanced decorating skills. The organic, whimsical nature of wildflowers means imperfection is part of the charm. Unlike perfectly piped roses that demand precision, these botanical beauties embrace natural, flowing designs that look professionally crafted even when you’re working with basic techniques.
Budget-Friendly Beauty
Making wildflower cakes at home saves you hundreds compared to ordering from specialty bakeries. A store-bought wildflower cake can cost $150 or more, but creating your own costs a fraction of that. You can use seasonal flowers from your garden or affordable edible blooms from grocery stores. The ingredients are simple—quality butter, vanilla, and your favorite cake base—while the flowers provide all the wow factor.
Endless Creative Possibilities
From pressed flower designs to cascading fresh blooms, wildflower cakes offer unlimited creativity. You can match any color scheme, season, or celebration theme. I love how versatile these cakes are—they work beautifully for rustic weddings, elegant baby showers, or casual Sunday brunches. If you enjoyed my lavender honey cake recipe, you’ll absolutely adore these wildflower variations that take botanical baking to the next level.
Ready to bring nature’s beauty to your dessert table? Let’s explore these stunning wildflower cake ideas that’ll have everyone asking for your secret!
How to Make Wildflower Cakes
Quick Overview
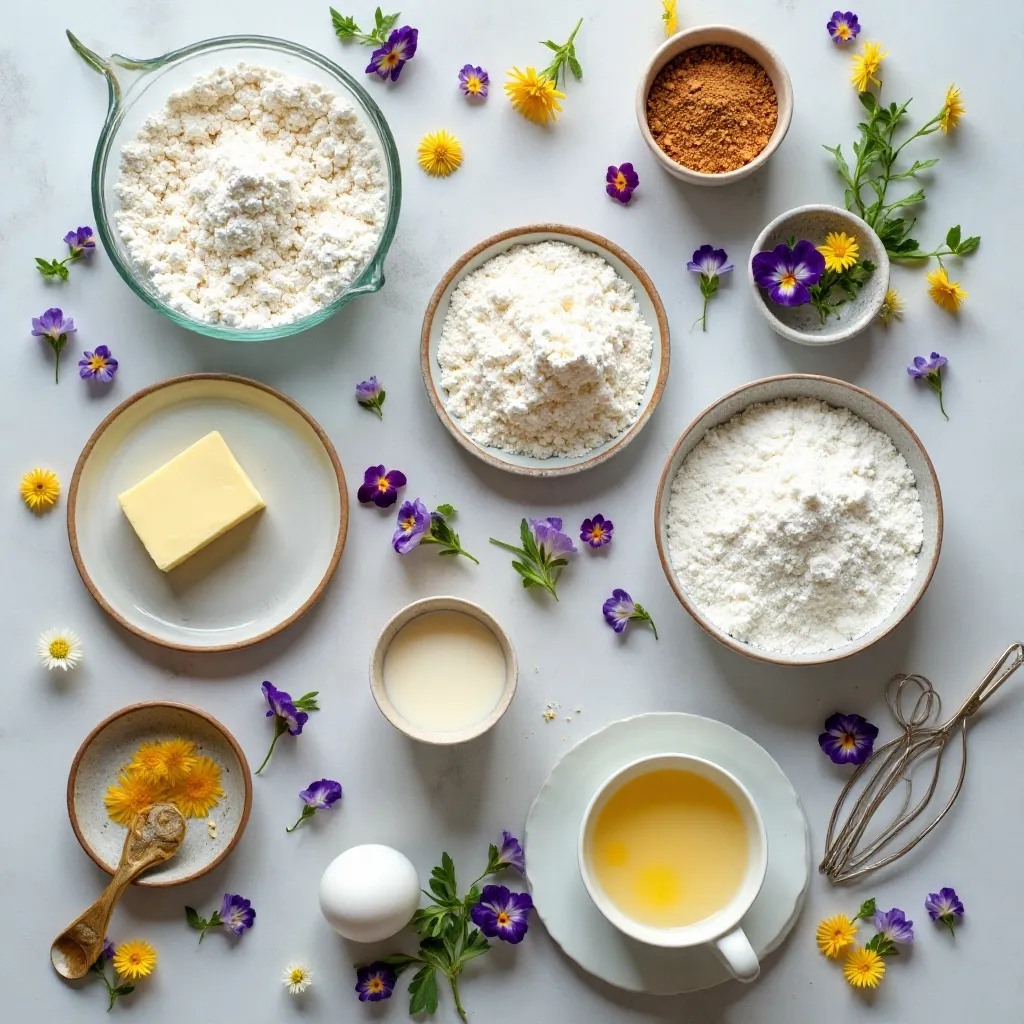
Creating wildflower cakes is easier than you might think. The foundation is a reliable cake recipe paired with smooth buttercream or cream cheese frosting that serves as your canvas. The magic happens when you add botanical elements—whether fresh edible flowers, dried blooms, or buttercream florals. Most wildflower cakes take about 1 hour for baking, 30 minutes for cooling, and 45 minutes for decorating, making them perfect weekend projects.
The key is starting with a stable, delicious base cake that can support your floral decorations. Once you master the basic technique, you can experiment with different flower varieties, color palettes, and decorating styles.
Preparation Time: 30 minutes
Baking Time: 30-35 minutes
Cooling Time: 30 minutes
Decorating Time: 45-60 minutes
Total Time: 2 hours 30 minutes
10 Stunning Wildflower Cake Ideas
1. Classic Pressed Wildflower Cake
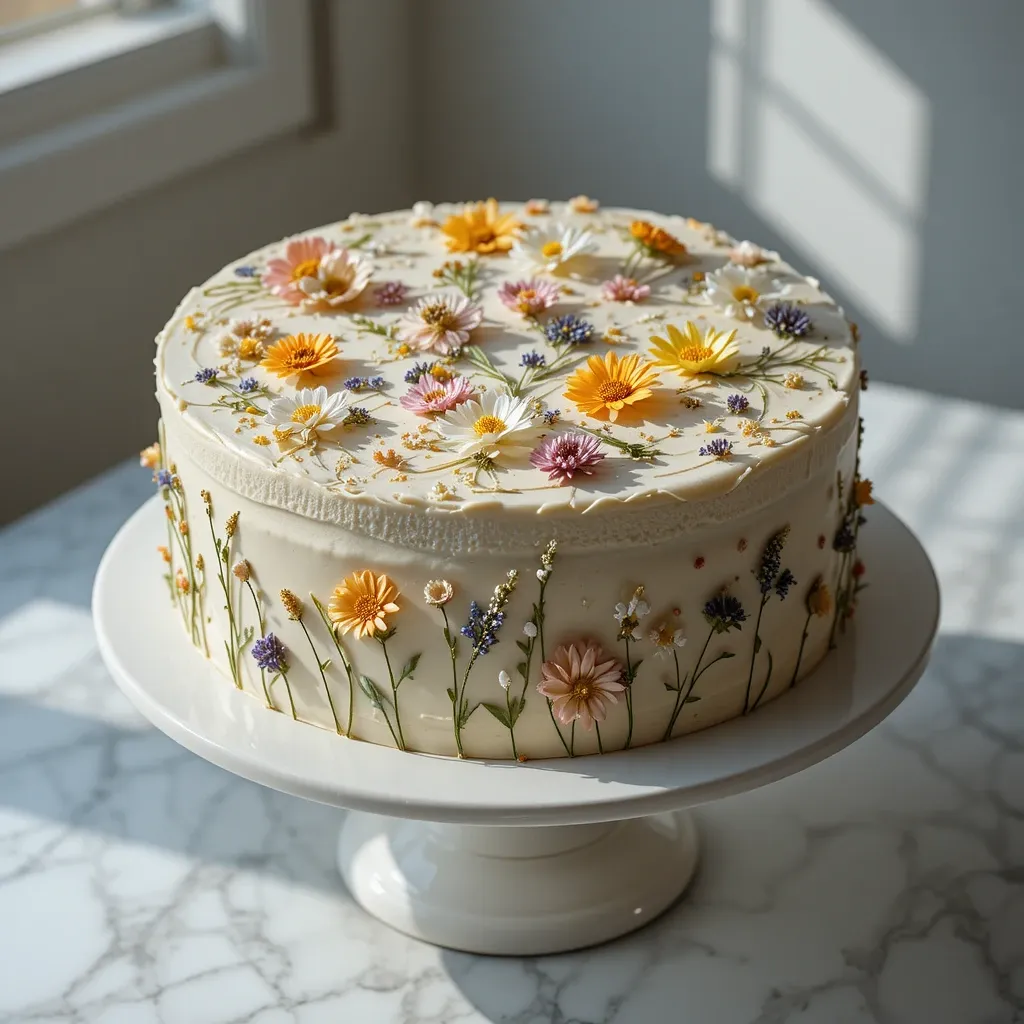
This elegant design features delicate wildflowers pressed directly into smooth buttercream frosting, creating a vintage botanical art effect.
Key Ingredients for Pressed Wildflower Cake
For the Vanilla Base Cake:
- 2½ cups all-purpose flour
- 2½ teaspoons baking powder
- ½ teaspoon salt
- 1 cup unsalted butter, room temperature
- 2 cups granulated sugar
- 4 large eggs, room temperature
- 1 tablespoon pure vanilla extract
- 1 cup whole milk, room temperature
For the Buttercream:
- 2 cups unsalted butter, softened
- 6 cups powdered sugar
- 3 tablespoons heavy cream
- 2 teaspoons vanilla extract
- Pinch of salt
For Decoration:
- Edible wildflowers (violas, pansies, chamomile, small daisies)
- Small paintbrush
- Clear alcohol or lemon extract for brushing
Step-by-Step Instructions
Preheat your oven to 350°F and prepare three 8-inch round cake pans by greasing them thoroughly and lining the bottoms with parchment paper. This prevents sticking and ensures clean cake removal.
In a medium bowl, whisk together the flour, baking powder, and salt. Set this dry mixture aside while you prepare the wet ingredients.
Using a stand mixer with the paddle attachment, cream the butter and sugar together on medium-high speed for 4-5 minutes until light and fluffy. This step incorporates air and creates a tender crumb.
Add the eggs one at a time, beating well after each addition. Scrape down the bowl sides to ensure even mixing. Pour in the vanilla extract and mix until combined.
Reduce mixer speed to low and add the flour mixture in three additions, alternating with the milk in two additions. Begin and end with the flour mixture. Mix just until combined—overmixing creates a dense cake.
Divide the batter evenly among the three prepared pans, using a kitchen scale for precision if available. Smooth the tops with an offset spatula.
Bake for 28-32 minutes until a toothpick inserted in the center comes out clean and the cakes spring back when lightly touched. The edges should just begin pulling away from the pan sides.
Cool the cakes in pans for 10 minutes, then turn them out onto wire cooling racks. Allow them to cool completely before frosting—this takes about 30 minutes.
While cakes cool, prepare the buttercream by beating softened butter on medium speed for 3-4 minutes until pale and creamy. Gradually add powdered sugar one cup at a time, mixing on low between additions.
Add heavy cream, vanilla, and salt, then increase speed to medium-high and beat for 5 minutes until light and fluffy. The buttercream should hold stiff peaks.
Once cakes are completely cool, level the tops with a serrated knife if needed. Place the first layer on your cake board or serving plate.
Spread about 1 cup of buttercream evenly across the first layer using an offset spatula. Add the second layer and repeat with another cup of buttercream.
Top with the final layer and apply a thin crumb coat of buttercream over the entire cake. Refrigerate for 20 minutes to set.
Apply the final coat of buttercream, smoothing it with a bench scraper or offset spatula. You want a clean, smooth surface for pressing flowers.
Carefully press fresh, clean, dry wildflowers into the buttercream while it’s still soft. Work gently to avoid bruising the petals. Create a flowing design from top to bottom or arrange them in clusters.
For the pressed flower effect, use a small paintbrush dipped in clear alcohol or lemon extract to gently brush over each flower. This helps them adhere and creates a translucent, pressed appearance.
Refrigerate the finished cake for 30 minutes to set the buttercream completely before serving.
Value Tip: This technique creates museum-quality beauty that looks incredibly complex but is actually beginner-friendly. The pressed flowers hide any frosting imperfections, and the alcohol wash preserves the flowers’ colors beautifully throughout your event.
2. Naked Cake with Fresh Wildflower Crown
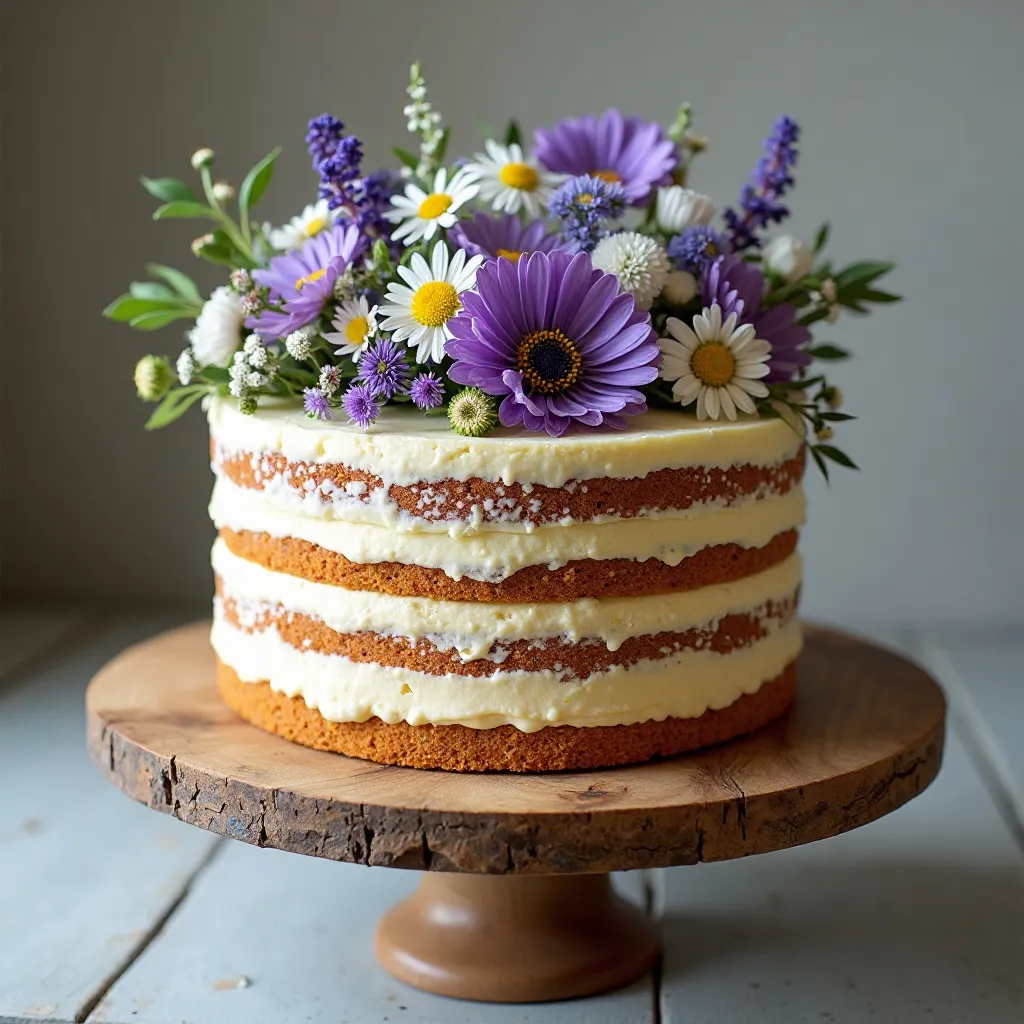
A rustic naked cake showcasing visible layers with minimal frosting, topped with a stunning crown of fresh seasonal wildflowers.
Key Ingredients for Naked Wildflower Cake
For the Honey Almond Cake:
- 3 cups all-purpose flour
- 1 tablespoon baking powder
- ½ teaspoon salt
- 1 cup unsalted butter, softened
- 1¼ cups granulated sugar
- ½ cup honey
- 4 large eggs
- 1 cup whole milk
- 1 teaspoon almond extract
- 1 teaspoon vanilla extract
For the Minimal Buttercream:
- 1 cup unsalted butter, softened
- 3 cups powdered sugar
- 2 tablespoons heavy cream
- 1 teaspoon vanilla extract
For Decoration:
- Fresh wildflowers (lavender, daisies, cornflowers, Queen Anne’s lace)
- Floral wire or toothpicks for support if needed
Step-by-Step Instructions
Start by preheating your oven to 350°F. Prepare three 8-inch cake pans with butter and parchment paper circles.
Combine flour, baking powder, and salt in a bowl and whisk thoroughly to distribute the leavening agents evenly.
In your stand mixer, beat butter until creamy, about 2 minutes. Add sugar gradually and cream together for 4 minutes until pale and fluffy.
Warm the honey slightly in the microwave for 10 seconds so it incorporates smoothly, then add it to the butter mixture and beat for another minute.
Add eggs one at a time, beating well after each. The mixture should look smooth and emulsified, not curdled.
In a measuring cup, combine milk with almond and vanilla extracts.
With the mixer on low, add flour mixture in three parts, alternating with milk mixture in two parts. Start and end with flour. Mix only until you see no dry flour streaks.
Divide batter evenly among pans using a scale for accuracy. Each pan should have about 550-600 grams of batter.
Bake for 30-33 minutes until golden and a tester comes out clean. The cakes should smell fragrant with honey notes.
Cool in pans for 15 minutes, then carefully turn out onto racks. These cakes are delicate when warm, so handle gently.
Make the buttercream by creaming butter until fluffy, then gradually adding powdered sugar. Add cream and vanilla, beating until smooth but not overmixed.
For the naked cake effect, apply buttercream only between the layers—about ½ cup per layer. Leave the exterior sides exposed to show the beautiful cake layers.
Use an offset spatula to smooth the buttercream between layers, keeping it slightly recessed from the cake edges for that authentic naked look.
Stack all three layers, ensuring they’re level and centered. The exposed cake sides should show even layers.
Top the cake with a generous crown of fresh wildflowers. Arrange them in a natural, loose style as if they were gathered from a meadow.
For flowers that need water, wrap stems in damp paper towels and floral tape, or insert them into small water tubes before placing on the cake.
Keep the cake refrigerated until 1 hour before serving, allowing the buttercream to soften slightly for the best flavor.
Value Tip: The naked cake style is perfect if you’re short on time or less confident with frosting. The minimal coverage means less buttercream to make and spread, while the wildflower crown does all the decorative heavy lifting. This style also keeps the cake lighter and less sweet, letting the honey almond flavor shine through.
3. Watercolor Buttercream with Edible Flowers
This artistic cake features painted watercolor buttercream in soft pastels, adorned with strategically placed edible blooms.
Key Ingredients for Watercolor Wildflower Cake
For the Lemon Cake:
- 2¾ cups cake flour
- 2 teaspoons baking powder
- ½ teaspoon baking soda
- ½ teaspoon salt
- 1 cup unsalted butter, room temperature
- 1¾ cups granulated sugar
- 4 large eggs, room temperature
- Zest of 3 lemons
- ¼ cup fresh lemon juice
- 1 teaspoon vanilla extract
- 1 cup buttermilk, room temperature
For the Watercolor Buttercream:
- 2 cups unsalted butter, softened
- 6 cups powdered sugar
- 3 tablespoons heavy cream
- 1 teaspoon vanilla extract
- Gel food colors (soft pink, lavender, mint green, sky blue)
For Decoration:
- Edible flowers (violas, borage, nasturtiums, marigold petals)
- Small offset spatulas or palette knives
Step-by-Step Instructions
Heat oven to 350°F and prepare three 8-inch pans with butter and parchment circles. Cake flour creates a tender crumb perfect for this delicate design.
Sift together cake flour, baking powder, baking soda, and salt. Sifting is crucial for cake flour to prevent lumps.
Cream butter and sugar for 5 minutes until very light and fluffy. This extra creaming time creates the perfect texture.
Add lemon zest and beat for another 30 seconds to release the essential oils into the butter.
Add eggs one at a time, beating for 20 seconds after each addition. The mixture should look smooth and cohesive.
Combine lemon juice, vanilla, and buttermilk in a measuring cup. Don’t worry if it looks slightly curdled—this is normal.
With mixer on low, add flour mixture in three additions, alternating with buttermilk mixture in two additions. Mix gently, stopping as soon as ingredients combine.
Divide batter evenly and bake for 26-28 minutes. These cakes bake faster than all-purpose flour cakes, so watch carefully.
Cool completely on wire racks before decorating. Warm cakes will melt the buttercream and ruin your watercolor effect.
Prepare buttercream by beating butter until pale, about 4 minutes. Add powdered sugar gradually, then cream and vanilla. Beat for 5 minutes until fluffy.
Stack and fill the layers with plain white buttercream, using about ¾ cup between each layer. Apply a smooth crumb coat over the entire cake.
Refrigerate for 30 minutes until the crumb coat is firm to the touch.
Apply a final smooth coat of white buttercream, creating as smooth a surface as possible using a bench scraper.
Divide small portions of buttercream into separate bowls—about ¼ cup each. Tint each with gel food coloring in soft watercolor shades: pale pink, lavender, mint, and sky blue.
Using small offset spatulas or palette knives, apply patches of colored buttercream randomly over the white base. Work with one color at a time.
Immediately after applying colored patches, use a clean offset spatula or bench scraper to blend and smooth the colors into the white base, creating a watercolor painting effect. The key is working quickly while the buttercream is soft.
Blend colors where they meet to create beautiful gradients. Don’t over-blend—you want distinct color areas with soft transitions.
Once you’re happy with the watercolor effect, strategically place edible flowers where colors meet or in clusters that complement your color scheme.
Refrigerate for 20 minutes to set, then allow to come to room temperature before serving for the best texture.
Value Tip: The watercolor technique is forgiving and artistic, meaning there’s no single “right” way to do it. Every cake will look unique and beautiful. This style masks frosting imperfections while looking incredibly sophisticated. The lemon cake adds a bright, fresh flavor that pairs perfectly with the delicate floral decorations.
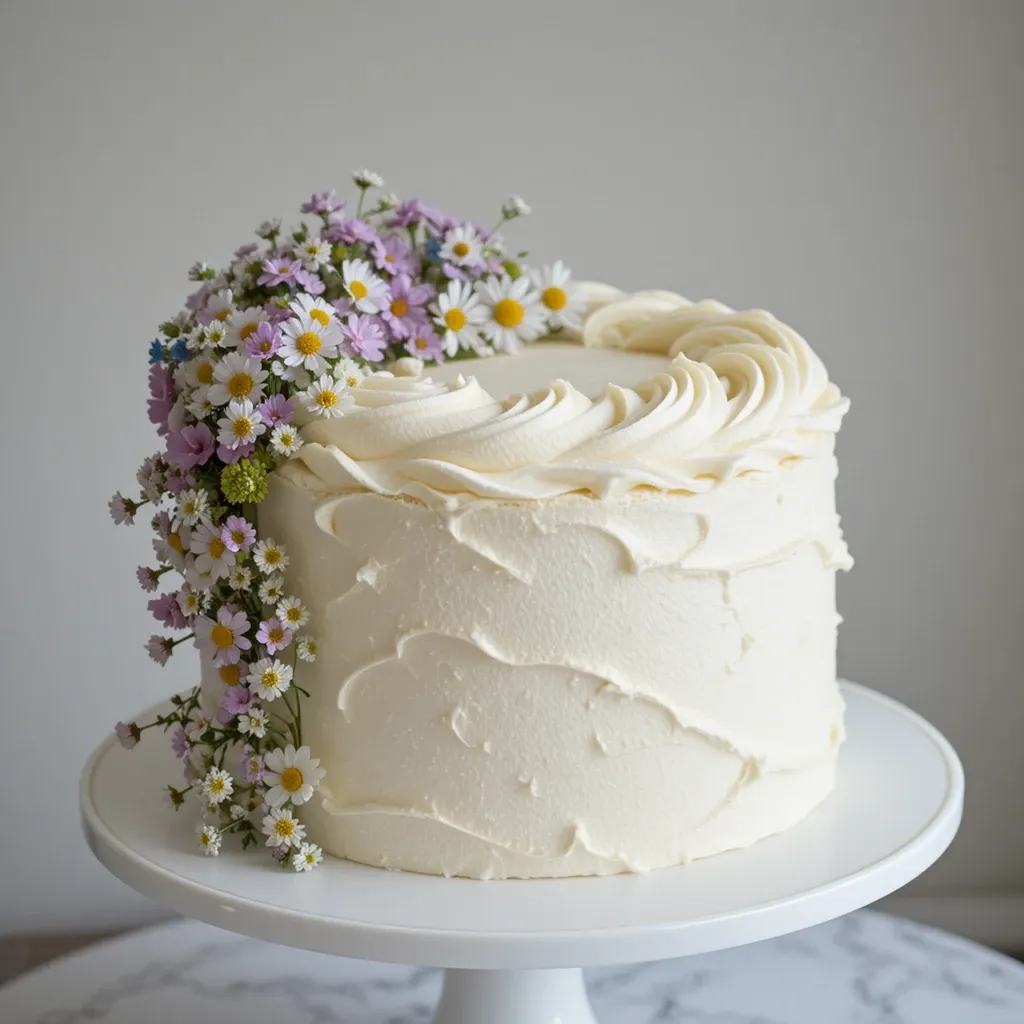
4. Lavender Honey Cake with Cascading Flowers
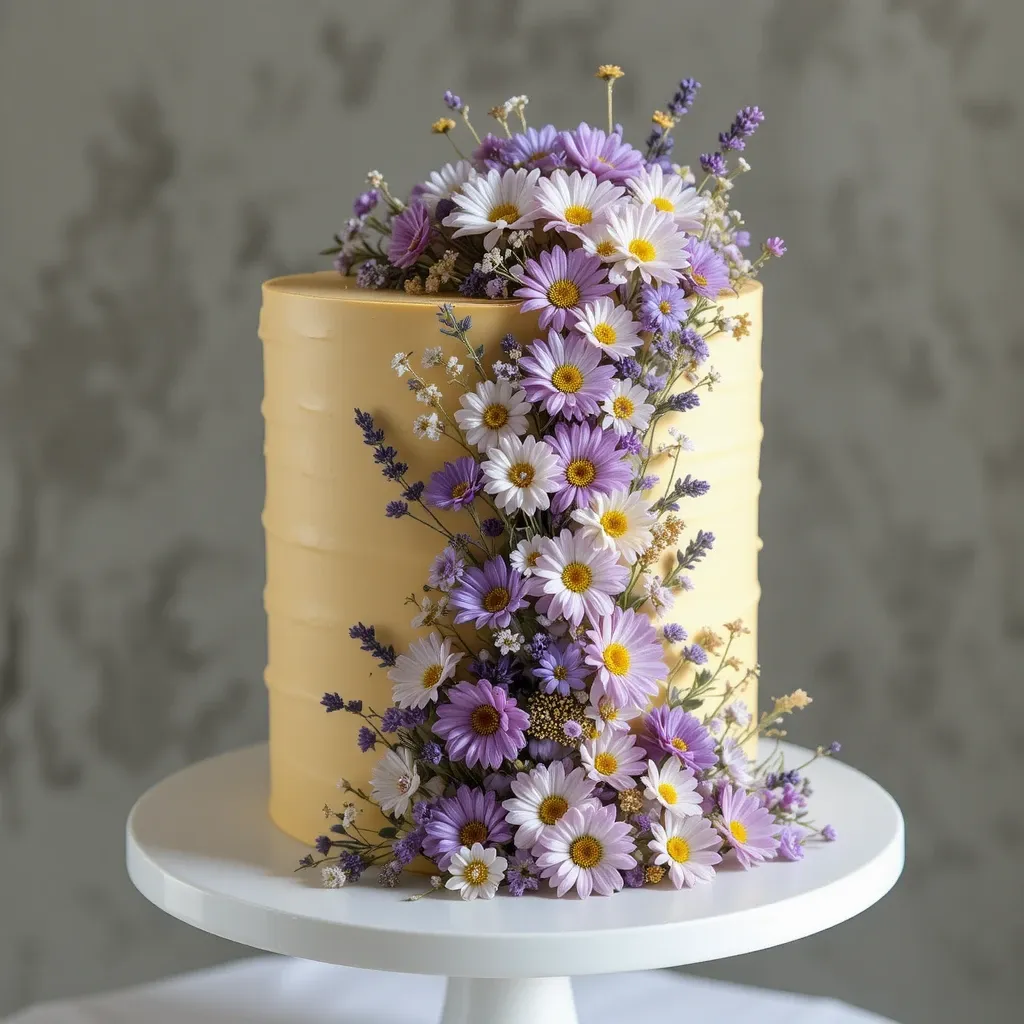
A romantic cake infused with lavender and honey, decorated with flowers cascading down one side in a dramatic floral waterfall.
Key Ingredients for Lavender Honey Wildflower Cake
For the Lavender Honey Cake:
- 2½ cups all-purpose flour
- 2 teaspoons baking powder
- ½ teaspoon baking soda
- ½ teaspoon salt
- 2 tablespoons dried culinary lavender
- ¾ cup unsalted butter, softened
- 1 cup granulated sugar
- ½ cup honey
- 4 large eggs
- ¾ cup sour cream
- ½ cup whole milk
- 1 teaspoon vanilla extract
For the Honey Buttercream:
- 2 cups unsalted butter, softened
- 5 cups powdered sugar
- ⅓ cup honey
- 3 tablespoons heavy cream
- Pinch of salt
For Decoration:
- Fresh lavender sprigs
- Daisies, chamomile, statice, baby’s breath
- Floral wire or tape for support
Step-by-Step Instructions
Preheat oven to 350°F. Grease and line three 8-inch round pans with parchment.
Place dried lavender in a spice grinder or mortar and pestle and grind to a fine powder. This releases maximum flavor without leaving large pieces in your cake.
Whisk together flour, baking powder, baking soda, salt, and ground lavender in a bowl. Set aside.
Cream butter and sugar together for 4 minutes until light and fluffy. The mixture should be pale and increased in volume.
Add honey and beat for another minute. Honey adds moisture and a beautiful floral sweetness that complements the lavender.
Add eggs one at a time, beating thoroughly after each addition. Scrape down the bowl between additions.
In a separate container, whisk together sour cream, milk, and vanilla until smooth.
With mixer on low, add flour mixture in three additions, alternating with sour cream mixture in two additions. Begin and end with flour.
Mix just until combined—you should see no dry flour, but don’t overmix or the cake will be tough.
Divide batter evenly among pans. These layers will be slightly thinner than standard cakes.
Bake for 25-28 minutes until a toothpick comes out with just a few moist crumbs. Don’t overbake or the delicate lavender flavor becomes bitter.
Cool in pans for 10 minutes, then turn out onto cooling racks. Cool completely.
For the honey buttercream, beat butter alone for 4 minutes until very pale and fluffy.
Add powdered sugar gradually, one cup at a time, mixing on low between additions to prevent sugar clouds.
Add honey, cream, and salt. Beat on medium-high for 5-6 minutes. The honey makes this buttercream extra silky and pipeable.
Level cake layers if needed. Place first layer on cake board and spread with about 1 cup of buttercream.
Add second layer and another cup of buttercream. Top with final layer.
Apply a thin crumb coat over the entire cake and refrigerate for 30 minutes.
Apply final coat of buttercream, smoothing with a bench scraper for a clean finish.
Starting at the top edge of the cake, begin arranging your cascade of flowers. Work from top to bottom, creating a flowing waterfall effect down one side.
Use longer stems like lavender as the base structure, then fill in with fuller flowers like daisies and chamomile.
Add delicate flowers like baby’s breath to create movement and fill gaps.
For a secure cascade, you can use floral wire wrapped with floral tape to create a small armature attached to the cake board, then arrange flowers through and around it.
The cascade should look natural and effortless, as if wildflowers are tumbling down the side of a countryside cake.
Value Tip: The lavender-honey combination creates a sophisticated flavor profile that’s not overly sweet. The cascading flower technique looks incredibly professional but is simpler than covering the entire cake with intricate piping. Focus your decorating energy on one dramatic focal point rather than perfectly frosting every surface.
5. Botanical Layer Cake with Pressed Herb Details
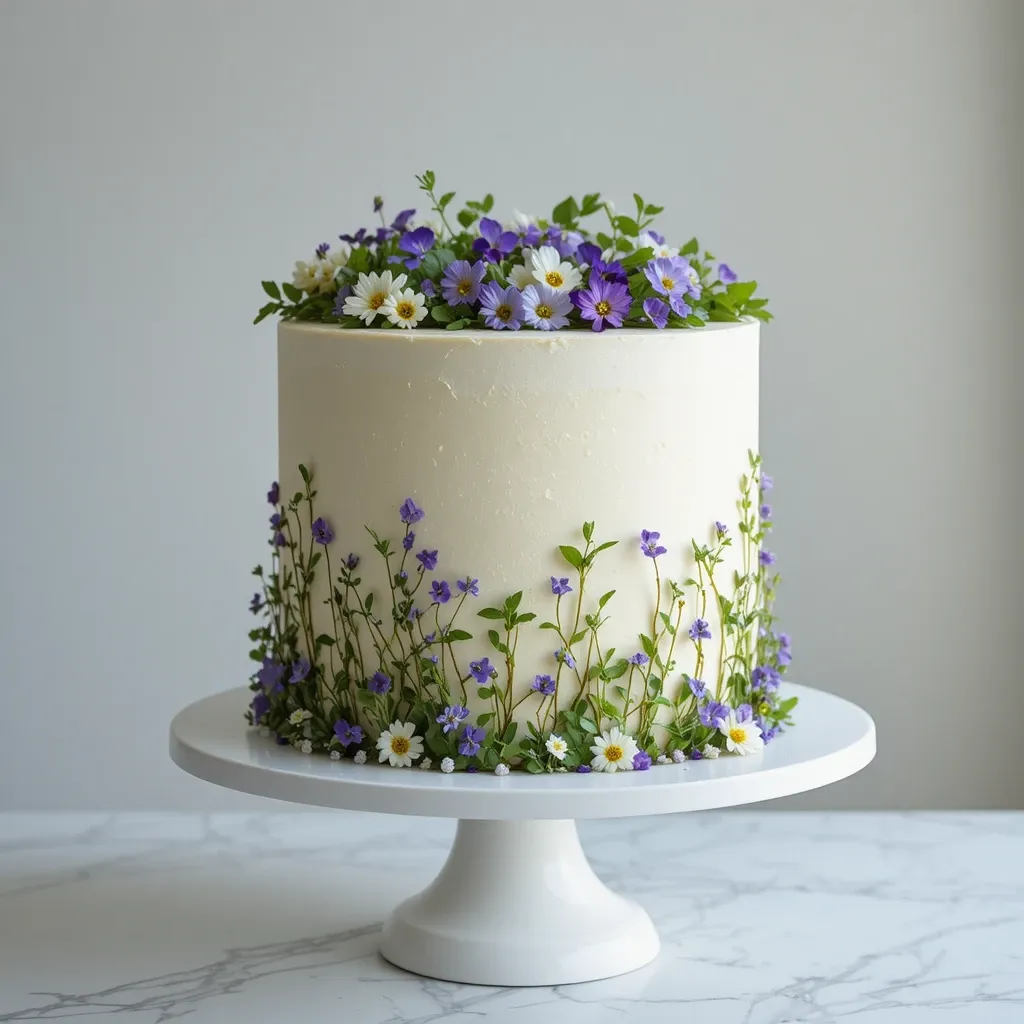
This sophisticated cake combines fresh herbs and edible flowers pressed into buttercream, creating an herbaceous, garden-inspired masterpiece.
Key Ingredients for Botanical Herb Cake
For the Olive Oil Cake:
- 2 cups all-purpose flour
- 1¾ cups granulated sugar
- 1½ teaspoons baking powder
- 1 teaspoon baking soda
- 1 teaspoon salt
- 3 large eggs
- 1¼ cups whole milk
- ¾ cup extra virgin olive oil (use mild-flavored)
- 2 teaspoons vanilla extract
- Zest of 2 oranges
For the Cream Cheese Frosting:
- 1 cup unsalted butter, softened
- 12 oz cream cheese, softened
- 5 cups powdered sugar
- 2 teaspoons vanilla extract
- Pinch of salt
For Decoration:
- Fresh herbs (rosemary sprigs, thyme, sage leaves, mint)
- Small edible flowers (violas, pansies, micro daisies)
- Clear alcohol or extract for brushing
Step-by-Step Instructions
Preheat your oven to 350°F. Prepare three 8-inch round pans by greasing and lining with parchment.
In a large bowl, whisk together flour, sugar, baking powder, baking soda, and salt until thoroughly combined.
In a separate bowl, whisk eggs until lightly beaten. Add milk, olive oil, vanilla, and orange zest. Whisk until emulsified.
Pour wet ingredients into dry ingredients and whisk gently until just combined. The batter will be thinner than traditional butter cakes—this is correct.
Olive oil creates an incredibly moist cake that stays fresh for days, making it perfect for advance preparation.
Divide batter evenly among prepared pans. The batter should be fluid and easy to pour.
Bake for 28-32 minutes until the tops spring back when touched and a tester comes out clean.
Cool in pans for 15 minutes. These cakes are sturdy thanks to the olive oil, so they turn out easily.
While cakes cool, prepare cream cheese frosting. Beat butter until fluffy, about 3 minutes.
Add cream cheese and beat until smooth and combined, about 2 minutes. Don’t overbeat or the frosting becomes too soft.
Gradually add powdered sugar, mixing on low between additions. Add vanilla and salt.
Beat on medium speed for 2-3 minutes until fluffy but not overmixed. Cream cheese frosting becomes unstable if overbeaten.
Once cakes are completely cool, level the tops. Trim any domed portions for perfectly flat layers.
Place first layer on cake stand. Spread about 1 cup of frosting evenly across the surface.
Add second layer and repeat with frosting. Top with final layer.
Apply a crumb coat of frosting over the entire cake, smoothing as best as possible. Refrigerate for 30 minutes.
Apply the final coat of frosting, creating a smooth, clean surface. Use a bench scraper and turntable for best results.
While frosting is still soft, arrange fresh herb sprigs and small flowers in a botanical pattern around the sides and top of the cake.
Create vertical lines of pressed herbs running down the sides, or arrange them in organic, flowing patterns.
Press gently but firmly so herbs adhere to the frosting without sliding.
Use a small paintbrush dipped in clear alcohol or lemon extract to brush over each herb sprig and flower. This helps them adhere and creates a preserved, translucent appearance.
The brush technique also prevents herbs from wilting quickly and keeps their vibrant green color.
Refrigerate for at least 1 hour before serving to set the frosting and allow flavors to meld.
Value Tip: Olive oil cakes have a unique texture—incredibly moist and tender with a subtle fruity undertone that pairs beautifully with herbs. This cake actually tastes better the next day as flavors develop, making it ideal for advance preparation. The herb decoration is essentially free if you grow your own herbs, creating a stunning cake on a tiny budget.
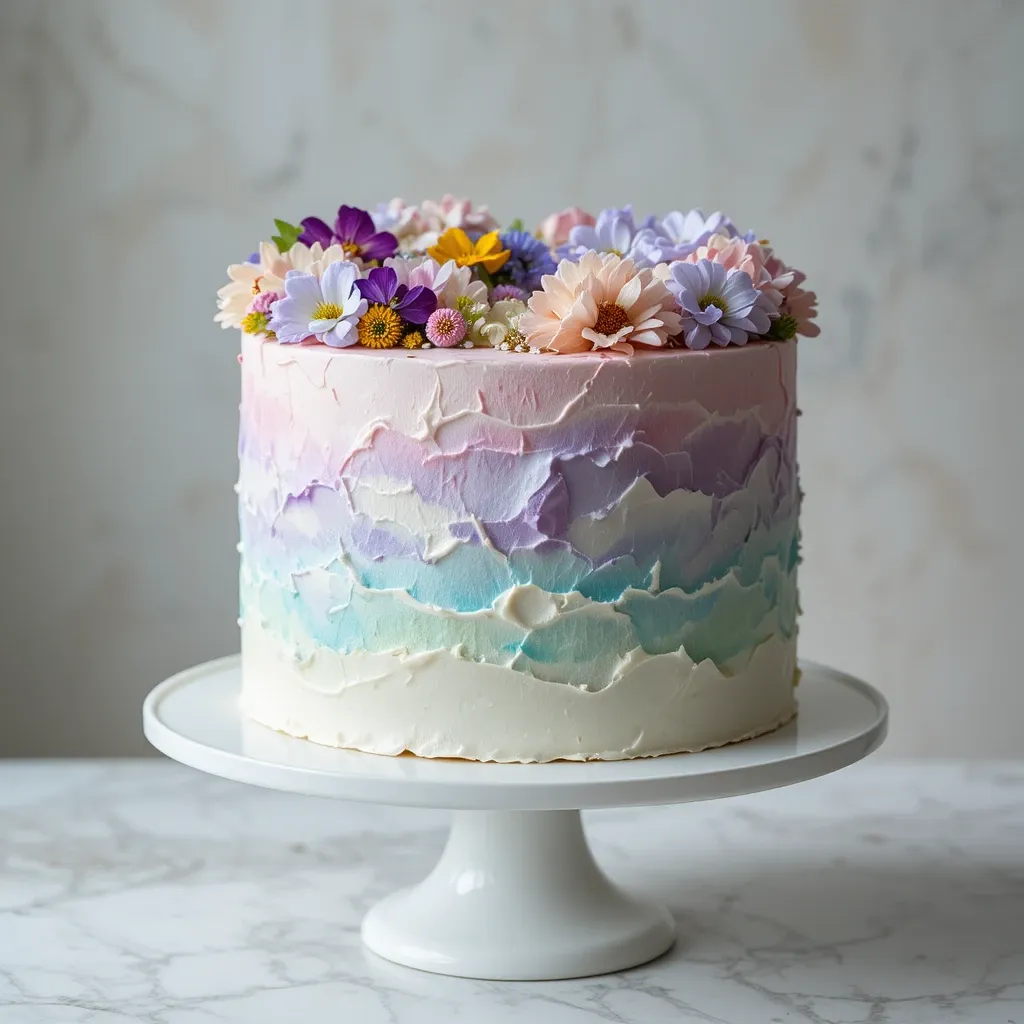
6. Ombré Buttercream with Wildflower Topper

A stunning gradient buttercream cake transitioning through soft natural tones, crowned with a generous cluster of wildflowers.
Key Ingredients for Ombré Wildflower Cake
For the Classic Vanilla Cake:
- 3 cups all-purpose flour
- 1 tablespoon baking powder
- ½ teaspoon salt
- 1 cup unsalted butter, room temperature
- 2 cups granulated sugar
- 5 large eggs, room temperature
- 1 tablespoon vanilla extract
- 1 cup whole milk, room temperature
For the Ombré Buttercream:
- 2½ cups unsalted butter, softened
- 8 cups powdered sugar
- ¼ cup heavy cream
- 2 teaspoons vanilla extract
- Natural food colorings (start with soft pink, peach, or lavender)
For Decoration:
- Large variety of wildflowers for topper
- Floral foam or flower frog (optional for stability)
Step-by-Step Instructions
Heat oven to 350°F. Prepare three 9-inch round pans with butter and parchment paper circles.
Whisk flour, baking powder, and salt together thoroughly in a medium bowl.
In stand mixer, cream butter and sugar for 5 full minutes until very pale and fluffy. This extra time creates a light, tender cake.
Add eggs one at a time, beating for 30 seconds after each addition. Add vanilla and mix until combined.
With mixer on low, add flour mixture in three additions, alternating with milk in two additions. Begin and end with flour.
Mix only until you see no dry flour streaks. Overmixing develops gluten and creates a tough cake.
Divide batter evenly among pans using a scale if possible. Each pan should have about 630-650 grams.
Bake for 30-35 minutes until golden and a tester comes out clean. These thicker layers need the full baking time.
Cool in pans for 15 minutes, then turn onto racks to cool completely. Large layers need longer cooling time.
For the ombré buttercream, beat softened butter for 4-5 minutes until pale and creamy.
Add powdered sugar gradually, mixing on low. Add cream and vanilla, then beat on medium-high for 5 minutes until light and fluffy.
Divide buttercream into 5-6 bowls. Leave one bowl white. Add increasing amounts of gel color to remaining bowls, creating a gradient from white to your deepest color.
For example: white, palest pink, light pink, medium pink, deep pink, deepest pink. Each bowl should be slightly darker than the previous.
Level your cake layers and stack with white or lightest buttercream between layers, about 1 cup per layer.
Apply a crumb coat of the lightest color and refrigerate for 30 minutes until firm.
Starting at the bottom of the cake, use an offset spatula to apply the darkest color buttercream in horizontal strokes around the base.
Moving up about 2 inches, apply the next shade lighter. Continue up the cake, using progressively lighter shades.
The colors should blend where they meet, creating a seamless ombré effect. Each color band should be roughly equal in height.
Once all colors are applied, use a bench scraper to smooth the entire cake, blending the colors together as you rotate the turntable.
The scraping motion naturally blends the colors into each other, creating the beautiful ombré gradient.
For sharper color transitions, refrigerate between color bands. For softer blending, work while buttercream is soft.
Top the cake with a generous cluster of wildflowers arranged in a natural, gathered style.
Mix different flower types, sizes, and textures for visual interest—combine larger focal flowers with delicate filler blooms.
Value Tip: The ombré technique is surprisingly forgiving. Even if your color blending isn’t perfect, the final smoothing with the bench scraper evens everything out. This technique creates a sophisticated look using basic tools, and the wildflower topper adds instant wow-factor that distracts from any small imperfections in the gradient.
7. Rustic Semi-Naked Cake with Garden Florals
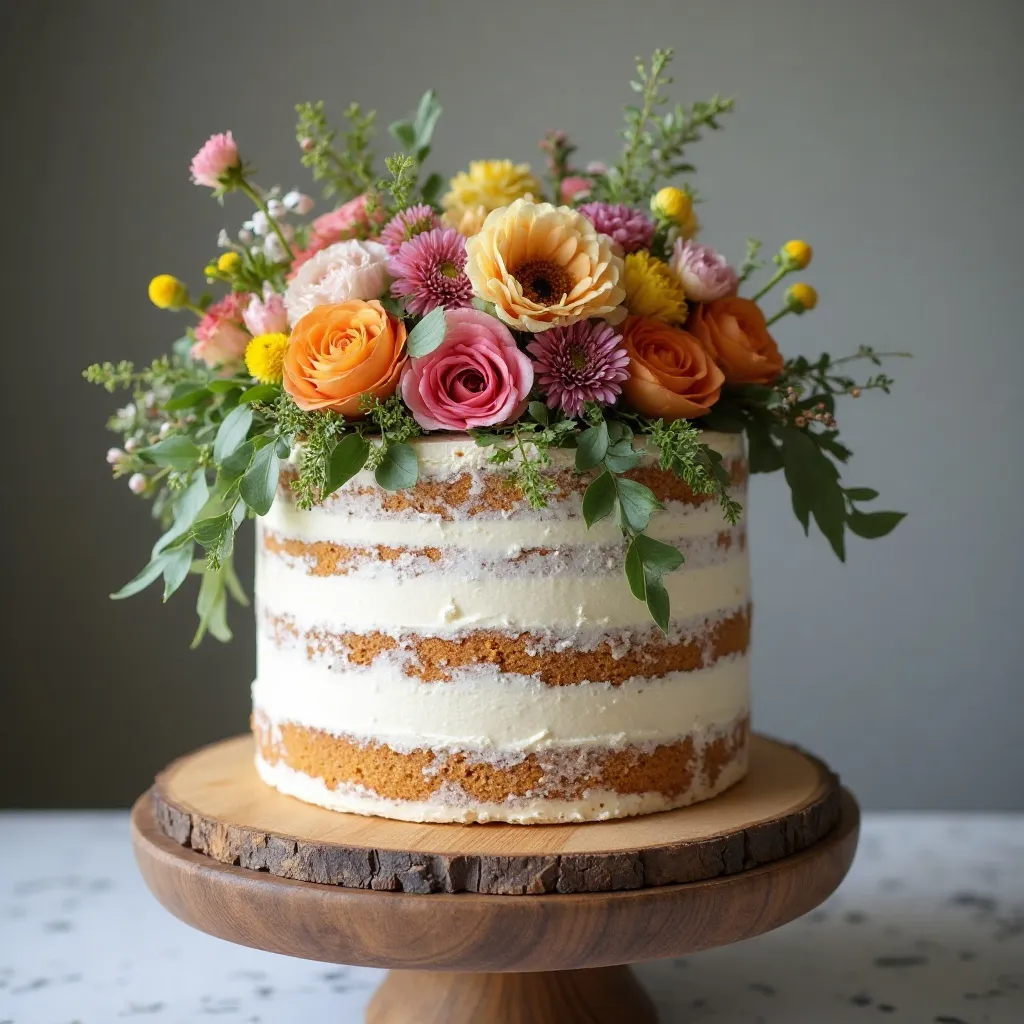
A charming semi-naked cake with visible layers peeking through textured buttercream, adorned with loosely arranged garden flowers.
Key Ingredients for Semi-Naked Garden Cake
For the Brown Butter Cake:
- 1½ cups unsalted butter
- 3 cups all-purpose flour
- 1 tablespoon baking powder
- ¾ teaspoon salt
- 2 cups granulated sugar
- 4 large eggs, room temperature
- 2 teaspoons vanilla extract
- 1¼ cups buttermilk, room temperature
For the Textured Buttercream:
- 1½ cups unsalted butter, softened
- 4 cups powdered sugar
- 3 tablespoons heavy cream
- 1½ teaspoons vanilla extract
For Decoration:
- Garden flowers (roses, dahlias, cosmos, zinnias, herbs)
- Fresh greenery (eucalyptus, ferns, ivy)
Step-by-Step Instructions
First, make brown butter. Place butter in a light-colored saucepan over medium heat. The light color helps you see when butter browns.
Melt butter completely, then continue cooking while stirring constantly. Butter will foam, then foam will subside.
Watch carefully as golden-brown flecks appear at the bottom. When butter smells nutty and is amber-colored, remove from heat immediately.
Pour into a heatproof bowl and refrigerate until solidified but still soft, about 45-60 minutes. Brown butter adds incredible nutty depth to cakes.
Preheat oven to 350°F. Prepare three 8-inch round pans with butter and parchment.
Whisk together flour, baking powder, and salt in a bowl.
Beat the cooled brown butter with sugar for 4-5 minutes until light and fluffy. The mixture should be pale and well-aerated.
Add eggs one at a time, beating well after each. Add vanilla and mix until combined.
With mixer on low, add flour mixture in three additions, alternating with buttermilk in two additions. Start and end with flour.
Mix until just combined—you want a tender cake, not a tough one.
Divide batter evenly among pans and smooth tops. The batter will smell amazing from the brown butter.
Bake for 28-32 minutes until tops spring back when touched and a tester comes out clean.
Cool in pans for 10 minutes, then turn onto racks. Allow to cool completely before decorating.
For the textured buttercream, beat softened butter for 3-4 minutes until pale and creamy.
Gradually add powdered sugar, mixing on low between additions. Add cream and vanilla.
Beat on medium-high for 3-4 minutes until fluffy. Don’t overbeat—you want a spreadable consistency.
Place first cake layer on your stand. Spread about ¾ cup of buttercream across the top, leaving the sides bare.
Add second layer and repeat with buttercream. Top with final layer.
Here’s where the semi-naked technique differs: Apply buttercream around the sides, but use less than you normally would.
Spread buttercream thinly, allowing the cake layers to show through in places. The coverage should be uneven and rustic.
Use an offset spatula to create texture by dabbing and pulling the buttercream in various directions.
The goal is an organic, imperfect finish that looks naturally weathered and rustic.
Arrange fresh flowers and greenery directly on top of the cake, creating a loose, garden-picked arrangement.
Let some flowers and greenery trail down the sides naturally. There should be no perfectly straight lines or formal placement.
Tuck sprigs of herbs and greenery between flowers for a fresh-from-the-garden look.
For flowers that need water, wrap stems with damp paper towels covered in floral tape, or use water tubes.
Value Tip: The semi-naked style uses significantly less buttercream than fully frosted cakes, saving both ingredients and time. The rustic texture is forgiving—there’s no need for perfectly smooth frosting. Brown butter adds gourmet flavor at no extra cost, transforming a simple vanilla cake into something special. This style is ideal for outdoor celebrations and garden parties.
8. Geode Cake with Crystallized Flowers
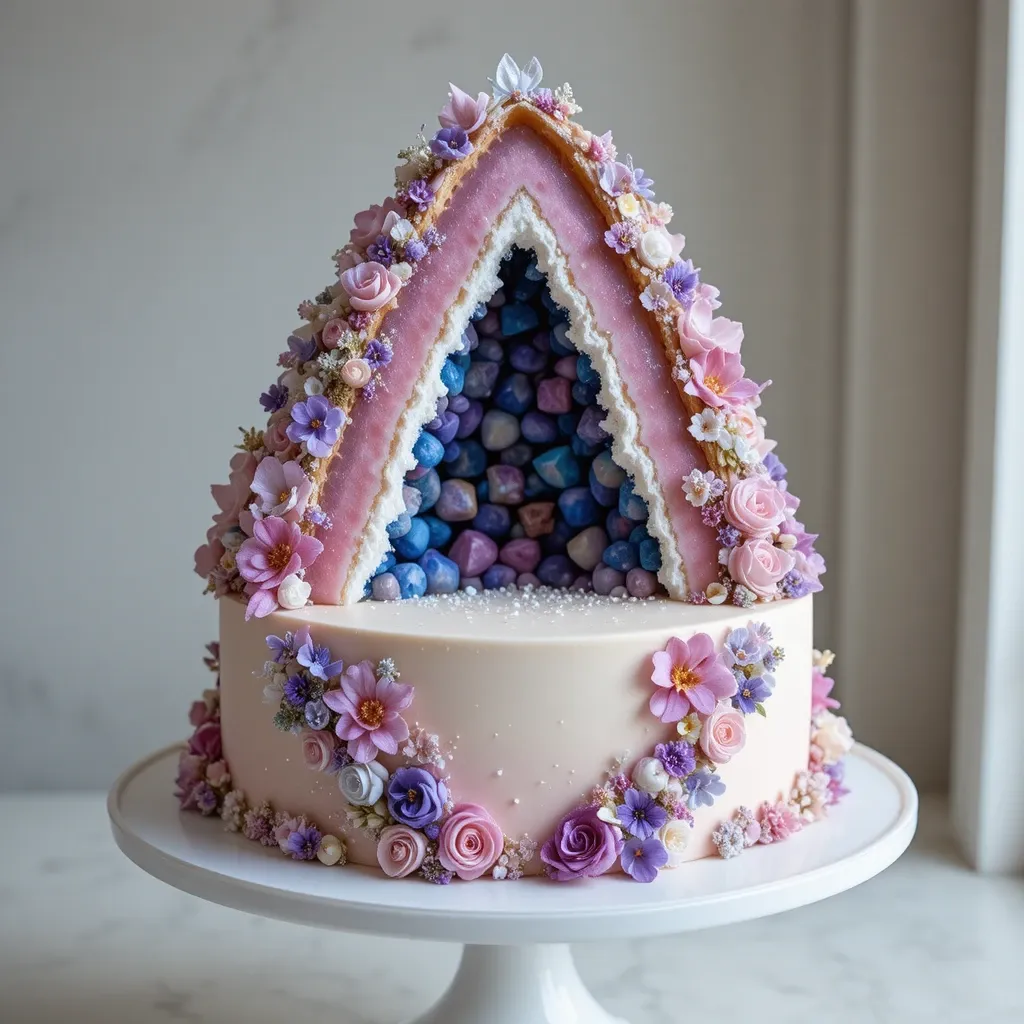
A stunning cake featuring a sugar crystal “geode” opening, paired with crystallized edible flowers for a glamorous botanical look.
Key Ingredients for Geode Wildflower Cake
For the Champagne Cake (use non-alcoholic sparkling juice):
- 2¾ cups cake flour
- 2½ teaspoons baking powder
- ½ teaspoon salt
- ¾ cup unsalted butter, room temperature
- 1¾ cups granulated sugar
- 3 large eggs, room temperature
- 3 large egg whites, room temperature
- 1 cup non-alcoholic sparkling white grape juice
- ½ cup sour cream
- 2 teaspoons vanilla extract
For the Buttercream:
- 2 cups unsalted butter, softened
- 6 cups powdered sugar
- 3 tablespoons heavy cream
- 1 teaspoon vanilla
- Gel food color (optional for tinting)
For the Geode and Crystallized Flowers:
- 2 cups rock candy or sugar crystals
- Small edible flowers (violas, pansies, rose petals)
- 1 pasteurized egg white
- 1 cup superfine sugar for crystallizing
- Small paintbrush
Step-by-Step Instructions
Preheat oven to 350°F and prepare three 8-inch round cake pans with butter and parchment paper.
Sift cake flour, baking powder, and salt together in a medium bowl. Cake flour creates an exceptionally tender crumb perfect for this elegant design.
In a stand mixer, cream butter and sugar together for 5 minutes until very pale and fluffy.
Add whole eggs one at a time, beating well after each addition. Add egg whites and beat until incorporated.
In a measuring cup, combine sparkling juice, sour cream, and vanilla extract. Whisk until smooth.
With mixer on low speed, add flour mixture in three additions, alternating with juice mixture in two additions. Begin and end with flour.
Mix just until combined—the carbonation in the juice creates a light, airy texture, so don’t overmix.
Divide batter evenly among prepared pans and smooth tops.
Bake for 28-30 minutes until tops spring back when gently touched and a tester comes out clean.
Cool in pans for 10 minutes, then carefully turn out onto cooling racks. These cakes are delicate due to the cake flour.
While cakes cool, prepare crystallized flowers. Beat pasteurized egg white until slightly foamy.
Using a small paintbrush, gently brush egg white over each flower petal, coating completely but not soaking.
Immediately sprinkle superfine sugar over the wet flowers, coating all surfaces. Shake off excess.
Place crystallized flowers on parchment paper and allow to dry at room temperature for 24 hours until completely hardened.
Once cakes are cool, level tops and prepare buttercream as in previous recipes.
Stack layers with buttercream filling, about 1 cup between each layer.
Apply crumb coat and refrigerate for 30 minutes.
For the geode effect, use a sharp knife to cut a triangular or irregular opening in one side of the frosted cake before the final coat.
The opening should be about 4-5 inches wide and cut through to the first layer of cake.
Remove the cut cake piece carefully and fill the cavity with rock candy or sugar crystals in coordinating colors.
Pack the crystals tightly so they stay in place, creating the appearance of a natural geode formation.
Apply the final smooth coat of buttercream around the rest of the cake, leaving the geode opening exposed.
Arrange crystallized flowers around the geode opening and cascading down the cake sides.
The combination of sparkling crystals and sugar-preserved flowers creates an incredibly glamorous effect.
Value Tip: This dramatic design looks extremely complex but uses simple techniques. The geode opening hides one entire side of the cake, meaning you only need to frost three sides perfectly. Rock candy is inexpensive at craft stores, and crystallizing flowers preserves them for weeks, allowing you to prep decorations well in advance.
9. Whipped Cream Cake with Delicate Wildflower Clusters
A light, refreshing cake with stabilized whipped cream frosting and strategically placed wildflower clusters for an ethereal look.
Key Ingredients for Whipped Cream Wildflower Cake
For the Sponge Cake:
- 6 large eggs, separated, room temperature
- 1 cup granulated sugar, divided
- 1 teaspoon vanilla extract
- ¼ teaspoon almond extract
- 1 cup cake flour
- ¼ teaspoon salt
- ¼ teaspoon cream of tartar
For Stabilized Whipped Cream:
- 3 cups heavy whipping cream, very cold
- ¾ cup powdered sugar
- 2 teaspoons vanilla extract
- 2 tablespoons cream cheese, softened
- 1 tablespoon cornstarch (for stability)
For Decoration:
- Small clusters of wildflowers (chamomile, forget-me-nots, tiny daisies)
- Edible greenery (mint leaves, small herb sprigs)
Step-by-Step Instructions
Preheat oven to 325°F. Prepare two 9-inch round cake pans with parchment circles on the bottom only—don’t grease the sides as the cake needs to climb.
Separate eggs carefully, ensuring no yolk gets into whites. Even a trace of yolk prevents whites from whipping properly.
In a stand mixer, beat egg yolks with ½ cup sugar for 4-5 minutes until pale yellow and thick. Add vanilla and almond extracts.
Sift cake flour and salt together, then gently fold into yolk mixture in three additions. The batter will be thick.
In a separate clean bowl with clean beaters, whip egg whites with cream of tartar until soft peaks form.
Gradually add remaining ½ cup sugar while continuing to beat until stiff, glossy peaks form. The peaks should stand straight up.
Gently fold ⅓ of the egg whites into the yolk batter to lighten it. This makes subsequent folding easier.
Fold in remaining whites in two additions, being careful not to deflate. Use a folding motion, cutting down through the center and bringing batter up and over.
Divide batter evenly between prepared pans. Smooth tops gently.
Bake for 30-35 minutes until tops spring back and cake pulls away from pan sides slightly.
Immediately invert pans onto cooling racks and allow cakes to cool completely upside down. This prevents collapsing.
Once completely cool, run a knife around edges and remove from pans. These sponge cakes are delicate but incredibly light.
For stabilized whipped cream, chill mixing bowl and beaters for 15 minutes before starting.
Beat cream cheese until smooth and creamy with no lumps. This is your stabilizing ingredient.
Add cold cream, powdered sugar, vanilla, and cornstarch to the bowl. Start mixing on low, gradually increasing to medium-high.
Beat until stiff peaks form, 3-4 minutes. Don’t overbeat or cream will become grainy. The cornstarch and cream cheese provide stability.
The whipped cream should hold its shape firmly and not weep or deflate even at room temperature for several hours.
Level sponge cakes if needed. These cakes are naturally flat, so minimal leveling is required.
Place first layer on cake stand and spread with about 1½ cups of whipped cream. The light cake can support generous cream layers.
Add second layer and frost entire cake with remaining whipped cream. Don’t worry about making it perfectly smooth—a rustic finish suits this style.
Use an offset spatula to create soft swirls and peaks in the whipped cream for texture.
Arrange small clusters of wildflowers strategically around the cake—at the top edge, cascading down one side, or evenly spaced around.
Keep flower clusters small and delicate to match the light, airy nature of the cake.
Tuck small pieces of edible greenery between flowers for natural-looking arrangements.
This cake must be served the same day and kept refrigerated until serving time. Whipped cream cakes don’t store well overnight.
Value Tip: Sponge cakes use no butter, making them incredibly economical. The whipped cream frosting costs a fraction of buttercream while offering a lighter, less sweet alternative that many guests prefer. This cake is perfect for summer celebrations when heavy buttercream feels too rich. The stabilized cream means you can prep this a few hours ahead without worry.
10. Buttercream Flower Garden Cake
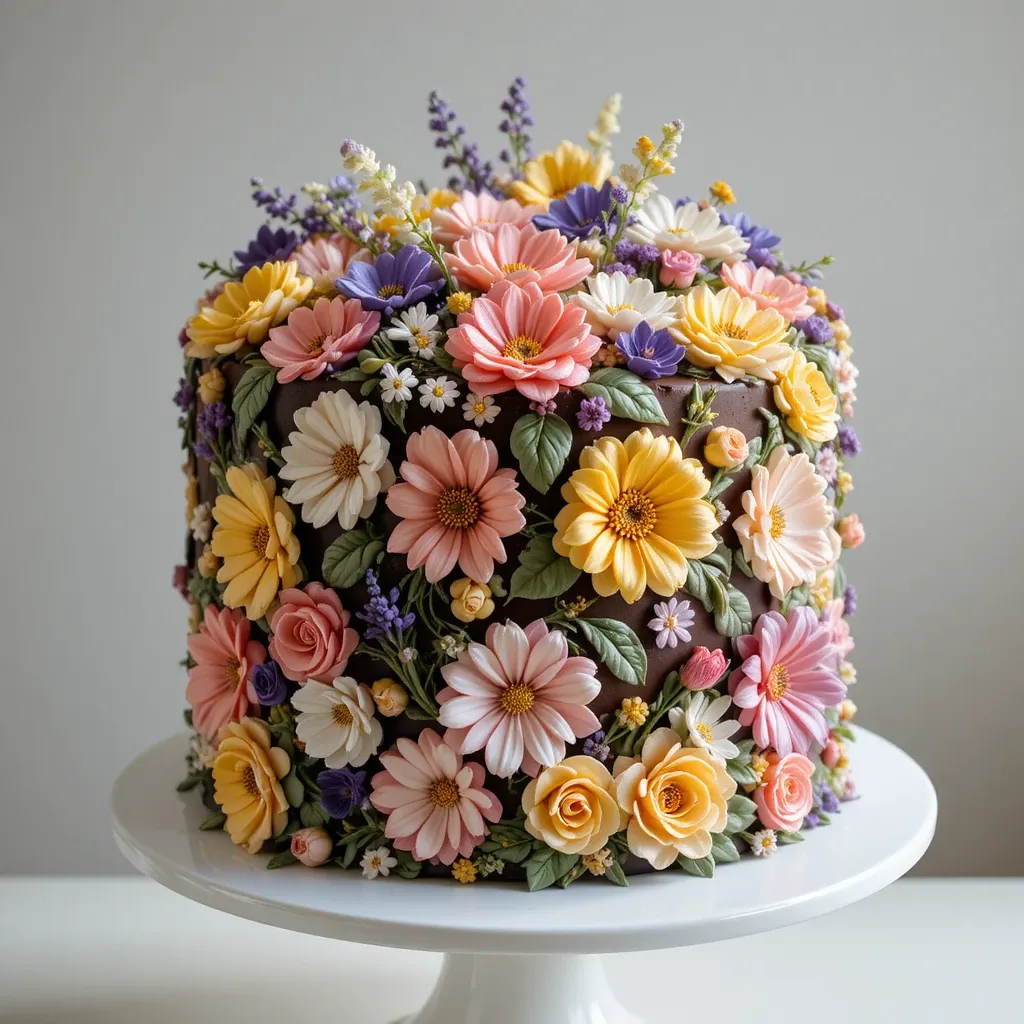
A showstopping cake featuring piped buttercream flowers that mimic wildflowers, topped with a few fresh blooms for authenticity.
Key Ingredients for Buttercream Garden Cake
For the Chocolate Cake:
- 2 cups all-purpose flour
- 2 cups granulated sugar
- ¾ cup unsweetened cocoa powder
- 2 teaspoons baking soda
- 1 teaspoon baking powder
- 1 teaspoon salt
- 2 large eggs, room temperature
- 1 cup buttermilk, room temperature
- 1 cup hot coffee (or hot water)
- ½ cup vegetable oil
- 2 teaspoons vanilla extract
For the Piping Buttercream:
- 3 cups unsalted butter, softened
- 9 cups powdered sugar
- ¼ cup heavy cream
- 1 tablespoon vanilla extract
- Gel food colors (various natural shades)
For Decoration:
- Piping bags and flower tips (petal tips #104, #103, leaf tip #352)
- Fresh wildflowers for accent (2-3 stems)
Step-by-Step Instructions
Preheat oven to 350°F. Prepare three 8-inch round pans with butter, flour, and parchment circles.
In a large bowl, whisk together flour, sugar, cocoa powder, baking soda, baking powder, and salt until no cocoa clumps remain.
In a separate bowl, whisk eggs, buttermilk, oil, and vanilla until smooth and emulsified.
Add wet ingredients to dry ingredients and mix until just combined. The batter will be very thick at this stage.
Carefully stir in hot coffee. The batter will become very thin—this is correct. The hot liquid activates the cocoa and creates incredible moistness.
Divide thin batter evenly among pans. Fill only halfway as this cake rises significantly.
Bake for 30-33 minutes until a tester comes out clean. The cakes will dome slightly.
Cool in pans for 10 minutes, then turn onto racks. These cakes are extremely moist and fragile when warm, so handle gently.
For the buttercream, beat softened butter for 5 minutes until very pale, fluffy, and increased in volume.
Add powdered sugar gradually, one cup at a time, mixing on low between additions. This prevents sugar clouds and ensures smooth incorporation.
Add heavy cream and vanilla. Beat on medium-high for 5-6 minutes until light, fluffy, and pipeable. The buttercream should hold stiff peaks.
Divide buttercream into several bowls and tint with gel colors in various wildflower shades: yellow, purple, pink, white, green for leaves.
Once cakes are completely cool, level tops with a serrated knife for flat, even layers.
Place first layer on cake stand and spread with about 1 cup of plain or lightly tinted buttercream.
Add second layer and another cup of buttercream. Top with final layer.
Apply a crumb coat of buttercream and refrigerate for 30 minutes until firm.
Apply a final smooth coat of buttercream in a light background color—soft ivory, pale green, or light blue work beautifully.
Smooth with a bench scraper for a clean canvas.
Fill piping bags fitted with petal tips with colored buttercream. Keep bags at room temperature while working—cold buttercream won’t pipe smoothly.
To pipe buttercream flowers, hold the wide end of the petal tip at the center point and the narrow end pointing outward.
Pipe in a U-motion to create petals, starting and ending at the center. Overlap petals slightly, working around in a circle.
Create various wildflower styles: five-petal daisies, multi-layered cosmos, delicate primroses. Vary flower sizes for natural appearance.
Fill the entire cake surface with piped flowers, covering the sides and top completely. Leave no background showing.
Pipe leaves using leaf tip #352, creating pointed leaves tucked between flowers naturally.
Add a few real fresh wildflowers at the top center as a focal point, tucking them into the buttercream flowers.
The combination of piped and fresh flowers creates incredible depth and realism.
Refrigerate finished cake for 1 hour to set buttercream completely. Allow to sit at room temperature 30 minutes before serving for best texture.
Value Tip: Piped buttercream flowers look incredibly professional but require only basic piping skills. Once you master the petal tip motion, you can create hundreds of flowers quickly. This technique is far more economical than buying fresh flowers to cover an entire cake. Dark chocolate cake provides a stunning contrast beneath pastel flowers, and the cake itself is one of the most reliable, foolproof recipes in existence.
What to Serve Wildflower Cakes With
Wildflower cakes pair beautifully with light, refreshing accompaniments that don’t overshadow their delicate beauty. Serve alongside fresh fruit salads featuring seasonal berries, sliced peaches, and citrus segments for a naturally sweet complement.
Herbal teas are an obvious choice—chamomile, lavender, or mint tea echo the botanical theme while cleansing the palate between bites. For a more luxurious pairing, try elderflower cordial mixed with sparkling water, or serve homemade lemonade with fresh herbs.
Ice cream is always welcome with cake. Choose subtle flavors like vanilla bean, honey, or lavender that won’t compete with the cake’s delicate flavors. Avoid heavy chocolate or intense flavors that might overpower.
For brunch settings, pair wildflower cakes with light savory items like cucumber finger sandwiches, smoked salmon on bagels, or a simple mixed green salad with citrus vinaigrette. The contrast between savory and sweet creates a balanced menu.
Coffee is classic but tends to overshadow delicate floral flavors. If serving coffee, opt for light roasts with fruity or floral notes. Cold brew with vanilla sweet cream makes an excellent pairing for summer celebrations.
Top Tips for Perfecting Wildflower Cakes
Always Use Food-Safe Flowers
This cannot be stressed enough. Never use flowers from florists, garden centers, or grocery store floral departments as they’re treated with heavy pesticides and preservatives that are toxic. Only use flowers specifically grown for culinary purposes, organically grown flowers from your own pesticide-free garden, or edible flowers from specialty food suppliers. When in doubt, don’t use it.
Prepare Flowers Properly
Gently rinse each flower under cool water to remove dirt or insects, then pat dry with paper towels. Avoid soaking flowers as this causes wilting. Keep flowers refrigerated with stems in water until the last possible moment before decorating. Trim stems close to flower heads, removing any leaves or stem portions that will touch the cake.
Know Which Parts Are Edible
Some flowers are edible only in part—for instance, certain blooms have edible petals but toxic stems or centers. Research each variety thoroughly. When serving, inform guests which flowers are fully edible versus purely decorative so they can make informed choices.
Time Your Decorating
Add fresh flowers as close to serving time as possible. Most fresh flowers last 6-8 hours on a refrigerated cake but only 2-3 hours at room temperature. For maximum freshness, decorate 1-2 hours before your event and keep refrigerated until serving.
Create Barriers When Necessary
If using flowers that aren’t fully edible but are non-toxic, create barriers to prevent direct contact with frosting. Wrap stems in floral tape, use plastic straws as stem holders inserted into the cake, or place flowers on parchment squares. This protects both the cake and guests.
Master Your Frosting
Wildflower cakes need smooth, stable frosting that can support flower weight without sliding. Buttercream should be beaten until fluffy but firm enough to hold shape. Cream cheese frosting needs stabilizing with extra powdered sugar. Whipped cream requires cornstarch or cream cheese for stability. A firm crumb coat refrigerated until solid prevents flowers from sinking into soft frosting.
Consider the Weather
Hot, humid weather wilts flowers faster and softens frosting. For outdoor summer events, consider using crystallized flowers, buttercream flowers, or a combination approach with minimal fresh flowers. Keep the cake in air conditioning as long as possible and set it up in shaded areas.
Match Flowers to Flavors
Consider flavor pairings when choosing flowers. Lavender complements honey, lemon, and vanilla. Roses pair beautifully with chocolate, raspberry, and almond. Chamomile works with peach, apricot, and subtle citrus. Herbs like rosemary and thyme suit olive oil cakes and citrus flavors.
Storing and Reheating Tips
Wildflower cakes require special storage considerations due to their fresh flower decorations. Here’s how to keep your creation looking and tasting its best.
Short-Term Storage (Same Day): Keep the decorated cake refrigerated until 30-60 minutes before serving. The cold temperature keeps both frosting firm and flowers fresh. Remove from refrigerator and let sit at room temperature briefly so frosting softens to ideal eating texture. Don’t leave at room temperature longer than 2-3 hours as flowers will wilt and frosting may soften excessively in warm conditions.
Overnight Storage: If you must store overnight, refrigerate the cake without flowers. Add fresh flowers the next day just before serving. Already-decorated cakes can be refrigerated overnight, but flowers will wilt slightly. Remove wilted blooms and replace with fresh ones before serving.
Freezing Unfrosted Cake Layers: All cake layers freeze beautifully for up to 3 months. Wrap cooled layers individually in plastic wrap, then aluminum foil. Freeze flat to prevent damage. Thaw wrapped layers in the refrigerator overnight before frosting. This makes advance preparation easy—bake layers weeks ahead, then frost and decorate fresh for your event.
Freezing Frosted Cakes: Frosted cakes without flowers can be frozen, though texture may change slightly. Flash-freeze uncovered for 1 hour until frosting is solid, then wrap carefully in plastic wrap and foil. Freeze up to 2 months. Thaw overnight in refrigerator still wrapped, then unwrap and add fresh flowers.
Leftover Storage: Remove all flowers before storing leftovers. Place in an airtight container or cover with a cake dome. Refrigerate for 3-4 days. Buttercream frosted cakes keep longest. Whipped cream frosted cakes should be eaten within 24 hours.
Don’t Freeze Fresh Flowers: Never freeze decorated cakes with fresh flowers on them. The flowers will turn brown, mushy, and completely wilted when thawed. Always remove flowers before freezing or add them after thawing.
Crystallized Flowers: Properly crystallized flowers stored in airtight containers at room temperature keep for several weeks. These make excellent decorations for cakes that need to be prepared in advance.
Frequently Asked Questions
What flowers are safe to put on cakes?
Safe flowers include pansies, lavender, violas, violets, roses, marigolds, cornflowers, carnations, chrysanthemums, chamomile, and sunflowers. Always ensure flowers are organically grown without pesticides. Herbs like rosemary, thyme, and mint are also excellent choices. Never use flowers from florists or garden centers as these are treated with chemicals unsafe for food contact.
Can I use grocery store flowers on cakes?
Store-bought flowers from floral departments are not safe for cakes as they’re grown with heavy pesticides and often stored in preservatives. Even if the variety is technically edible, the chemical treatments make them unsafe for food contact. Purchase edible flowers from specialty food suppliers, farmers markets, or grow your own organically.
How long do fresh flowers last on a cake?
Fresh flowers typically last 6-8 hours on a refrigerated cake and 2-3 hours at room temperature. Keep the cake refrigerated until shortly before serving for best appearance. Flowers with hardy stems like roses last longer than delicate blooms like pansies or violas.
Do I need to wrap flower stems before putting them on cakes?
Yes, for flowers that aren’t fully edible or when you want extra protection. Wrap stems with floral tape or food-safe plastic wrap to create a barrier between stems and frosting. Some bakers use plastic bubble tea straws as stem holders, inserting the straw into the cake and placing flower stems inside.
Can I make wildflower cakes ahead of time?
Bake and freeze cake layers up to 3 months in advance. Make buttercream frosting 1 week ahead and refrigerate, or freeze for 3 months. Assemble and frost the cake 1-2 days ahead and refrigerate. Add fresh flowers only on the day of serving, preferably 1-2 hours before your event for maximum freshness.
What’s the difference between edible and non-toxic flowers?
Edible flowers are safe to eat and have been grown specifically for culinary use without pesticides. Non-toxic flowers won’t harm you if touched but aren’t necessarily meant to be eaten and may not be grown in food-safe conditions. For cakes, always choose fully edible varieties grown organically to ensure complete safety.
How do I crystallize flowers for cakes?
Brush clean, dry edible flowers with pasteurized egg white using a small paintbrush. Immediately sprinkle with superfine sugar, coating all surfaces. Place on parchment paper and let dry at room temperature for 24 hours until completely hard and crystallized. Store in airtight containers for several weeks.
What frosting works best with fresh flowers?
American buttercream is ideal—it’s stable at room temperature and firm enough to support flowers. Swiss or Italian meringue buttercream also work beautifully. Cream cheese frosting needs extra stabilization. Whipped cream requires stabilizers like cornstarch. Avoid glazes or thin frostings that can’t support flower weight.
Which flowers should I absolutely avoid on cakes?
Never use lily of the valley, daffodils, calla lilies, hyacinths, oleander, wisteria, rhododendrons, hydrangeas, azaleas, sweet peas, or baby’s breath. These contain toxic compounds that can cause serious illness even through casual contact with frosting. When uncertain about a flower’s safety, don’t use it.
Can I use dried flowers on cakes?
Dried flowers work well for decoration if they’re food-safe varieties that were dried properly. Avoid commercially dried flowers unless specifically labeled as culinary grade. Home-dried organic edible flowers are safe. Dried flowers add a vintage, rustic aesthetic and won’t wilt like fresh blooms.
Tips for Avoiding Common Wildflower Cake Mistakes
Mistake #1: Using Wrong Temperature Ingredients
Room temperature ingredients are crucial for proper emulsification. Cold butter won’t cream properly with sugar. Cold eggs can curdle batter. Cold milk prevents even mixing. Take ingredients out of the refrigerator 1-2 hours before baking. For quick warming, place eggs in warm water for 5 minutes or microwave butter for 5-8 seconds until just softened but not melted.
Mistake #2: Overmixing Batter
Once you add flour to wet ingredients, mix only until you can’t see dry flour streaks. Overmixing develops gluten, creating tough, dense cakes with tunnels. Use low mixer speed and stop frequently to check progress. It’s better to have a few tiny flour specks than an overmixed batter.
Mistake #3: Opening Oven Door Too Early
Opening the oven before cakes are set causes them to sink in the center from sudden temperature drops. Wait until at least 75% of baking time has passed before checking. Use your oven light to peek at progress instead of opening the door unnecessarily.
Mistake #4: Frosting Warm Cakes
Warm cakes make frosting melt, slide, and tear the cake surface. Always cool cakes completely—this takes at least 30 minutes on wire racks. For faster cooling, refrigerate cooled-to-touch cakes for 15 minutes. Test by touching the bottom of the cake layer—it should feel cool, not warm.
Mistake #5: Skipping the Crumb Coat
The crumb coat seals in crumbs and creates a smooth base for your final frosting layer. Apply a thin layer of frosting over the entire cake, scraping off excess. Refrigerate 20-30 minutes until firm before applying the final coat. This single step transforms amateur-looking cakes into professional results.
Mistake #6: Using Dirty or Unwashed Flowers
Always gently rinse flowers under cool water and pat dry to remove dirt and insects before using them on cakes. Even homegrown organic flowers harbor tiny bugs. Dirty flowers look unprofessional and pose food safety risks.
Mistake #7: Adding Flowers Too Early
Adding flowers hours before serving causes wilting, brown edges, and drooping stems. Decorate 1-2 hours maximum before your event. Keep the unfrosted cake refrigerated and add flowers at the last possible moment for pristine appearance.
Mistake #8: Not Testing Flower Placement
Before committing flowers to frosting, arrange them on the cake surface without pressing in. Step back and assess the design. Take a photo and review it—cameras reveal design flaws invisible to the naked eye. Adjust placement until you’re completely happy, then secure flowers in place.
Mistake #9: Ignoring Flower Toxicity
Never assume a pretty flower is safe. Some flowers range from mildly toxic to life-threatening, and even decorative contact with frosting can pose risks. Research every single flower variety before using. When in doubt, skip it. Your guests’ safety is more important than aesthetics.
Mistake #10: Using Unstable Frosting
Soft, unstable frosting can’t support flower weight and causes decorations to sink or slide. Buttercream should hold stiff peaks. Test by placing a flower on a small frosting sample—it should stay put, not sink in. If frosting is too soft, refrigerate the frosted cake for 20 minutes or add more powdered sugar to thicken.
Nutrition Information
Per Serving (1 slice of basic wildflower cake, 1/12 of cake):
| Nutrient | Amount |
|---|---|
| Calories | 420-480 |
| Total Fat | 18-24g |
| Saturated Fat | 11-14g |
| Cholesterol | 95-120mg |
| Sodium | 220-280mg |
| Total Carbohydrates | 62-72g |
| Dietary Fiber | 1-2g |
| Sugars | 48-56g |
| Protein | 5-7g |
| Vitamin A | 12-15% DV |
| Calcium | 6-8% DV |
| Iron | 8-10% DV |
Note: Nutritional values vary based on specific recipes, frosting types, and portion sizes. Lighter options like whipped cream frosted cakes have fewer calories, while buttercream-heavy designs have more. The flowers themselves add negligible calories.
Final Thoughts
Creating wildflower cakes has become one of my absolute favorite baking adventures. There’s something deeply satisfying about combining homemade cake with nature’s most beautiful creations. These designs prove you don’t need years of decorating experience to make stunning cakes—sometimes the most beautiful decorations come straight from your garden.
The key to success with wildflower cakes is understanding that imperfection is part of their charm. Unlike precisely piped designs that demand technical skill, wildflower arrangements celebrate organic, flowing beauty. Each cake you create will be completely unique, reflecting the flowers available in your season and region.
Start simple with a pressed flower design or a naked cake with a flower crown. As your confidence grows, experiment with more elaborate techniques like watercolor buttercream or cascading floral displays. Remember to always prioritize safety by using only organically grown, edible flowers and researching each variety thoroughly.
Whether you’re celebrating a wedding, birthday, baby shower, or simply want to make a Tuesday special, wildflower cakes bring joy to any occasion. They transform simple desserts into memorable centerpieces that guests will photograph, admire, and most importantly, thoroughly enjoy eating.
I’d love to see your wildflower cake creations! Share your results and tell me which technique you tried first. Happy baking, and may your cakes always bloom beautifully!
Save this post for later and share it with fellow baking enthusiasts who love botanical designs! Don’t forget to check out my other floral-inspired recipes for more garden-to-table inspiration.